By: Tim Ford | Updated: 2018-08-31 | Comments (7) | Related: > SQL Server Agent
Problem
How often have you reviewed a SQL Server Agent Job's history to determine why a job failed only to be confronted with a minimal level of detail? When a job failure occurs it is imperative to be able to quickly identify the root cause in order to determine the correct remediation. As such, what are some of the options to consolidate the logging on a per job basis? How can I setup this functionality for my key SQL Server Agent Jobs?
Solution
Before we get too far, let's start with an example to paint the picture of a backup job failure, then jump into the mechanics of how to capture the complete data for troubleshooting purposes.
Here is a sample SQL Server Agent Job Failure Notification.

Here are the details of Log File Viewer for the Backup Job Failure.
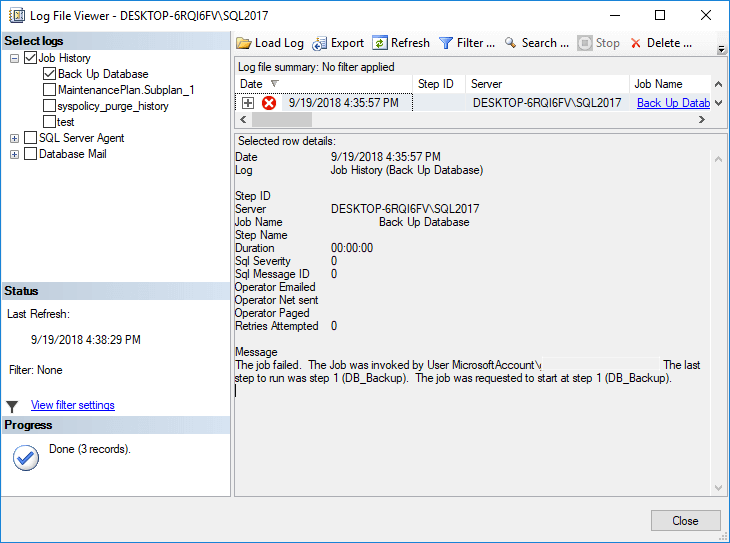
As you can see, neither of these gives much information about why it failed.
Configuring the SQL Server Agent Job to Capture More Information
For the sake of this tip I'll be using the SQL Server Management Studio (SSMS) GUI. Let's jump into how to configure the job step.
SQL Server Agent Advanced tab
Open up the SQL Agent job you want to add verbose logging to and navigate to the Steps page. If you have multiple steps then edit the first step, in particular we are going to make changes on the Advanced tab of the step.
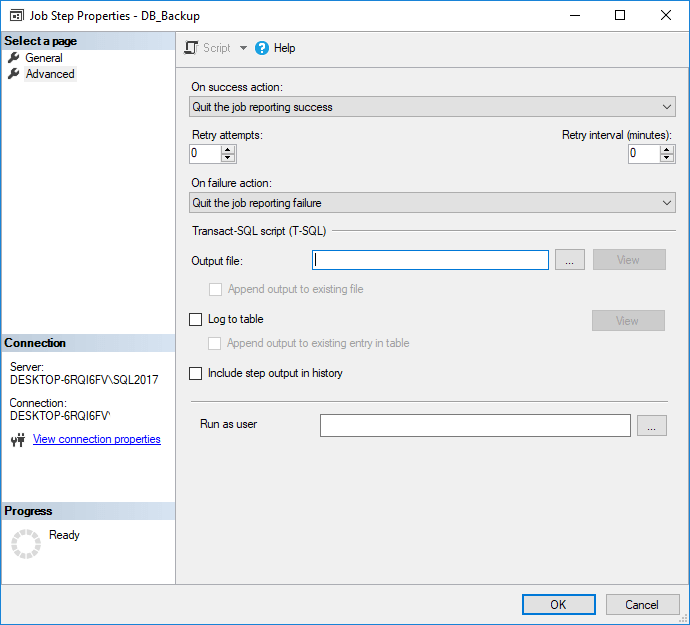
Specify the Output File
Using the Output file field, enter an existing file path (I tend to use the log directory for SQL Server so as to remember where these log files are located). Append to the file path either an existing or non-existing file to use for the verbose logging. If the file does not exist one will be created for you the first time the job is run:
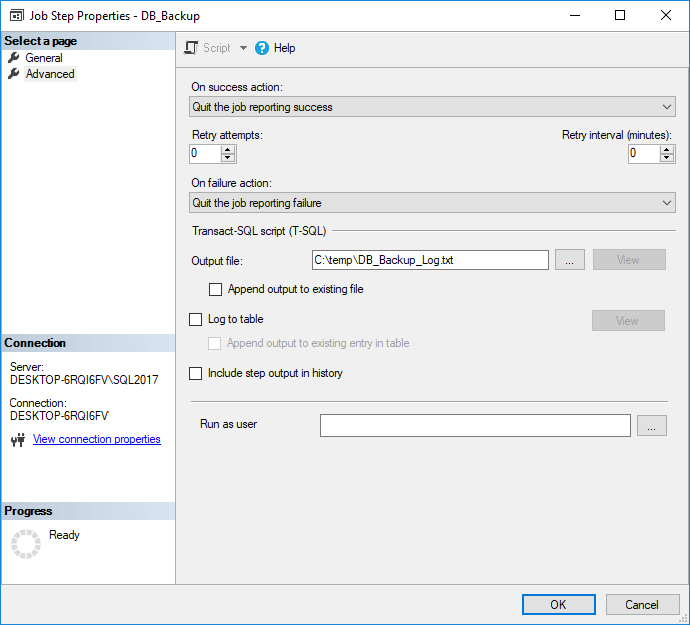
Output File Contents
Based upon the screen shot above this is the contents of the DB_Backup_Log.txt file after I re-execute the job:

Troubleshooting
I was able to determine that the reason the job failed. Let's assume I correct the name of the database in step 1 and also change the On Success action to "Go To Next Step".
Adding a second job step
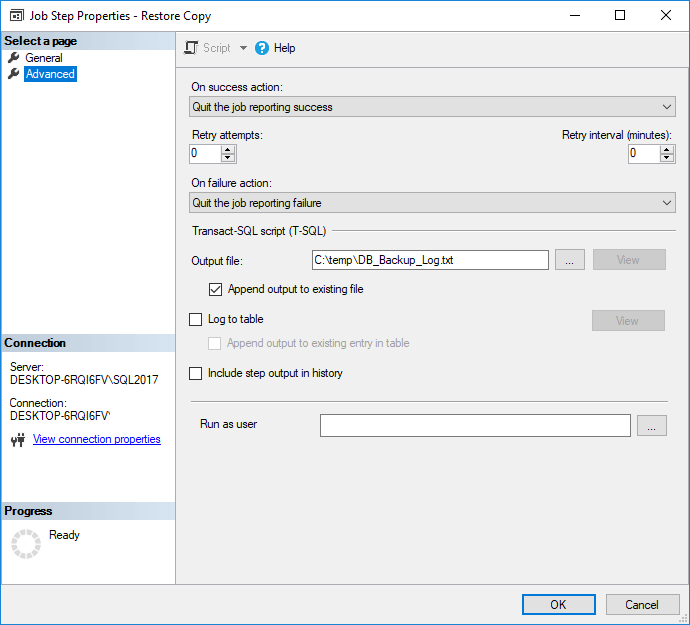
I will now add a second step to the job that restores a copy of the database to a different database name if step 1 succeeds. Here are what the job step screens look like for that step.
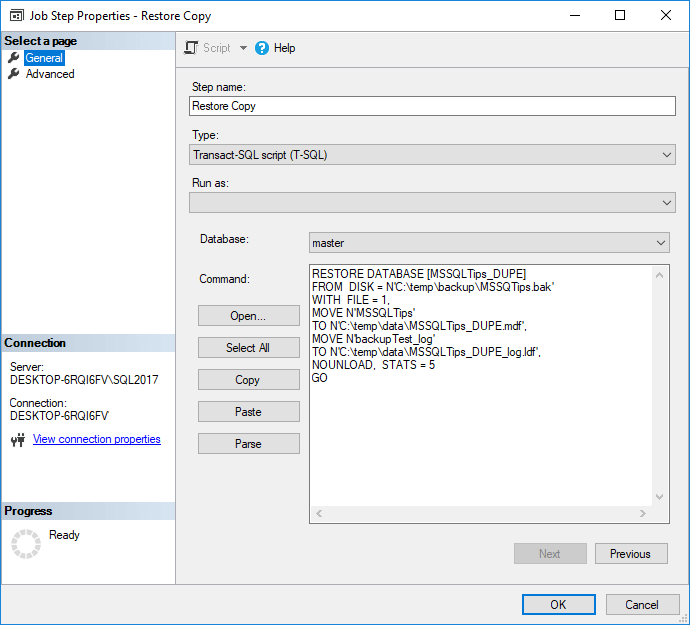
Final Output
As you can see, I checked the Append output to existing file checkbox on the second step above. Doing so will append the results of the second step to the same file that displays the results of the first step.
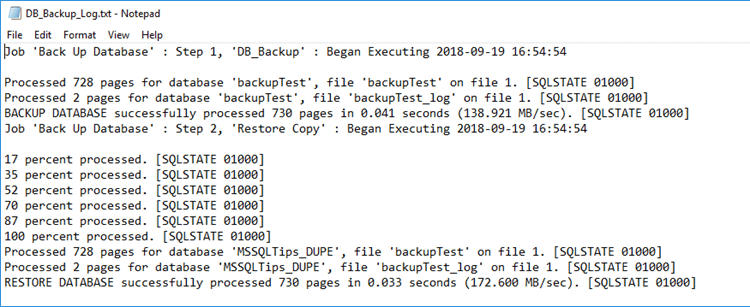
Now, when I execute the job, the verbose log looks like this showing both the backup and restore operations.
Notes about Append output to existing file checkbox
- If you want to maintain a historical record of the job history, check this box for each step. The file will not be over-written each time the job executes.
- If you are only interested in keeping a log of the last execution for the job then leave the checkbox unchecked.
- When I have a multiple-step job (like the example I've provided you) I log all steps against a single file. I check the 'Append output to existing file' checkbox for all steps in the job that execute after the initial step. This results in a log file with all of the job steps from the last job execution. Each time the first step executes (each time the job is kicked-off) the file will be overwritten, so I have a record of the last set of output.
Next Steps
- There are more opportunities for utilizing this functionality than just debugging failed jobs. I have situations where customers want the output of the queries periodically dropped to a network share for the purposes of mail merging with Microsoft Office documents or similar processes. By using the process outlined in this tip, I can easily set up a job that runs a query on a regular basis and stores the result set on a shared drive accessible to the users. This is a very convenient aspect of SQL Server Agent and is often overlooked.
- This should work fine with SQL Server 2005 and later. This was last tested on SQL Server 2017.
- Check out all of the valuable SQL Server Agent tips!
About the author
 Tim Ford is a Senior Database Administrator with MindBody.
This author pledges the content of this article is based on professional experience and not AI generated.
View all my tips
Article Last Updated: 2018-08-31


