By: Koen Verbeeck | Updated: 2018-07-11 | Comments (69) | Related: > SharePoint
Problem
We have data stored in SharePoint lists, which we need to extract into our database. We need to use SQL Server Integration Services (SSIS) for this task. How can we achieve this using the built-in components?
Solution
In previous versions of SSIS, the open-source SharePoint List adaptors from Codeplex could be used to access data stored in SharePoint lists. This was described in a previous version of this tip, however, Codeplex has been deprecated by Microsoft and it seems there are no further updates for the SharePoint List adaptors. This means we have to use an alternative. For reading data from a SharePoint List, the OData Source component can be used since a SharePoint List is exposed as an OData feed.
The availability of the OData source component depends on the version of SSIS:
- For SSIS 2012 you have a separate download.
- For SSIS 2014 you need to download the component from the SQL Server 2014 feature pack.
- In SSIS 2016 & 2017, the source component is included out-of-the-box.
In this tip, we’ll read data from a SharePoint Online list using SSIS 2017. You can download the latest version of SQL Server Data Tools for Visual Studio 2017 here.
Test Data
First, we need a SharePoint List to read from. In this tip, we’ll use SharePoint Online, but the process is the same for an on-premises SharePoint. In the SharePoint site, navigate to Site Contents. There, you can add a new list by clicking on the plus symbol and choosing List from the dropdown.

You’ll need to specify a name and an optional description. You can also choose if the list is displayed in the navigation menu at the left.

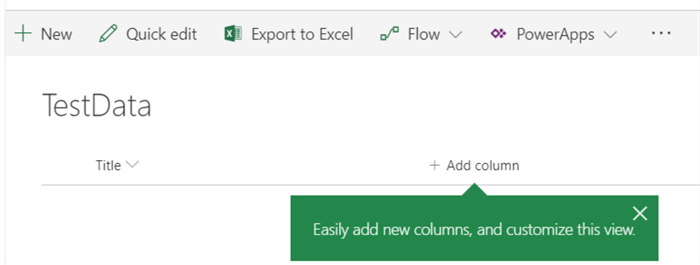
When the list is created, a column with the name Title will be added by default. You can click on the plus icon on the right of the Title column to easily add new columns.

We’ll add two extra columns: a code column containing integers and a text column. First, we’ll add a Number column:

The column has the following properties:

Next up is the text column.

It has the following properties:

Now we’re going to get rid of the Title column. In the top right corner, click on the arrow at All Items and select Edit Current View.

Deselect the Title column from the list of columns and click OK:

This removes Title from the view, but it’s still there and it requires values. Trying to insert data will result in an error if no value was specified for the Title column. We can change this behavior in the Settings. Go back to editing the view. At the top, click on Settings. This will take you to the list settings.

In the columns section, click on Title.

In the properties, set the setting for requiring information to No:

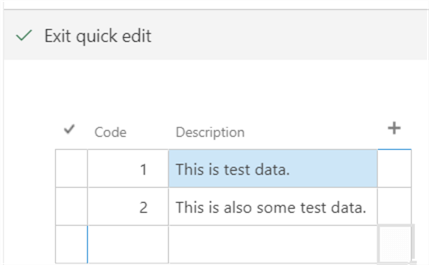
Click OK and go back to the list. Now you can click on Quick Edit to fill in some data.

Reading the List
Add a data flow to your SSIS package. From the Common section, drag the OData source into the canvas. Be careful, it is not listed under sources!

Open the editor. Click on New to create a new OData connection manager.

Specify a name for the connection manager and the URL for the SharePoint website. The URL takes the following format: https://mycompany.sharepoint.com/sites/mysite/_vti_bin/listdata.svc. The parts in bold need to be replaced for your situation. If you use an on-premises installation of SharePoint, you’ll also need to replace sharepoint.com with the address of you SharePoint website.

Depending on your scenario, there are different authentication options available. Since we’re using SharePoint Online in this tip and we want to specify a username and password (so it can maybe be parameterized later on), we’ll choose Microsoft Online Services. In order for this authentication type to work on the server running SSIS, you need to install the SharePoint Server 2013 Clients Components SDK. You need to install those libraries on every server running the SSIS package.
Once you selected the Microsoft Online Services option, you can specify a username (most likely an email address) and password.

Click on OK to create the connection manager. Now we can choose our SharePoint list from the Collection dropdown:

In the OData Source component, you can work with Collections or Resource Paths. To read from a SharePoint list, collections are the easiest choice. For more info on resource paths, you can check out the tip Using the OData Source in SQL Server Integration Services. Click OK to close the editor. With a data viewer, we can inspect the data coming out of the SharePoint List:

There are two issues:
- All of the columns of the list are retrieved: our two columns, but also the Title column and all other metadata columns (some columns names are dependent on the regional settings, so they can differ from your situation)
- The data types of some columns are not ideal. The Description column for example has the DT_NTEXT data type, which is a Unicode BLOB, which is bad for data flow performance.
In the next sections we’ll solve both problems.
Reducing the Number of Columns
You can specify which columns you want to retrieve in the source editor by using the query options:

By using the select query option, you can select only the columns you actually need, which will also improve data flow performance. Keep in mind that having spaces in column names can cause issues.

Converting the Data Types
Sometimes the data types returned by the OData source component are not ideal. Although the Description column in the SharePoint list is limited to 255 characters, the data type in the SSIS data flow is DT_NTEXT. Unfortunately, this data type cannot be converted using the Data Conversion transformation. Luckily, we can change the data type in the advanced editor of the source component. Right-click on the source component to open the advanced editor.

In the editor, go to Input and Output Properties. There you navigate to Output > Output Columns in the tree in the left pane. When you select a column, you can change its data type.

We’re going to change the data type column to DT_WSTR with a length of 255. Keep in mind only DT_NTEXT and DT_WSTR can be converted in the advanced editor. Other data types need to be converted using transformations. If you try to convert other data types, you’ll get the following warning:

When we run the data flow, we’ll get the following data viewer, where we can now finally read the data:

Next Steps
- For more info on the OData Source, check out the tip Using the OData Source in SQL Server Integration Services.
- Other tips about SSIS and SharePoint Lists:
Editor's Note
- The original tip, "Accessing SharePoint Lists with SQL Server Integration Services SSIS 2005", was written by Ray Barley and published 2009-04-20. The original tip referenced code on Codeplex that no longer exists, so this tip was rewritten on 2018-07-11 as shown above.
About the author
 Koen Verbeeck is a seasoned business intelligence consultant at AE. He has over a decade of experience with the Microsoft Data Platform in numerous industries. He holds several certifications and is a prolific writer contributing content about SSIS, ADF, SSAS, SSRS, MDS, Power BI, Snowflake and Azure services. He has spoken at PASS, SQLBits, dataMinds Connect and delivers webinars on MSSQLTips.com. Koen has been awarded the Microsoft MVP data platform award for many years.
This author pledges the content of this article is based on professional experience and not AI generated.
View all my tips
Article Last Updated: 2018-07-11


