By: Arshad Ali | Updated: 2011-09-14 | Comments (2) | Related: 1 | 2 | 3 | 4 | More > Integration Services Development
Problem
I heard there are couple of enhancements in SQL Server 2012 for SSIS. What are these enhancements and how do they improves the usability, productivity, manageability and performance of SQL Server Integration Services? Learn about these items and more in this tip.
Solution
SQL Server Integration Services (SSIS) first appeared in SQL Server 2005. SSIS is the successor of Data Transformation Services (DTS) and was completely written with a new architecture altogether. In SQL Server 2012 there are several new SSIS enhancements to include:
- SQL Server 2012 SSIS Enhancements Part 1 of 2
- SSIS Package Deployment Model in SQL Server 2012 (Part 1 of 2)
- SSIS Package Deployment Model in SQL Server 2012 (Part 2 of 2)
In the first tip of this series (SQL Server 2012 SSIS Enhancements Part 1 of 2) I talked about usability enhancements in Control Flow Designer and related things. In the second tip of the series, I am going to talk about some of the UI or usability changes in the Data Flow Designer which improves the productivity of a new or experienced SSIS developer. Let's jump in.
SQL Server Integration Services Source and Destination Assistance
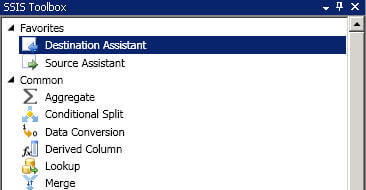
The source and destination assistants have been added to help new and experienced users to create sources, destinations and connection managers easily. The Source Assistant and Destination Assistant have been added under the "Favorites" category of data flow designer toolbox as shown below. In order to add a new source, drag the Source Assistant to the designer window to launch the window for further selection likewise to add a new destination drag the Destination Assistant from the toolbox to the designer window as shown below:
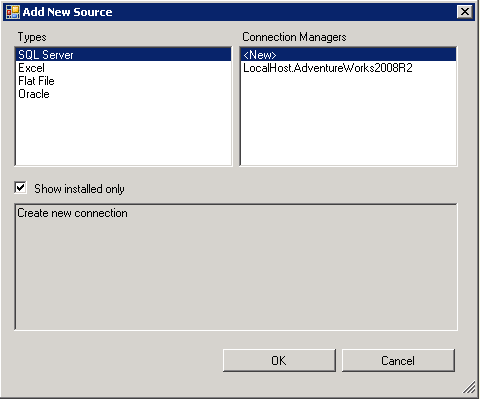
The "Add New Source" or "Add New Destination" window, by default displays only the sources or destinations already installed on your system although you can uncheck "Show installed only" checkbox to display a larger list of source and destination types. You select the source or destination type in the list on the left side of the window and you have the option to create new connection manager of that type on the right side of the window. You can see in the image below, that if there are existing connection managers of a selected type, those will also be shown in list on the right side.
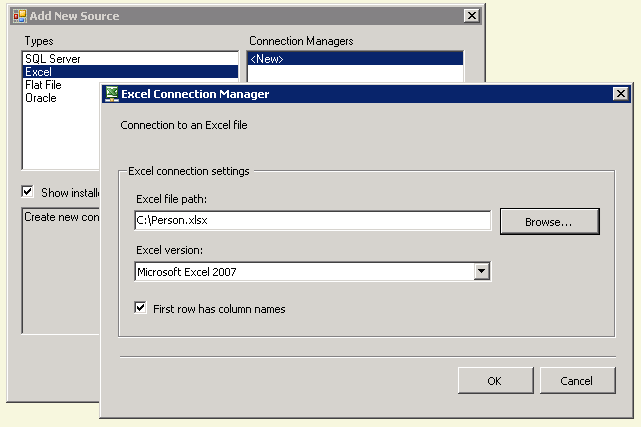
I want to create a Connection Manager for Excel and hence in the image shown next, I have selected Excel in list of "Types" on the left side of the screen and <New> on the right side of the screen. In the Excel Connection Manager screen I was prompted for the Excel file path, Excel version and whether the first row has column names or not as shown below:
Completing the form and clicking on the "OK" button twice will create an Excel Connection Manager and an Excel Source as shown below:

SQL Server Integration Services Grouping in Data Flow Designer
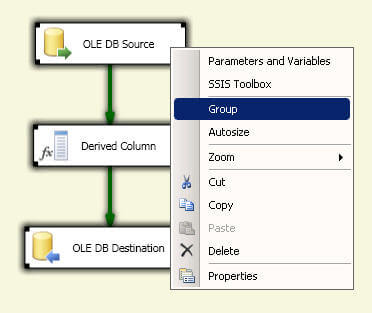
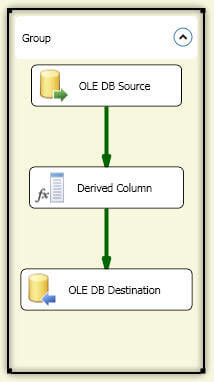
When the number of components increases in the data flow designer, it starts looking cluttered and becomes difficult to manage on the designer surface. Now the good part is, you can group components inside the data flow designer to make the design interface more organized. You can select all the logical related components, although its not mandatory, right click on any one of them and the click on "Group" menu item as shown below. Please note that using the "group" option is a designer object only unlike the Sequence Container in the Control flow and hence the "group" option does not change the runtime behavior of the package. Here is example screen shot of grouping three objects:
Once the components have been added in a group, a group looks like a container for those components. You can move the group and the components inside it will move along with it. You can even collapse or expand the group to free up some space on the designer surface as shown below:
SQL Server Integration Services Data Viewer Simplification
The Data Viewer has been simplified to display a grid view of the data by simply selecting the data path and pressing F9 or by selecting the data path, right clicking on it and then clicking Enable Data Viewer as shown below:

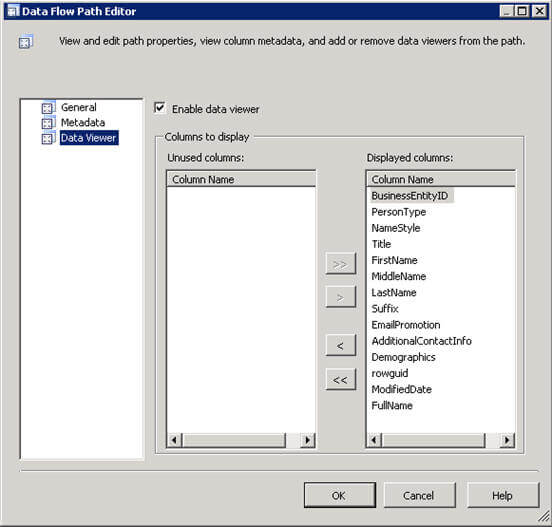
You can also open the Data Flow Editor, go to the Data Viewer page and check the Enable data viewer check box. On this page, you can also include columns which you want to be displayed on the data viewer. The "Unused columns" list shows the columns available in data path that can be included in data viewer and the "Displayed columns" list shows the columns which are already included in the data viewer.
SQL Server Integration Services Resolve Reference Editor
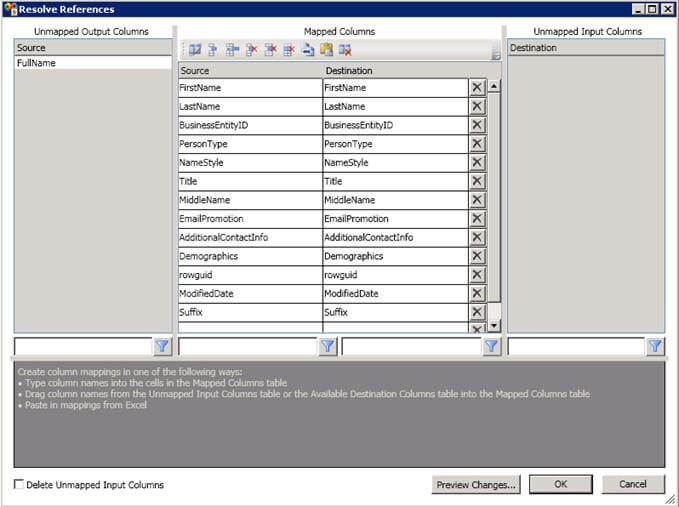
The new flexible authoring now allows you to edit a data flow component even when the input path is not connected. Also the process of reconnecting a data flow component to a different input path and remapping the columns have been simplified.
The new Resolve References editor allows you to remove any data path errors and associate/link unmapped output columns with the unmapped input columns for all the paths in the execution tree. To learn more about Resolve References editor, click here.
Notes
- The sample code, example and UI is based on SQL Server 2012 CTP 1, it might get changed in further CTPs or in final/RTM release.
Next Steps
- As you begin to work with SSIS in SQL Server 2012, be sure to keep the improvements outlined in this tip in mind.
- Check out these related tips:
About the author
 Arshad Ali is a SQL and BI Developer focusing on Data Warehousing projects for Microsoft.
This author pledges the content of this article is based on professional experience and not AI generated.
View all my tips
Article Last Updated: 2011-09-14


