By: Brady Upton | Updated: 2013-09-09 | Comments (3) | Related: > Azure
Problem
I've introduced my manager to SQL Server's cloud based platform, SQL Azure and Windows Azure Virtual Machine. He wants to test functionality with some of our applications, which would require me to move my on premise databases to the Azure Virtual Machine. What is the easiest way to accomplish this task? See how it is done in this tip.
Solution
This tip is branching off of another tip I wrote recently, "Move an On Premise SQL Server Database to the SQL Azure Cloud" where I explained how to move an on premise database to the cloud using the Export/Import Data-tier application. After some comments on this tip, research and testing I think it would be beneficial for the SQL community to understand the different options of moving to the cloud.
If you'd like to follow along with the examples I would suggest creating a free (trial) account at http://www.windowsazure.com. Once you are logged into the Windows Azure portal a SQL Server will need to be created.
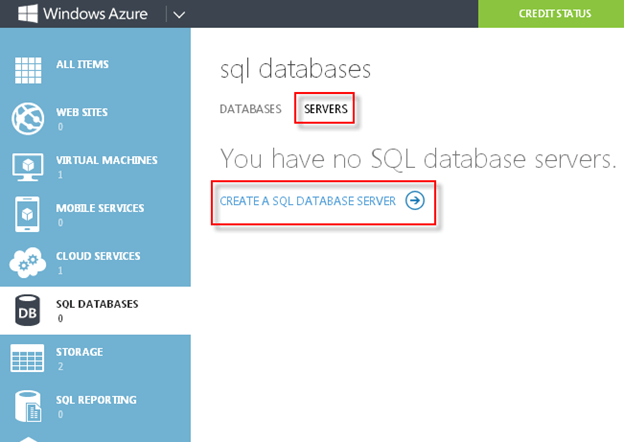
Click on SQL Databases, Servers, Create a SQL Database Server:
Create a login name, password, and choose your region and click the check mark:
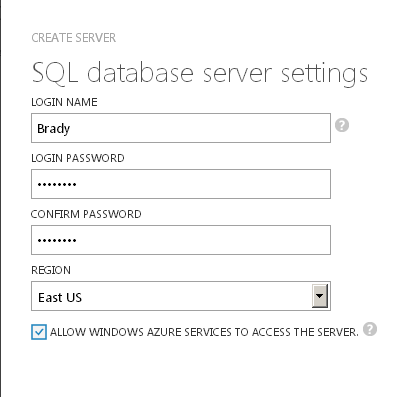
A new SQL Server should be built in a few seconds! Click Manage at the bottom and a few firewall rules options may appear. Click Yes on all of them.

Next, click on the server, and click Dashboard:
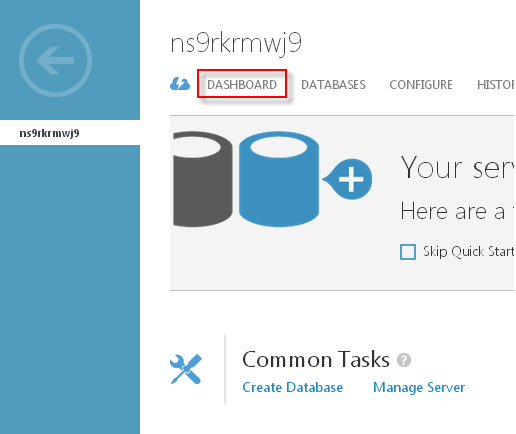
On the right side of the screen you will see the full SQL Server name. In this example, the name is ns9rkrmwj9.database.windows.net. Write this name down, you'll need it later.
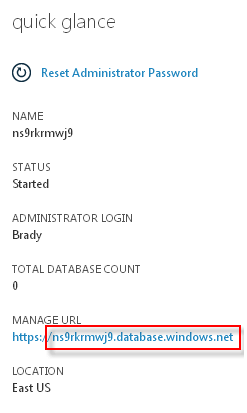
Now that we have a SQL Azure Server built, let's move our databases.
Option 1: Using the Deploy Database to SQL Azure Wizard
In SQL Server 2012, there is a new wizard that will allow you to move an on premise database to SQL Azure. This is only available in SQL Server 2012 since SQL Azure was nonexistent in previous versions.
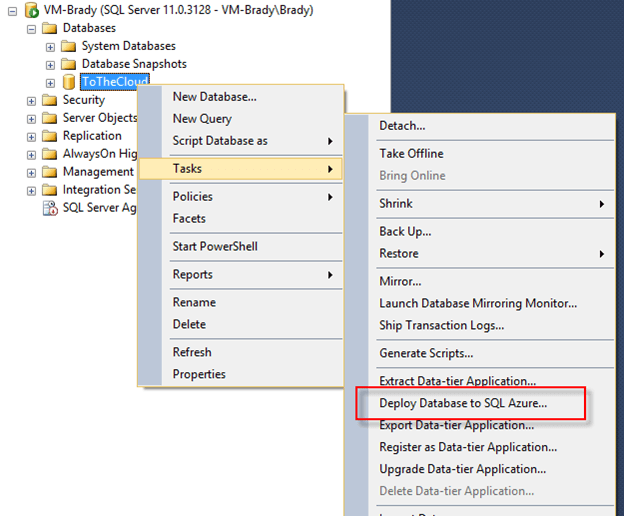
To use this wizard, open SQL Server Management Studio (SSMS) and connect to the server. Right click the database you want to move, click Tasks, Deploy Database to SQL Azure...
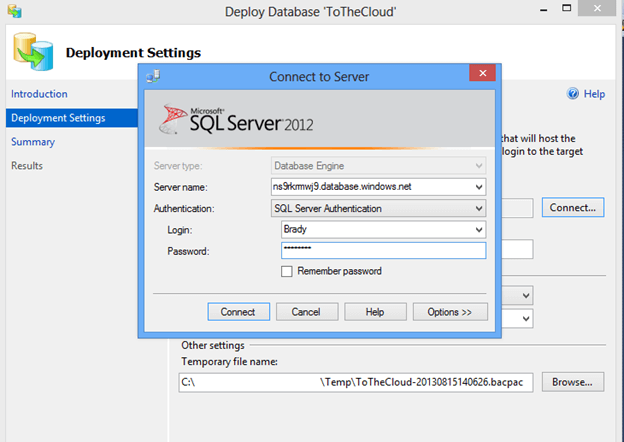
Click Next at the introduction window until you are at the Deployment Settings screen. On the Deployment Settings screen click Connect to connect to your SQL Azure Server that we created above.
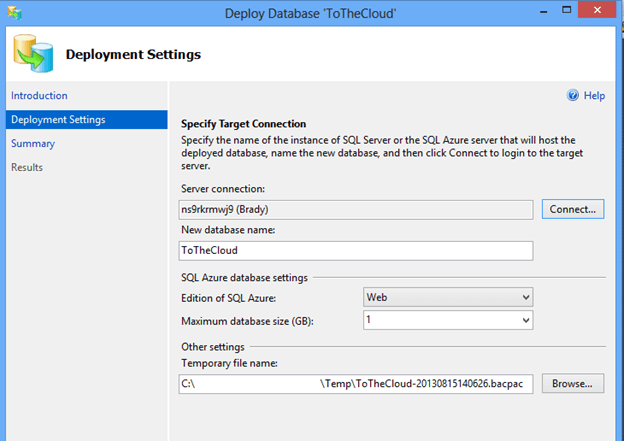
Make sure you adjust the Maximum database size to the desired amount and click Next:
View the Summary page and click Finish:
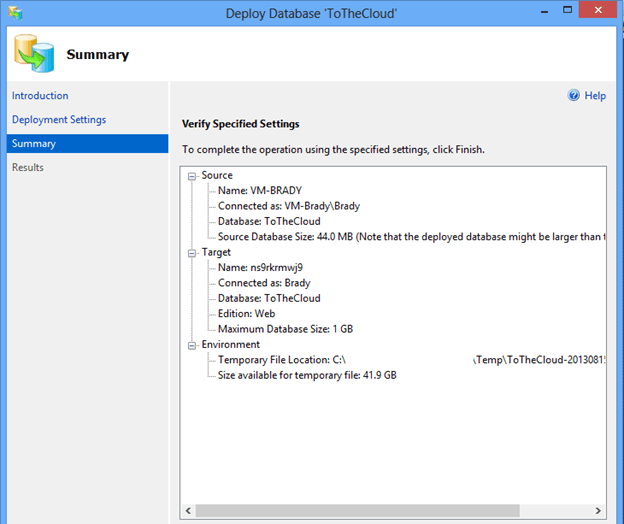
During my testing I noticed that each table being exported has to have a clustered index and cannot contain extended properties.
Once the wizard completes successfully, connect to the SQL Azure Server and view the copied database:
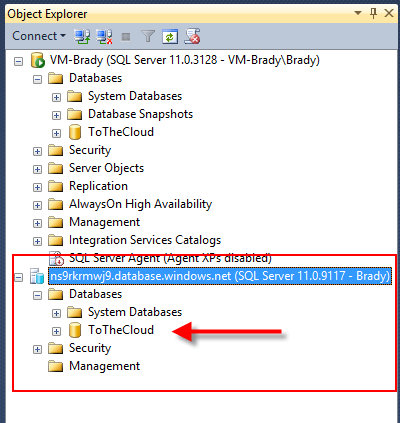
Option 2: Using the SQL Database Migration Wizard from Codeplex
Codeplex offers a free SQL Database Migration Wizard that is designed to help you migrate SQL Server 2005/2008/2012 databases to SQL Azure.
This free download can be found here: http://sqlazuremw.codeplex.com
Once downloaded and extracted it's a pretty easy wizard to navigate. In this section, I'll show you the steps.
First, download the zip file and extract. Once extracted, open SQLAzureMW.
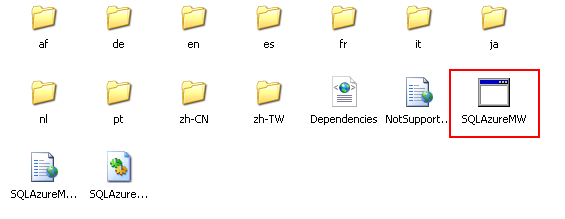
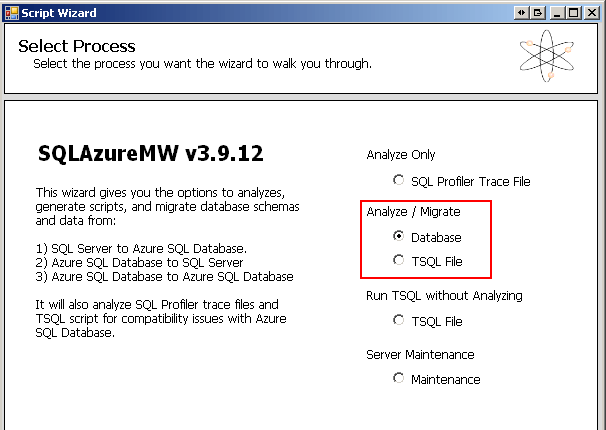
There are a few different options for this wizard, but for this tip we'll only discuss the Analyze/Migrate Database option. Click Analyze/Migrate - Database and click Next:
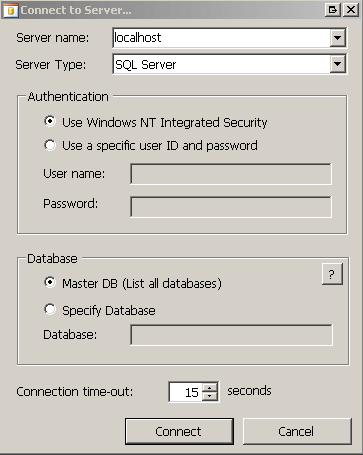
Next, a "Connect to Server..." window will appear. This is where you will enter your source information. For this example, I'll use localhost as my ServerName and Master DB for my database. Click the "Connect" button.
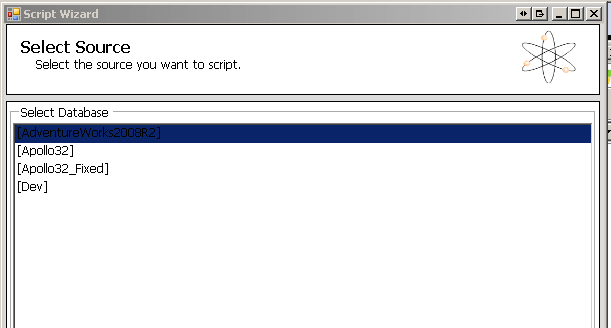
The wizard will show you all databases that you have access to. In this example, I want to migrate the AdventureWorks2008R2 database to SQL Azure so I'll select it and click Next:
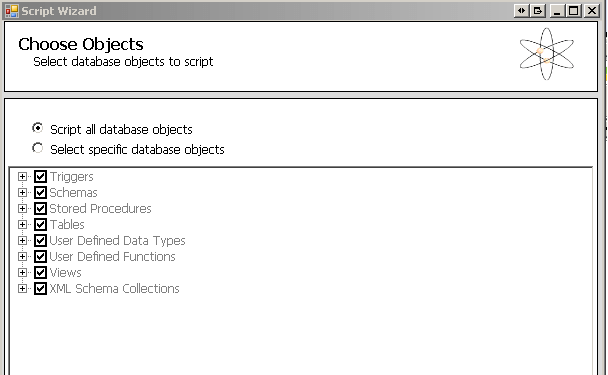
The next screen will give me two options, "Script all database objects" or "Select specific database objects". I want to do a full migration so I'll select the "Script all database objects" option and select Next:
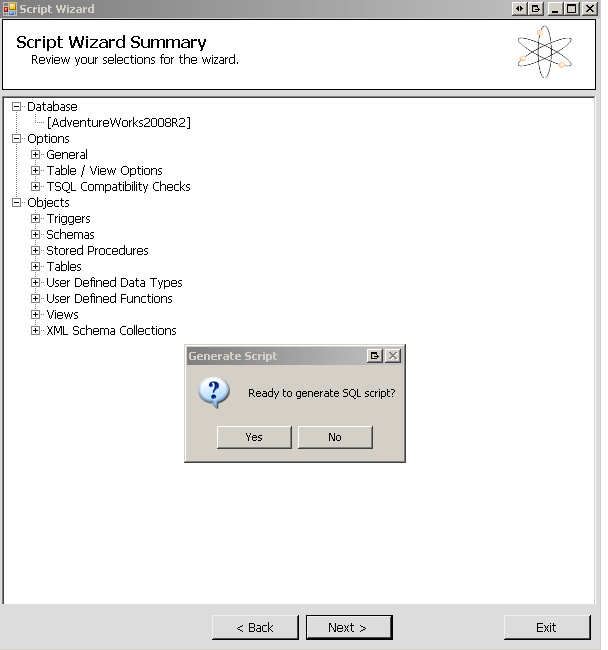
View the "Script Wizard Summary" page to make sure all of the selections are correct and click "Next". Click "Yes" to begin creating the SQL script:
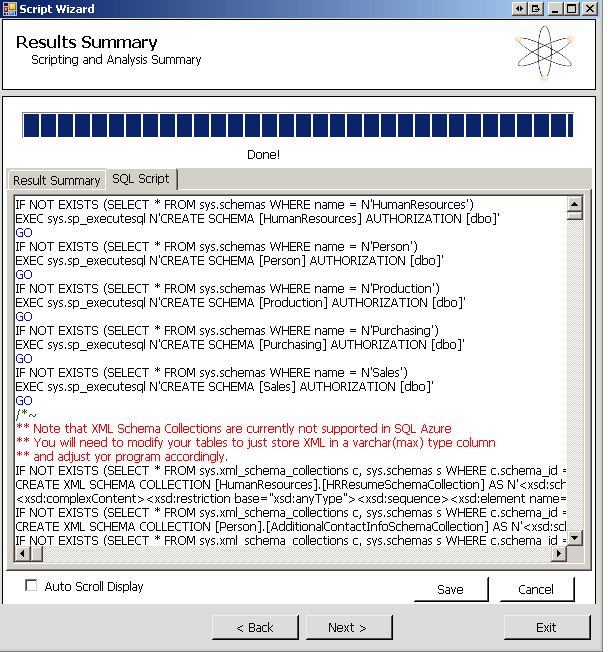
While the script is generating you can scroll down and see the action. Once the script is finished click "Next". You can also save the script for later use if needed.
After the script has been created another "Connect to Server..." window will appear. This is where you put in your destination (SQL Azure) server, user and database information:
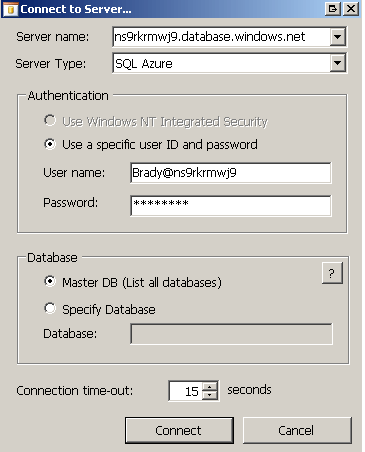
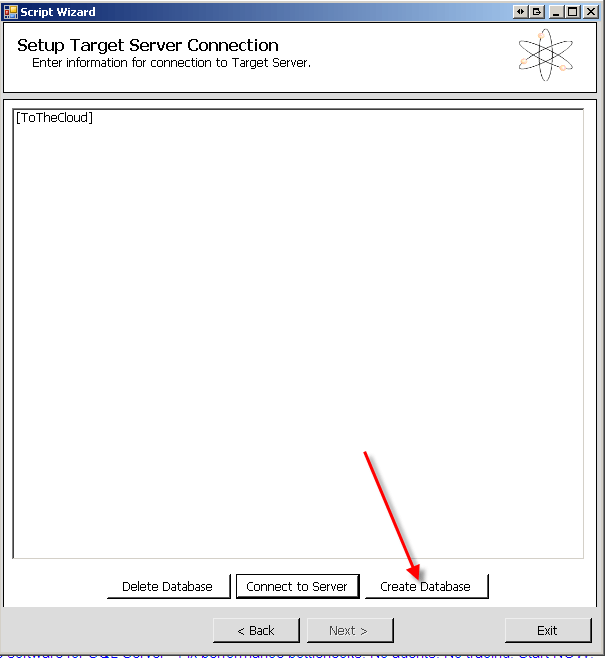
Click Connect. The Setup Target Server Connection screen will appear and will list the databases associated with the connected server. Since AdventureWorks2008R2 isn't in the list, we'll need to click on the Create Database button at the bottom of the window:
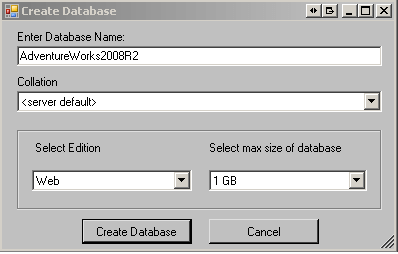
On the "Create Database" pop-up enter the name of the database and select the collation, edition and max size:
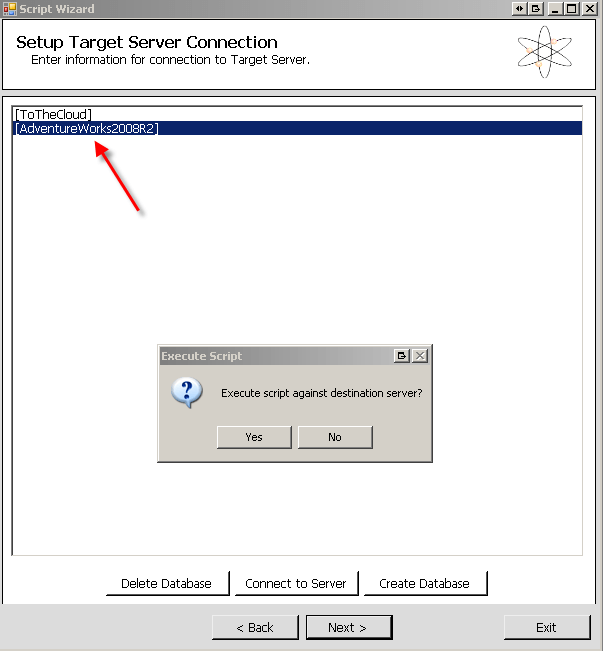
Click "Create Database". You will notice that the new database will appear in the list. Click on the database and select "Next". Click "Yes" on the Execute Script pop-up:
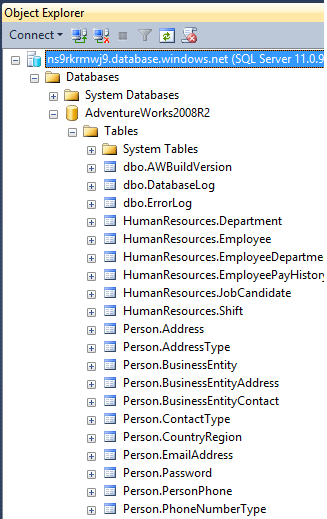
That's it! Connect to the SQL Azure server and view the copied database:
Next Steps
- Check out the previous tip regarding Moving an On Premise SQL Server Database to the SQL Azure Cloud
- Certain features aren't supported in SQL Azure like they are on a standalone SQL Server so be sure to view error logs and test the migrated database before using in a production environment.
About the author
 Brady Upton is a Database Administrator and SharePoint superstar in Nashville, TN.
This author pledges the content of this article is based on professional experience and not AI generated.
View all my tips
Article Last Updated: 2013-09-09


