By: Dallas Snider | Updated: 2013-10-07 | Comments (6) | Related: > Analysis Services Development
Problem
Many Data Mining or Machine Learning students have trouble making the transition from a Data Mining tool such as WEKA [1] to the data mining functionality in SQL Server Analysis Services. Can you provide some assistance with this transition to Microsoft's Naive Bayes Data Mining algorithm? Check out this tip to learn more.
Solution
The solution presented here takes a classic example of the Naive Bayes classification algorithm from Data Mining and Machine Learning seen in differing variations in textbooks by Quinlan [2], Mitchell [3], Han, Kamber and Pei [4], and the WEKA application. Also in this tip, a demonstration is given on how to use the SSAS Mining Model Prediction feature to predict the class label of an unknown object.
The first step is to create a table and load it with data using the T-SQL sample below.
IF EXISTS (SELECT name FROM sys.tables WHERE name = N'tblNaiveBayesExample')
    DROP TABLE dbo.tblNaiveBayesExample;
create table dbo.tblNaiveBayesExample
(
  PKey integer identity(1,1) Primary Key,
  Outlook varchar(8) not null,
  Temperature varchar(4) not null,
  Humidity varchar(6) not null,
  Windy varchar(5) not null,
  Play varchar(3) not null
)
insert into dbo.tblNaiveBayesExample values ('sunny','hot','high','FALSE','no')
insert into dbo.tblNaiveBayesExample values ('sunny','hot','high','TRUE','no')
insert into dbo.tblNaiveBayesExample values ('overcast','hot','high','FALSE','yes')
insert into dbo.tblNaiveBayesExample values ('rainy','mild','high','FALSE','yes')
insert into dbo.tblNaiveBayesExample values ('rainy','cool','normal','FALSE','yes')
insert into dbo.tblNaiveBayesExample values ('rainy','cool','normal','TRUE','no')
insert into dbo.tblNaiveBayesExample values ('overcast','cool','normal','TRUE','yes')
insert into dbo.tblNaiveBayesExample values ('sunny','mild','high','FALSE','no')
insert into dbo.tblNaiveBayesExample values ('sunny','cool','normal','FALSE','yes')
insert into dbo.tblNaiveBayesExample values ('rainy','mild','normal','FALSE','yes')
insert into dbo.tblNaiveBayesExample values ('sunny','mild','normal','TRUE','yes')
insert into dbo.tblNaiveBayesExample values ('overcast','mild','high','TRUE','yes')
insert into dbo.tblNaiveBayesExample values ('overcast','hot','normal','FALSE','yes')
insert into dbo.tblNaiveBayesExample values ('rainy','mild','high','TRUE','no')
select * from dbo.tblNaiveBayesExample
go
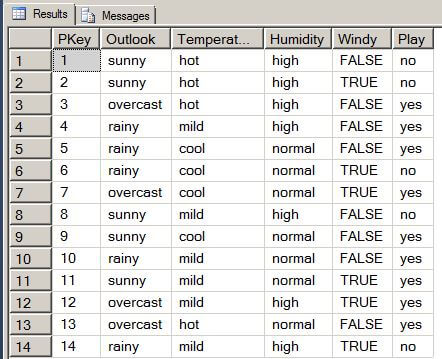
The output from the T-SQL code is shown below. This data will be used as the input for the data mining algorithm.
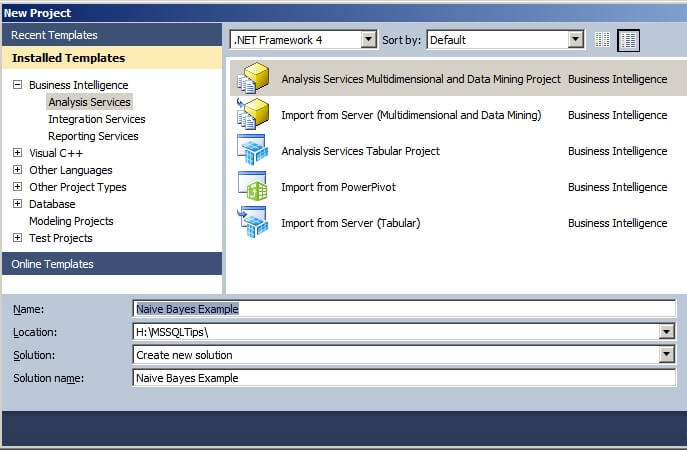
In Visual Studio (also known from the start menu as SQL Server Data Tools), create a new Analysis Services Multidimensional and Data Mining Project. In this tip, we will name the project Naive Bayes Example. Click on OK when finished with the New Project window.
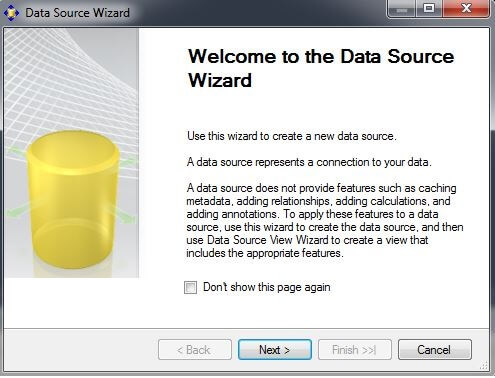
In the Solution Explorer window, right-click on the Data Sources folder and choose "New Data Source..." to initiate the Data Source Wizard. Click on "Next >".
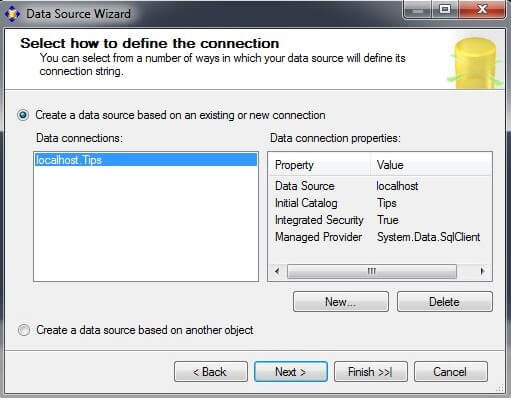
Choose your data connection, if one exists. If a Data connection does not exist, click on "New..." to create a new data connection. In this example, we are using a connection to the Tips database on the localhost. Click on "Next >".
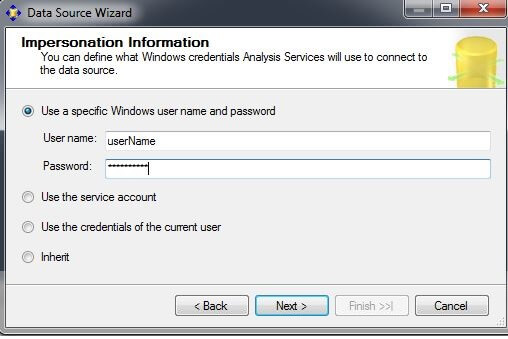
On the Impersonation Information screen, click on "Use a specific Windows user name and password." Enter your username and password. Click on "Next >".
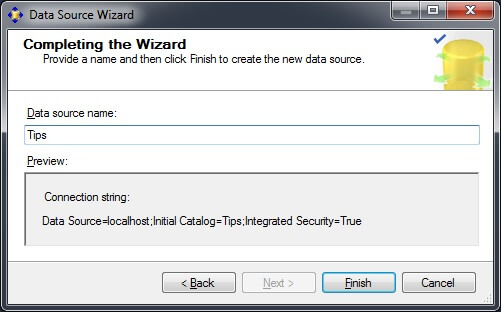
On the Completing the Wizard screen, the data source name can be changed if desired. Click on "Finish".
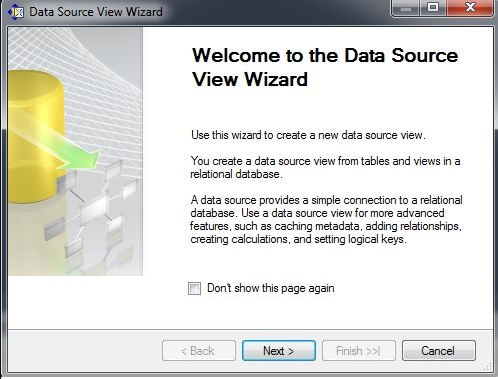
In the Solution Explorer window, right-click on the Data Source Views folder and choose "New Data Source View..." to launch the Data Source View Wizard. Click on "Next >".
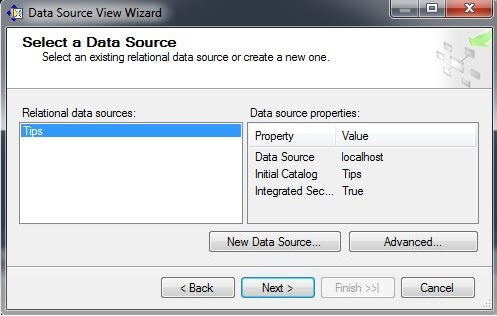
On the Select a Data Source page in the Relational data sources window, select the data source we created in the above step. Click on "Next >".
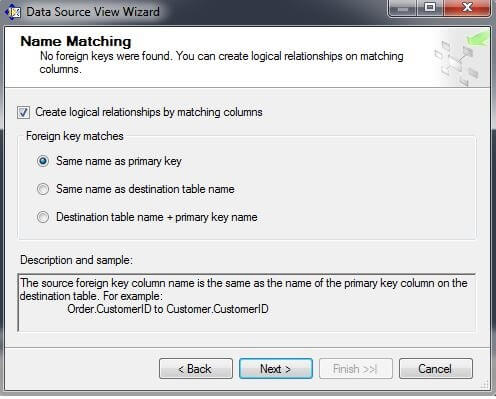
On the Name Matching page, check the box for "Create logical relationships by matching columns." In the Foreign key matches box, press the "Same name as primary key" button. Click on "Next >".
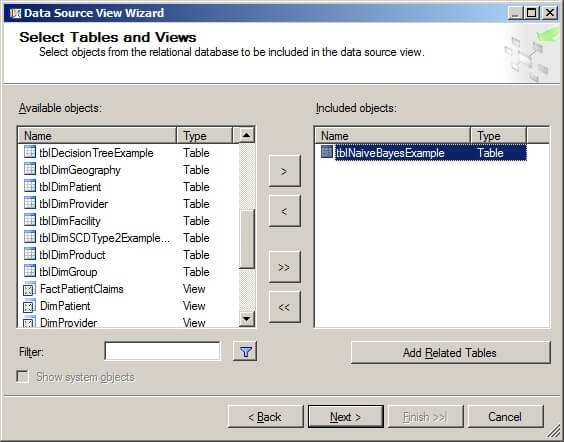
On the Select Tables and Views page, move tblNaiveBayesExample from the Available Objects box to the Included object box by selecting tblNaiveBayesExample in the Available objects box and then clicking on the ">" box. Click on "Next >".
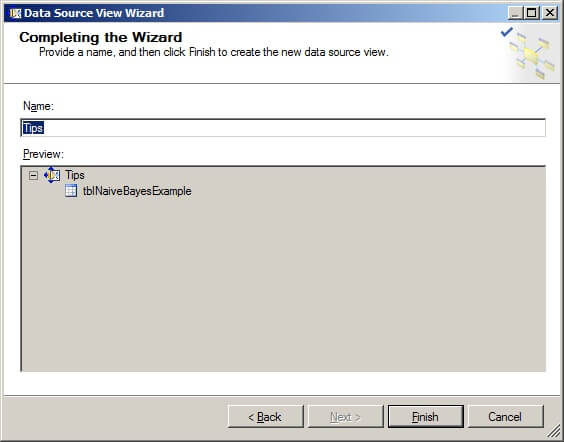
On the Completing the Wizard page, give the Data Source View a name and click on "Finish".
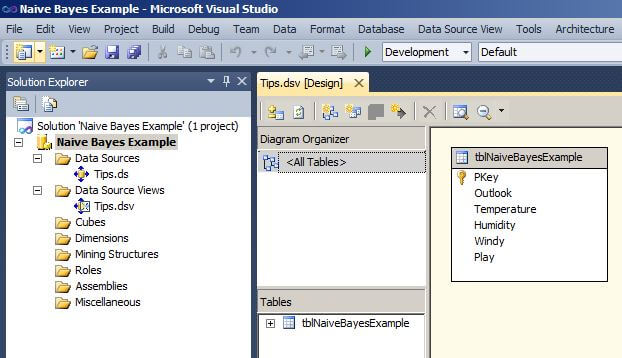
The Solution Explorer should appear as it does below with one Data Source and one Data Source View defined.
In the Solution Explorer window, right-click on the Mining Structures folder and choose "New Mining Structure..." to launch the Data Mining Wizard. Click on "Next >".
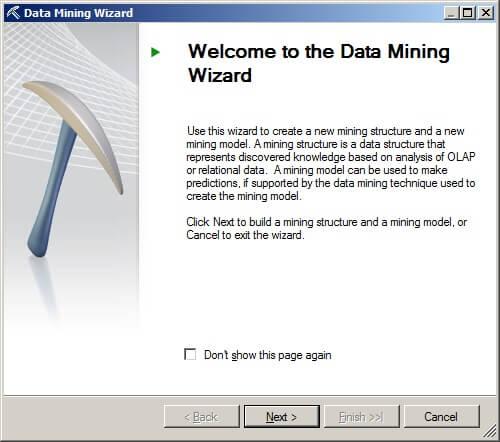
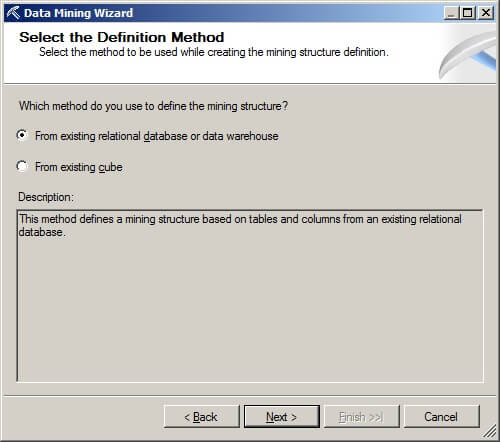
On the Select the Definition Method page, press the radio button labeled "From existing relational database or data warehouse". Click on "Next >".
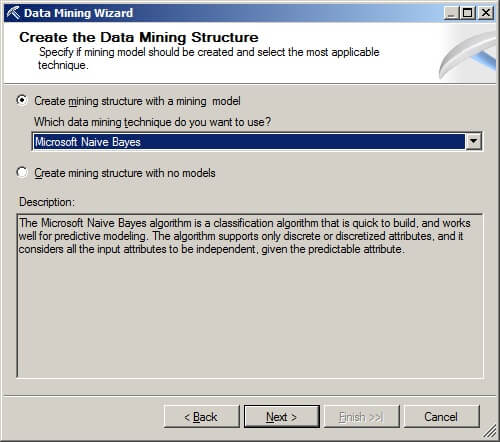
On the Create the Data Mining Structure page, press the radio button labeled "Create mining structure with a mining model". Choose the "Microsoft Naive Bayes" data mining technique from the drop-down box.
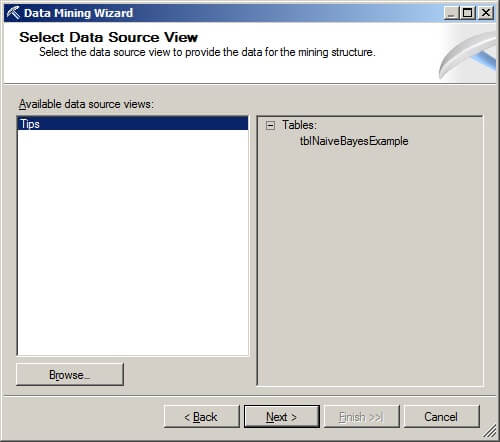
On the Select Data Source View page, choose "Tips" from the Available data source views. Please note this is the data source view we created earlier. Click on "Next >".
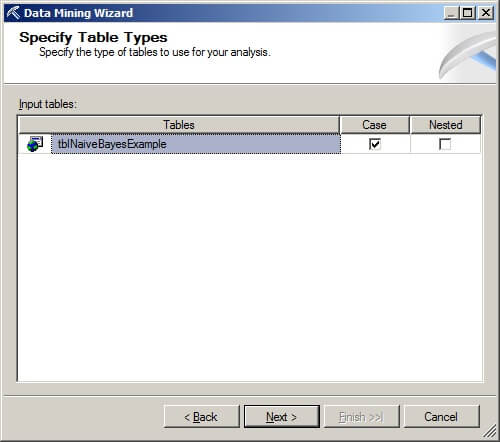
On the Specify Table Types page, make sure the Case box is checked and the Nested box is unchecked for the table named tblNaiveBayesExample.
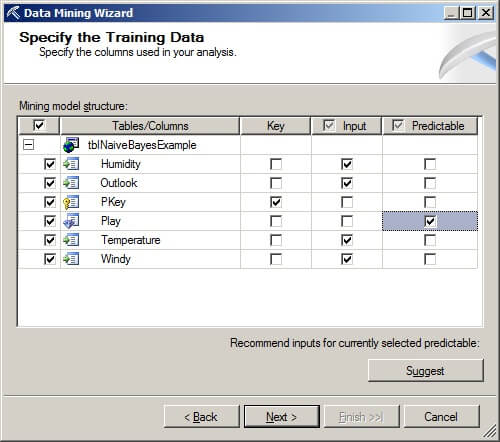
On the Specify the Training Data page, in the Key column check the box that corresponds to the PKey column. In the Input column, check the boxes for the Humidity, Outlook, Temperature, and Windy columns. These input columns will be used as input to the Naive Bayes algorithm. In the Predictable column, check the box for the Play column which is the column the Naive Bayes algorithm will attempt to predict. Click on "Next >".
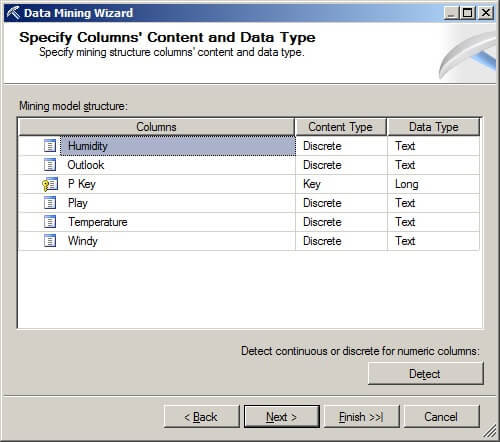
On the Specify Columns' Content and Data Type page, we see the columns to be used in the mining model structure, along with their content and data types. Click on "Next >".
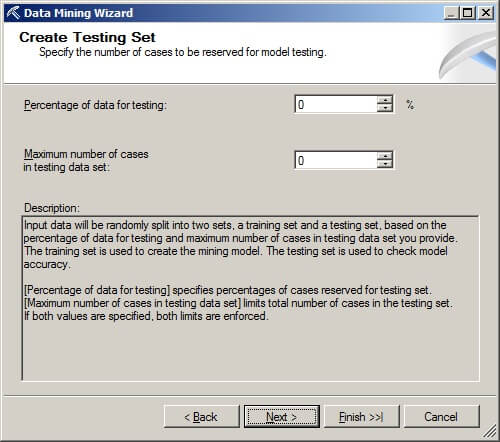
On the Create Testing Set page, we will set the "Percentage of data for testing" and "Maximum number of cases in testing data set" to zero for this example. Please note that there needs to be a set of data reserved for testing or use 10-fold cross validation to prevent overfitting the data mining model to the training data. Click on "Next >".
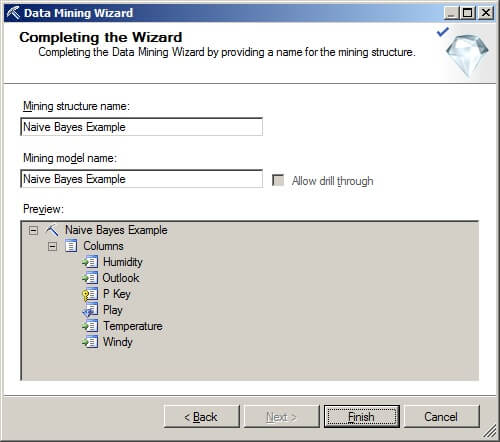
On the Completing the Wizard page, the name of the mining structure and model can be changed. Click on "Finish".
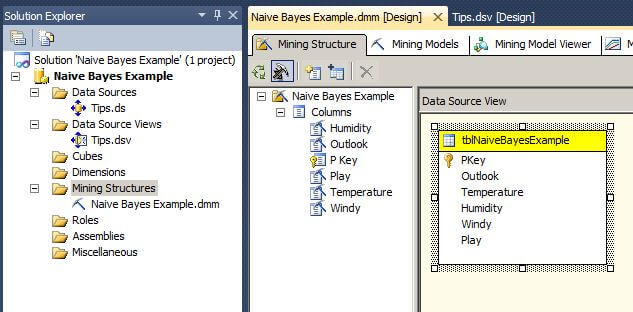
The image below shows the Visual Studio Solution Explorer window and the Mining Structure tab of the data mining model that was created in the steps above.
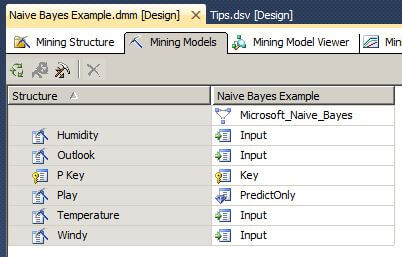
The next image from Visual Studio shows the Mining Model tab of the data mining model that was created in the steps above.
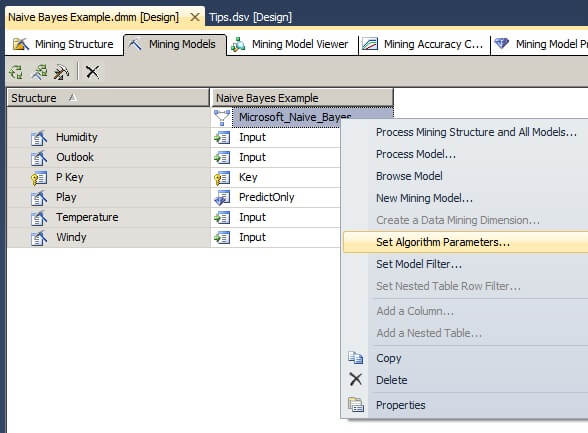
Under the Mining Model tab, right click on the box labeled "Microsoft_Naive_Bayes" to bring up the menu shown below and select "Set Algorithm Parameters..." to display the Algorithm Parameters window.
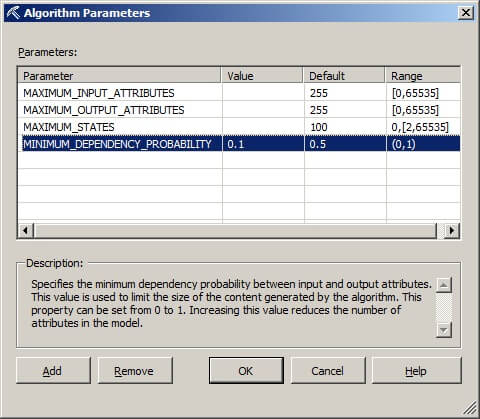
In the Algorithm Parameters window, set the MINIMUM_DEPENDENCY_PROBABILITY 0.1. The description box explains the meanings of the parameters and their values. Click on OK.
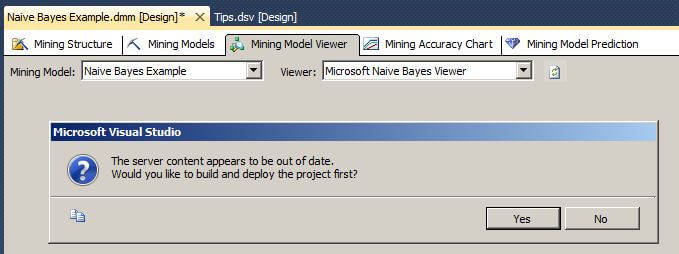
Next, click on the Mining Model Viewer tab. If you get the message shown below about the server content appearing to be out of date and asking "Would you like to build and deploy the project first?", click on Yes.
If you get the message shown below about the amount of time it will take to process the mining model, click on "Yes" to continue because we only have 14 records.

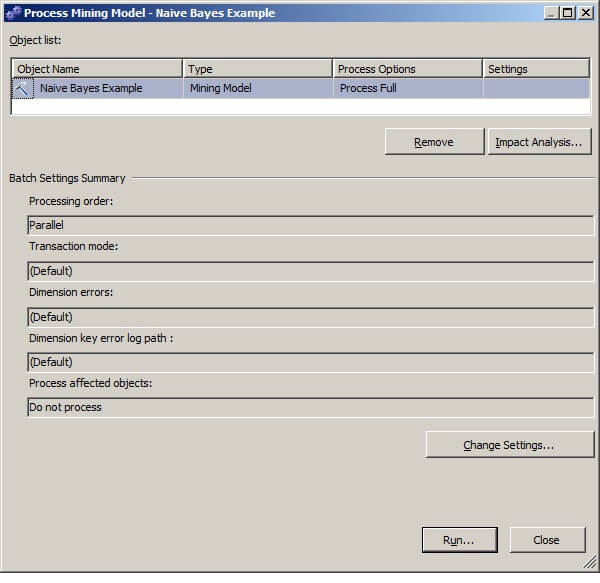
When the Process Mining Model - Naive Bayes Example window pops up, leave the default settings and click on Run...
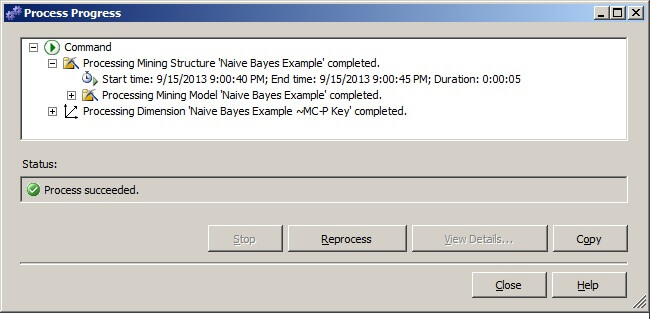
The Process Progress window will display. When the process successfully completes as shown below, click on Close to return focus to the Process Mining Model window, and then click on Close to return focus to the Mining Model Viewer window.
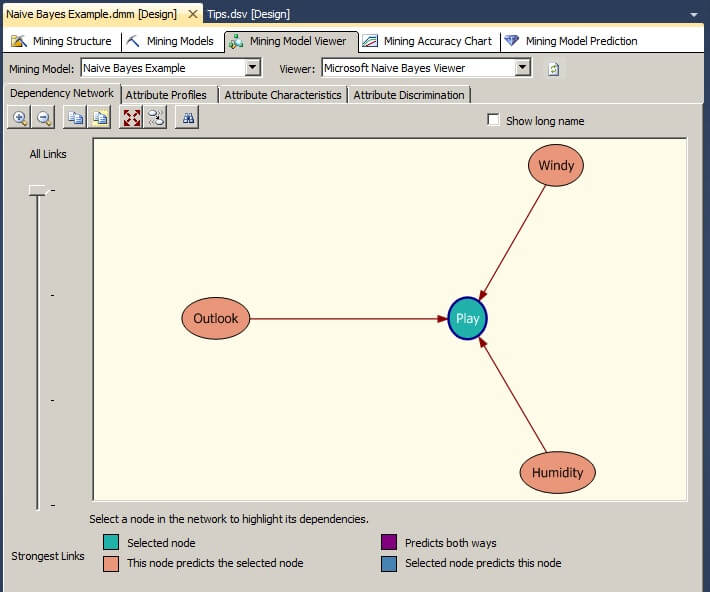
The Mining Model Viewer window's Dependency Network tab shows the dependencies among the attributes. The legend at the bottom explains the color coding of the graph. Clicking on the Play node shows that the attributes, Outlook, Windy and Humidity are used to predict Play.
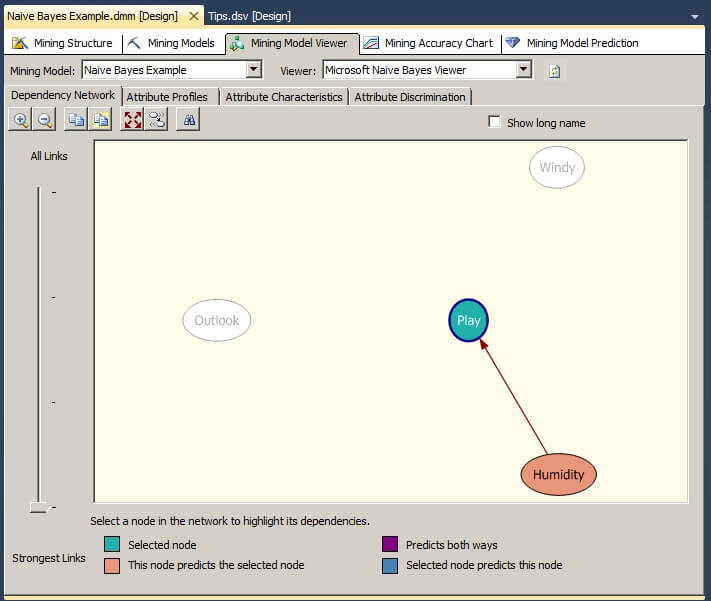
If we move the vertical slider on the far left from All Links to Strongest Links, we will see that the link between Humidity and Play is the strongest.
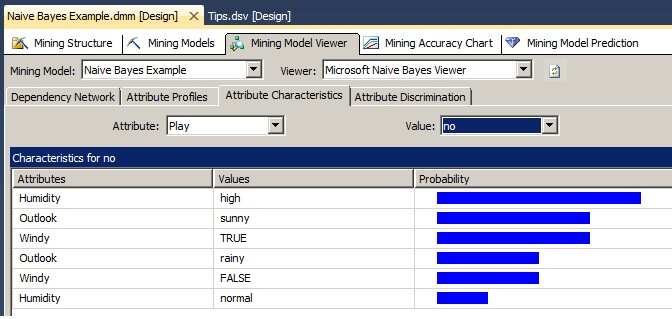
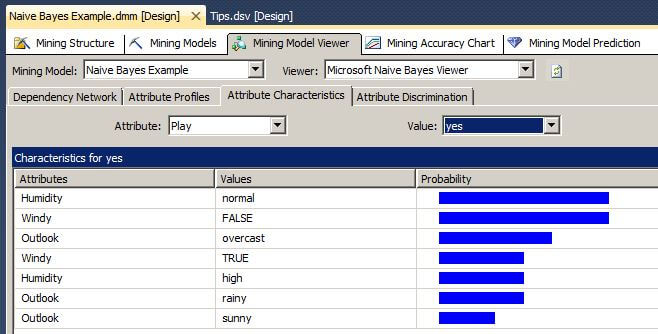
Since Naive Bayes uses probabilities to predict an object's classification, we can use the Attribute Characteristics tab to see the strength of each attributes' values in predicting the class value. Based on the Strongest Links in the image above, we expect Humidity to be the strongest. When we click on the Attribute Characteristics tab for the attribute Play and for both values "yes" and "no", we see the Humidity attribute to be the strongest.
The final step of this tip is to predict an unknown class value based on a new set of attribute values. Let's click on the Mining Model Prediction tab.
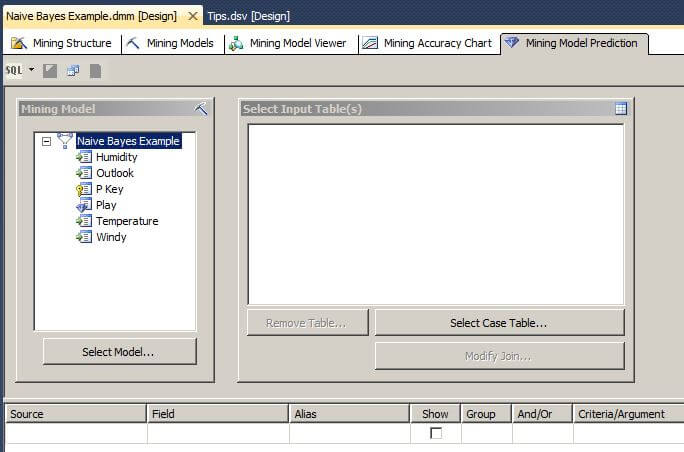
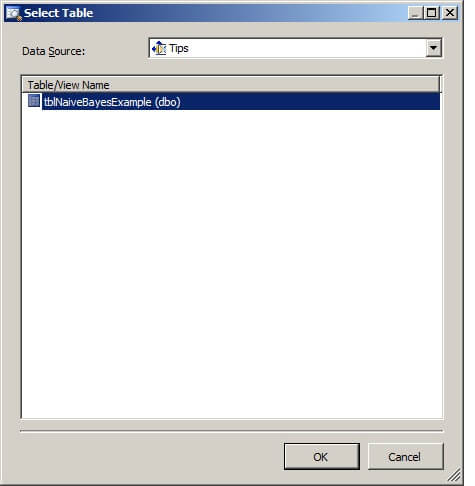
Click on the "Select Case Table..." button to display the Select Table window. Select tblNaiveBayesExample and then click on OK.
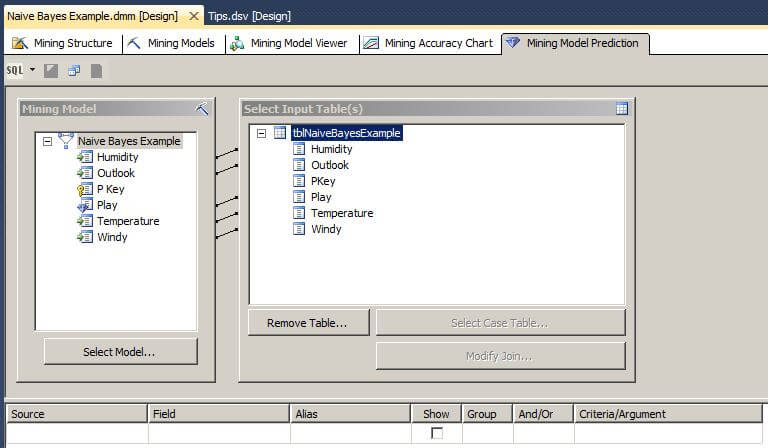
We can see where the mining model columns map to the input table columns.
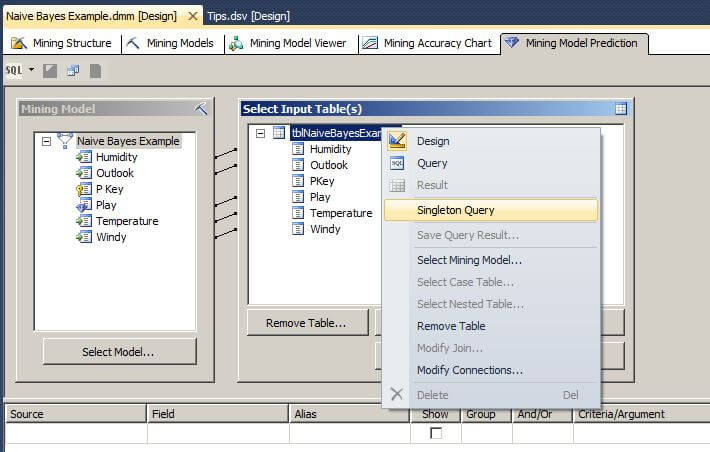
Next, right click on the table name in the Select Input Table(s) box and choose Singleton Query. This will allow us to select or enter values for a query against the data mining model to predict an unknown class label.
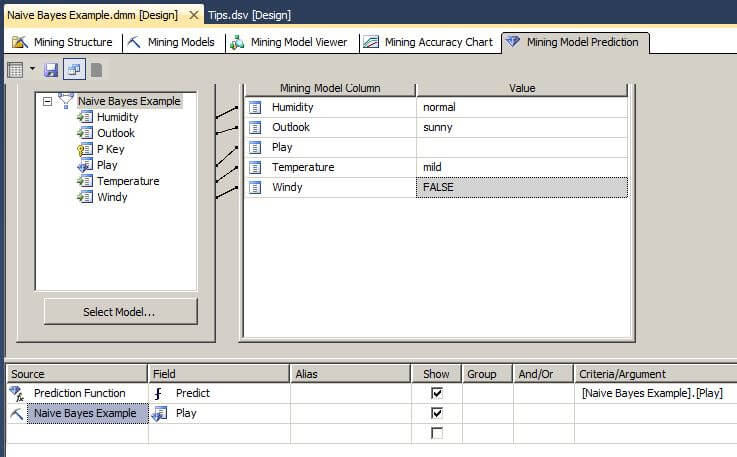
We will select normal humidity, sunny outlook, mild temperature and not windy in the Singleton Query Input box. In the middle of the window, we will select "Prediction Function" in the Source box, Predict in the Field box, check the Show box, and drag the Play attribute from the Mining Model box to the Criteria/Argument box as shown below. On the next line, we will select Naive Bayes Example in the Source box, and the Play attribute in the Field box.
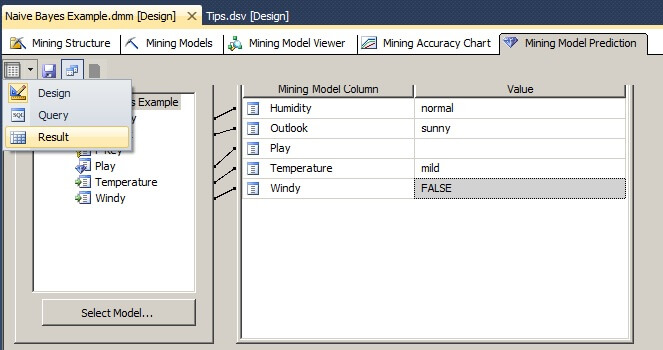
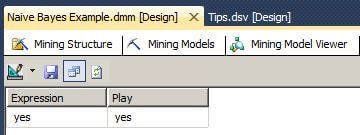
Now we are ready to see the predicted class value for the Play attribute. Let's select Result and the predicted value for the Play attribute is Yes.
Next Steps
- Try different values for the attributes to see which class is predicted.
- See the Decision Tree algorithm applied to this same dataset.
- SQL Server Analysis Services Glossary
References
[1] Witten, I.H., E. Frank, E., Data Mining: Practical Machine Learning Tools and Techniques, 2nd ed., Morgan Kaufmann Publishers, 2005.
[2] Quinlan, R., C4.5: Programs for Machine Learning. Morgan Kaufmann Publishers, 1993.
[3] Mitchell, T., Machine Learning, McGraw Hill, 1997.
[4] Han, J., M. Kamber and J. Pei, Data Mining: Concepts and Techniques, Elsevier, 2012.
About the author
 Dr. Dallas Snider is an Assistant Professor in the Computer Science Department at the University of West Florida and has 18+ years of SQL experience.
This author pledges the content of this article is based on professional experience and not AI generated.
View all my tips
Article Last Updated: 2013-10-07


