By: John Grover | Updated: 2014-12-29 | Comments (25) | Related: > Backup
Problem
My organization is beginning to invest in Infrastructure as a Service (IaaS), one of the things we are interested in doing is migrating SQL Server backups to the cloud. How can I do this safely, securely, and affordably?
Solution
Amazon's Simple Storage Solution (S3) is an inexpensive and effective way to move your backups off-site with minimal effort. In three easy steps you can have your SQL Server backed up to Amazon's redundant infrastructure, for less than a nickel per gigabyte per month. This is a 300-level tip, I expect that the reader has had some experience with AWS, PowerShell, SQL Server Maintenance Plans and SQL Server Agent Jobs. If you're not that advanced read on anyway and I'll point you to some great references for the details I don't cover explicitly.
Step 1: Set up Amazon S3 Storage
In his article "Introduction to the Amazon Relational Database Service" Tim Cullen provided detailed instructions on how to create an Amazon AWS account. If you don't already have an account take a few minutes to set one up. Everything in this tip can be accomplished using the available free tier if you want to follow along. Even my source database is SQL Server 2012 running on a t2.micro EC2 instance.
Once you have set up your Amazon AWS account you will need to create a user and a key pair. These are used by AWS PowerShell Toolkit to access and manipulate objects in AWS. Starting at the AWS console click on the Identity and Access Management (IAM) icon to get to the IAM dashboard.
On the menu to the left choose "Users" and on the next page click the blue "create new users" button. Enter a username in the first box, make sure the box labeled "Generate an access key for each user" is checked, then click "create" on the bottom left.
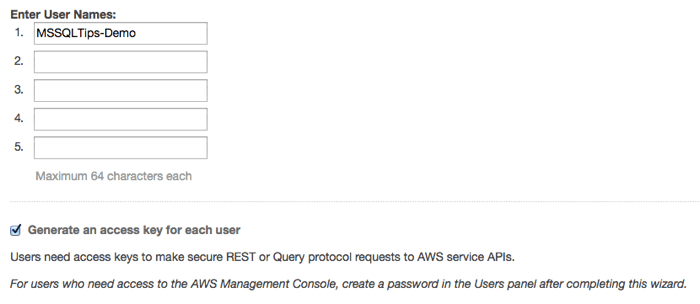
You'll be presented with this warning.

Click the "download credentials" button at the bottom of the page and save the credentials.csv file somewhere safe, you'll need it later when we set up PowerShell for AWS. Once you've downloaded the credentials file you can click on "close" to return to the IAM dashboard and you will see your new user listed. Click on the orange box in the upper right to return to the AWS control panel.
Next we will create an S3 "bucket" in which to upload our backup files. Click on the S3 icon on the AWS control panel.
At the S3 console click the "Create Bucket" button on the upper left to get the create bucket dialog.
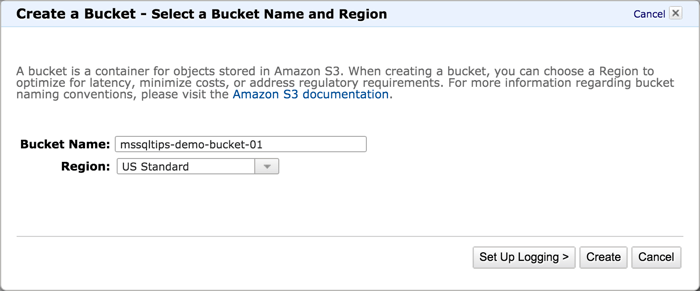
Give your bucket a unique name, the namespace for S3 buckets is global, must follow DNS naming rules and be all lower case (for more information on bucket naming click the link on the dialog box or go to https://docs.aws.amazon.com/AmazonS3/latest/UG/CreatingaBucket.html). Don't worry about setting up logging, we won't use it in this tip, just click "create". This will return you to the S3 console.
Click on the "Properties" button in the upper right of the page. For this tip we are going to set the retention policy of the bucket to 30 days, then delete. You can set the retention to as long as you like depending on how much you want to pay for the storage. You can also choose to have the aged files transferred to Amazon Glacier which is less expensive storage, but has the disadvantage of a very slow (glacial) restore time and more expensive data retrieval rate. Click on the "Lifecycle" band to expand it and then click the "add rule" button. This brings up the lifecycle rules dialog. For step one choose to apply the rule to the whole bucket then click the "Configure Rule" button to go on to the next step.

This step is where we configure the retention period and the disposition of the files when they expire. We will choose "Permanently Delete Only" from the "Action on Objects" drop-down. There are also options to do nothing, archive to Glacier only, or archive to glacier and delete. Once you've chosen an option you can specify the number of days after the object's creation that the action will take place. You can click the "See an example" link for a graphical explanation of what your setting will do.

Click the "Review" button to finish configuring and naming the lifecycle rule. Give it a descriptive name, then click "Create and Activate Rule". You have the chance to make any adjustments here and you can always go back and change the lifecycle rule later.
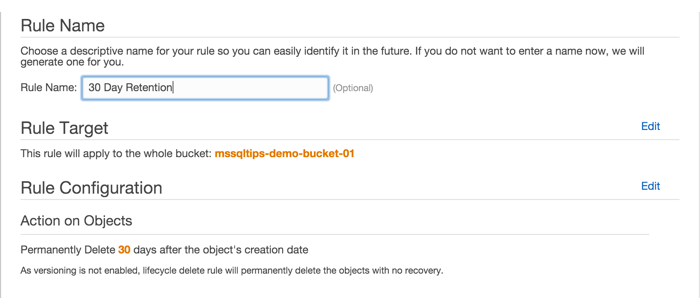
Back at the S3 console you can now see your new rule in the Lifecycle section.
Now we have created an S3 bucket for our backup files and applied a retention policy. We are ready to download and configure the tools we need to move our backups to the cloud.
Step 2: Install and configure the Amazon PowerShell module.
Amazon has a very complete API which can be used with various languages as well as a command line interface. They have also created a PowerShell toolkit that will let you do just about everything you can do from the AWS console and in some cases even more. The SDK and PowerShell tool kit are bundled together and downloadable from Amazon at http://aws.amazon.com/powershell. Click on the "AWS Tools for Windows" button to download the installer. Running the installer lets you choose which components you want to install, the full SDK, just PowerShell, sample code and a toolkit for Visual Studio. Since I'm using a throw-away EC2 instance I just installed the default, which is everything.
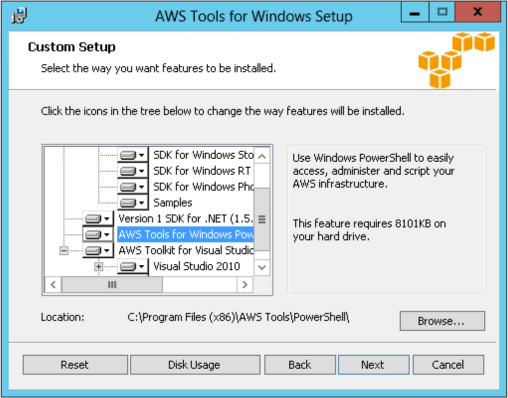
Whether you're using PowerShell, the various APIs or the command line interface every call to AWS must be authenticated using the credentials we created and downloaded in step one. Amazon's solution for PowerShell is to maintain your credentials in a secure, local store and load them into memory as needed so they do not have to be hard-coded into your scripts. The file is located in %LOCALAPPDATA%\AWSToolKit\RegisteredAccounts.json and the keys are obfuscated- either hashed or encrypted. For a complete description of Amazon's best practice for key management you can refer to their documentation at http://docs.aws.amazon.com/general/latest/gr/aws-access-keys-best-practices.html.
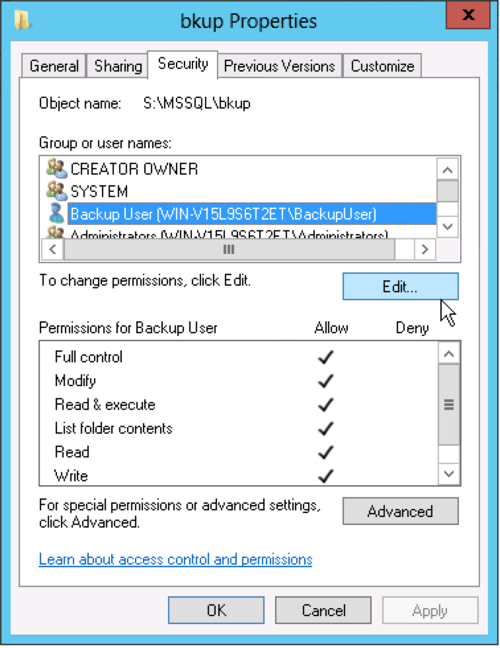
We're going to run the PowerShell part of our Backup Maintenance plan using a separate account that only has the rights it needs to run the backups, copy the files to S3, and to delete the old files. On the server create a new account called "BackupUser" with no special privileges, then give it full rights only on the backup directory.
In the Database setup a Windows Login and give it the sysadmin role in order to be able to create and run the Maintenance Plan.
Now we will load the credentials we created into a local secure store. First we need to log into the server with the BackupUser account since it will be running the PowerShell. Once we've logged in, open up the credentials.csv file we downloaded previously into a text editor or spreadsheet. To make your credentials available to your scripts use the Set-AWSCredentials cmdlet as shown below.

Set-AWSCredentials -AccessKey = AKIAJ2G7LB7Z6EXAMPLE -SecretKey = tOcCPhuPufirLNpydXeU4MWeC7V4YhExampleKey -StoreAs default
Complete information on adding and removing credentials and credential profiles is in the Amazon documentation at http://docs.aws.amazon.com/powershell/latest/userguide/specifying-your-aws-credentials.html. You can verify that the credentials are available for use with the Get-AWSCredentials cmdlet with the -ListStoredCredentials argument and it will return the names of all the profiles registered in the persistent store.
PS C:\> Get-AWSCredentials -ListStoredCredentials
default
The Set-AWSCredentials cmdlet writes your keys to the local store for the OS account under which it is running, you will need to run this command for every account that will use the AWS PowerShell toolkit.
Step 3: Set up your Maintenance plan using SQL Native backups and a simple PowerShell script
For this tip we will build a maintenance plan to backup the databases and transaction logs, move the backups to S3 using PowerShell, and clean up the local backup copies.
Since the SQL Server Agent account does not have sufficient privileges on the server to do that, we will set up a proxy to run the SQL Server Agent Jobs that are a part of the plan. First, create a credential for the BackupUser account:
USE [master]
GO
CREATE CREDENTIAL [SQLBackupUser] WITH IDENTITY = N'DOMAINNAME\BackupUser', SECRET = N'verysecurepasswordhere'
GO
Then create a proxy for the account configured to run CmdExe (subsystem_id 3).
USE [msdb]
GO
EXEC msdb.dbo.sp_add_proxy @proxy_name=N'SQLBackupUser', @credential_name=N'SQLBackupUser', @enabled=1
GO
EXEC msdb.dbo.sp_grant_proxy_to_subsystem @proxy_name=N'SQLBackupUser', @subsystem_id=3
GO
We cannot execute our PowerShell directly from a Maintenance Plan. We need to wrap it in a SQL Server Agent Job first. Further, because of the way the agent sets up the environment for the job we will need to wrap the PowerShell in a batch program where we explicitly set %USERPROFILE% otherwise it will be set to c:\Users\Default instead of c:\Users\BackupUser and PowerShell will not be able to find the AWS credentials we stored in the previous step. The batch file will also accept a single command line parameter that will be passed directly to the PowerShell to tell it whether it is running for full or transaction log backups.
@echo off
echo ================= BEGIN ================
echo USERNAME ....... %USERNAME%
echo USERPROFILE .... %USERPROFILE%
set USERPROFILE=C:\Users\%USERNAME%
echo NEW USERPROFILE. %USERPROFILE%
echo ================= PS ===================
PowerShell c:\AWS\BackupToS3.ps1 %1
echo ================= END ==================
Now lets set up the job, then we'll delve into the PowerShell that will do the heavy lifting to get the backups moved to S3.
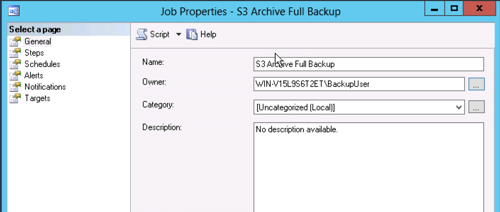
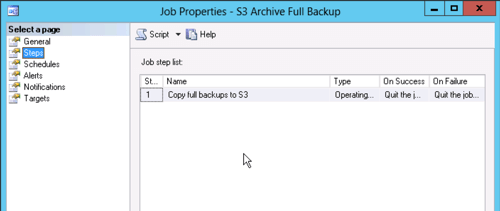
And the step.
The step will run the batch file with the code from above and pass either "*.bak" for a full backup copy to S3 or "*.trn" to copy a transaction log backup. Note that the job step has to be run as the Proxy we created earlier so it will have rights to the files in the backup directories.
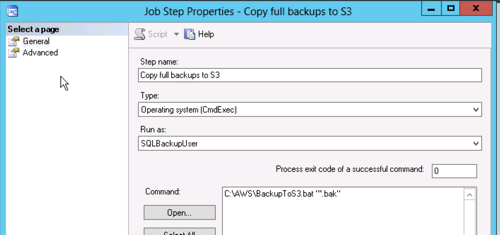
That's all for the full backup job, now create a second job just like it for the transaction logs except pass "*.trn" as a parameter to the command instead of "*.bak"
The maintenance plan will be very bare-bones, it will have a sub plan each for full backups and transaction log backups which will be essentially the same except for the schedule and the files they are backing up. Create a new Maintenance Plan called "Database Backup" and start the first sub-plan.
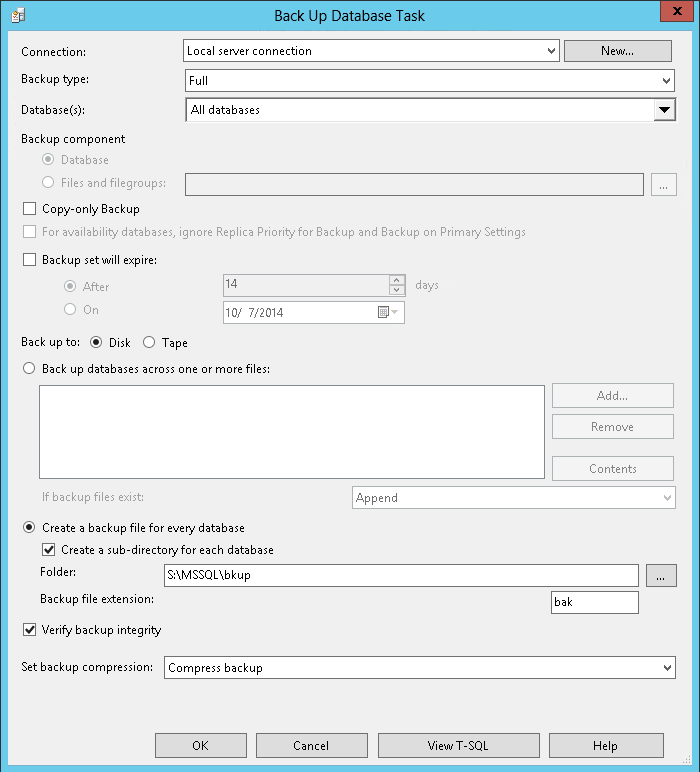
First create the Back Up Database task. In this tip we will back up all the databases and compress the backups, since we are going to pay for storage by the gigabyte we want to keep our bill as low as possible. We will put all the backups in the same directory with subdirectories for each database, this is where the PowerShell will look for them when it's time to copy to S3.
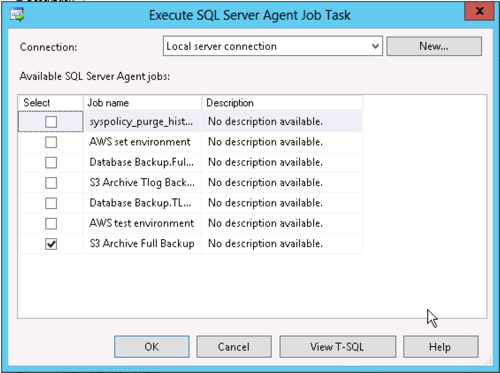
In SQL Server Management Studio if we want to run an external command from a maintenance plan we need to use the "execute SQL Server Agent Job" task and tell it to run the first job we just defined (the "*.bak" version).
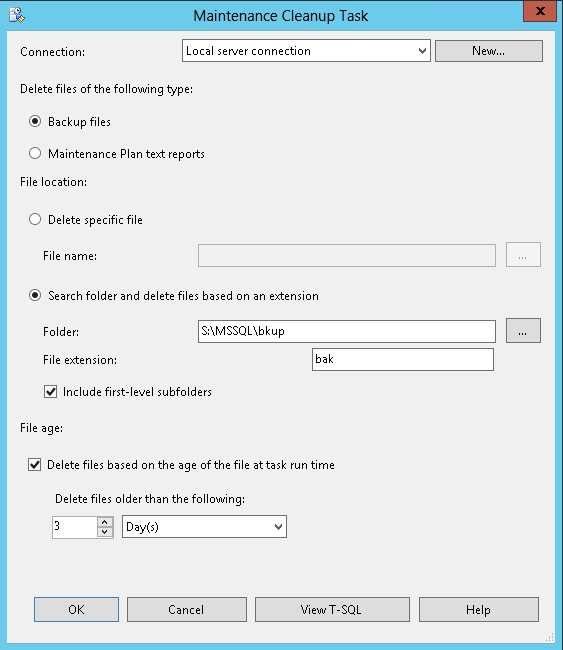
Finally, we will clean up after ourselves. We will leave the three days most recent backups on the local disk in case we need them, the rest will already be in S3 for us to copy back for use.
Now, link the steps together, add a schedule and the first sub-plan is complete. In this example the full backup is scheduled daily.
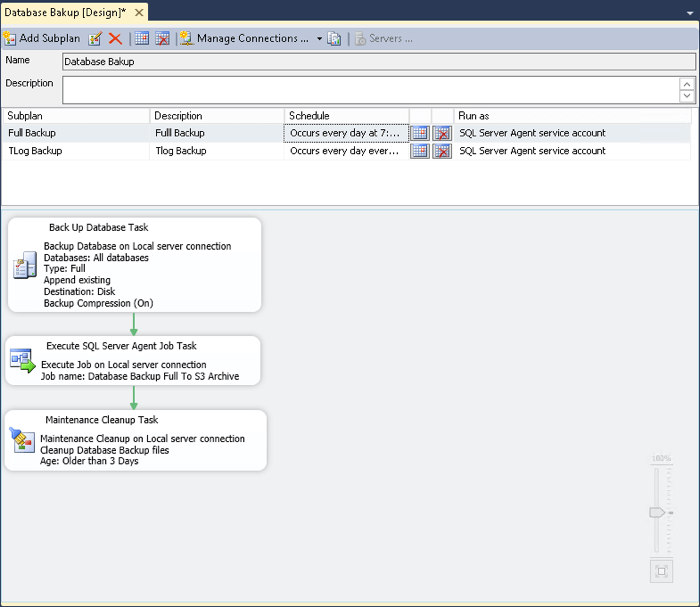
Now create the second subplan for the transaction log backups, noting that in the Execute SQL Server Agent Job Task to specify "*.trn" as the argument to the batch file. Also set the schedule to something more frequent, for this tip we will use four hours.
We're ready to write the PowerShell to move the backups to S3. The first step is to make sure the AWS PowerShell Toolkit is included. Depending on your version of PowerShell this may happen automatically, but well include the code just in case.
#
# SQL Server Backup to S3
#

# Get the AWS Stuff
Import-Module -Name AWSPowerShell
Next, we'll check that the parameter passed on the command line is okay. We only know two kinds of backups, anything else will cause the script to terminate
# Should be "*.bak" or "*.trn"
if ( $args[0] -eq "*.bak" -or $args[0] -eq "*.trn" ) { $backuptype = $args[0] } else { exit 1 }
Here we load in the credentials from the persistent store we created. This will only work if the script is running as the same user who created the store and the %USERPROFILE% environmental variable is set. The "ProfileName" must also match what was saved, if you look back you will see we specified "default" when we saved the credentials.
# Get credentials from the persisted store
Initialize-AWSDefaults -ProfileName default -Region us-east-1

# Go to base backup location
Set-Location s:\mssql\bkup

# Loop thru the subdirectories for each database
Get-ChildItem | Foreach-Object {
    if ($_.PSIsContainer) {

        # Set the prefix for the S3 key
        $keyPrefix = "sql-server-backups/" + $_.name

        # Switch to database subdirectory
        Set-Location $_.name;
At this point we've moved into the backup directory and are looping into each database subdirectory. We set the $keyPrefix variable to the name of the folder we created in S3 plus the name of the databases subfolder. Next we get the name of the newest backup file of the type specified for this run. This script is run immediately after the backup task in the Maintenance plan so we want to grab the file that was just created
        # Get the newest file in the list
        $backupName = Get-ChildItem $backuptype | Sort-Object -Property LastAccessTime | Select-Object -Last 1
S3 is not a file system, it stores objects as a key/value pair. For all intents and purposes it looks like a file system, but it is important to know the difference. The file is saved as an object with a key, then retrieved using the same key (which looks very much like a filename and directory, but isn't really).
        # build the S3 Key
        $s3Keyname = $keyPrefix + "/" + $backupName.Name
Finally we write the file out to S3. We specify the bucket name to be used, the key (or filename) to be used in S3, the local filename to be uploaded, and the encryption to be used. In this tip were using server side encryption so the file will be encrypted at rest by Amazon using their keys. There is a client side encryption option as well which would require us to set up our own key management system, but give us more control over who has access to the files. With server side encryption the files are encrypted, but anyone with credentials to access the S3 bucket can still retrieve an unencrypted copy.
        # Copy the file out to Amazon S3 storage
        Write-S3Object -BucketName mssqltips-demo-bucket-01 -Key $s3keyname -File $backupName -ServerSideEncryption AES256

        # Go back the the base backup location
        Set-Location s:\mssql\bkup
    }
}
To retrieve your files from S3 use the command
Read-S3Object -BucketName "BUCKETNAME" -Key "S3KEYNAME" -File "LOCALFILENAME"
And there you have it, a complete system for backing up your SQL Server databases to the cloud in three easy steps!
Summary
In Step One we started by making an Amazon Web Services account if we did not already have one. We added a user to the account and generated credentials to be used to access our S3 bucket. We created and configured our S3 bucket with a folder for backups and a retention period of 30 days.
In Step Two we installed the PowerShell toolkit and created a local credentials store.
In Step Three we created a Maintenance Plan to back up the databases, run some custom PowerShell to copy the backups to S3, and keep our local backup directory cleaned up.
Next Steps
- Read Tim Cullen's tip "Introduction to the Amazon Relational Database Service"
- Get a free-tier Amazon account for yourself and see what you can do with it
- Take a look at Sadequl Hussain's series on RDS
- Check out some of Amazon's documentation and tutorials on their web services
- Experiment! AWS is like a giant technology playground!
About the author
 John Grover is a 25-year IT veteran with experience in SQL Server, Oracle, clustering and virtualization.
This author pledges the content of this article is based on professional experience and not AI generated.
View all my tips
Article Last Updated: 2014-12-29


