By: Rob Fisch | Updated: 2010-01-28 | Comments | Related: > SharePoint Document Management
Problem
There are many users collaborating on document creation with MOSS 2007 or WSS3. It is critical that some level of control or 'gatekeeping' exists. Is there are way to manage this so that everyone knows when a document has been finalized and approved?
Solution
Yes. Using SharePoint workflow is one option, however if the process is simple, the objective can be accomplished by using the built-in "Content Approval" system. Though it's possible to integrate SharePoint workflow with the Content Approval system, it is a separate feature and can work independently from workflow. This article discusses only the Content Approval system. It also assumes using the feature on a document library, though it works the same on any content list type.
Go to the main Document Library Settings.
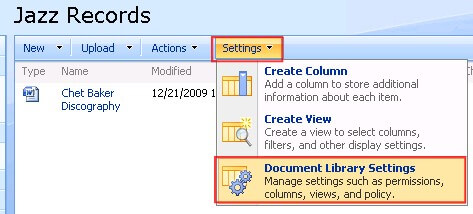
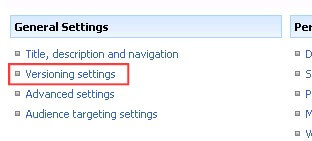
Select "Versioning settings".
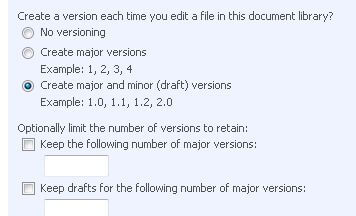
For "Require content approval for submitted items", select "Yes".

For version control, there are some options. The first two options are self-evident. The last option is a variation of the 2nd option, and adds a status called "draft". This means that a document can go through multiple iterations, even before being submitted for approval. Each iteration gets numbered with a decimal until the document is submitted and approved. Once approved, the major version number gets incremented. (This is hard to explain and probably more difficult to understand until you use each option at least once.) Don't worry too much about it now.
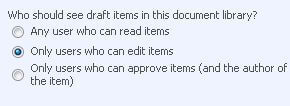
This is an interesting option. It defines who can see what for each content approval status.
This feature is not critical for the Content Approval system, but it's always a good idea to require documents to be 'checked out'.

Once Content Approval is turned on, you will see a new "Approval Status" field in the library automatically. By default, all previously uploaded documents become "Approved". But you can revert the statuses manually back to draft or pending.
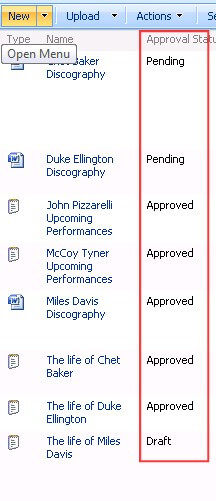
Permission setup for Approver:
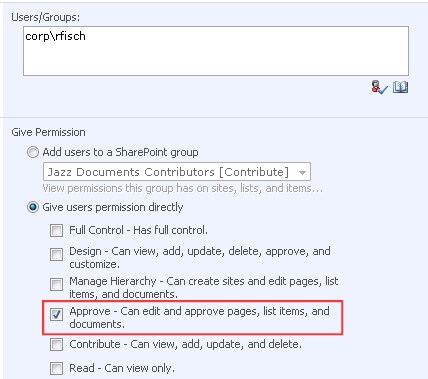
Permissions setup for Contributor:
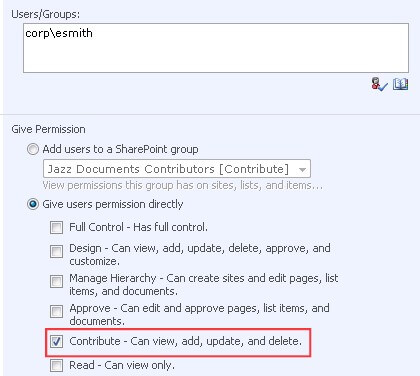
To revise or otherwise downgrade an "Approved" document, select "Unpublish this version" from the document dropdown. This can be done by either Approvers or Contributors.
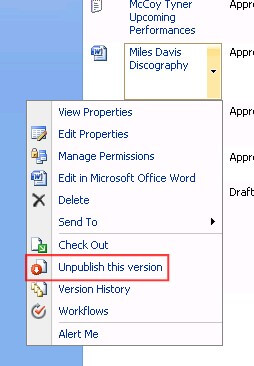
If you are using both minor and major versioning (with the decimals), you submit documents for approval by "Publishing" them.
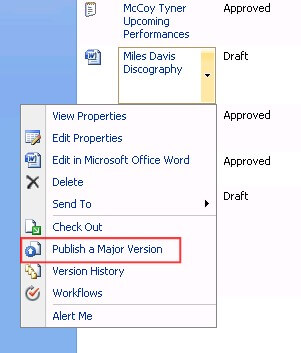
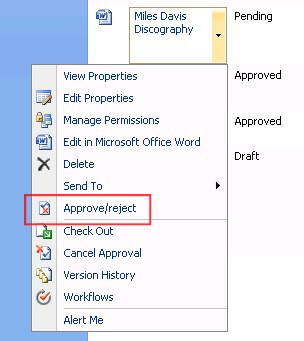
To "Approve" (or Reject) documents, select the "Approve/reject" option from the document dropdown. Only "Approvers" have the permission access to fulfill this option.
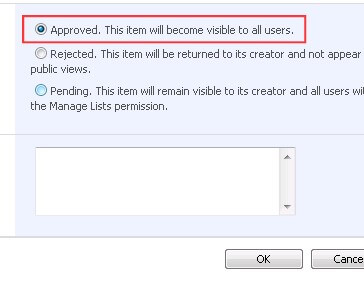
The Approver chooses the appropriate, and can even add a comment.
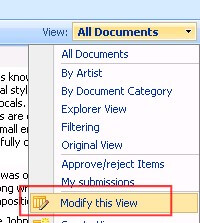
Now let's add one more refinement. We'll group the documents by approval status. From the "View" dropdown, select "Modify this View".
Then uncheck the "Approval Status" columns from the displayed list of columns. (Don't worry, this is what we are grouping by.)

In the "Group By" section, select "Approval Status". Leave the "Show group in ascending order" option.

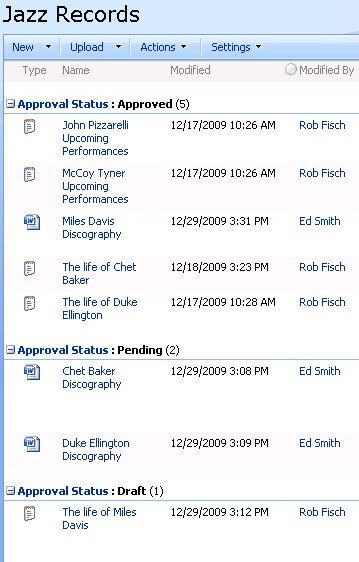
Here's a quick look at the library grouped by Content Approval status. Notice, in this case, "ascending order" in the grouping means something other than alphabetical. The documents in "Draft" status are works-in-progress. The "Pending" documents have been submitted for approval. And the documents at the top are "Approved" documents. This is a natural sequence, and is what is meant by "ascending order" in the grouping.
Next Steps
- Check out MSSQLTips.com for great information about Microsoft SQL Server.
About the author
 Rob Fisch has worked with SQL Server since version 6.5 as a dba, developer, report writer and data warehouse designer.
This author pledges the content of this article is based on professional experience and not AI generated.
View all my tips
Article Last Updated: 2010-01-28


