By: Arshad Ali | Updated: 2010-08-24 | Comments | Related: > SharePoint Configuration
Problem
In a recent tip, I discussed installing the Windows SharePoint service and SharePoint Foundation 2010. Once you have completed the installation, you need to understand the steps to create a web application, site collections and sites. In this tip, we cover the steps required to complete your SharePoint installation.
Solution
In this tip I am going to use SharePoint 2010 Central Administration to create a web application, site collections and sites. The same can be done programmatically by using PowerShell using the SharePoint libraries or object model / SharePoint APIs. In future articles, I will talk about how setup can be done programmatically.
Web Application
In the SharePoint hierarchy, a web application is the top tier. It is nothing but an IIS (Internet Information Services) website which is specifically configured to run as a SharePoint site and contains at least one or more site collections. While creating a web application you can either associate it with an existing application pool or you can create a new application to be associated with it. While creating your SharePoint web application you also need to specify a content database and details like authentication method used to connect to the content database. It is possible to have multiple content databases for different site collections for the web application. Using multiple databases makes it easier for content database management, backup, restore, etc...
Site Collections
As I mentioned above, a web application needs to have one or more site collections. A site collection is a logical container for grouping sites and allows hierarchical arrangement of sites within it. A site collection has exactly one default top level site and may have many child sites. By default all sites of a site collection share navigation, security/permissions, templates and content types so you should plan to include all sites in single site collection if they all need to share these things. If needed, you can specifically change settings for a particular site if required.
Sites
A site collection has at least one parent site which is created by default when you create a site collection and may have many other sites within its hierarchy. A site allows us to organize and store all content in SharePoint, the content can be Lists, Libraries (Document Library, Picture Library, Report Library, Form Library etc...) Web pages, Web parts, Sites and Workspaces. Further a site can have child sites in its hierarchy.
Enough on concepts, let's go through some examples:
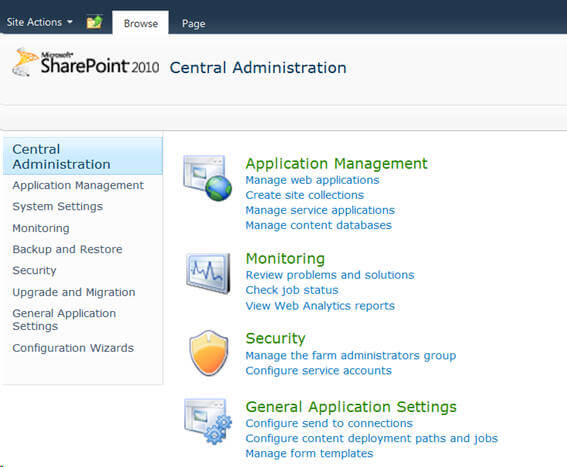
Go to START > All Programs > Microsoft SharePoint 2010 Products and click on SharePoint 2010 Central Administration, this will open the Central Administration site UI as shown below. Click on Manage web applications under Application Management in Central Administration page or under Web Applications in the Application Management page.
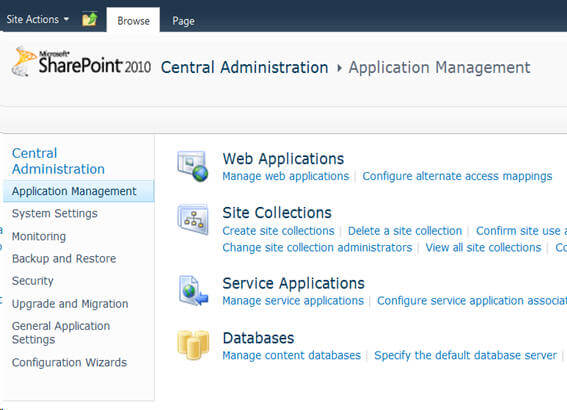
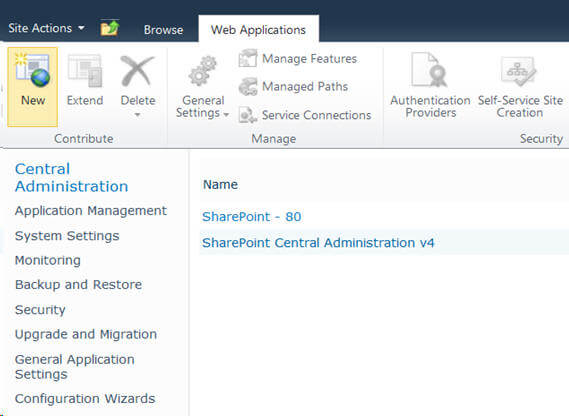
On the web applications page, in the right pane you will notice all the web applications created so far. On top you will see an Office style ribbon which is a new feature of SharePoint 2010. Because we intend to create a new web application, simply click on the New option in left most side of the ribbon.
This will open up a Create New Web Application page, you need to specify different settings/parameters for your new web application to be created. Some of these settings/parameters are described below:
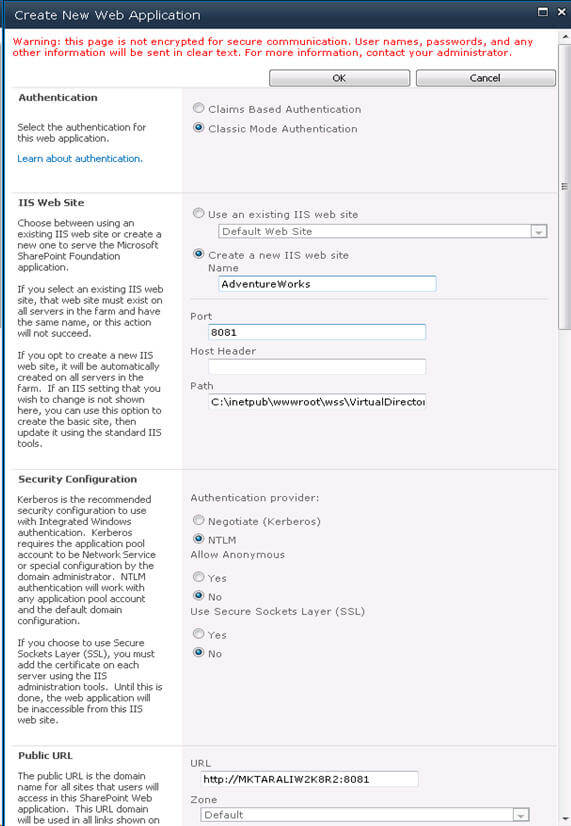
| Settings | Description |
|---|---|
| Authentication | This setting allows you to define the authentication method for SharePoint users. In classical mode, users are authenticated to access the web application using Windows authentication. The claim based authentication is new with SharePoint 2010 and allows users to be authenticated by Windows authentication or form based authentication (FBA) or a trusted identity provider (SAML) so that users from heterogeneous systems can access the web application. |
| IIS Web Site | With this setting you specify whether you want to create a new IIS website or use an existing IIS website for your web application. Next you specify the port number for your new IIS website or this will be the same as the existing IIS website if you are re-using it. Host Header is an optional setting and is used in case you want to share the same port number across multiple IIS websites. If you specify anything here you also need to configure DNS to route requests to the appropriate server. Path is the physical location where files for the web application will be copied. |
| Security Configuration | With this setting you specify the authentication provider to be used by this web application, it could be either Negotiate (Kerberos) or NTLM. Select Allow Anonymous to Yes if you want your web application to be enabled for anonymous access, it uses the computer-specific anonymous access account i.e. IIS_IUSRS. Next you can enable SSL for your web application, but you also need to install and configure an SSL certificate in IIS. |
| Application Pool | This setting associates an application pool with your web application; you can either choose to use an existing application pool or create a new one for your web application. If you are creating a new application pool for your web application you also need to specify the security credential either predefined or configurable. |
| Database Name and Authentication | This setting allows you to define the database server where the content database for your web application will be created (or will be reused from); next you need to specify the content database name and authentication mechanism to connect to the database server. Windows authentication is recommended as is SQL authentication, note that passwords are sent unencrypted to SQL Server by default. |
| Failover Server | If you have configured database mirroring for the content database then you can specify the name of the failover server here. |
| Service Application Connections | You can use either Default or Custom, if you choose Default the web application will be connected to the default set of service applications or you can use Custom to individually select the service applications on which this web application will be connected to. |
| Customer Experience Improvement Program | If you select Yes, SharePoint sends program errors and information to Microsoft for improving the product. |
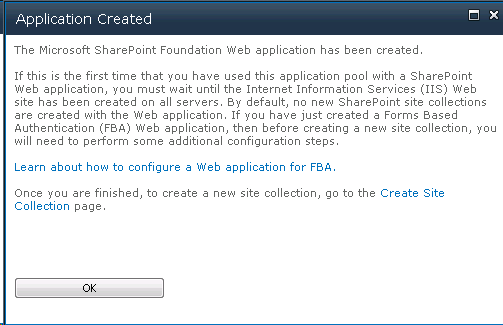
Once you have specified all of the required/optional parameters on the Create New Web Application page, simply click on the OK button and wait for the web application to be created. Once the web application is created you will see a screen like below. Click on the Create Site Collection link to create a site collection as the web application is not usable unless you create at least one site collection.
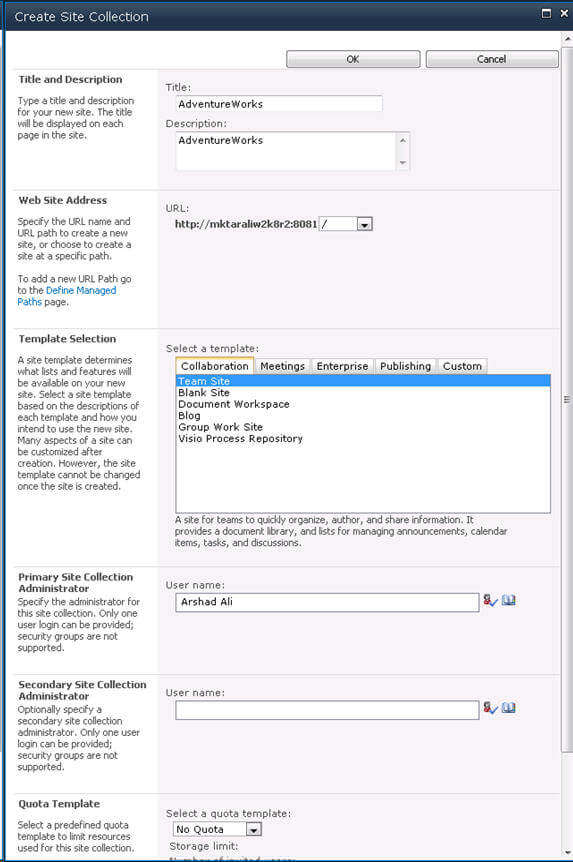
On the Create Site Collection page, first you need to specify the Title and Description for your new site collection.
Next you need to specify the URL for your site collection in the Web Site Address section.
Then you need to select one of the several available custom created templates which will be used as a blue-print to create your site collection.
Next you need to specify the Primary Site Collection Administrator, specifying the Secondary Site Collection Administrator is an optional setting, but recommended as it allows secondary administrator to take charge of administration if the primary administrator is not available.
Next if required, you can use the Quota template to restrict growth of your site collection to a certain limit.
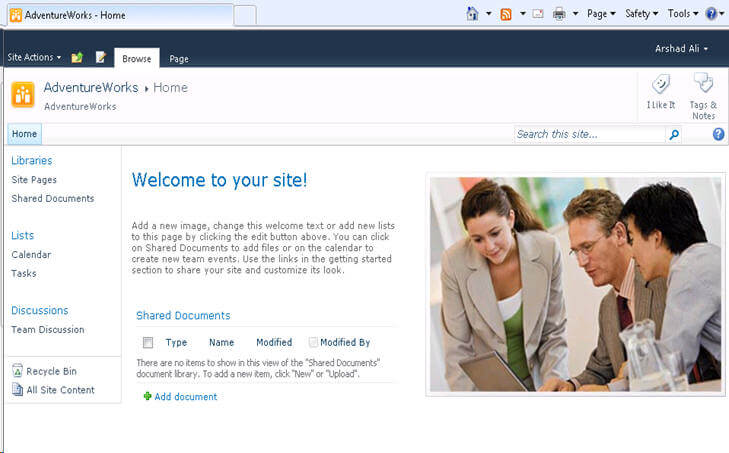
Click on the OK button and you are done with the creation of the SharePoint web application. Click on the link and you will see your web application like this.
We normally create a site for each division/department/project. To create more sites, click on Site Action on the top left corner and you will see several options like this (this is another change from last SharePoint version where it used to be on top right side):
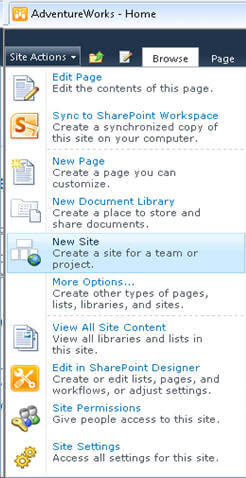
Click on New Site and specify different parameters (Title and URL) for your new site as shown below.
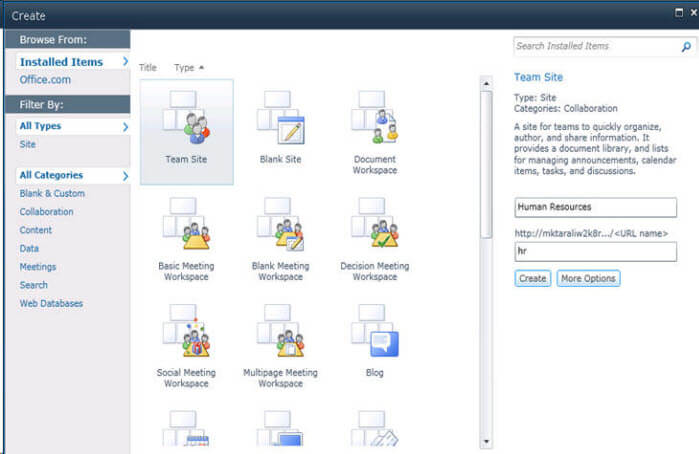
You can create as many sites as you want, for example I have created a couple of different sites for each department of the organization as you can see below.
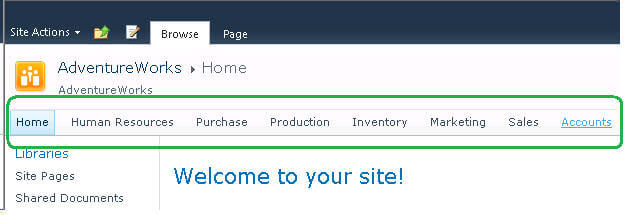
Notes
- You need to have appropriate permissions in order to create a web application, site collections and sites.
- When you create a web application, you also need to create a site collection to make your web application usable. When you create a site collection a parent/top level site is created by default which you can use for common information, news, announcements etc.
- If you want your web application to be available to extranet users you can extend your existing web application to have separate IIS websites that expose the same content to the extranet users.
Next Steps
- Review Installing SharePoint Foundation 2010 on a Single Server - Part 1
- Review Installing and Configuring Windows SharePoint Service (WSS) 3.0
- Review SharePoint Products documentation on msdn.
About the author
 Arshad Ali is a SQL and BI Developer focusing on Data Warehousing projects for Microsoft.
This author pledges the content of this article is based on professional experience and not AI generated.
View all my tips
Article Last Updated: 2010-08-24


