By: Hesham Saad | Updated: 2011-02-22 | Comments | Related: > SharePoint
Problem
It is easy to export SharePoint lists to an Excel spreadsheet, but how about the reverse? If we already have data in excel format with predefined columns , headers , formulas , ... etc how can we make those available in a SharePoint list?
Solution
Via Microsoft Office Excel 2007 we can create a table and then export it to a new SharePoint list. SharePoint provides OOTB (Out Of The Box) functionality to import Excel spreadsheets and to save it as a custom list. There are multiple techniques for getting this job done. Parts I and II of this tip will explore three different approaches.
- Export an Excel spreadsheet table to a SharePoint custom list (Default text data type for table - Columns headers) - Part I.
- Export an Excel spreadsheet table to a SharePoint custom list (Multiple data type for table - Columns headers) - Part II.
- Import an Excel spreadsheet table to a SharePoint custom list (SharePoint OOTB Custom Lists feature) - Part II.
1. Export an Excel SpreadSheet table to a SharePoint custom list : (Multiple data type for table - Columns headers)
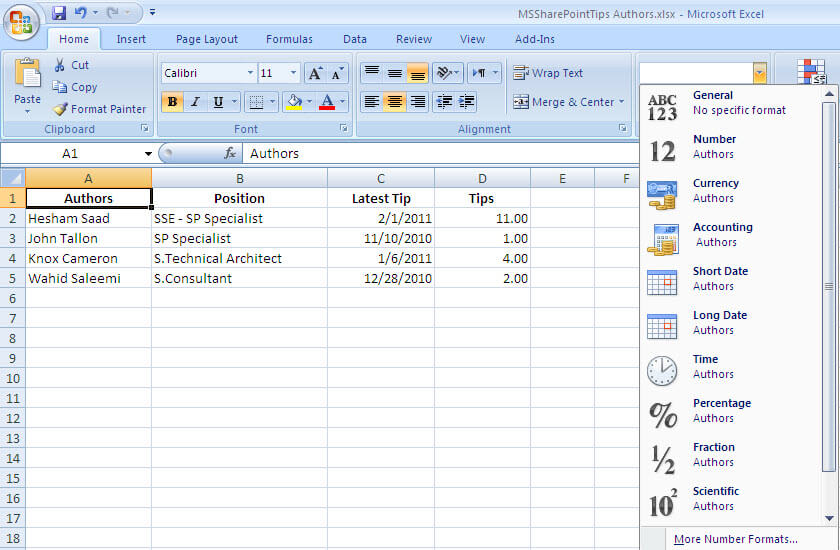
- Open Microsoft Excel 2007. Start to simulate a table by typing it's columns headers in bold then type some data , We can change the column data types as shown below:
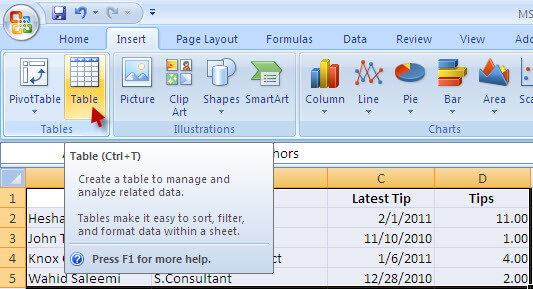
- Then select (highlight) your range of cells and click on "Table" button under the Insert tab:
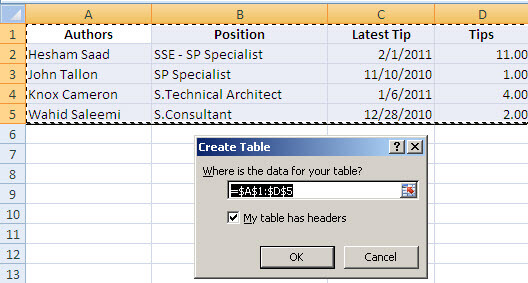
- Also, Make sure that the displayed range of cells match what you have selected (highlighted) then click on the Ok button, then check the "My table has headers" check box in order not to create initial column headers and to map your bold text headers to be your table columns headers:
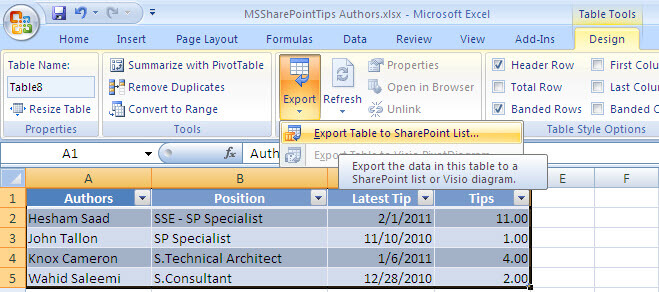
- Then Click on "Export" : "Export Table to SharePoint List..." under Design tab:
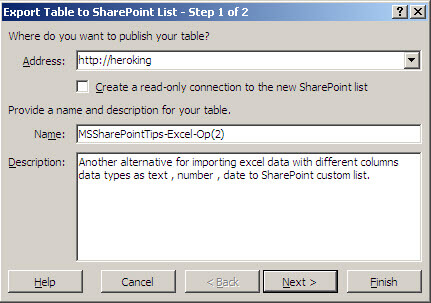
- Then, type your SharePoint site URL at the "Address" section. Provide a name and description for your exported table and click the Next button :
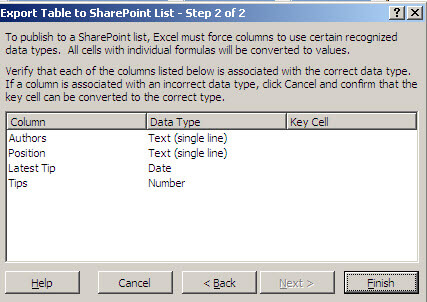
- Make sure that all of your selected (highlighted) column headers are displayed and then click the Finish button: (Note here that we have multiple predefined data types as : Text(Single Line) , Date , Number)
- Wait until the message box shows indicating that "The table was successfully published and may be viewed on":

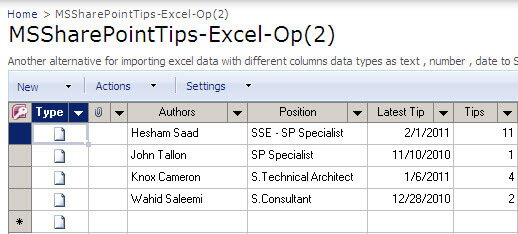
- After clicking on the above link which is displayed, we'll see our table exported to SharePoint custom list in datasheet view:
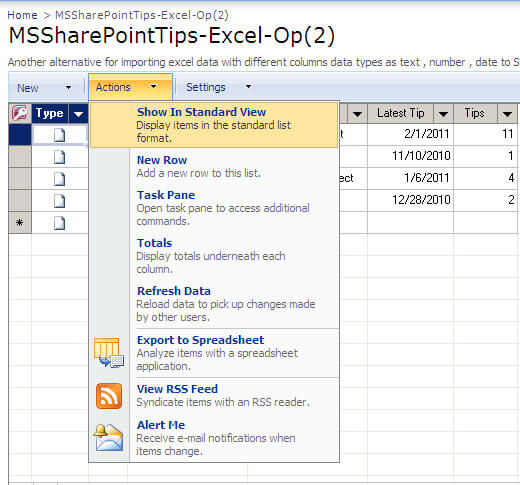
- Then, we can return to the default standard view by clicking on the "Show In Standard View" button under the "Actions" menu items:
- And finally here's our new automatically created SharePoint custom list imported with our Excel table data with multiple column header data types:
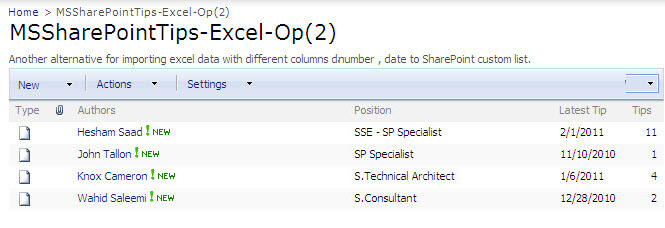
- We need to make sure that our predefined excel table column headers are exported successfully and match the custom SharePoint list columns.
Quality check:
I. Check the list column data types:
- Click on "List Settings" under the Settings menu items:
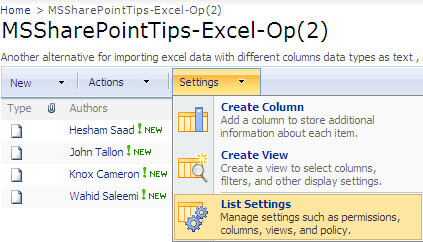
- Check the Columns section as shown below:
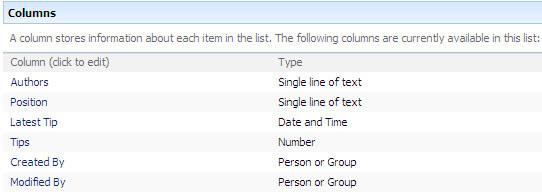
II. Add a new list item:
- Click on "New Item" under the New menu:
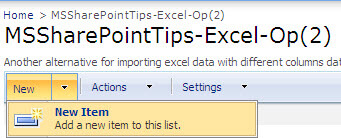
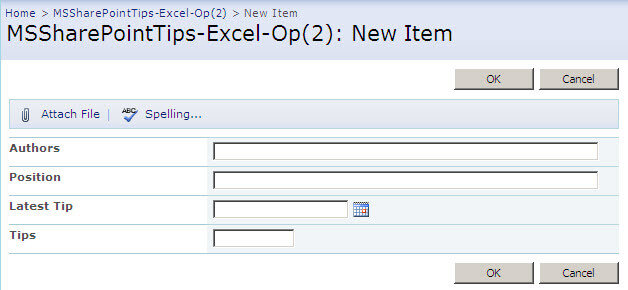
- Check here that "Authors & Position" are text (single line) column data type while "Latest Tip" is a date column data type and "Tips" is a number data type":
2. Import an Excel SpreadSheet table to a SharePoint custom list : (SharePoint OOTB Custom Lists feature)
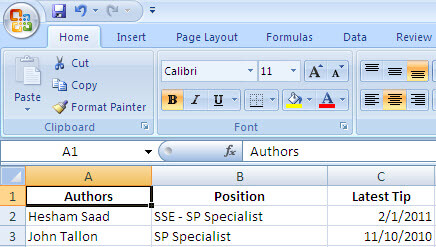
- Open Microsoft Excel 2007. Start to simulate a table by typing it's column headers in bold then type some data:
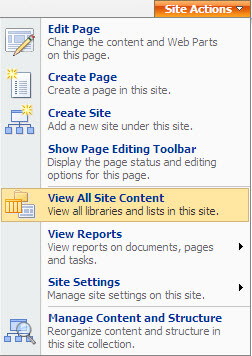
- Go to the SharePoint site, Click on the "Site Actions" menu then click on "View All Site Content":
- Click on "Create":

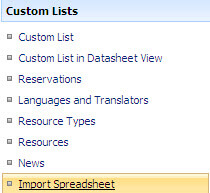
- Click on "Import SpreadSheet" under Custom Lists section:
- Then, Type a "Name & Description" to your list, then click on the "Browse" button to import our predefined excel spreadsheet :
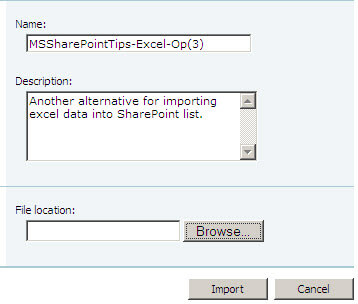
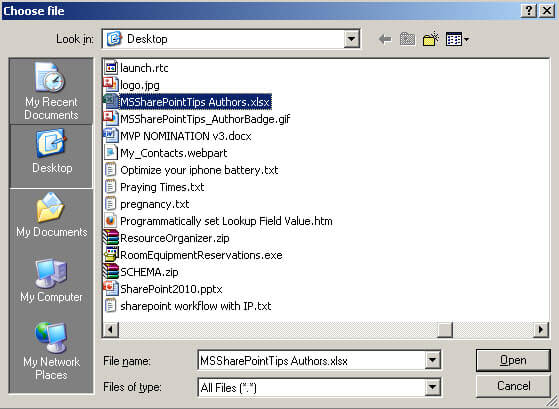
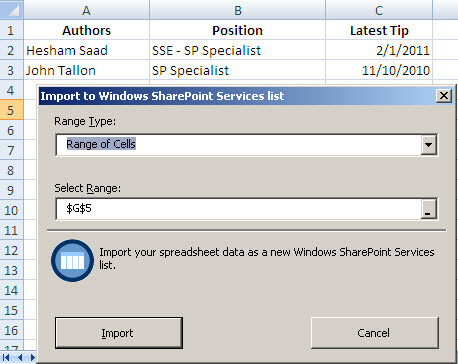
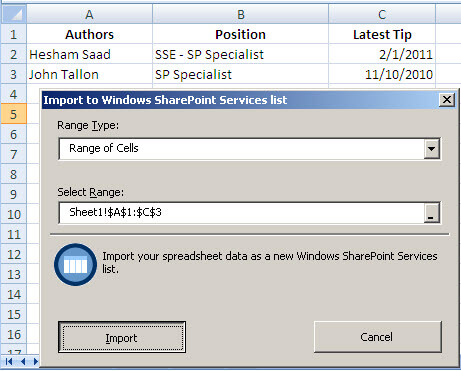
- Once we click on the "Open" button this will open the Excel spreadsheet and another popup window to select the range of cells that we want to import it to the SharePoint list.
Select "Range of Cells" from the "Range Type" drop down list then click on the...
...button.
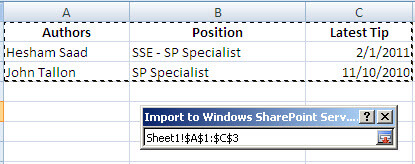
At "Select Range" for selecting the range of cells, choose the particular rows and columns that we want to import it to the SharePoint list:
- Then, select (highlight) the whole range of cells (i.e: For example from A1 : C3 , as shown below) :
- Then Click on "Import" button:
- And finally here's our new automatically created SharePoint list imported with our Excel table data:

Notes:
Sometimes when we try to import Excel spreadsheet, we might get the "Method Post of object IOWSPostData failed " error so in order to fix this error click here. Also, after fixing this problem we can face another error "Cannot connect to the server at this time. your table cannot be published" so to fix this problem we just need to check that we have created a top level site or not. If not then just create the top level site and it will start working. This may not seem logical but it works. Also, I noticed that this problem no longer exist afer installing SharePoint SP2 (Service Pack 2).
Next Steps
About the author
 Hesham Saad
This author pledges the content of this article is based on professional experience and not AI generated.
View all my tips
Article Last Updated: 2011-02-22


