By: Shishir Bhandari | Updated: 2011-03-09 | Comments (1) | Related: > SharePoint Administration
Problem
Generally you open a document library in Windows Explorer view to move items/ documents in bulk to other document libraries. This approach doesn’t maintain the current item/document’s metadata properties like "Modified" (DateTime) & "Modified by". The list items will get the current Date Time as "Modified" (DateTime) and the user who does the migration as the Modified By.
So what do you do to preserve list item Metadata Properties while migrating the list within the site collection?
Solution
You would think of using Datasheet view to move list items but that doesn’t preserve item Metadata Properties.
You may even think of saving the list as template with content included and create your new list at the desired location out of this list template. But this doesn’t preserve the metadata properties either. The list items will take the current time in the "Modified" (DateTime) field and "Created by" as the user who created the new list.
The simplest solution is to use "Site Content and Structure" to migrate Lists!
Follow the steps to move your SharePoint List along with its Metadata properties:
1. Create the document library or your custom list at the destination. You don’t have to worry about the custom fields and list structure. The move process will take care of it.
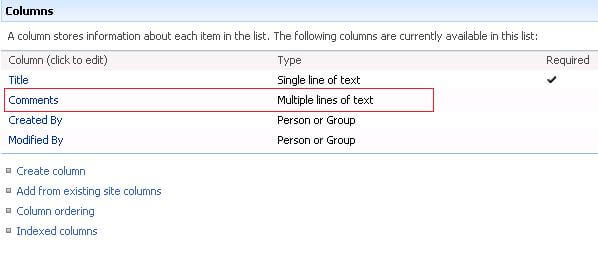
2. Lets create a source custom list with a custom field "Comments" as shown below:
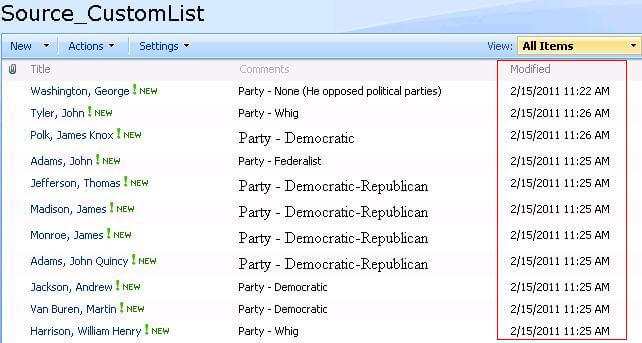
3. Create some dummy data. Note the Modified date and time field values (Metadata properties)
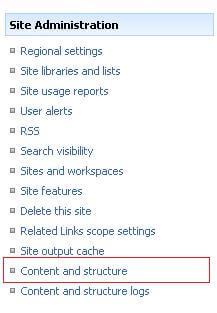
4. Go to Site Actions → Site Settings → "Content and Structure" under site administration as shown below:
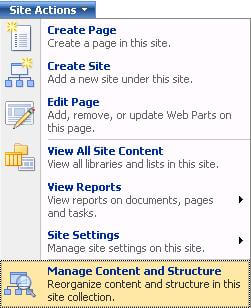
Or for a publishing site, you can go to Site Actions → "Manage Content and Structure" as shown below:
5. Open your source custom list and select all items to be moved, as shown below:
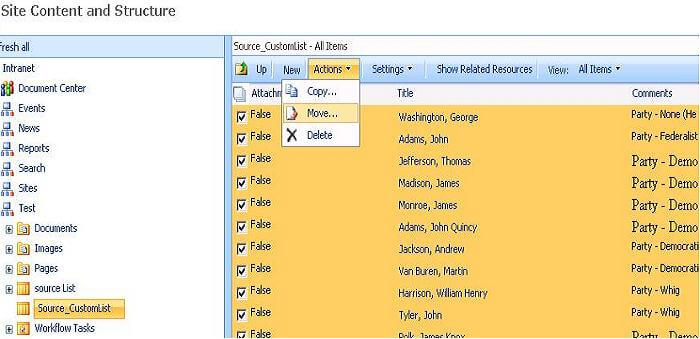
6. This opens up the Move dialog box. Select the Destination Custom list in which
you want to move your list items
Note: "Destination_CustomList" list doesn’t have custom field "Comments"
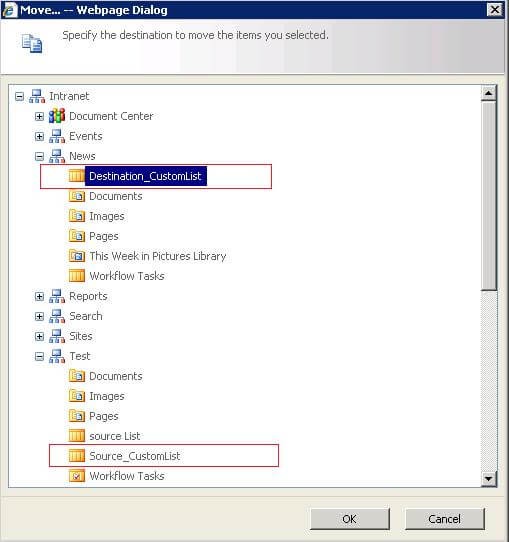
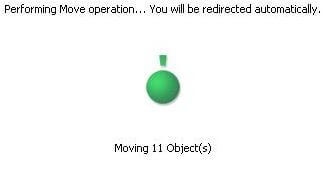
7. Go to the destination list → you will see that all content has been moved and custom fields have been created. Add the custom field "Comments" in your view.
Below is the "Destination_CustomList" snapshot:
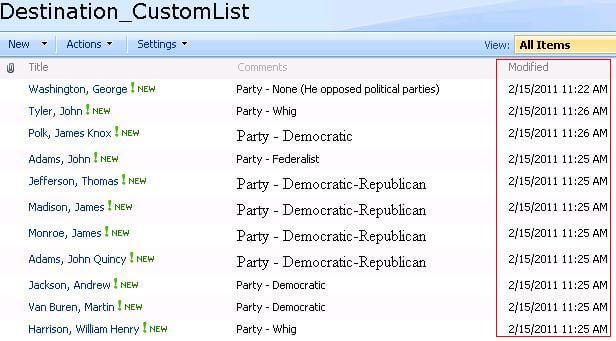
As shown in the above figure, you can see that this process preserved Metadata properties of listitems and also created the new custom fields.
Next Steps
- Check out these other SharePoint tips
About the author
 Shishir Bhandari
This author pledges the content of this article is based on professional experience and not AI generated.
View all my tips
Article Last Updated: 2011-03-09


