By: Siddharth Mehta | Updated: 2011-08-25 | Comments | Related: > SharePoint
Problem
Excel workbooks are published on SharePoint and viewed using the Excel Web Access web part. But the workbook is available in read-only mode when viewed using this web part. A configured Excel workbook can be very well used for developing applications to facilitate a what-if analysis. In this tip we will explore one of the ways to facilitate what-if analysis.
Solution
Excel is generally programmed by business users using formulas to derive / calculate values on pre-existing data. This calculation is based on a set of parameters that drive the calculation. Let us try to create an Excel spreadsheet with some data and calculated fields.
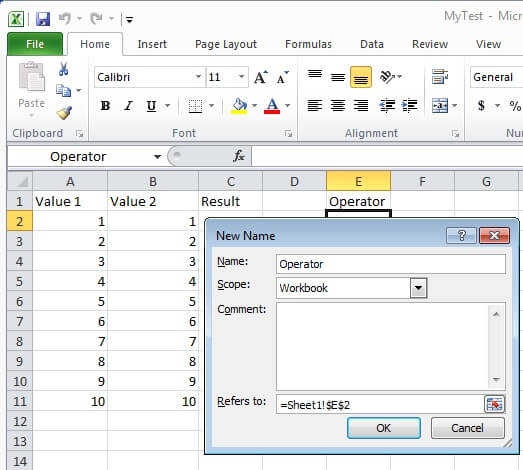
Step 1: Using Excel, create a new workbook. Create two fields with the names Value 1 and Value 2 and populate it with some numeric data.
Step 2: Right-click on a column and select "Define name", and name it "Operator". Our intention is to get a calculated value in a field named "Result" based on the selected operator.

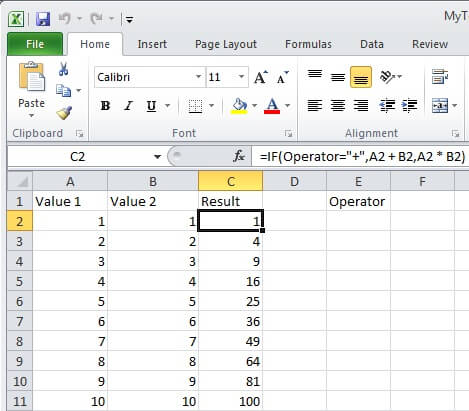
Step 3: For the Result field, add the formula as shown in the screenshot below.

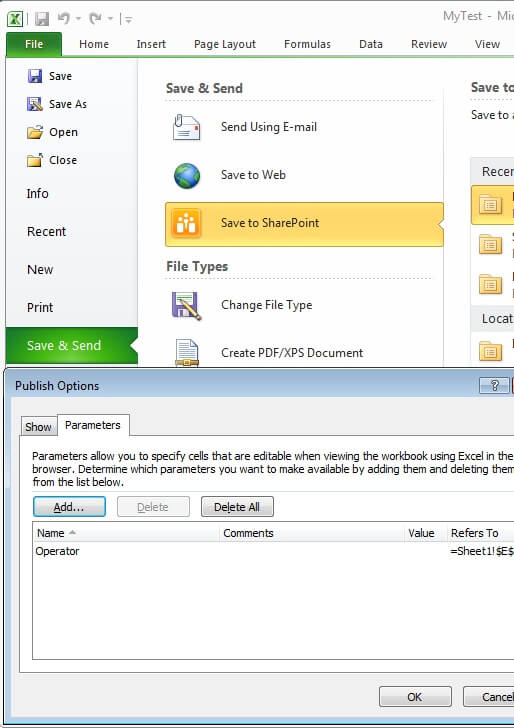
Step 4: From the File menu, select "Save and Send" -> "Save to SharePoint", and select Publish Options. In the Parameters tab, click "Add", select the "Operator" object we created earlier and click "OK".

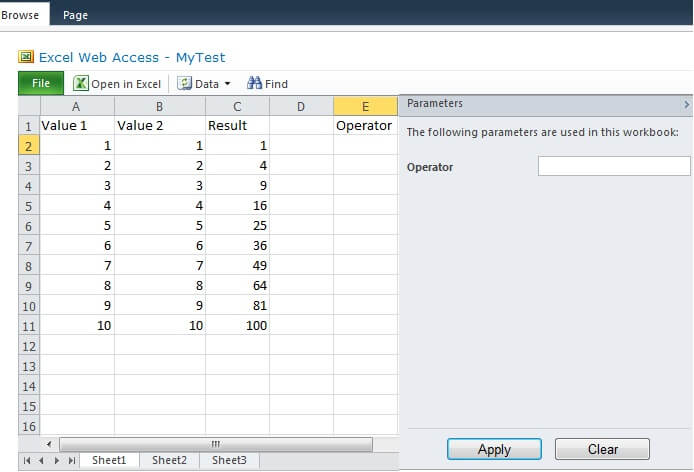
Step 5: When the same workbook is viewed using Excel Web Access web part, a parameters
pane will be displayed which will have the same parameter that we added while publishing
the workbook. Enter "*", click on Apply and watch the effect. Now enter "+" as the
operator and you will be able to see that the calculated fields are updated accordingly!

In real life projects, this feature can be effectively used for an application like a loan calculator, a tax calculator, creating graphs dynamically based on input parameters etc. for what-if analysis.
Next Steps
- Try to add different parameters of different data types to the workbook.
- Publish these parameters with different scopes, and try to use the same parameter in more than one worksheet.
- Check out these other tips:
About the author
 Siddharth Mehta is an Associate Manager with Accenture in the Avanade Division focusing on Business Intelligence.
This author pledges the content of this article is based on professional experience and not AI generated.
View all my tips
Article Last Updated: 2011-08-25


