By: Ivan Ivanov | Updated: 2011-10-05 | Comments | Related: > SharePoint
Problem
There is a company with a lot of employees. The requirement is to automate the request process and the approval of employees’ holidays.
- Each employee has to be able to submit requests for holidays.
- The request has to be approved or rejected by the employee's manager.
- Each employee has to have the ability to view only his/her own requests.
- Each manager has to have the right to approve or reject only requests that are requested by employees in his/her department.
- After the manager’s actions, the manager has to be able to only read requests related to his/her department.
Solution
Let’s assume there are 3 departments in the company - Sales, Accounting and IT.
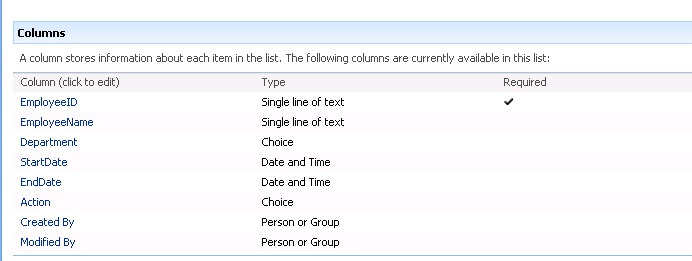
To fulfill the requirement we are going to create a SharePoint list named "Holidays". We will store the requests in this list. All users will need "Add item" permissions.

The following picture shows the columns needed:
Now we have to set the Add permission to all users.

Create 3 SharePoint groups - one for each department: Sales, Accounting and IT
The main point is how to set the appropriate user’s permissions on each step of the process. When the employee has made a request and then saves it, the saved item has to be denied for everybody, except for the creator and the manager. The Creator has to have read permission on the item and the corresponding manager has to have "Update" permissions on the item. After the manager’s action (approve or reject), the manager has to have read permission on the item. So does the creator.
To fulfill the requirements related to the permission rules, we can create two web parts - one for new requests and one for approvals and rejections. On the save action, we will programmatically set the appropriate permissions.
Let’s start with the creation of the web parts.
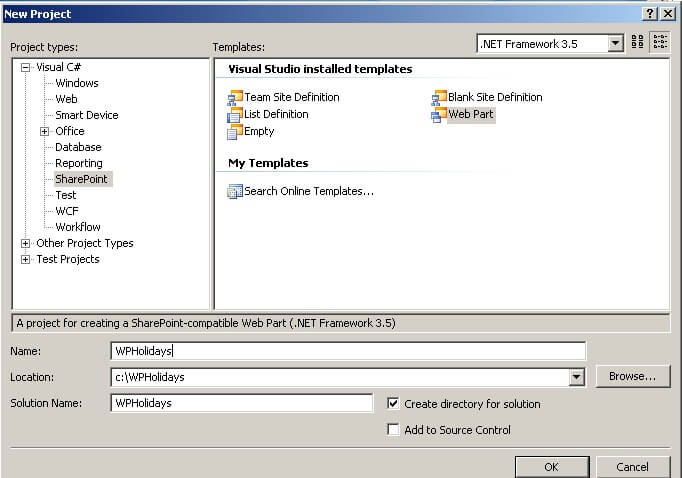
In order to make the web parts we will use Visual Studio 2008. On the Navigation Pane from the "File" menu, select "New Project". We will name this project "WPHolidays". Under "Project Types" select SharePoint, and under "Visual Studio installed Templates" select "WebPart Template". Type the project name and press OK.
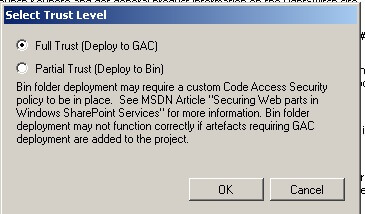
Next is to select the trust level for this project. We chose Partial Trust.
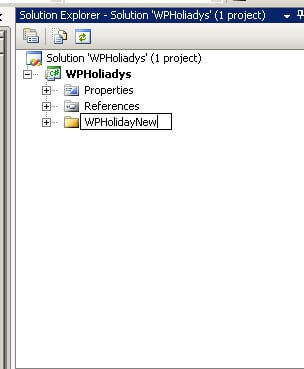
For better visibility we renamed the default name of the project folder from WebPart1 to WPHolidayNew.
Open WPHolidayNew.cs.
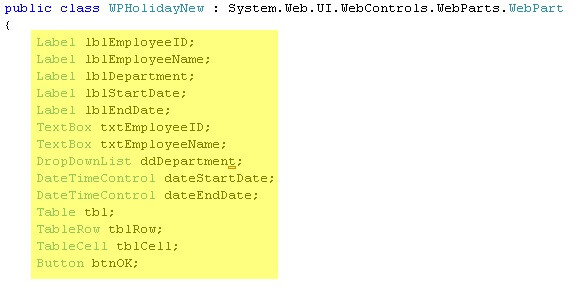
Next we need to add controls to make a form. To achieve this we have to add labels, textboxes, dropdownlists and a button. For better visibility we will put these controls into a table. We have to declare the controls and implement the method CreateChildControls, as shown below:
Here is the CreateChildControls implementation:
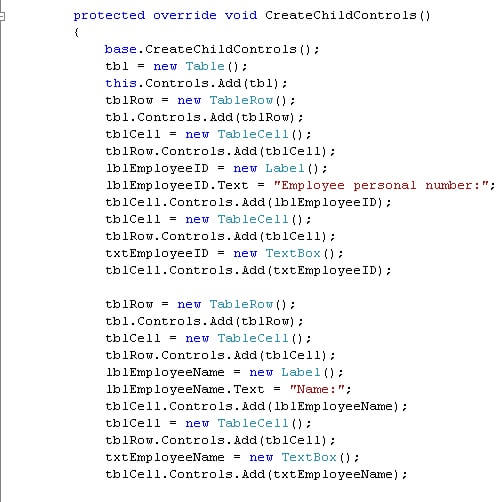
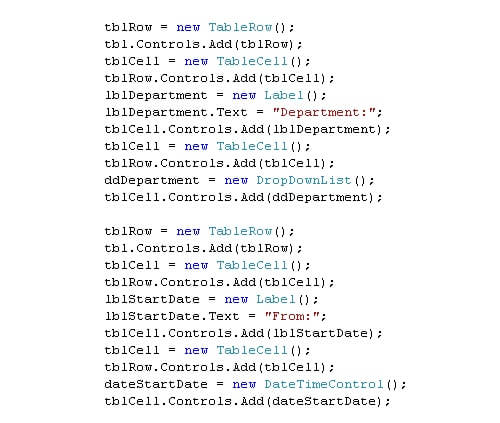
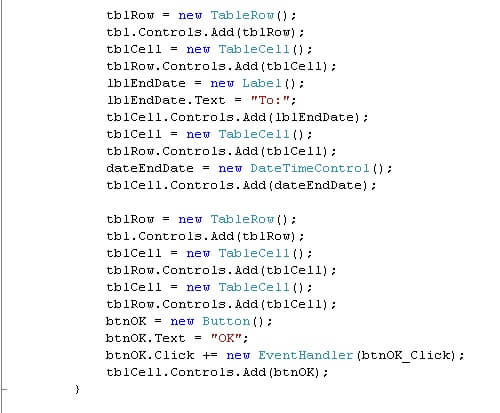
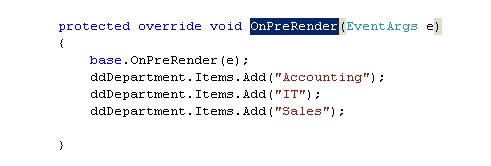
We have to override the OnPreRender method in order to populate departments in drop down list.
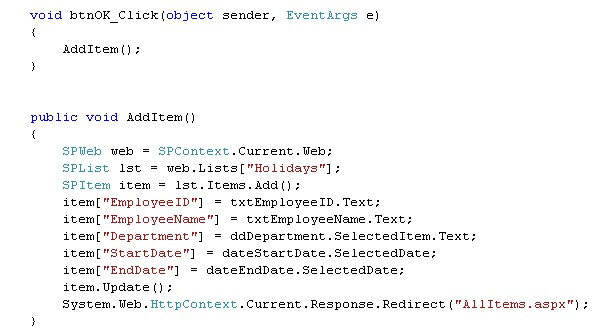
The next step is to implement btnOK_Click. We call the method AddItem to save a request in the list.
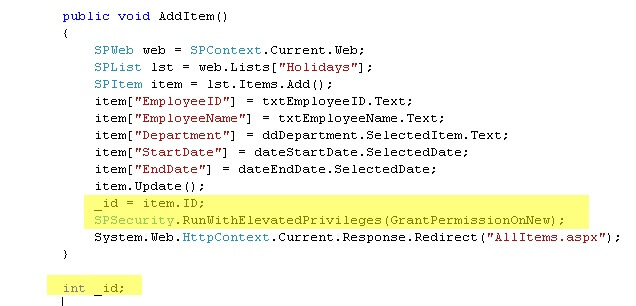
Now we have to deal with permissions. After submitting the request, the creator has to have only read permissions on item. The corresponding department manager has to have edit permissions. To fulfill these requirements we have to change the AddItem method as shown below. Actually we call the function GrantPermissionOnNew and declare variable _id.
The _id variable will store the ID of the new entered request. We call the function in context with elevated privileges because we have to set permissions and these actions require high privileges.
The implementation of GrantPermissionOnNew
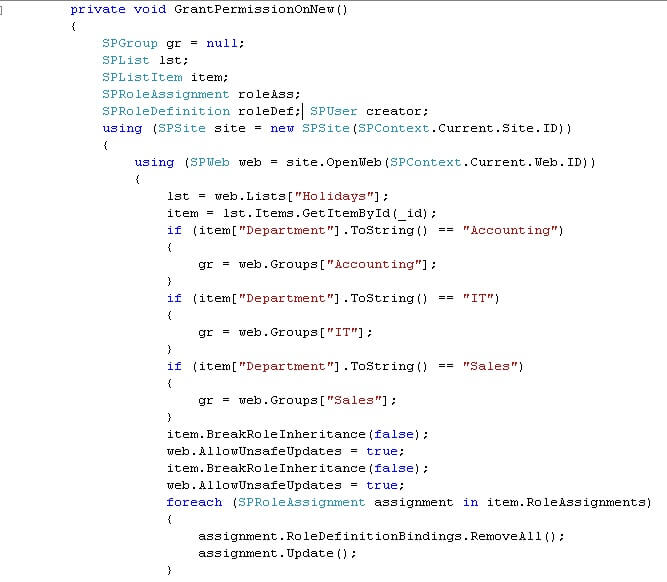
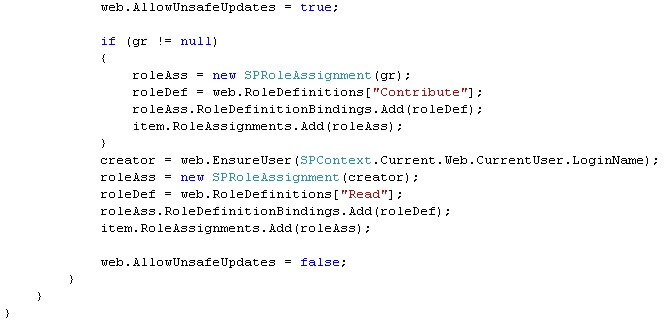
In GrantPermissionOnNew we check the selected department and find the corresponding group. We grant that group Contribute permissions and the creator read permissions . Nobody else has any permissions. The first web part is completed.
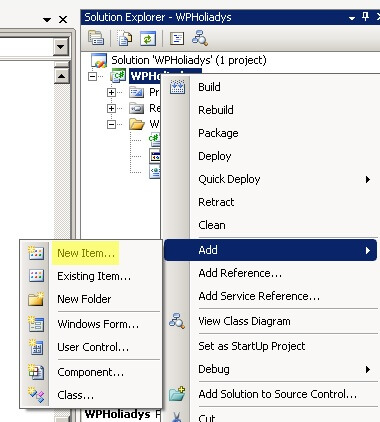
Now we are ready to start to create the web part for managers. In the Solutions explorer right-click on the project and select Add -> new item
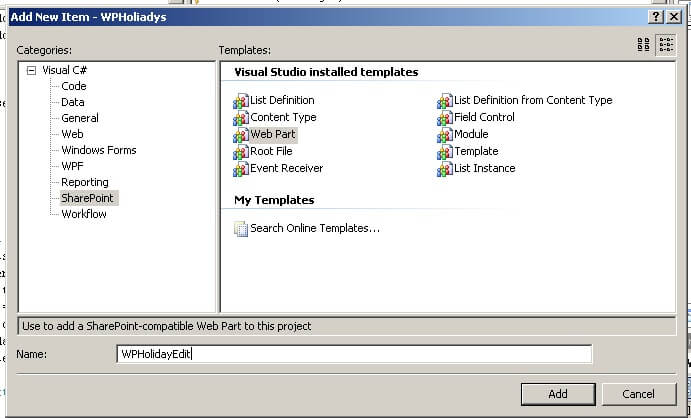
Select Web part and name it WPHolidayEdit
Open WPHolidayEdit.cs.
Next we need to add controls to make a form. To achieve this we have to add labels, textboxes, dropdownlists and a button. For better visibility we will put these controls into a table. We have to declare controls and implement the method CreateChildControls, as shown below:
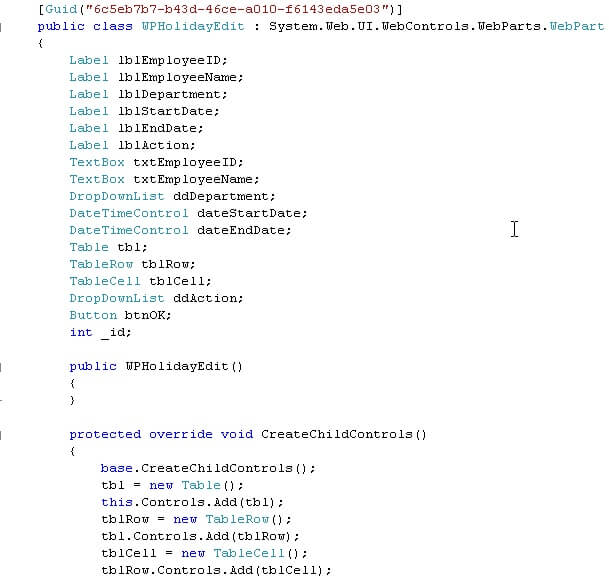
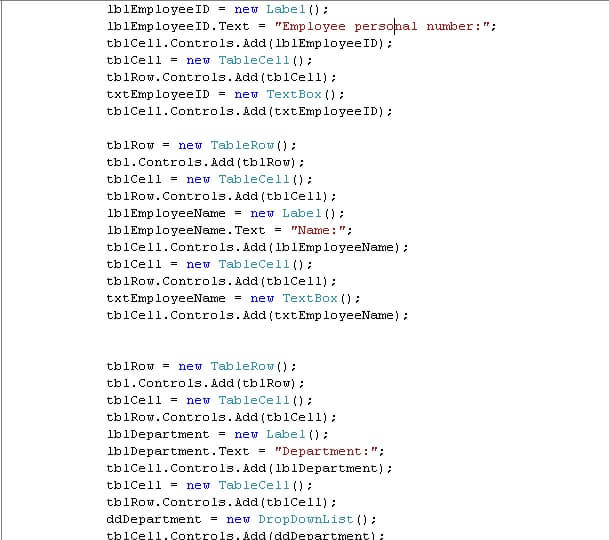
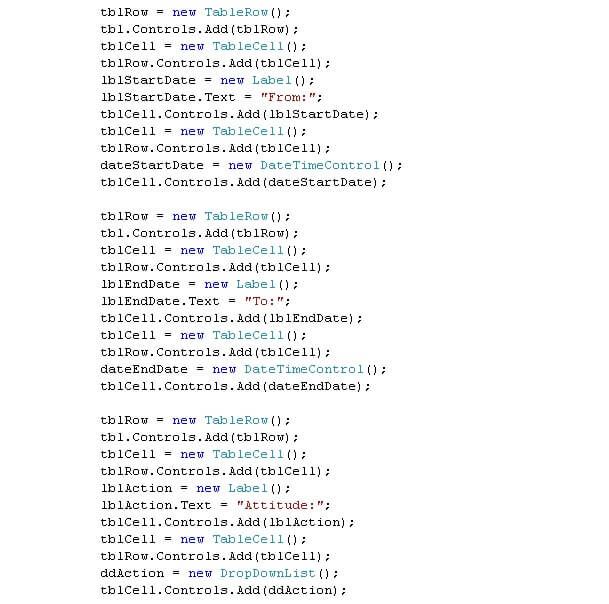
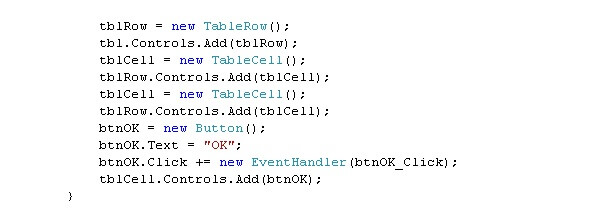
The next step is to write the GetItem method.
In this method we are going to get the request and populate data into the controls; In the OnPreRender method we populate dropdowns and call GetItem.
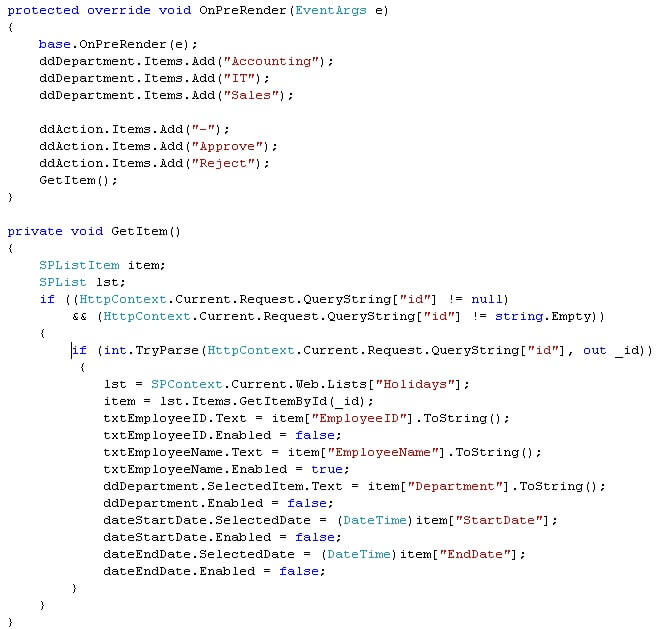
Next is to create the EditItem method and implement btnOK_click. The EditItem method saves the selected option in the ddAction dropdown.
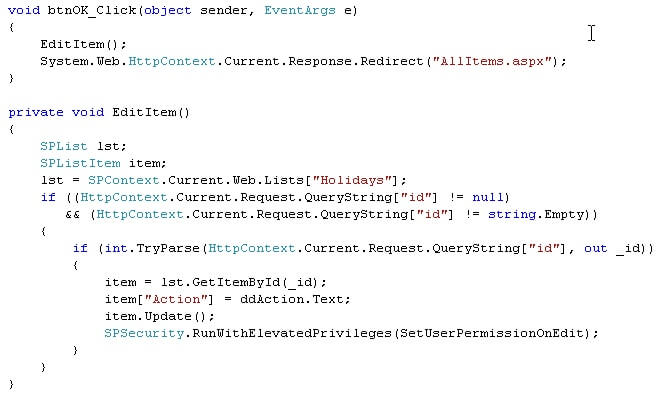
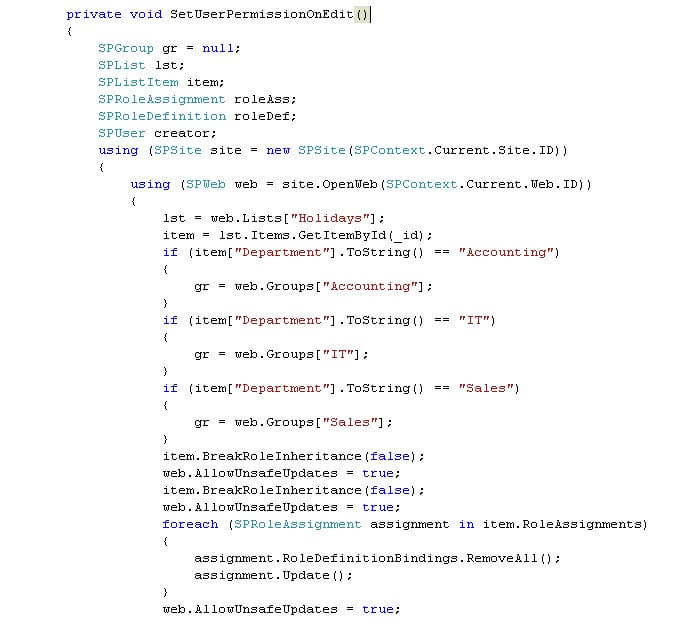
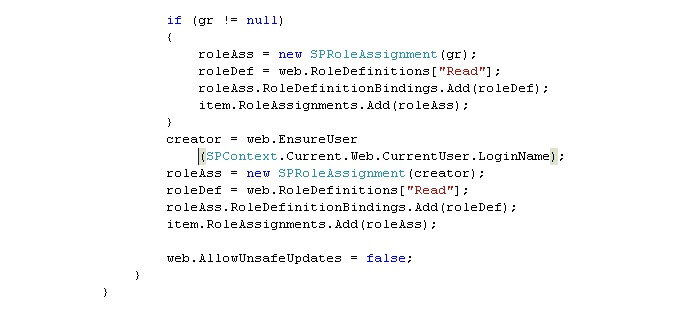
After a response is made by the manager we have to set the creator and manager to read only permissions . To fulfill these requirements we have to write the method SetUserPermissionOnEdit and call it in the GetItem method.
The implementation of SetUserPermissionOnEdit is shown bellow.
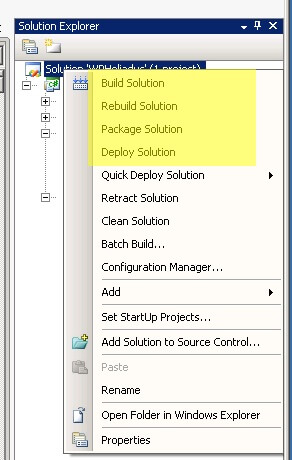
Next we build, package and deploy solution.
Create a new web part page and add the WPHolidayNew webpart. Create another page and add the WPHolidayEdit webpart.
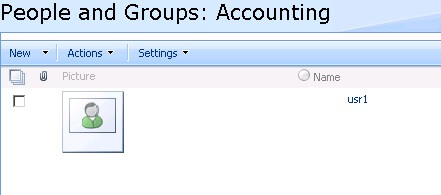
Let’s assume we have user with a login name of usr1 and this user is the Accounting manager. We have to put usr1 in the Accounting group.
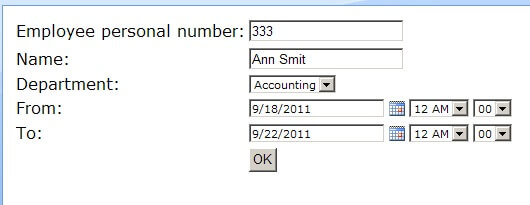
Now we have a user with a login name of usr2. We sign in as user usr2, open the page with the WPHolidayNew webpart and submit a request.
To illustrate the results, we open the permissions page for the new registered item and check permissions. As you can see the creator has read permissions and Accounting Group has Contribute permissions. Nobody else has any permissions.

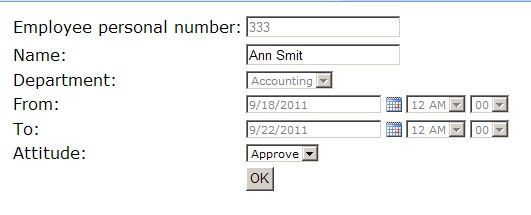
Now we are ready to test the accounting manager role. Sign in as the usr1 user and open the page with the WPHolidayEdit webpart. In our case, the id of the item is 4. This is the id corresponding to the entered request. (In your case it may be different ) Approve the request and save it.
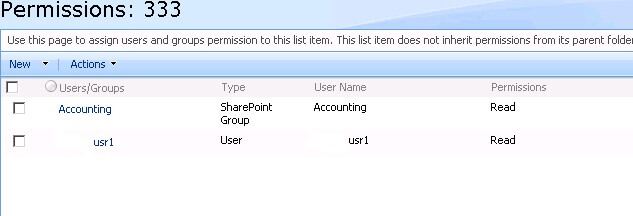
Let's check the permissions. As you can see creator and accounting group both have only read permissions:
You can make similar tests with users in other departments - Sales and IT.
Now we have a customized solution for making holiday requests!
Next Steps
- Check out these other tips:
About the author
 Ivan Ivanov
This author pledges the content of this article is based on professional experience and not AI generated.
View all my tips
Article Last Updated: 2011-10-05


