By: Koen Verbeeck | Updated: 2016-09-06 | Comments | Related: > SQL Server 2016
Problem
With a new release of SQL Server (SQL Server 2016) comes also a new sample database: Wide World Importers! In part 1 in this tip series, we saw how you could install and configure the OLTP database. In part 2 of this tip series, we will show you how you can do the same for the data warehouse sample database.
Solution
It's important to have already the OLTP sample database - WideWorldImporters - in place. When you create the sample data warehouse from scratch using scripts only, the data from the OLTP database will be used to populate the star schemas of the data warehouse. Make sure to go over part 1 of this tip series to have this covered.
Back-up and Restore the Wide World Importers Database
Just like the OLTP database, you can simply download the back-up files from GitHub (this URL links to the version 1.0 release) and restore them on your system. In the current release, the data ranges from January 1st, 2013 to May 31st, 2016. In order to keep the download size reasonable, the data size is limited. The only way to change the size is to create the OLTP database using the scripts and adjust the parameters so that more random data is generated. This data is then imported into the data warehouse.
For more information on how to restore a database: How to restore a SQL Server backup.
Using Scripts to Create the Wide World Importers Data Warehouse
The most flexible option is creating the data warehouse sample database from scratch using T-SQL scripts, which can be found on Github. There are a total of 8 scripts to help you create your own copy of WWI. A prerequisite is that you already have the OLTP sample database on your system. If you create the OLTP sample database using scripts as well, you can influence the size of the sample database. This might be important, because the initial sizes of the sample databases might be too small to do performance tuning demos for example.
Script 1 - Create Metadata Database - WWI_DW_Preparation
The first script - 1-wwi-dw-metadata-population.sql - creates a metadata database called WWI_DW_Preparation.
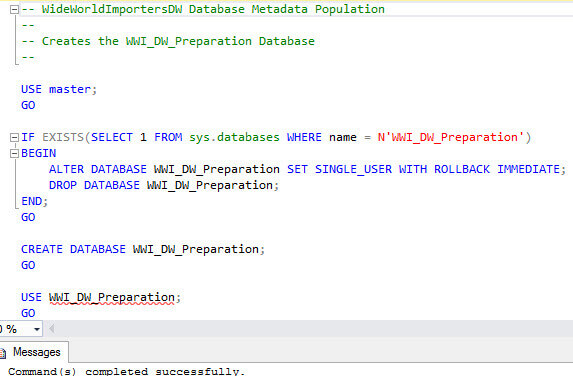
This database holds all the table, column and schema metadata required to create the sample data warehouse.
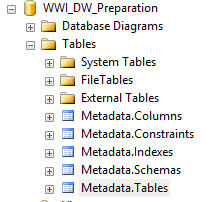
Some table metadata:
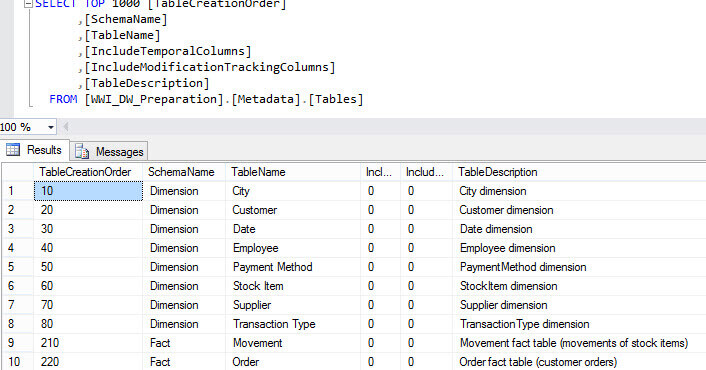
After running all the scripts, this database can be removed.
Script 2 - Construct the WWI Data Warehouse
The second script - 2-wwi-dw-construct-database-from-metadata-tables.sql - will generate all of the T-SQL required to construct the WWI data warehouse. It uses the metadata created in the first script and some system metadata as well.
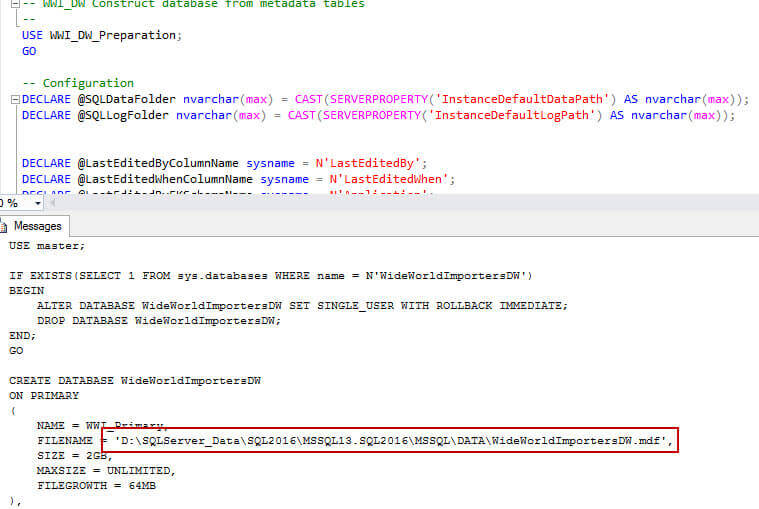
You can see for example the data directories for the database files use the server default of your system. You need to copy paste the result and execute it in another query window in order to create the data warehouse. After executing the script you end up with the empty WWI data warehouse, called WideWorldImportersDW. In contrast with the OLTP database, there are no system versioned tables.
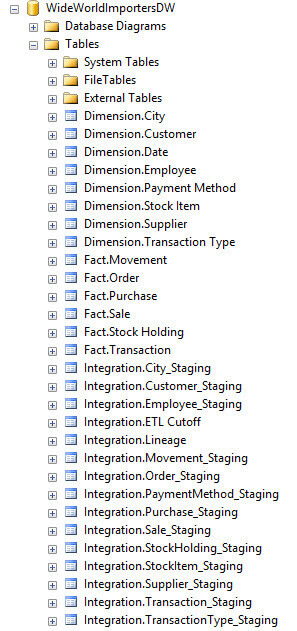
Script 3 - Optional Script to create the WideWorldImportersDW Database
Another option is to run the third script called 3-wwi-dw-recreate.sql. The script is optional because it contains the output of the second script, but this time without your system settings, as indicated in the following screenshot.
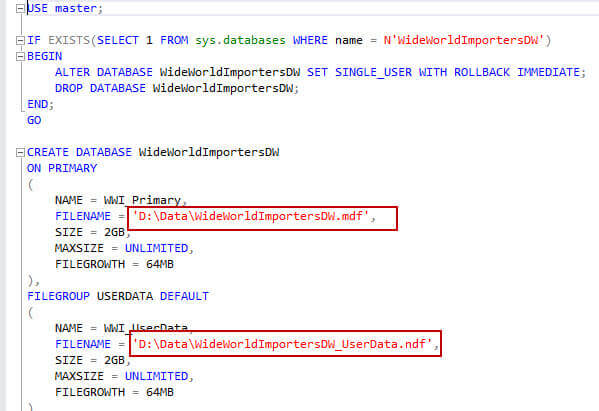
In most cases, the best choice is to run the second script, copy-paste and execute the results instead of running the third script.
Script 4 - Create Roles, Views and Stored Procedures
The fourth script - 4-wwi-dw-configure-required-database-objects.sql - creates some extra objects, such as roles, views and stored procedures.
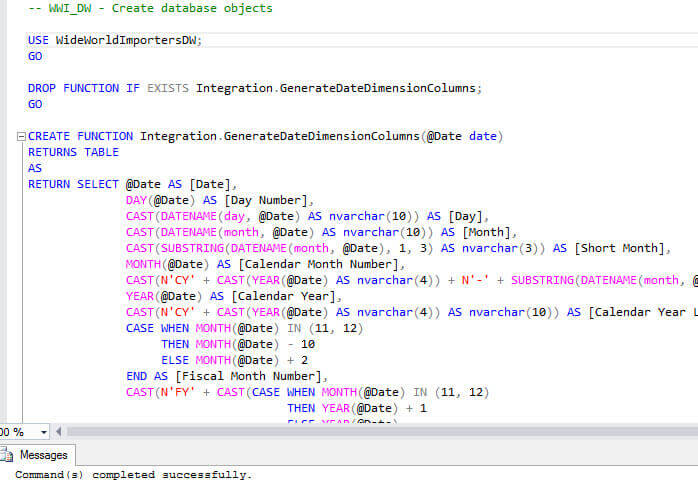
Numerous stored procedures are generated. Most of them assist with the ETL process that loads data from the OLTP database to the data warehouse.
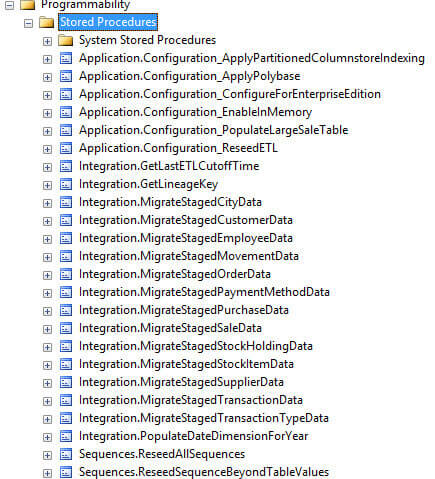
Script 5 - Load the Seed Data in the WWI Database
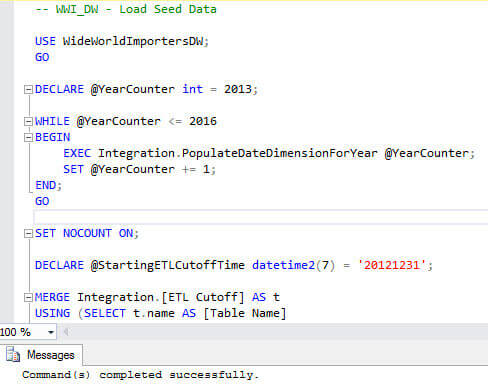
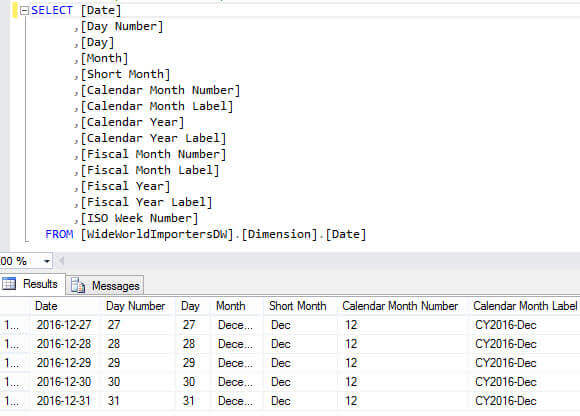
The 5th script - 5-wwi-dw-load-seed-data.sql - loads seed data into the WWI database. This script will populate the time dimension until the year 2016. This is hardcoded, but the ETL process will insert additional dates if necessary at a later point in time. The script also loads the ETL Cutoff table, which is needed for incrementally loading the data warehouse and it will insert one dummy row into each dimension.
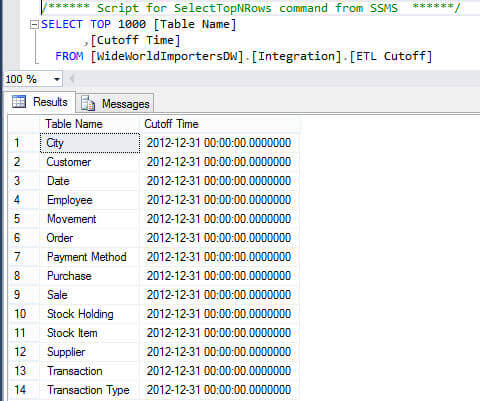
The cutoff table:
The date dimension:
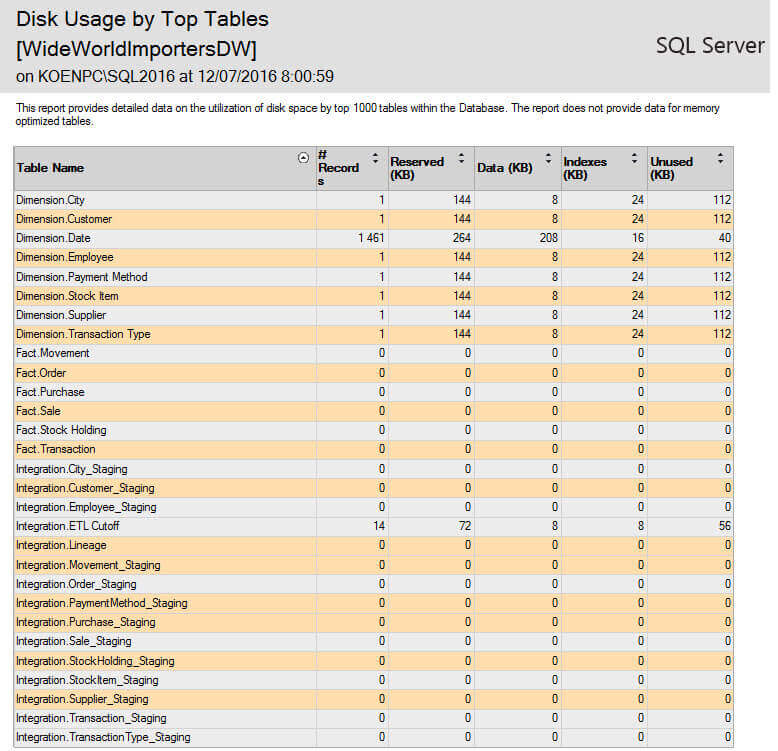
An overview of the inserted rows by table:
Script 6 - Enable Enterprise Features
The 6th script - 6-wwi-dw-enable-full-features.sql - will enable additional Enterprise features, such as partitioning, in-memory OLTP for the staging tables and Polybase. It's optional, but recommended if you want to use the Enterprise features of course.

Scripts 7, 8 and 9 - Polybase Installation, Backup and Restore
I did not install Polybase on my machine, so the script skips this feature. The 8th script - 8-wwi-dw-backup.sql - and the 9th script - 9-wwi-dw-restore.sql - are optional and are respectively for backing up and restoring the WWI data warehouse. They are not discussed any further.
At this point, the data warehouse is still pretty empty. In order to get some data into it, we need to run the ETL. On Github you can find an SSIS solution that provides you with the ability to run a daily load on the data warehouse. This solution contains a single package: DailyETLMain. A detailed treatment of the package is out of scope for this tip.
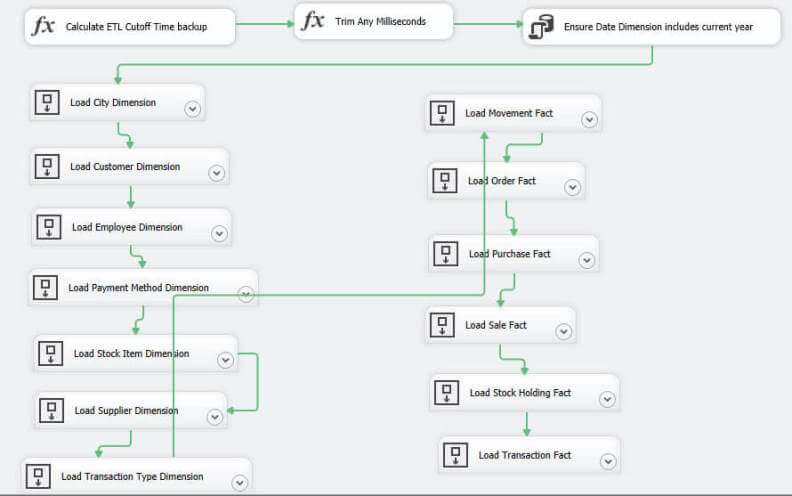
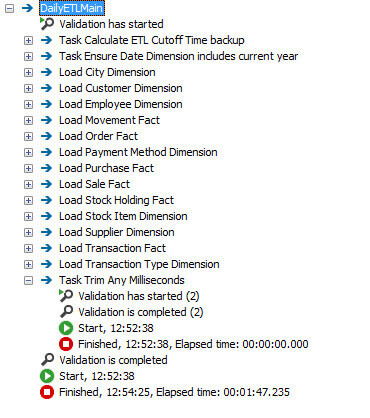
To populate the data warehouse, you simply need to run this package. It will check the ETL cutoff table to find out which data it has to load incrementally from the OLTP data warehouse. The 5th script has set every date in the cutoff table to the end of December 2012, guaranteeing a full load of the data warehouse (the data in the OLTP database starts at the 1st of January 2013). On my machine, the package finished in less than two minutes.
The data warehouse is now fully populated:
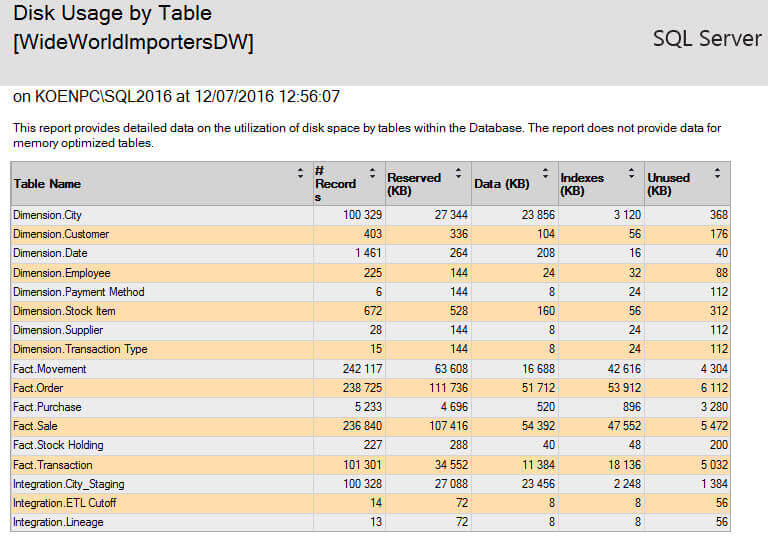
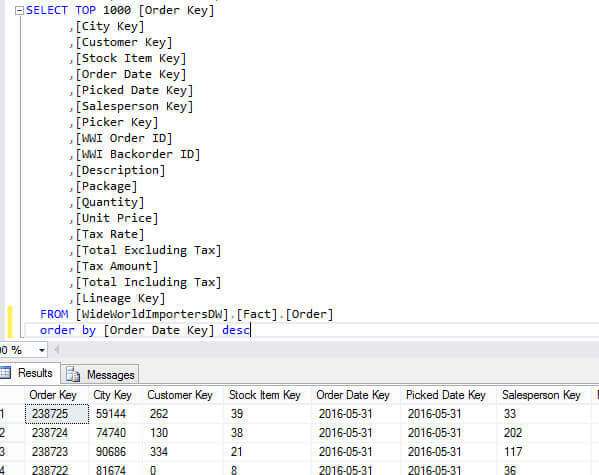
As you can see, the number of records are still fairly low, considering the average data warehouse size. The data is loaded right until the end of May 2016.
Conclusion
SQL Server 2016 is accompanied with a brand new set of sample databases: Wide World Importers. In part 1 of the tip we saw how we could create the OLTP database. This part showed us how we could create the OLAP data warehouse and how we could populate it with data directly from the OLTP database.
Next Steps
- Try it out yourself! You can download all the source code from Github.
- Make sure to check out all of the sample scripts and application workflows as well!
- Since the data warehouse uses the data of the OLTP sample database, you can use part 1 of this tip to install and configure that database.
- For SQL Server 2016 tips, you can use this overview.
About the author
 Koen Verbeeck is a seasoned business intelligence consultant at AE. He has over a decade of experience with the Microsoft Data Platform in numerous industries. He holds several certifications and is a prolific writer contributing content about SSIS, ADF, SSAS, SSRS, MDS, Power BI, Snowflake and Azure services. He has spoken at PASS, SQLBits, dataMinds Connect and delivers webinars on MSSQLTips.com. Koen has been awarded the Microsoft MVP data platform award for many years.
This author pledges the content of this article is based on professional experience and not AI generated.
View all my tips
Article Last Updated: 2016-09-06


