By: Haroon Ashraf | Updated: 2018-09-12 | Comments (2) | Related: 1 | 2 | > Analysis Services Development
Problem
As a SQL Server business intelligence developer, I would like to work directly on a tabular analysis services project using a SQL Server database sample which must comply with data warehouse sample requirements.
Solution
The solution is to convert a SQL Server database sample into a tabular model sample by making changes in such a way that it looks as if the data model has gone through all the stages of the data warehouse and is ready to be used with a tabular analysis services project.
Creating Tabular Model from SQL Database Sample Part-1 Recap
In order to proceed further let us have a quick recap of all the steps mentioned in the first part of the tip to understand the work done so far and the work that needs to be done.
Development Steps Summary
In the first part of this tip a SQL sample database “OfficeSuppliesSampleV2” containing orders, product, customer and order type table was used as a starting point.
The steps were as follow:
- A new Analysis Services Tabular Model Project was created in Visual Studio by choosing Integrated Workspace option.
- The sample database was added to the project as a data source.
- The sample database was added to Analysis Services Tabular Model Project to serve as data source of the project.
- The data of the sample database was loaded into the Data Model in the form of tables and relationships.
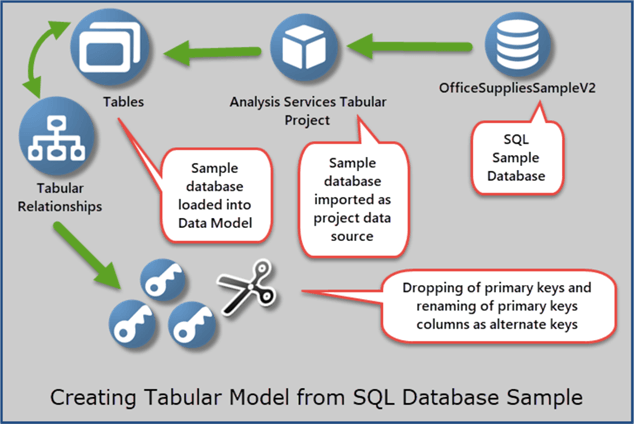
- The primary keys of the tables in the data model were dropped and renamed as alternate keys to make space for surrogate keys and also to comply with data warehouse best practices.
Development Steps Diagram
This can be illustrated as follows:
Complying with Data Warehouse Best Practices
In the next steps we are going to comply with data warehouse best practices, so that we can work on this model same way we work on any other model which has gone through all the steps of data warehouse business intelligence solution.
Prerequisites (Steps Done)
This tip assumes that you have already finished the walkthrough mentioned in the first part of this tip and as a result you have reached the stage where you have dropped and renamed primary key columns of your tables in the data model of Analysis Services Tabular Project.
The steps done in part 1 are as follow:
| Steps | Status |
|---|---|
| 1. Creating Analysis Services Tabular Model Project in Visual Studio | Done |
| 2. Choosing Integrated Workspace | Done |
| 3. Setting up Compatibility Level | Done |
| 4. Setting up Data Source | Done |
| 5. Providing Credentials | Done |
| 6. Loading Data into Date Model | Done |
| 7. Switching to Diagram View | Done |
| 8. Converting primary key columns (IDs) into alternate key(s) | Done |
Project Check (Tabular Model Explorer)
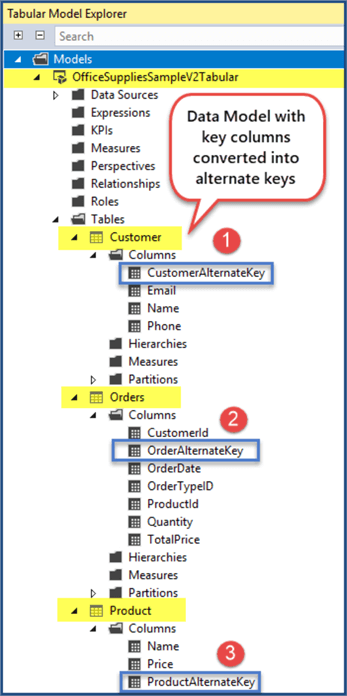
Do a quick check by switching from Solution Explorer to Tabular Model Explorer to see tables and primary key columns renamed as alternate keys:
What’s next?
The next steps as mentioned earlier are more focused on ensuring our data model complies with database warehouse business intelligence solution.
Please see below the steps:
| Steps | Prerequisites/Supporting Information |
|---|---|
| 9. Creating Surrogate Key(s) for the tables in Data Model | Surrogate keys are considered essential part of data warehouse projects |
| 10. Creating and Populating Date (Dimension) Table | Date dimension (table) needs to be created and populated in the sample database so that it can be added to the model |
| 11. Adding Date (Dimension) Table | Date dimension (table) must be present in a data warehouse business intelligence compliant solution |
| 12. About Audit Dimension | Audit dimension is required to make sure loaded data can be traced back in case of any issues (this is optional in our case) |
| 13. Refining tabular relationships including Date (table) | Create table relationships based on surrogate keys along with creating date relationship with order table to get date time benefits |
| 14. Viewing Tabular Relationships | Toggle to Diagram View in the model to see the recently modified tabular relationships |
Creating Surrogate Key(s) in SQL Server
Surrogate keys are considered as actual primary keys for data model tables which are normally automatically generated (same as identity column with auto increment) as the ETL packages move from phase to phase. The details of the whole process are beyond the scope of this tip, but it is important to understand a data warehouse solution takes into account its own primary keys (surrogate keys) rather than previously marked primary keys which become alternate keys.
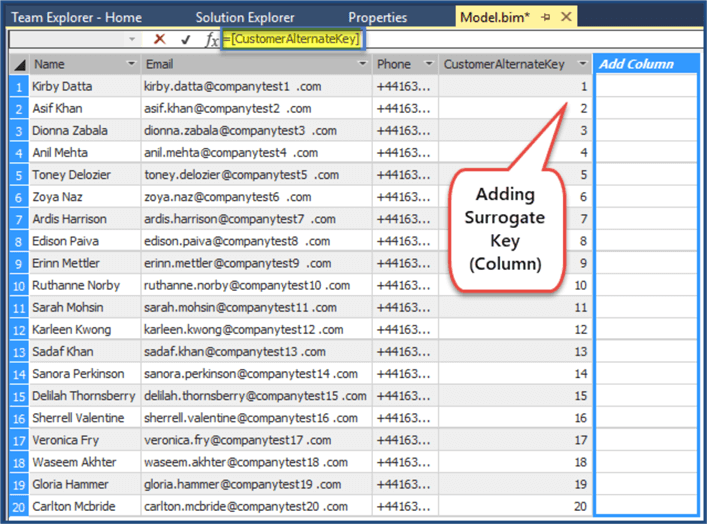
Switch to the Customer table in the Model and then select Add Column and keeping it selected type the following formula:
=[CustomerAlternateKey]
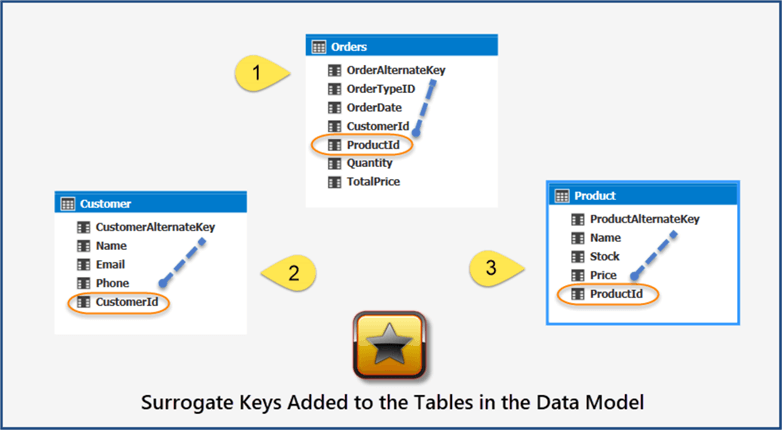
Since we are mocking surrogate key so we are creating it simply from alternate key as shown below:
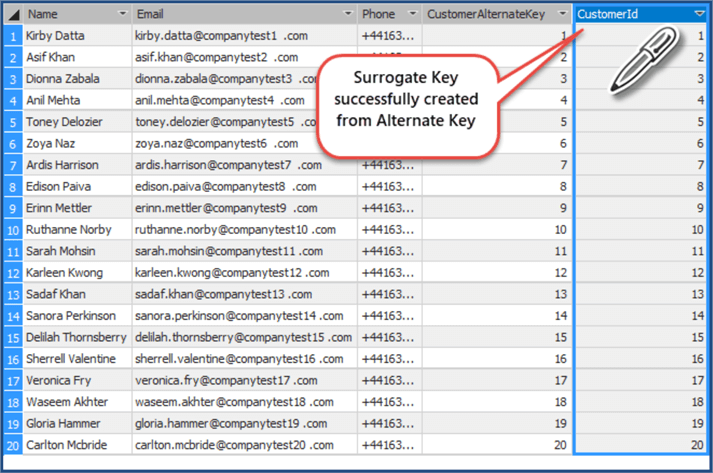
Press the Enter key to apply the formula and then rename the column as “CustomerId”:
Please do the same for Orders table creating “OrderId” surrogate key (using the formula “=[OrderAlternateKey]”) and creating “ProductId” surrogate key from alternate key using the formula “= [ProductAlternateKey]” for Product table.
Toggle to “Diagram View” and have a look at the newly created surrogate keys:
Creating and Populating Date (Dimension) Table
We must not think about a data warehouse business intelligence solution without a date dimension (table) since this is an essential part of the solution.
In other words, the date dimension (table) helps us to get time intelligence which means we can view our data with respect to desired time frames such as weekly, daily, monthly, yearly, etc. by just linking date attribute of a Fact table (a special table which contains desired computations and related tables surrogate keys) with date dimension (table).
Run the following script against the sample database to create and populate date table from 01-Jan-2016 to 31-Dec-2017.
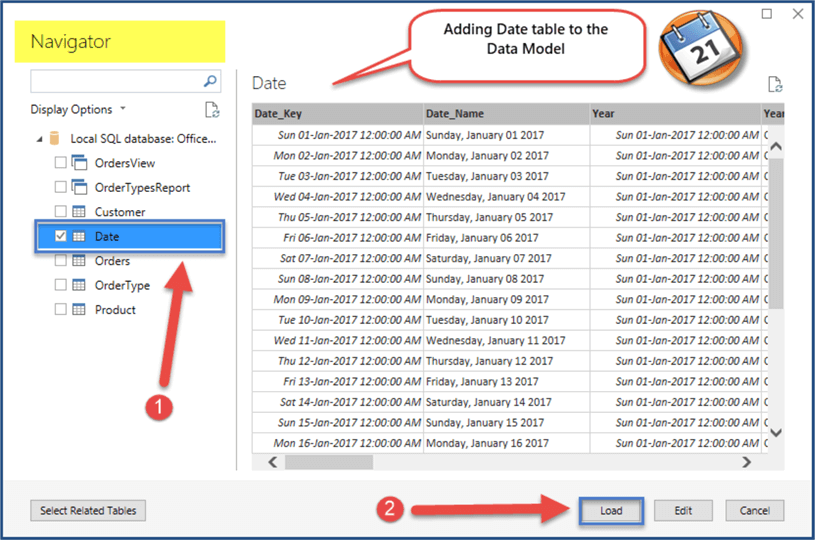
Adding Date (Dimension) Table
Import the date table (just created in the sample database) from the sample database into the Model:
View the Date table:
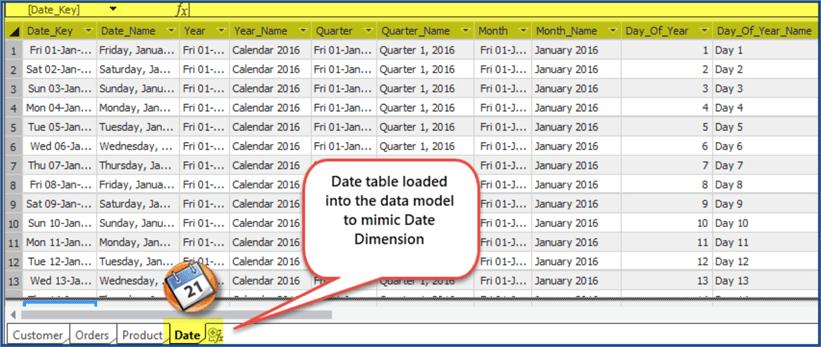
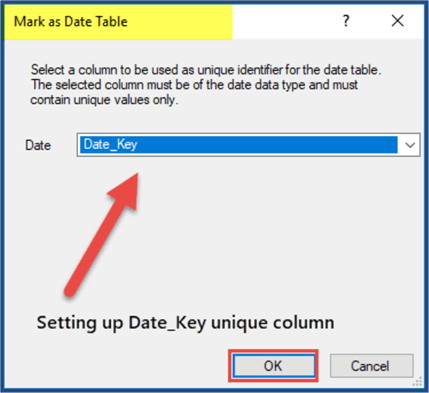
Once we have the Date table it is worth telling the model that this is our Date Table.
Go to Table menu and click on “Mark as Date Table” under Date submenu:

Next choose Date_Key as unique identifier:
About Audit (Dimension) Table (Optional)
Audit dimension logs the data transfers from data sources to core data warehouse so that in case of any data issues or inconsistencies we can refer to the audit dimension (table) to see what went wrong and where.
We are skipping audit table since this is not mandatory in the current context.
Refining Tabular Relationships
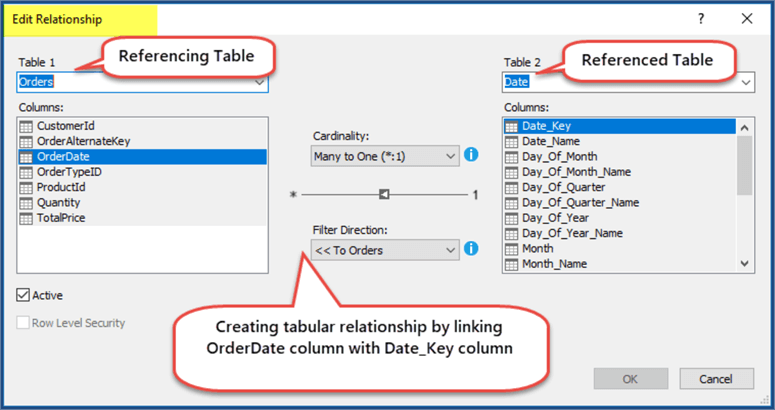
Once surrogate keys are defined and date table is added to the model, next step is to create table relationships based on surrogate keys as follow:
- Join CustomerId in Customer table with CustomerId in Orders table
- CCreate a relationship between Product and Orders table by linking ProductId in Product with ProductId in Orders table
- Link Date_Key in Date table with OrderDate in Orders table
Viewing Tabular Relationships
View the table relationship by switching to diagram view of the Data Model:
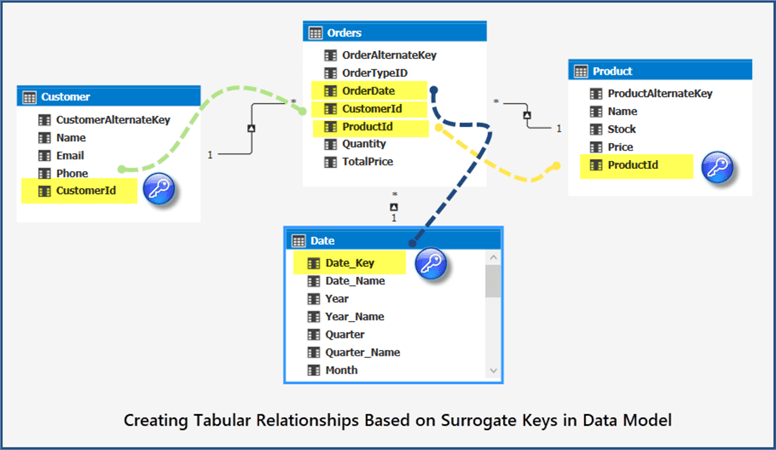
Congratulations! We have successfully created a tabular data model from SQL database sample in such a way that it looks it has gone through all the basic steps of a data warehouse business intelligence solution.
Next Steps
- Please try creating a new tabular project by adding any other SQL database sample of your choice and follow the steps mentioned in the tip.
- Please try adding audit table (dimension) in the data model.
- Please add Supplier table to the SQL database sample and populate it manually and follow the steps mentioned in this tip to make it tabular model sample.
- Please try adding measures to your Orders table and analyze the model in Excel.
About the author
 Haroon Ashraf's interests are Database-Centric Architectures and his expertise includes development, testing, implementation and migration along with Database Life Cycle Management (DLM).
This author pledges the content of this article is based on professional experience and not AI generated.
View all my tips
Article Last Updated: 2018-09-12


