By: Mohammed Moinudheen | Updated: 2018-09-26 | Comments | Related: > Azure
Problem
I have heard of Azure Quickstart templates recently. What are these templates and where can I download them? How can I use these templates to deploy on my Azure subscription?
Solution
There are hundreds of community contributed templates that are available that can be used to deploy resources quickly on your own subscription. You can refer to this link: https://azure.microsoft.com/en-us/resources/templates/ where you can view the Quickstart templates that are available to download.
Once you click on the link, the home page is shown.
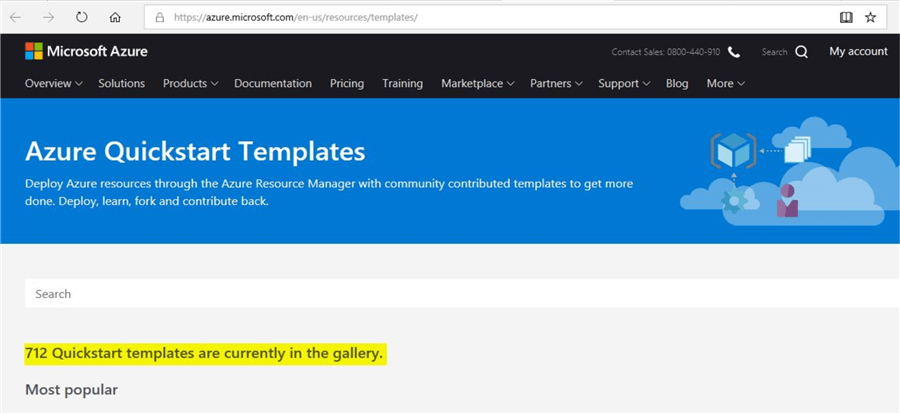
From the screenshot you can see that there are 712 Quickstart templates that are currently available in the gallery.
If you are looking for specific Quickstart templates, for example, look for “SQL” related templates, just type “SQL” in the “Search” option and search.

Once you click on the “search” icon, it will show you all the templates that are SQL related. From the screenshot, you can see there are 76 SQL related templates available.
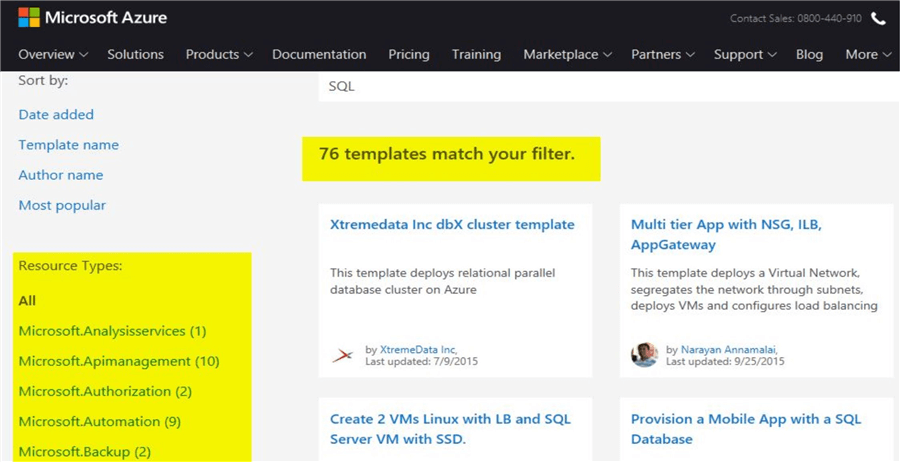
On the left-hand side, you can also see the other resource types that are available which you can use. By clicking on those resource types, it will display the templates that are available for that resource type.
How to use Azure Quickstart Templates
After searching for the keyword using “SQL”, you could see that there were 76 templates available. One of them was a template to provision a “SQL Database with TDE”.
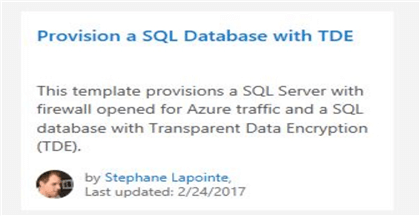
We will use this template for our demo in this tip. Just click on the template which will take you to this screen.

When you look closely, I have highlighted the section which you should read as it would be relevant to you. Certain organizations have rules around using such community provisioned tools. You may want to check regarding your company’s policies and guidelines before using any of the Quickstart templates that are available.
Here is the text:
"This Azure Resource Manager template was created by a member of the community and not by Microsoft. Each Resource Manager template is licensed to you under a license agreement by its owner, not Microsoft. Microsoft is not responsible for Resource Manager templates provided and licensed by community members and does not screen for security, compatibility, or performance. Community Resource Manager templates are not supported under any Microsoft support program or service, and are made available AS IS without warranty of any kind."
Deploy an Azure Quickstart Template
You can deploy the Azure Quickstart template using the portal, using PowerShell or by using the command line interface. From the template, you can see the parameters that are required.

These are the values that you are required to enter when you deploy on Azure. Once you click on “Deploy to Azure”, it will take you to the next screen where you will need to login to your Azure subscription. After you login, you will be at this screen where you can view your Quickstart template in your Azure subscription and is ready for deployment.
Deploying a Quickstart template without any modifications.
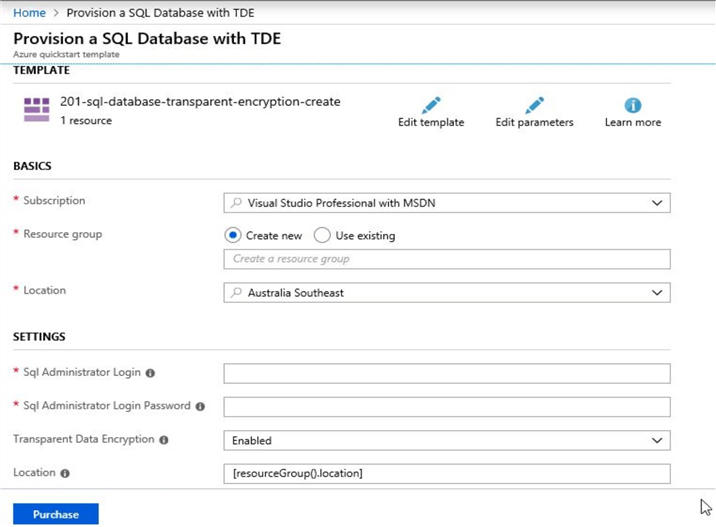
On the Azure portal, you can view the quickstart template as displayed. The settings section is the value of the parameters for the template that you need to provide. You can enter the details as shown. For “Resource group”, I have used an existing one, review the “Terms and Conditions” and click on “Purchase”.
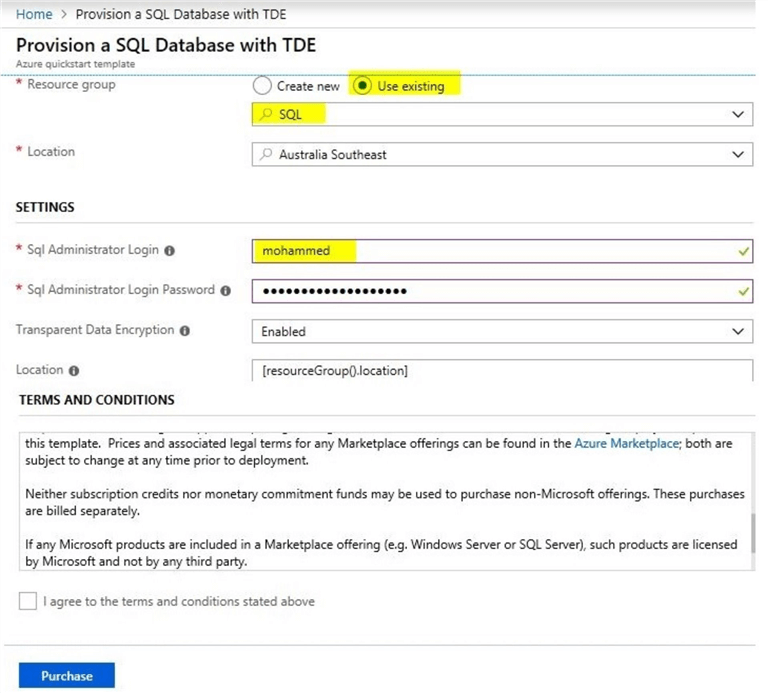
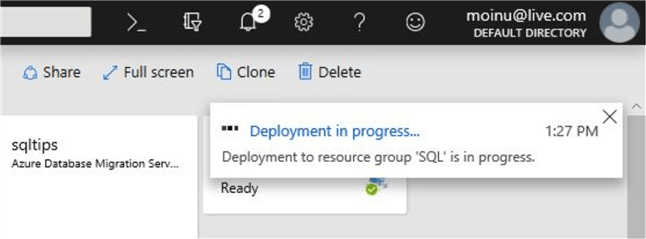
Once you click on “Purchase”, the deployment of the SQL Database will start as shown.
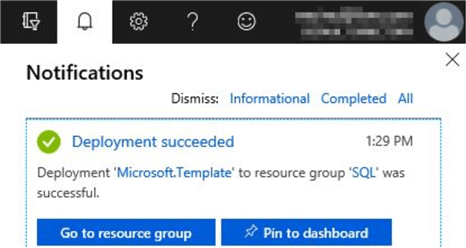
Once the deployment succeeds, you can check the confirmation from the notifications section.
After this confirmation, you can go to the “SQL Databases” section of the Azure portal to confirm that the new database is created.
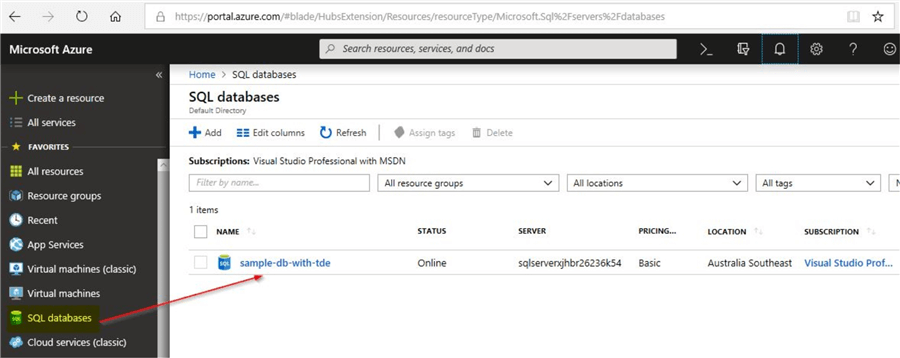
The “sample-db-with-tde” is the new SQL database created using the Quickstart template.
Modifying a Quickstart template by editing the template and then deploy
From the above demo, you can see that a SQL database with a name “sample-db-with-tde” got created. However, what if you want a different database name instead of this? You can easily accomplish this by modifying the Quickstart template. When you first viewed the Quickstart template on the Azure portal, you would have seen an option to edit the template as shown below.

Once you click on “Edit Template”, you will see the underlying JSON file which defines the resources that will be used for this template. JSON stands for - Java Script Object Notation. To understand more about JSON, you can refer this tip.
At a high level, the key components of a JSON file include the below items which you will see when you click on “Edit Template”.
- Schema
- ContentVersion
- Parameters
- Variables
- Resources
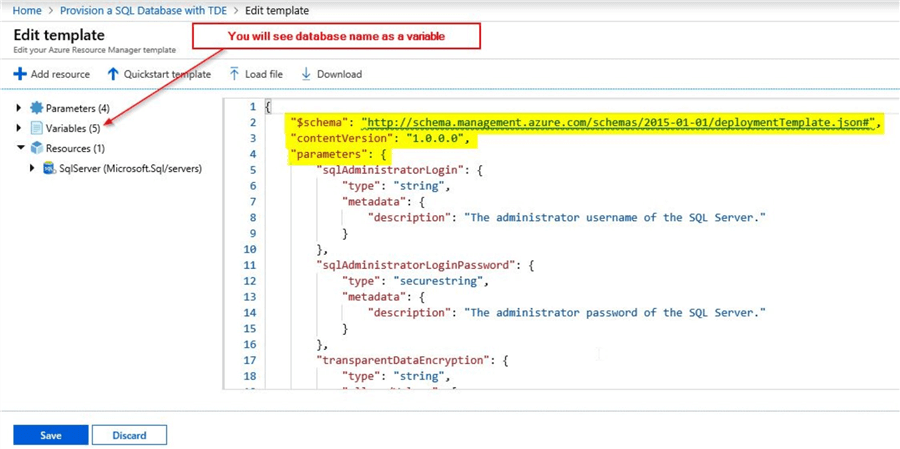
The database name will be visible in the section under “Variables”. Click on “Variables” and you will be able to view the variables that are defined in this template.

Once you click on “databaseName” under the “Variables” section, you will be able to view the code line number to the right where you can see where the database name is defined. For this template, it is defined as “sample-db-with-tde”. Just modify it to the name of your choice, for this example, we will modify the database name as “SQLTIPSDEMO”.

Once you click on “Save”, it will take you back to the original window where you need to key in the parameters, enter the resource group details, accept the “Terms and Conditions” and click on the “Purchase” option.
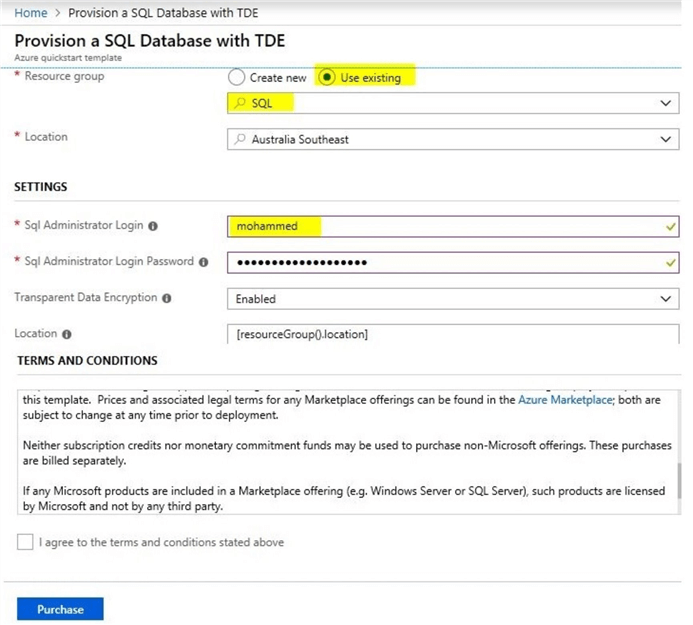
New database created with a customized name of your choice
Once the deployment completes you can view the new database that gets created during a successful deployment.
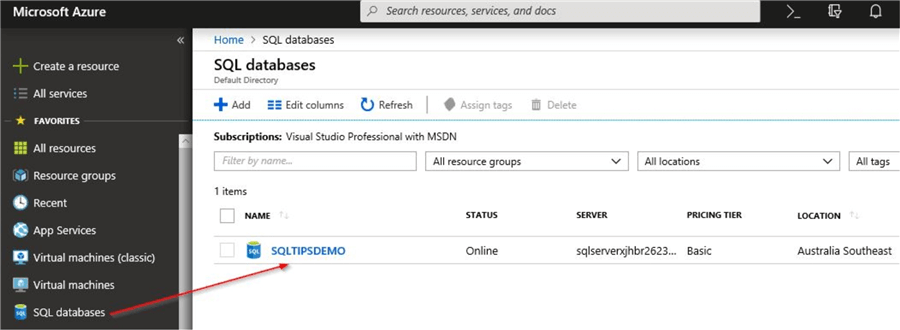
With just a few clicks, you were able to successfully update an existing Quickstart template and deploy a SQL database with a name of your choice.
Modifying a Quickstart template by editing parameters
Now you know how to edit a Quickstart template. In this section, we will review the steps to edit the parameters. You would have noticed that you had to manually enter your account details in the template before purchasing.

This would be time consuming if you are planning to use this template for a number of deployments. In that case, you have the option to edit parameters and embed the values within the parameters, so you don’t have to reenter the values every time you use the template. Click on the option to “Edit Parameters” as shown.

Once you click on this option, it will take you this screen where you can view the details of the parameters that are used in the JSON file.
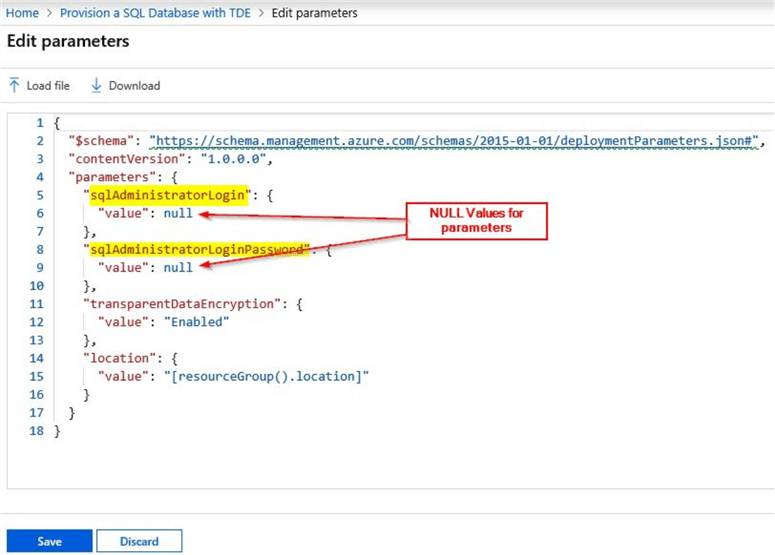
From the screenshot, you can see that the values for the “sqlAdministratorLogin” and “sqlAdministratorLoginPassword” are both NULL. You can update the NULL values with appropriate values as per your requirements. In my case, I have updated the values as below, click on “Save” when done.

Once you click on “Save”, it will take you to the main Quickstart template page where you will see that the values of the parameters are already populated.
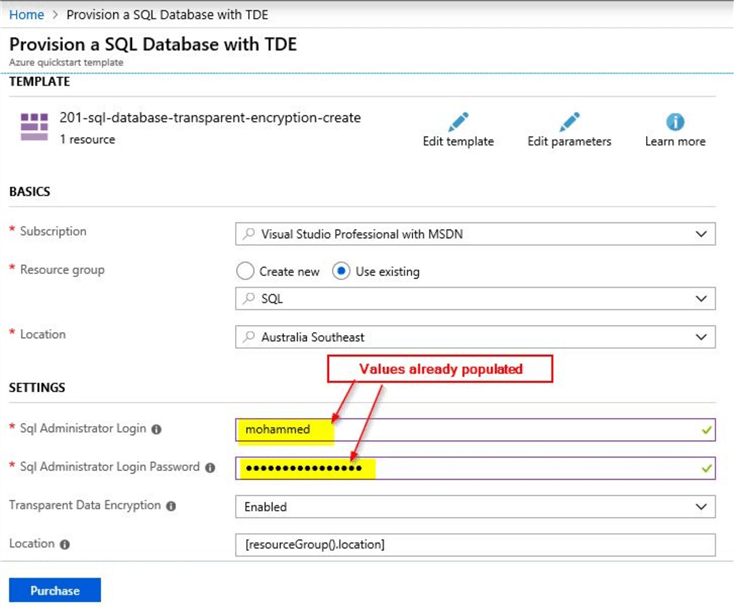
With this you avoid having to spend time filling in parameter values and you can straight away accept and provision the SQL database. In the same way, you could play around with the numerous other Quickstart templates that are available from the portal.
Next Steps
- In this tip, you learned about Azure Quickstart templates
- You saw how JSON files are used for the templates
- In the first section, you were able to deploy the Quickstart template without any modifications
- In the second section, you modified the Quickstart template to use a different database name
- In the last section, you updated the parameters that were used in the Quickstart template
- Refer to the numerous Quickstart templates that are available and try out on your own subscription
- Check your company policies and guidelines before deploying the Quickstart templates in your client’s environment
- Refer to these other Azure articles available on MSSQLTips
About the author
 Mohammed Moinudheen is a SQL Server DBA with over 6 years experience managing production databases for a few Fortune 500 companies.
This author pledges the content of this article is based on professional experience and not AI generated.
View all my tips
Article Last Updated: 2018-09-26


