By: Bhavesh Patel | Updated: 2019-03-19 | Comments (6) | Related: More > Integration Services Development
Problem
There is often a need to zip and unzip files that we get that need to process with SQL Server Integration Services (SSIS). There are several different tools that exist that have this functionality. In this tip, I will show the steps on how to zip and unzip files using 7-Zip as part of a SQL Server Integration Services package.
Solution
We can use any file extractor in SQL Server Integration Services, but for this demonstration I am going to use 7-Zip to zip and unzip folders and files. Before jumping into the SSIS package we should cover some basics of 7-Zip.
About 7-Zip File Archiver
7-Zip is a file archiver with a high compression ratio using LZMA and LZMA2 compression. Its free software and open source. It has self-extracting capabilities for 7Z format and strong AES-256 encryption in 7z and ZIP formats. To install 7-Zip, you can download 7-Zip for Windows.
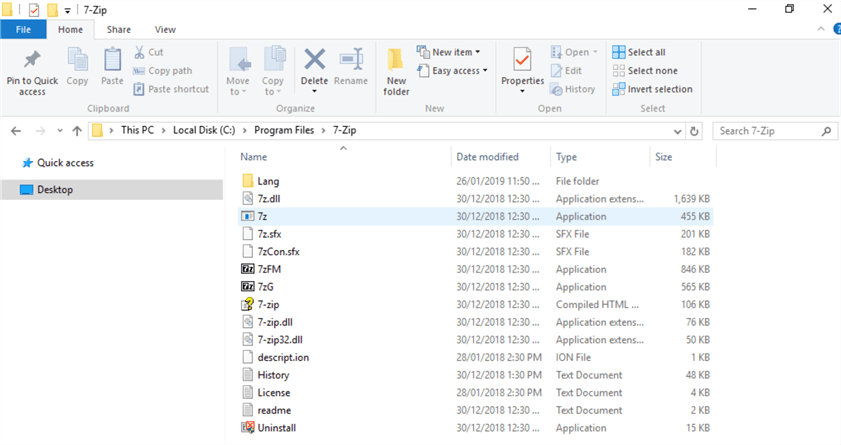
After installing the 7-Zip on my PC, here is the 7-Zip installation location.
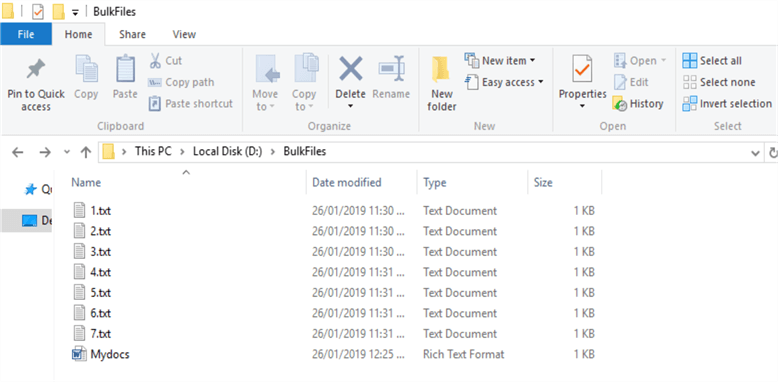
This is the location where I want to zip files.
Zip Files Using 7-Zip in SQL Server Integration Services Package
I created a new SSIS project and named it "Zip_UnZip_Using7zip_SSIS" then dragged an Execute Process Task from the SSIS Toolbox to the Control Flow and renamed it "ZIP Data".
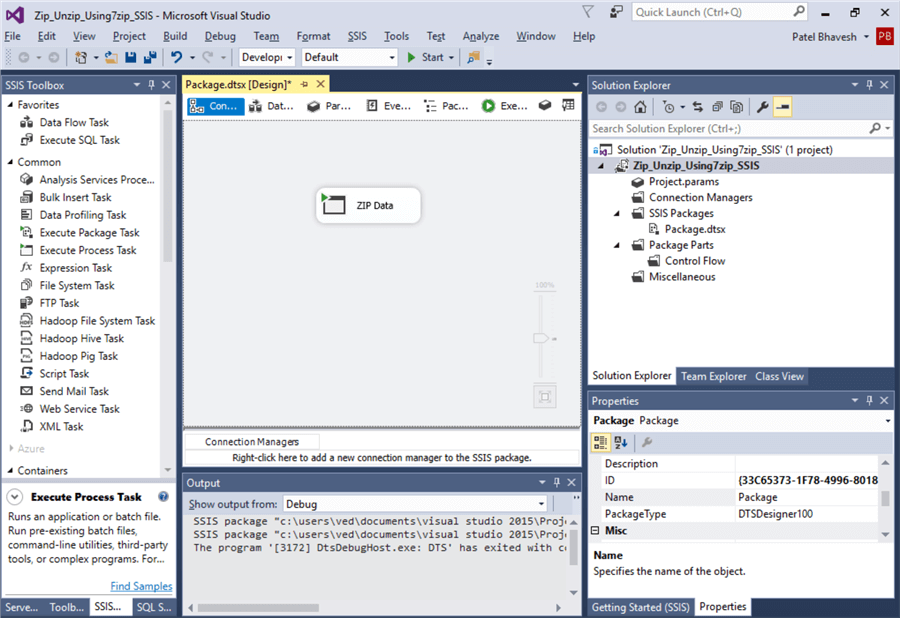
As per MSDN, the Execute Process Task runs an application or batch file as part of a SQL Server Integration Services package workflow. Although you can use the Execute Process task to open any standard application, you typically use it to run business applications or batch files that work against a data source.
Here are the settings for the Execute Process Tasks.
| RequireFullFileName | The task should fail if the executable is not found at the specified location. |
| Executable | Name of the executable to run. |
| Arguments | Command prompt arguments. |
| WorkingDirectory | Path of folder that contains executable, or click the browse button (...)and locate the folder. |
| StandardInputVariable | Select a variable to provide the input to the process, or click New variable... to create a new variable. |
| StandardOutputVariable | Select a variable to capture the output of the process, or click New variable... to create a new variable. |
| StandardErrorVariable | Select a variable to capture the error output of the processor, or click New variable... to create a new variable. |
| FailTaskIfReturnCodeIsNotSuccessValue | Indicates whether task fails if process exit code is different from the value specified in SuccessValue. |
| SuccessValue | Specify the value returned by the executable to indicate success. By default, this value is set to 0. |
| TimeOut | Specify the number of seconds that the process can run. A value of 0 indicates that no time-out value is used, and the process runs until it is completed or until an error occurs. |
| TerminateProcessAfterTimeOut | Indicates whether process is forced to end after the time-out period specified by the TimeOut option. This option is available only if TimeOut is not 0. |
| WindowStyle | Specify the window style in which to run the process. |
Now right click the task and choose "Edit…" to open the Execute Process Task Editor and then click "Process" on the left and change the executable path, arguments and working directory as follows and keep the others as the defaults. I explain this further down.
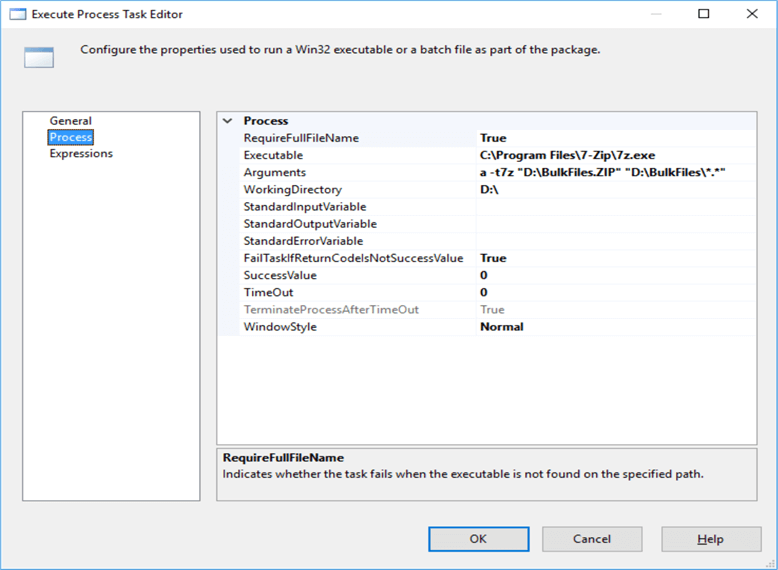
Executable
Put the full path to the executable as: C:\Program Files\7-Zip\7z.exe
Arguments
Provide the command prompt arguments: a -t7z "D:\BulkFiles.ZIP" "D:\BulkFiles\*.*"
- I am going to archive the files using the "a" command argument.
- The format is specified with the -t switch -t7z
- Put all files into the zip file "D:\BulkFiles.ZIP"
- From location "D:\BulkFiles\*. *"
Here is a link to the Command Lind Commands and here is a link to Command Line Switches.
Working Directory
The Execute Process Task will change directories to this location. If an EXE writes to an output file in the current directory, this file will be located wherever the working directory is pointing. Here I am going to add a zip file on D:\drive.
Running the SSIS Package to Zip Files
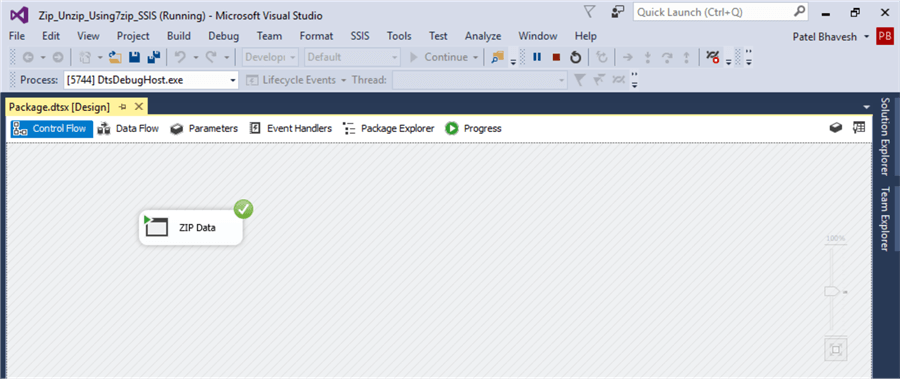
Now the package is set for archiving the data.
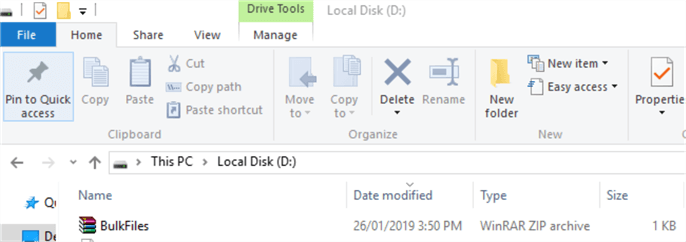
As per the configuration, all files are zipped into BulkFiles on the drive "D:\".
Unzip Files Using 7-Zip in SQL Server Integration Services Package
I will add to the SSIS package another Execute Process Task to extract the files we just zipped up.
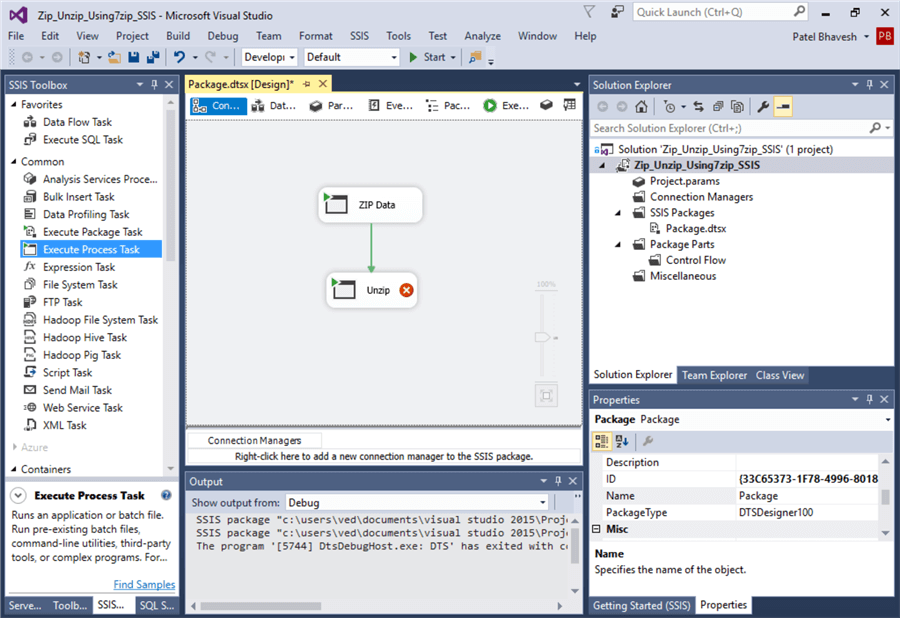
Here are the settings to unzip the files.
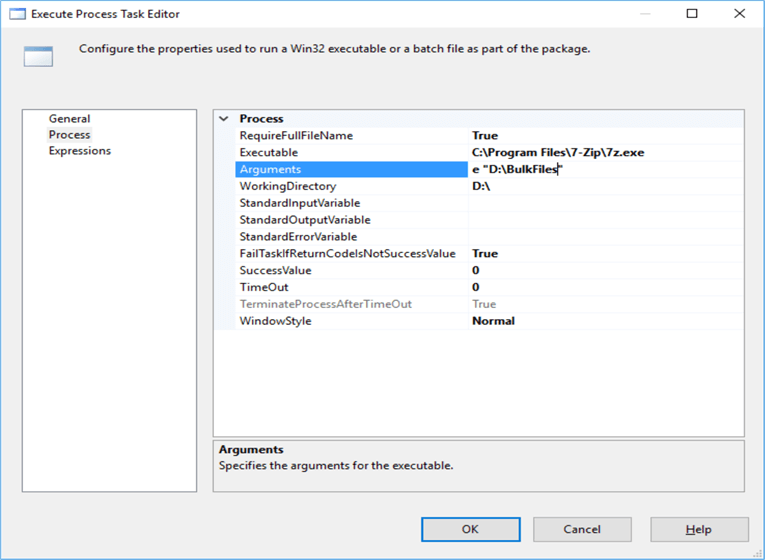
Executable
Put the full path to the executable as: C:\Program Files\7-Zip\7z.exe
Arguments
Provide the command prompt arguments: e "D:\BulkFiles"
- I am going to extract the files using the "e" command argument.
- This will extract the file "D:\BulkFiles"
Here is a link to the Command Lind Commands and here is a link to Command Line Switches.
Working Directory
The Execute Process Task will change directories to this location. If an EXE writes to an output file in the current directory, this file will be located wherever the working directory is pointing. Here I am going to add a zip file on D:\drive.
Running the SSIS Package to UnZip Files
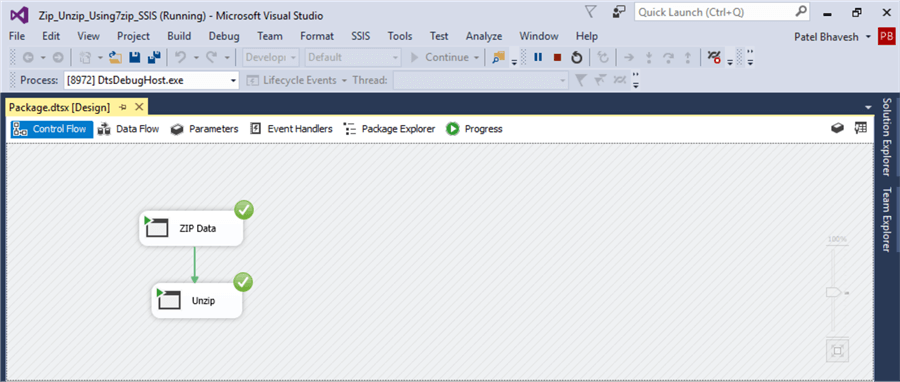
Here is the package.
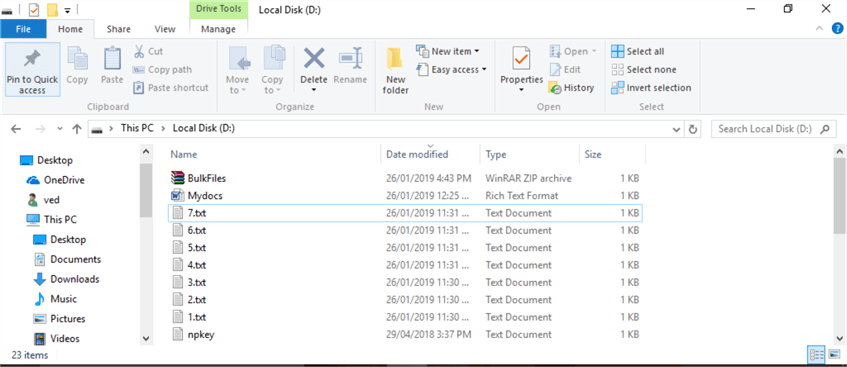
If we look on the D:\ drive we can see the extracted files.
SQL Server Integration Services Execute Process Task Use
- The Execute Process Task can be used to execute an application, executable files, batch files inside a SSIS execution.
- As per this scenario, we can also use RAR/Winzip/PeaZip/Jzip to perform compression/decompression of files and folders.
- We can also execute standard applications like (Winword, Excel, Powerpoint, etc.) and custom application (C#.Net,Vb.Net,etc).
- It’s easy to integrate variables, parameters and arguments.
- If you need to execute Windows command line commands such as RENAME, DEL, COPY, DIR you use the cmd.exe utility with this task.
Next Steps
- Kindly ensure to test with a test server first before rolling out to production.
- Additional Reading
About the author
 Bhavesh Patel is a SQL Server database professional with 10+ years of experience.
This author pledges the content of this article is based on professional experience and not AI generated.
View all my tips
Article Last Updated: 2019-03-19


