By: John Martin | Updated: 2018-12-18 | Comments | Related: More > Database Administration
Problem
We are using Azure IaaS VMs and we want to ensure that useful tools and utilities are in place on our servers. We want to make sure there is consistency for what we deploy and make sure that nothing gets missed. How do we achieve this while minimizing our administrative overhead and need to perform additional tasks during the build process?
Solution
Azure VMs have an extension framework that has a wide array of pre-configured options that we can leverage when defining the deployment of a VM. In addition to these there is the Custom Script Extension which allows us to run PowerShell to perform whatever tasks we need. There are several different ways to make use of Custom Script extensions. We will look at introducing the most fundamental way which is via the Azure Portal when creating a VM.
I am a firm believer that as part of any server deployment where SQL Server is in use that DBATools should be installed by default. Whether it is the SQL Server, Application Server, or Jump Box having DBATools available for management and troubleshooting is a must.
Creating the Installation Script
In order to use the script extension, we first need a script to run. Because this is a new VM build we will be looking to install NuGet and DBATools. NuGet is needed in order to allow us to use Install-Module to install DBATools onto our VM.
When creating this script, we need to ensure that it meets a few key requirements, the key ones however are:
- Ensure that the script is Idempotent.
- Must execute within 90 minutes.
- Must not require user input when running.
Considering these requirements my script performs a few checks to validate the state of the environment ahead of the installations.
# Check to see if NuGet is present, if not install, if incorrect version then upgrade.
$MinNuGetVersion = [Version]"2.8.5.201"
$NuGet = Get-PackageProvider -ListAvailable | Where-Object Name -EQ "NuGet"
$DBATools = Get-InstalledModule | Where-Object Name -EQ "DBATools"

if(!$NuGet) {

    Write-Host "NuGet not installed, installing."
    Install-PackageProvider -Name NuGet -MinimumVersion $MinNuGetVersion -Force
}
elseif ($NuGet.Version -LT $MinNuGetVersion) {

    Write-Host "Nuget installed, incorrect version, upgrading."
    Install-PackageProvider -Name NuGet -MinimumVersion $MinNuGetVersion -Force
}

# Now install DBATools PowerShell Module.
if(!$DBATools) {
    Write-Host "Installing DBATools."
    Install-Module -Name DBATools -Scope AllUsers -Force
}
If we were to perform an interactive installation of DBATools on a new install of Windows, then we would be prompted to install NuGet and then also need to respond when connecting the gallery. In order to get around this we are checking for and installing/upgrading NuGet first and then using the -Force switch to override these prompts.
When installing DBATools I am also making sure that it installs for all users so that any of the team can use them when they login.
Deploying a VM and Script Extension
Now that we have created our script, we can deploy the Azure Virtual Machine. For the purposes of this post I am simply deploying a basic Windows Server 2016 image from the gallery. This could be any of the SQL Server 2016 images that exist or your own custom image if needed.
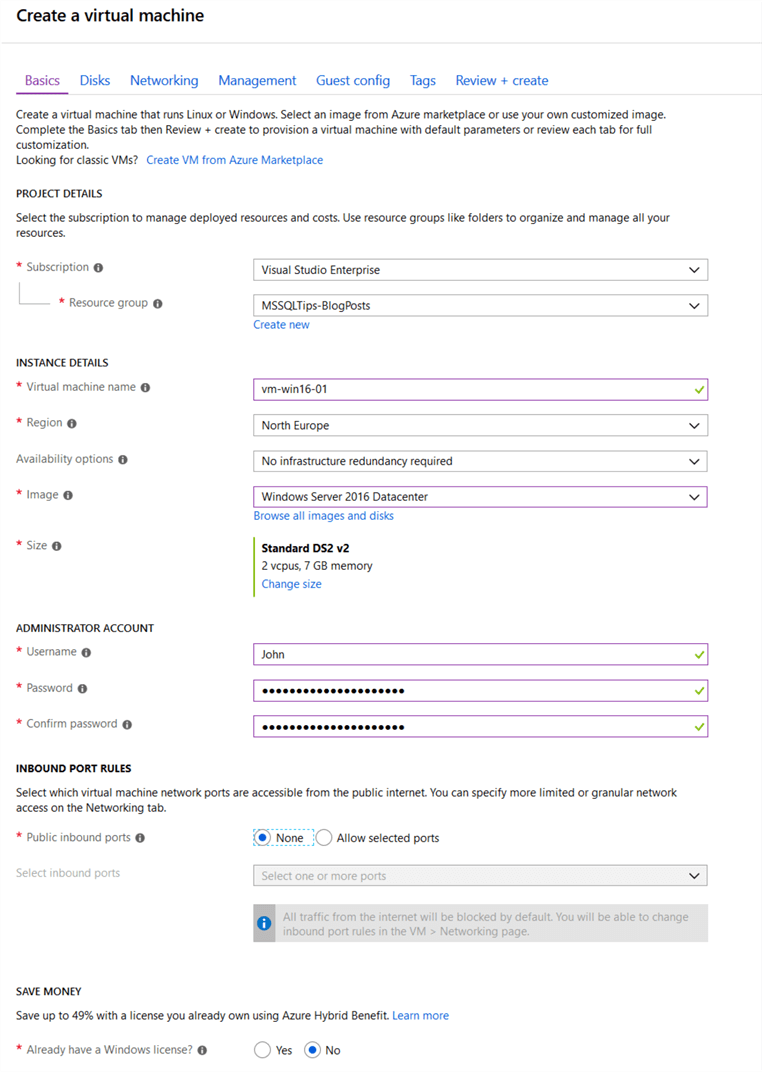
Ordinarily if I was deploying this VM into a production scenario then I would be using an Availability Set or Zone and ensuring there is a level of resilience. There are no special considerations at this point that need to be set in order to use the script extension.
Once the basic information for the VM creation has been added and the networking configured we can select the script extension under the "Guest config" section.
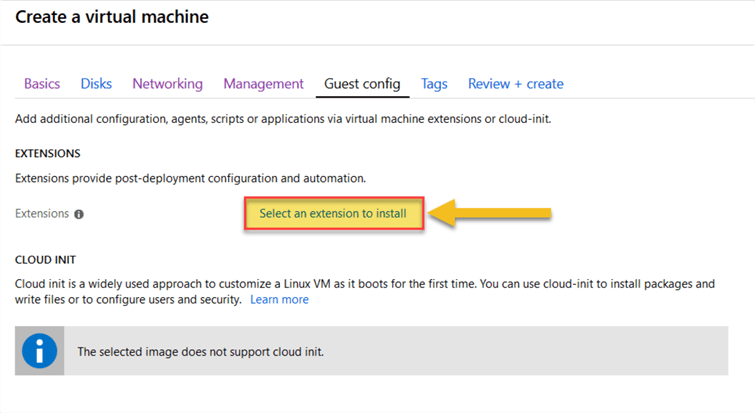
We will then be presented with a list of different extensions that are available. We want to select "Custom Script Extension" from Microsoft.
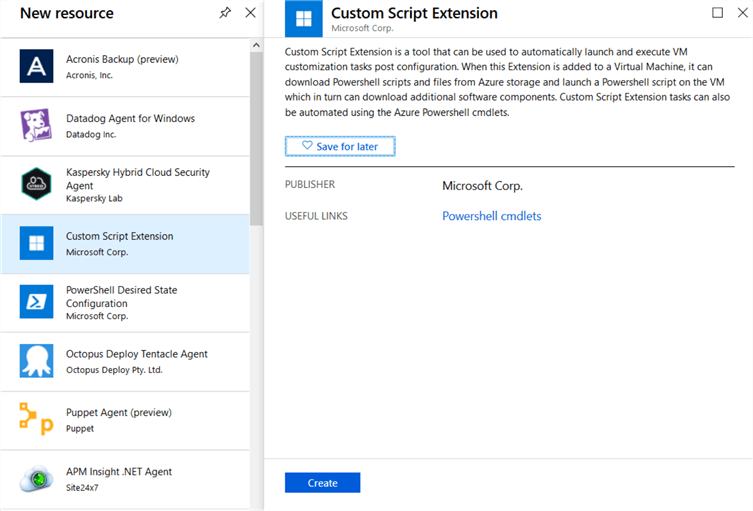
This will then present us with a simple blade asking for the script file that we want to run.
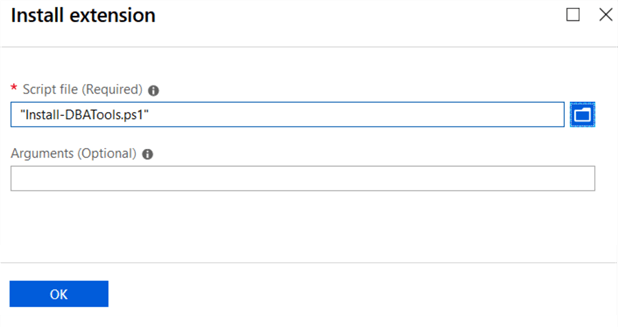
Here I have a PowerShell script called "Install-DBATools.ps1" which contains the code from earlier in this post. This file is located on your client and will be uploaded to Azure Blob Storage where it will be accessed by the VM. It is important to wait for the notification saying the script has been uploaded after clicking OK before continuing. There is an optional area for us to put any runtime arguments that the script would need, as ours is self-contained we don’t need to specify these.
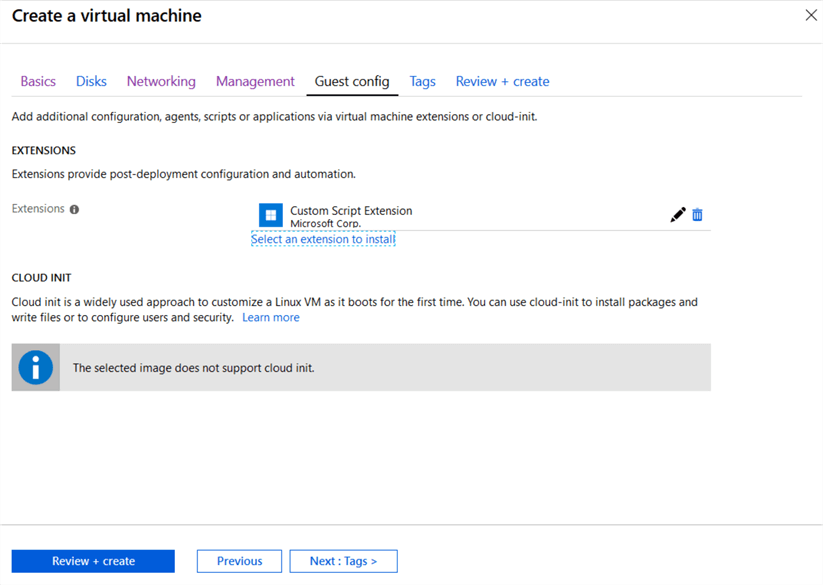
The final step is to review the configuration before we create the VM.
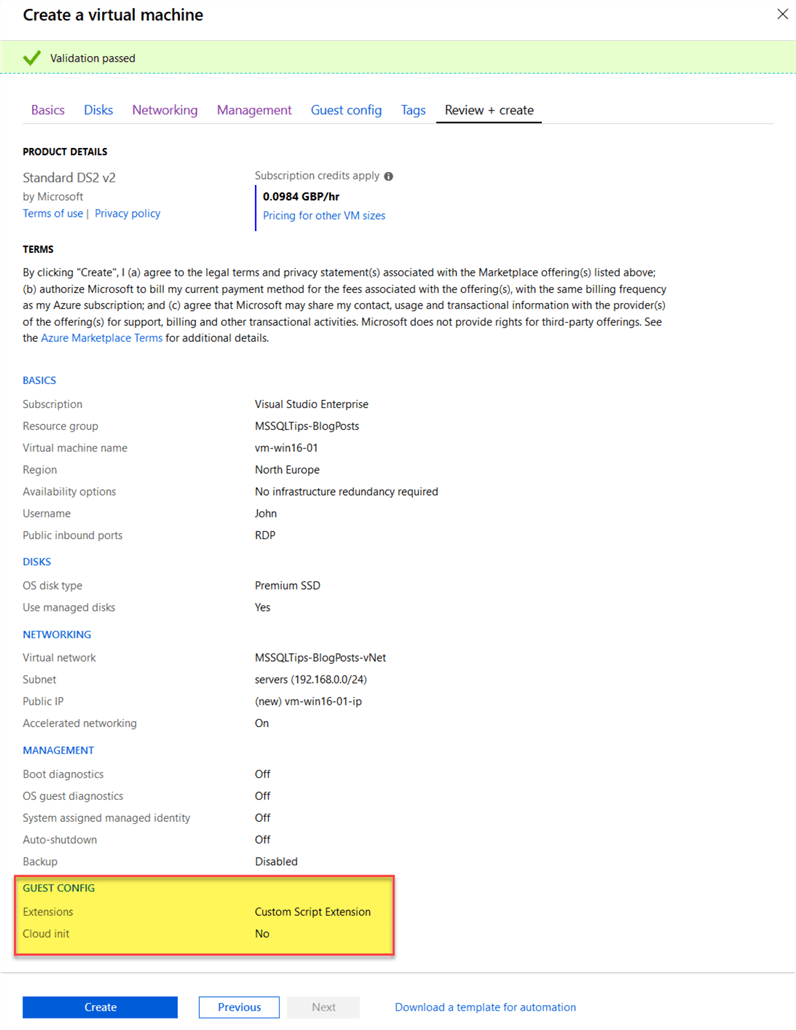
So long as everything is as it should be we can kick off the creation of the VM with our Custom Script that will result in a basic Windows Server 2016 Datacenter VM with DBATools installed for us to use as soon as we login.
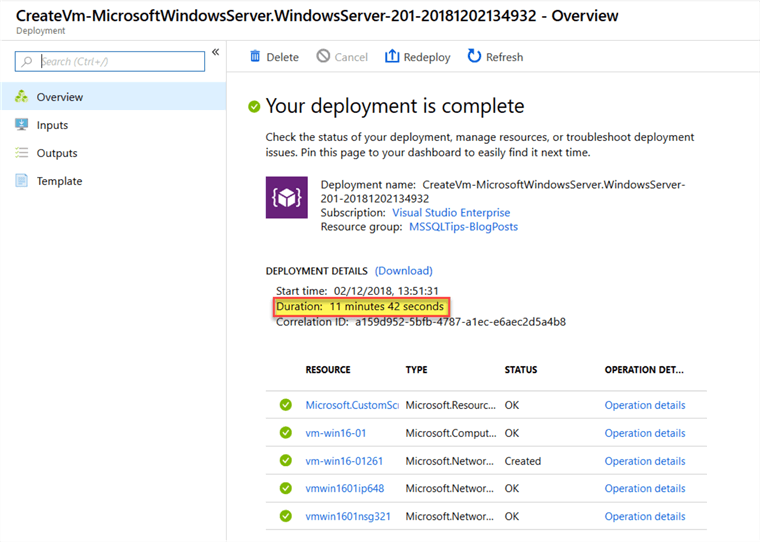
It is worth noting that in my experience, the addition of the Custom Script can result in the deployment times being increased over just using a standard image. If the script is performing many actions this time will vary. Just be patient and grab a coffee.
Once the deployment is complete, we can login, open PowerShell and check that the script did its work.
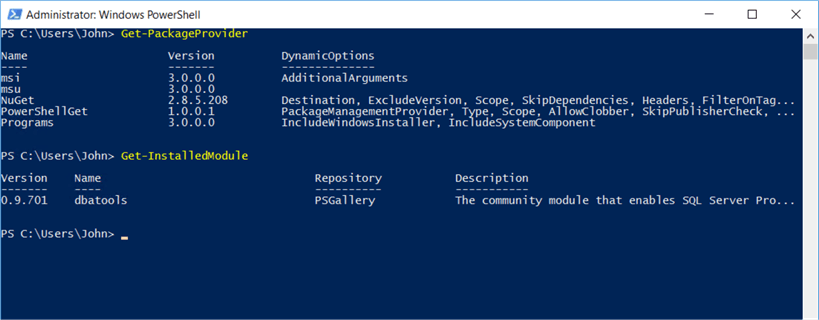
As we can see here in this output our custom script has resulted in the installation of the NuGet dependency and DBATools. While I have only installed DBATools this same model can be used to perform many different activities that allow us to perform any number of configuration options.
Next Steps
- Access SQL Server instance on Azure VM using local copy of Management Studio
- Setup an Azure Virtual Machine and Contoso Sample Database for SQL Server Testing
- Introduction to Azure PowerShell Modules for the SQL Server DBA Part 1
- Introduction to Azure PowerShell Modules for the SQL Server DBA Part 2
- Introduction to Azure PowerShell Modules for the SQL Server DBA Part 3
- Perform on-premises SQL Server database backups using maintenance plans to Azure Blob Storage
About the author
 John Martin is a Data Platform Engineer working in the financial sector as well as Director-at-Large for the PASS organisation and currently a Microsoft Data Platform MVP.
This author pledges the content of this article is based on professional experience and not AI generated.
View all my tips
Article Last Updated: 2018-12-18


