By: Koen Verbeeck | Updated: 2019-02-12 | Comments | Related: > Azure
Problem
I have created a Logic App workflow in Azure. It transfers data from a SharePoint library to Azure Blob storage. How can I integrate this workflow into my other data pipelines?
Solution
In the tip Transfer Files From SharePoint To Blob Storage With Azure Logic Apps we built a workflow using Logic Apps which downloaded an Excel file from SharePoint and stored it in an Azure Blob container. We tested the Logic App by manually running it in the editor. However, outside the development environment you probably want to automate this workflow. There are several methods for starting the Logic App. In this tip we'll take a look at these two options:
- Running the Logic App on demand. When starting to design the Logic App, you need to choose a trigger. In the tip mentioned previously, we used the trigger "When a HTTP request is received". This means that every time an HTTP request is made, the Logic App will start, scan the SharePoint library and copy its contents to Azure Blob storage. In this tip, we will issue the request from Azure Data Factory (ADF). There are many tools which can do the same action, but the development in ADF is straight forward and it's also the most likely location for the rest of your data pipelines.
- Letting the Logic App start itself. Another type of trigger is a file watcher. Here you let the Logic App monitor a folder. Once a new file is created, the Logic App will start and copy the file to Blob Storage. This option is more useful when you want to implement event-driven data flows.
If you want to follow along with this tip, make sure you have created the Logic App as stated in the tip Transfer Files From SharePoint To Blob Storage With Azure Logic Apps, since we will build further upon its end result.
Start the Logic App with the HTTP Request
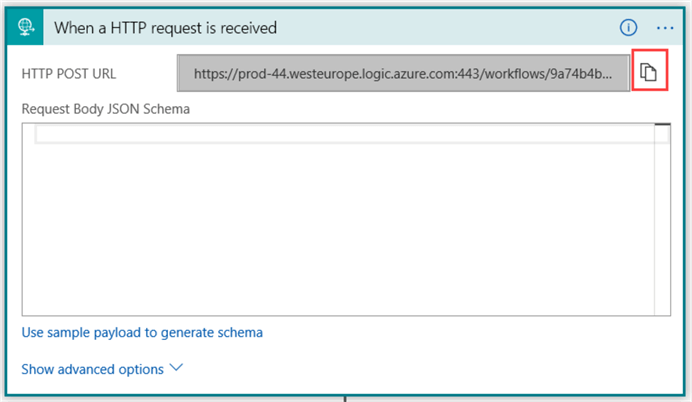
Let us take a look at the HTTP Request first. If you click on the HTTP Request trigger in the Logic App designer, you can copy the HTTP POST URL by clicking on the icon next to the URL.
With the URL copied, go to Azure Data Factory and create a new pipeline. If you haven't set up an ADF environment yet, you can follow the steps outlined in the tip Configure an Azure SQL Server Integration Services Integration Runtime.
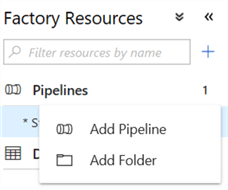
Give your pipeline a name and add the Web activity to the canvas.
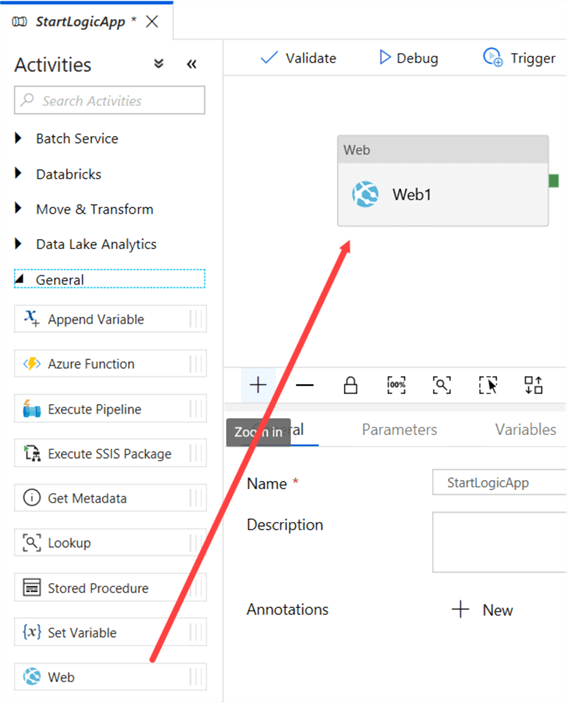
Click on the Web activity to edit its properties.
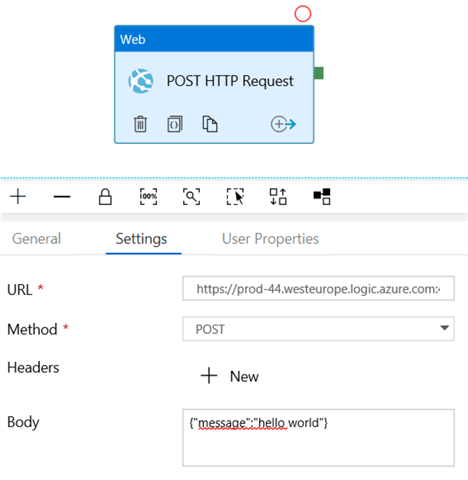
In the URL box, you paste the URL from the Logic App HTTP trigger. In the Method box, choose the POST method. In the body, you can enter a dummy placeholder, as shown in the screenshot above. The ADF pipeline is now finished and you can start it by clicking on the debug icon.
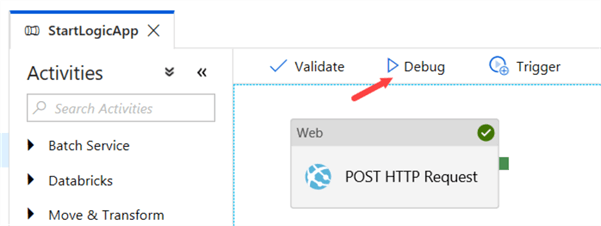
The pipeline will finish very quickly, since the HTTP request is asynchronous: it doesn't wait till the Logic App is finished. It just sends the request and it's done.

In the Logic App overview in the Azure Portal, we can check the logging to see if it has run successfully:

As you can see, the Logic App ran immediately after the HTTP request was sent by the ADF pipeline. In Azure Storage Explorer, we can see the file has successfully been copied:

To copy the file on demand, you can add a trigger to the ADF pipeline and choose a schedule, or you can incorporate the pipeline as a part of a bigger ETL flow.
Start the Logic App through a Trigger
In this option we are going to start the Logic App once a new file arrives in the SharePoint library. In the Logic App designer, remove the HTTP Request trigger. You'll be asked to create a new trigger:
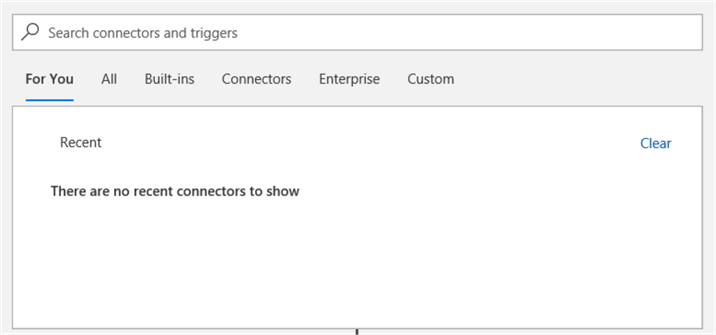
It's possible SharePoint is listed as a recent connector. If it is, click it, otherwise search for SharePoint in the top bar. Once the connector is chosen, you need to choose the type of trigger:
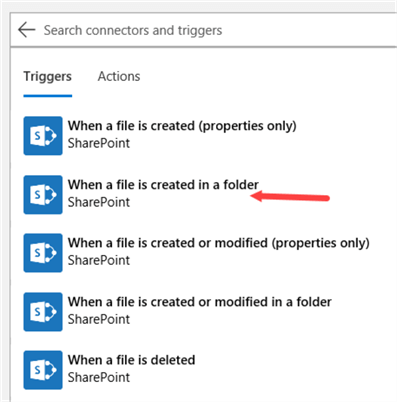
Here we're going to pick the "When a file is created in a folder". Configure the site address and the folder, just like we did in the List Folder step (the next step in the Logic App).
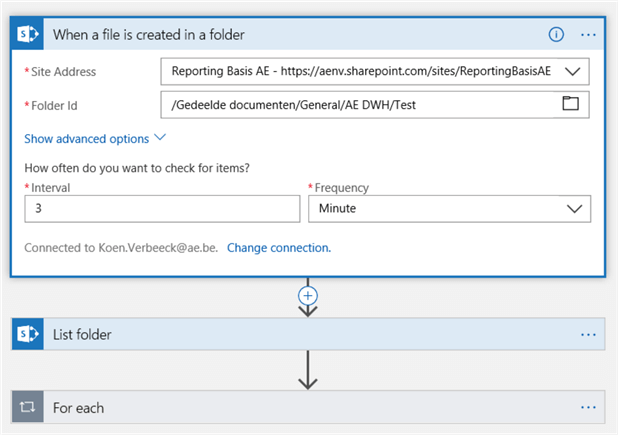
You can also configure the frequency for how often the Logic App will check the folder. The remainder of the Logic App can stay the same. Save the Logic App and click on Run to debug it. You might get a pop-up to inform you that you might want to copy a file to the SharePoint folder for test purposes. Once you copied a file, the Logic App will run (you might have to wait a bit, this depends on the frequency you configured) and copy the file to Blob Storage.
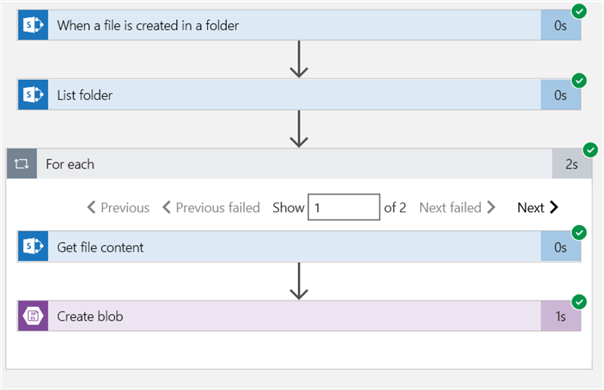
In Azure Storage Explorer, we can verify the new file has been added:

Finish the Event-driven Design
Dropping the file in blob storage usually isn't the last step in the process. Typically, you'll want to pick up the file and write its contents to an Azure SQL database. You can schedule a process that inspects the blob container to see if new files have arrived. However, this means you're still using the "old batch process" idiom. If you want to speed things up, you can go to an event-driven design where the file is immediately processed once it arrives in the blob container. There are several methods to do this:
- You can start an ADF pipeline right from the Logic App. The pipeline copies the data with the Copy Data activity. The necessary steps are described in the tip Connect to On-premises Data in Azure Data Factory with the Self-hosted Integration Runtime - Part 2. You can find more info on the ADF activities in Logic Apps in the blog post Using ADF V2 Activities in Logic Apps by Matt How.
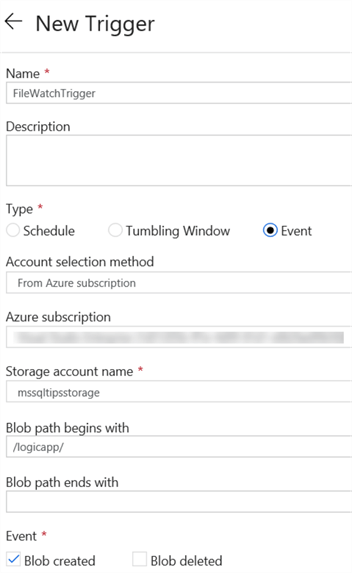
- You can use the same ADF pipeline, but instead trigger it by using an event trigger, which is quite similar to how the Logic App is triggered. An example:
Next Steps
- If you want to follow along, make sure you have read the tip Transfer Files From SharePoint To Blob Storage With Azure Logic Apps.
- An interesting article about event-driven triggers in ADF: Event trigger based data integration with Azure Data Factory.
- You can find more Azure tips in this overview.
About the author
 Koen Verbeeck is a seasoned business intelligence consultant at AE. He has over a decade of experience with the Microsoft Data Platform in numerous industries. He holds several certifications and is a prolific writer contributing content about SSIS, ADF, SSAS, SSRS, MDS, Power BI, Snowflake and Azure services. He has spoken at PASS, SQLBits, dataMinds Connect and delivers webinars on MSSQLTips.com. Koen has been awarded the Microsoft MVP data platform award for many years.
This author pledges the content of this article is based on professional experience and not AI generated.
View all my tips
Article Last Updated: 2019-02-12


