By: Koen Verbeeck | Updated: 2019-04-22 | Comments (19) | Related: > Power BI
Problem
I have built a pipeline in Azure Data Factory that runs my daily ETL process, which loads data into an Azure SQL Server database. On top of this database, a Power BI model has been created that imports the data. At the end of the pipeline, I'd like to refresh this model so it contains the latest data. However, there's no built-in functionality in Azure Data Factory to communicate with Power BI. How can I achieve this?
Solution
At the moment, there's no support in Azure Data Factory (ADF) for directly refreshing a Power BI dataset. However, there's a work around you can use by leveraging Azure Logic Apps. Unfortunately, currently even Logic Apps doesn't support full integration with Power BI. There's only a preview feature to add rows to a dataset:
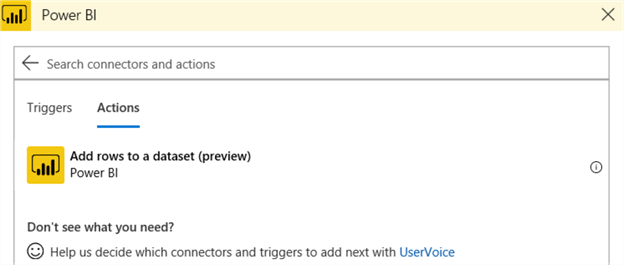
So, we need to go one step further: we're going to create a Logic Apps custom connector, which will allow Logic Apps to communicate with the Power BI API.
Creating the Logic Apps Custom Connector
Registering a Power BI App
Since we're going to use the Power BI API, we need to register an app at https://dev.powerbi.com/apps. Normally this is used to embed Power BI content, but we need an application ID and an application secret to be able to connect to the API. First you need to log in with your Power BI credentials (make sure you use an account with sufficient privileges).
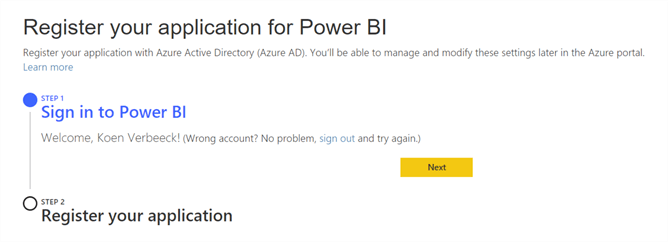
Once you're registered, fill in the form to register the app:
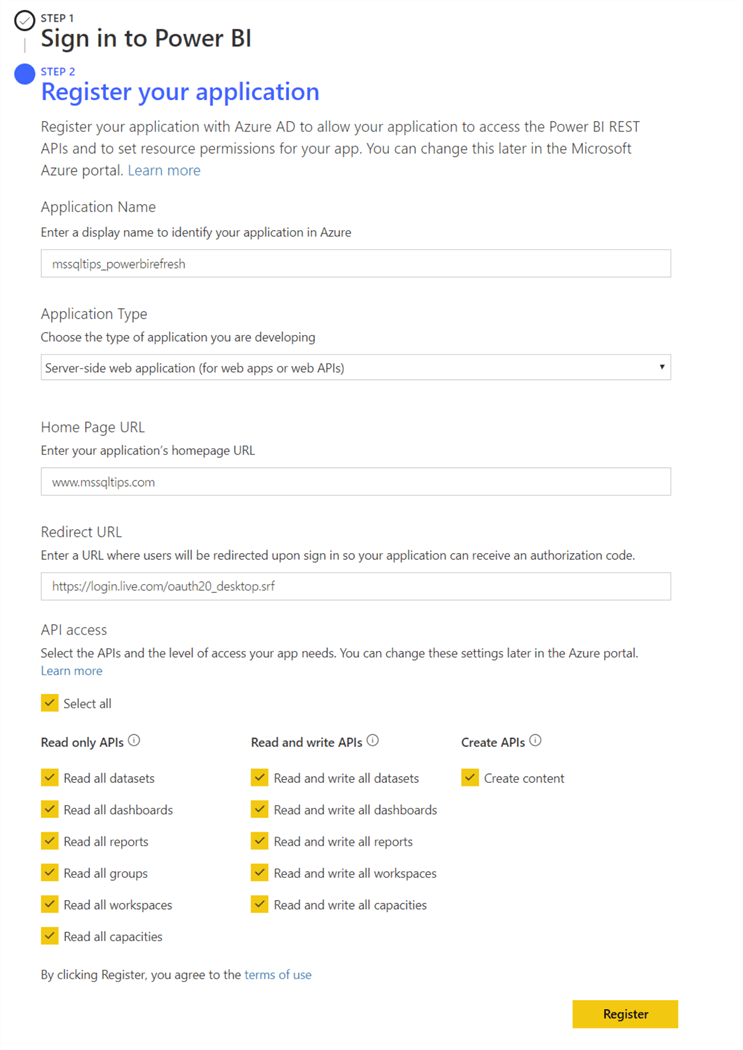
The following information is required:
- Application name
- Application type. Since we're just using this "app" to refresh a dataset, you can choose the server-side web application.
- As home page URL, you can choose any valid URL.
- For the redirect URL, we will temporarily use https://login.live.com/oauth20_desktop.srf. We're going to change this later on in the Azure Portal.
- For access permissions, you can only Read and write all datasets, but I've checked all options. Maybe you need to Logic App custom connector to do more later on than just refreshing datasets.
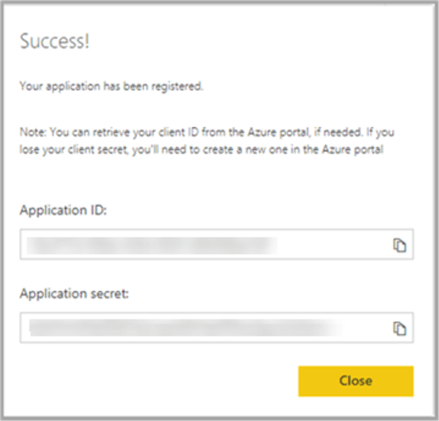
When you hit Register, you'll receive confirmation and your application ID and secret. Be sure to copy these down to a safe location.
If you don't have the correct permissions (it's possible to block the registering of apps by users on the tenant level), you'll get the following message:

Note you can do the same process from within the Azure Portal, by using app registrations:

More info on using app registrations can be found in the official documentation. Using the Power BI website is a bit more straight forward than using the Azure Portal.
Logic Apps Custom Connector
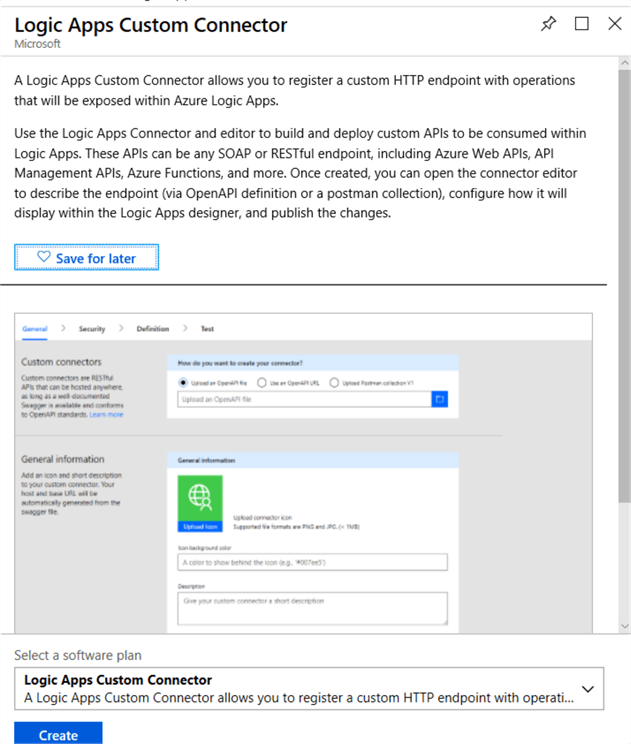
Now we're going to create a custom connector. In the Azure Portal, click on Create a resource and search for Logic Apps custom connectors.
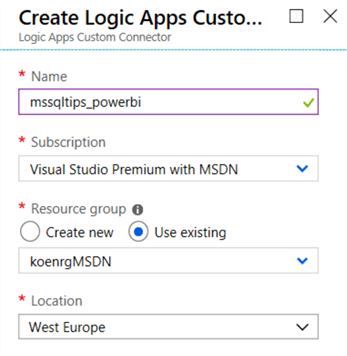
To create a new connector, specify a name, subscription, resource group and location:
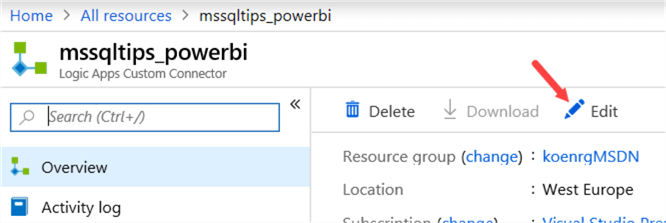
Once the connector is created, go to the editor:
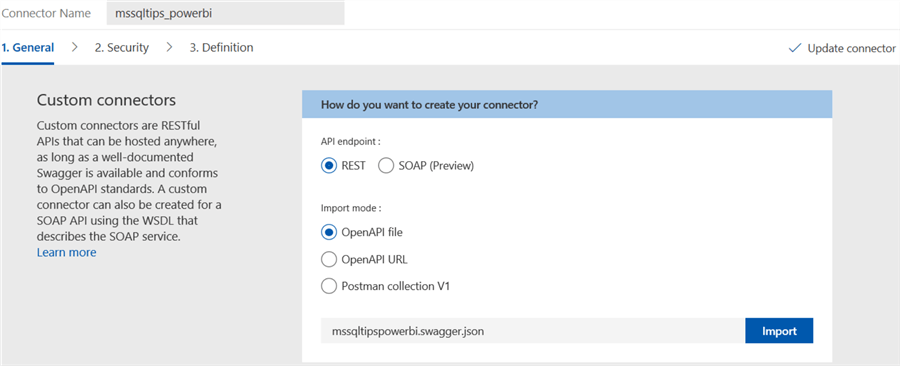
In the General tab, you can specify how you want to create the custom connector. It is possible to define all the actions for the Power BI connector yourself, but luckily there's a swagger file available on Github that defines all the possible actions for you (and there are quite a lot of actions!). A swagger file describes a RESTful API. Download the file from Github to your local machine, and then import it in the custom connector editor.
If you want, you can specify an icon and a description for the custom connector:
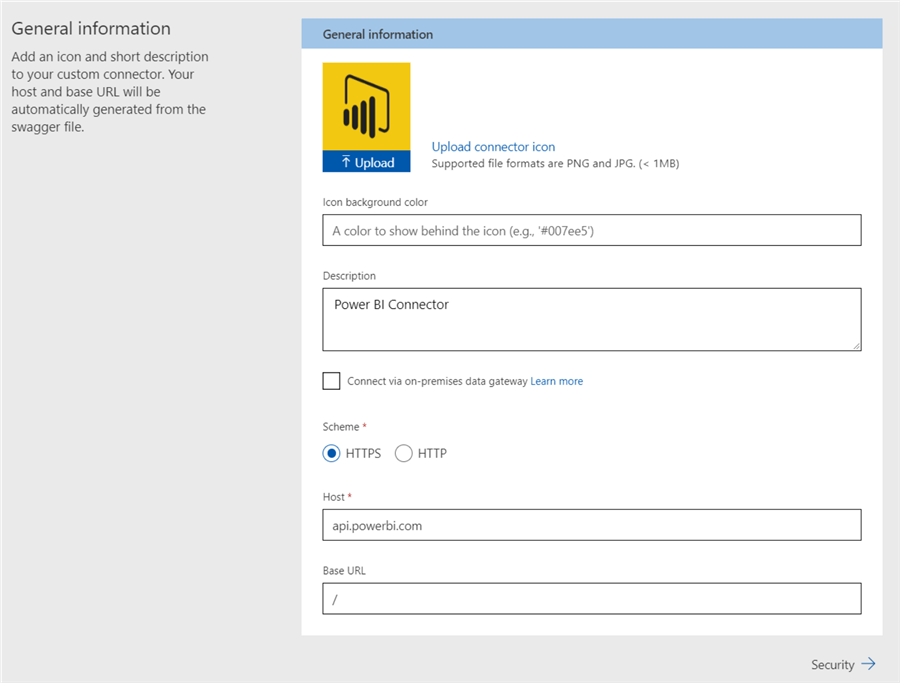
Other settings can be left as-is. In the security tab, we need to configure the authentication type.

For our custom connector, we're going to choose OAuth 2.0.
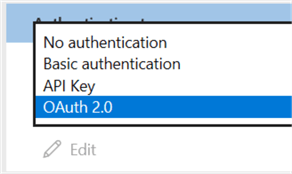
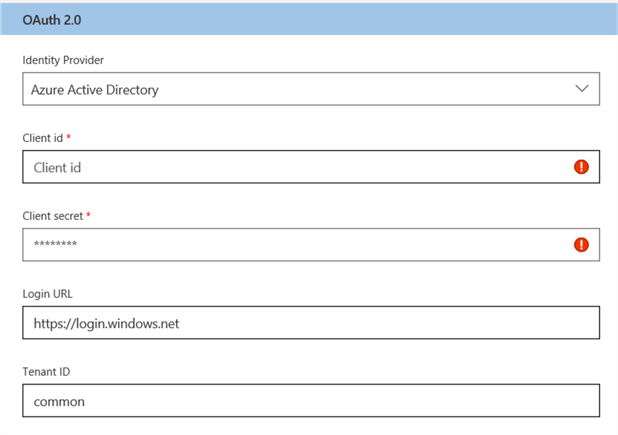
Configure the form with the following information:
- Azure Active Directory as the identity provider.
- The client ID and secret we created earlier by registering the app at the Power BI website.
- The login URL can be kept as-is.
- The tenant ID needs to be common.
- As resource URL, we need to fill in https://analysis.windows.net/powerbi/api.
- The scope is set to openid.
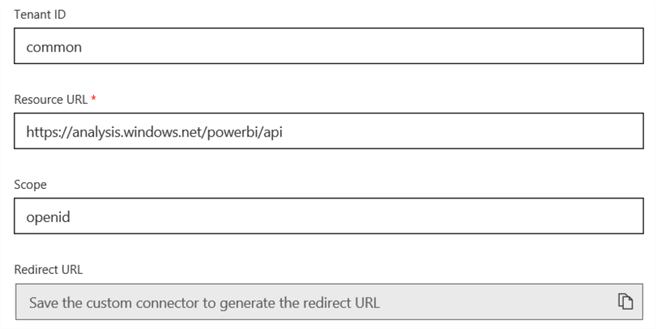
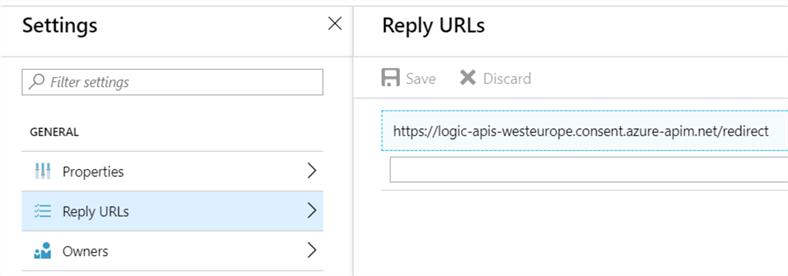
Once you save the custom connector, the redirect URL will be generated. We need to copy this and replace the original redirect URL (remember, when we registered the app?) in the Azure Portal.

In the Azure Portal, go Azure Active Directory and then App registrations. Find the app with the name you used when registering the app in the Power BI website. Go to Settings and then Reply URLs. There you can replace the original reply URL with the one from the Azure Logic Apps custom connector:
Back to the custom connector. In the third tab, definition, you will see all of the actions and references defined by the swagger file we imported earlier. Most actions will display one or more warnings, most likely because a type or something similar hasn't been defined. These can be ignored. There's one problem however. In the Logic Apps editor, actions that end with a point are not allowed. Unfortunately, almost all actions names and with a period.
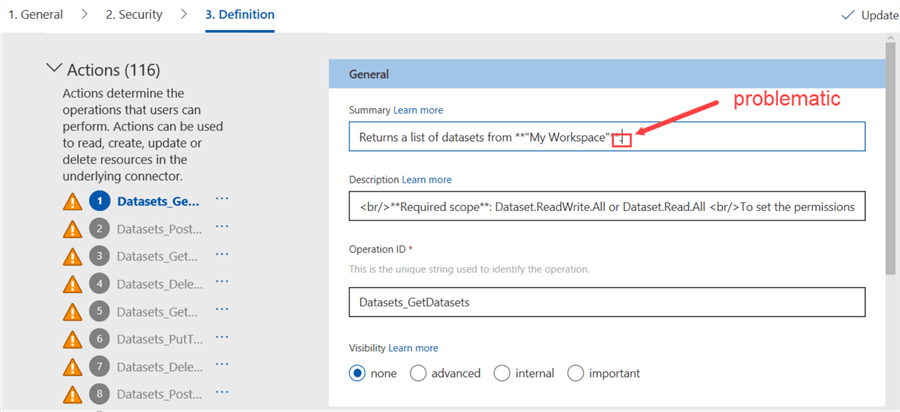
It's still easier to import the swagger file and update the 116 actions than manually defining the actions yourself though. To speed up the process, you can edit only the action we're actually going to use, which is number 49: "Triggers a refresh for the specified dataset from the specified workspace".
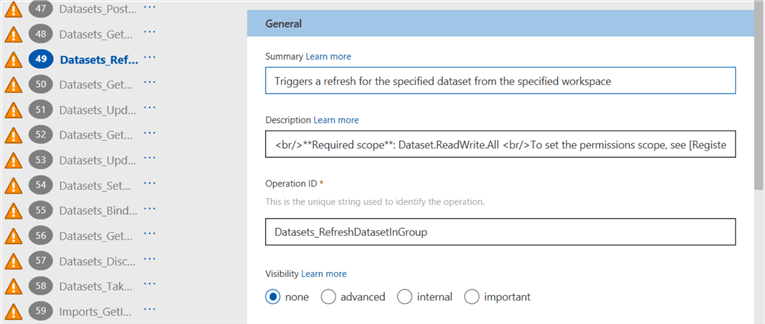
Make sure you have the action with "dataset from the specified workspace" and not "from My Workspace". The custom connector is now finished and ready to be used in your Azure Logic Apps.
Conclusion
In this part of the tip, we created a Logic Apps custom connector. We imported the Power BI API definitions using a swagger file and registered an app on the Power BI website for authentication purposes. In the next part of the tip, we're going to build a Logic App using the custom connector, so we can refresh a dataset in Power BI from Azure Data Factory.
Next Steps
- More tips about Logic Apps:
- You can find more Azure tips in this overview.
Learn more about Power BI in this 3 hour training course.
About the author
 Koen Verbeeck is a seasoned business intelligence consultant at AE. He has over a decade of experience with the Microsoft Data Platform in numerous industries. He holds several certifications and is a prolific writer contributing content about SSIS, ADF, SSAS, SSRS, MDS, Power BI, Snowflake and Azure services. He has spoken at PASS, SQLBits, dataMinds Connect and delivers webinars on MSSQLTips.com. Koen has been awarded the Microsoft MVP data platform award for many years.
This author pledges the content of this article is based on professional experience and not AI generated.
View all my tips
Article Last Updated: 2019-04-22


