By: Koen Verbeeck | Updated: 2019-07-02 | Comments | Related: > Azure Data Factory
Problem
When migrating your Integration Services project to the Azure cloud environment, it’s not only a matter of moving the projects and packages to Azure, you also have to take into account external dependencies, such as the source data. Is it going to stay on-premises? Or is it going to move to the cloud as well. For files, such as flat files or Excel files, you can use Azure File Services to host these inside the Azure cloud. In part 1 of the tip, we demonstrated how you can setup and configure Azure File Services (also named Azure File Storage or simply Azure Files). In this part, we’ll show a practical example of how we can modify an existing SSIS package so it uses Azure File Services.
Solution
If you haven’t already, please refer to part 1 of this tip. There the setup and configuration of Azure File Services is explained, as well as how you can setup your credentials on your machine and in the SSISDB database. A correct configuration is necessary if you want to follow along with this tip.
Replacing Local File Share with Azure File Services
Test Setup
In this tip, we’re going to read a very simple CSV file containing a list of the top 250 movies (the list is a couple of years old if you see some weird rankings):

We’re going to read this data and store in a table inside an Azure SQL Database (or any other SQL Server database). The DDL for the destination table is as follows:
CREATE TABLE [dbo].[Top250Movies](
   [Movies] [nvarchar](250) NULL
);
Our sample SSIS package is straight forward as well (it is created using Visual Studio 2019 using the dark theme). First, we truncate the destination table with an Execute SQL Task:
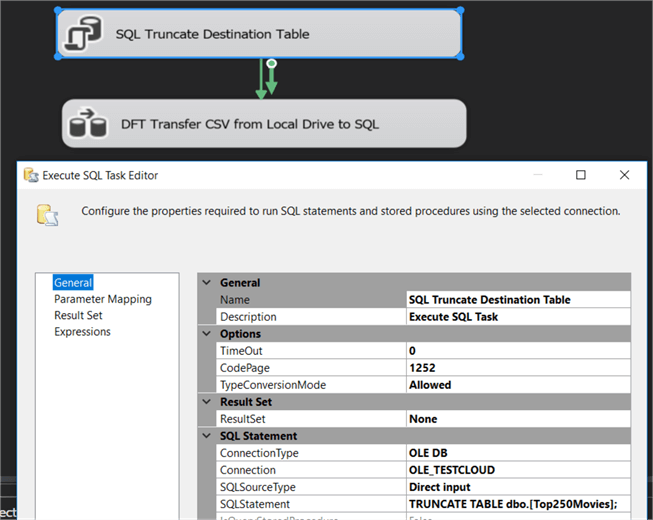
After the Execute SQL Task, we have a data flow. Inside, there’s a flat file source and an OLE DB Destination. The flat file source is configured with a flat file connection manager pointing to the file on our local file share:

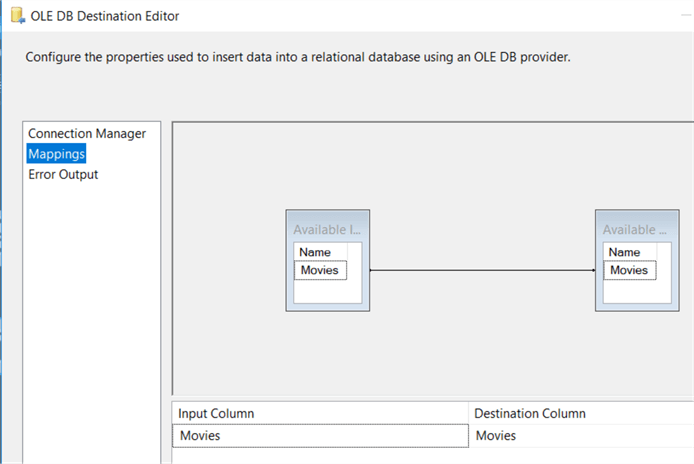
The destination simply maps the one column of the flat file to the column in the table:
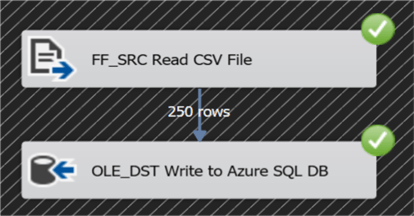
When we run the package, the data is read from the local file share and transferred over the network to the destination table inside the Azure SQL DB.
Replacing Local File Share with Azure File Services
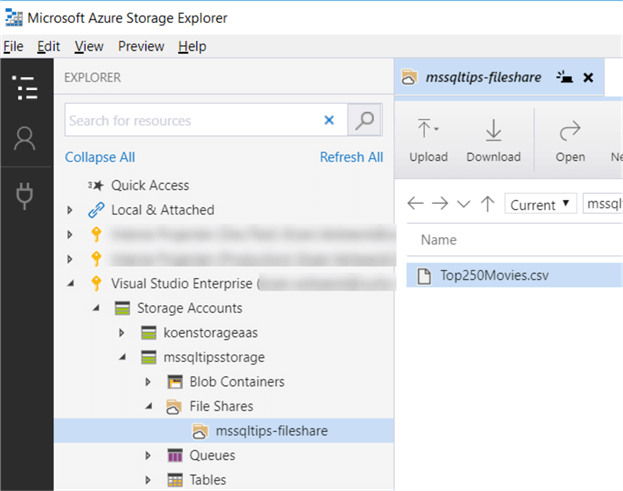
In part 1, we created an Azure Storage account and a file share which we called mssqltips-fileshare. Inside this share, we now store the CSV file:
The only change we need to make to our SSIS package is the connection string of the flat file connection manager! It’s that easy. Be aware though, that credentials to access the file share need to be set up on your machine. More information on that in part 1. The connection string takes on the following format:
In our sample, this becomes:
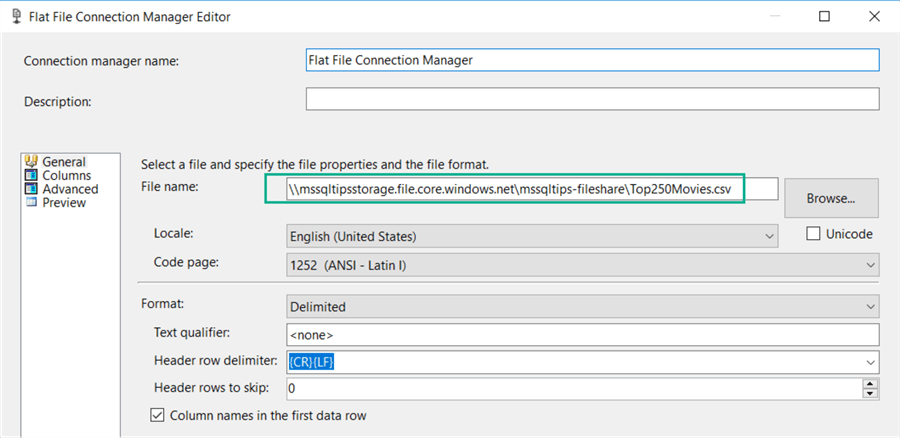
Moving to Azure File Services should be pretty painless if you have expressions in place for your connection managers. In that case, you just need to change the project/package parameter or an environment variable in one single location to update multiple connection managers. You can find more information on this subject in the tip: Setup Environment Variables in SQL Server Integration Services.
Getting your Files in Azure File Services
Reading files stored in Azure File Services is one thing, but getting them there is another. There are a couple of options for writing data to Azure File Services:
- Simply use the Flat File Destination in an SSIS package. The configuration is the same as shown in this tip.
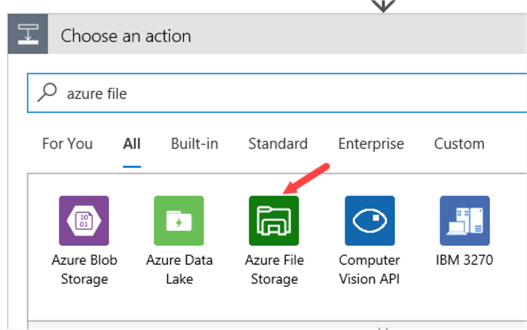
- You can use Azure Logic Apps to copy files to the file share. This follows the same pattern described in the tip Transfer Files from SharePoint To Blob Storage with Azure Logic Apps. In Logic Apps, there’s an Azure File Storage connector:
-
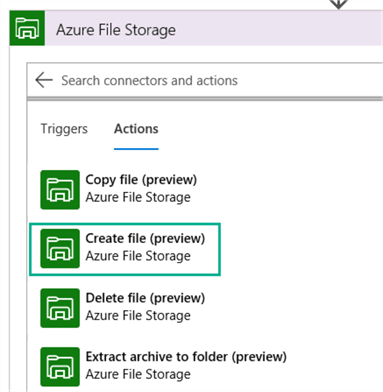
There are a couple of actions you can choose from. Currently they’re all in preview. You can for example choose the Create file action.
- Finally, you can choose the folder where you want to store your file:

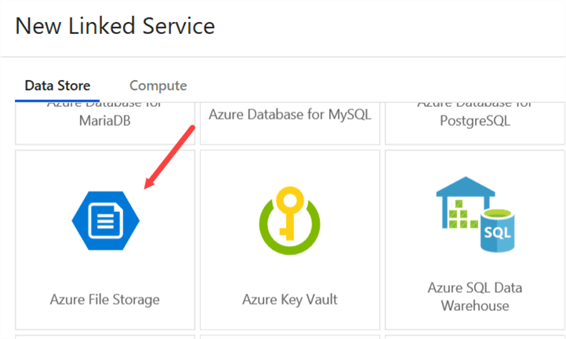
- You can use Azure Data Factory to store data inside Azure File Services using the Copy Data activity. You can find an example of this activity in the tip Create Azure Data Factory Pipeline. There’s a connector available out-of-the-box:
-
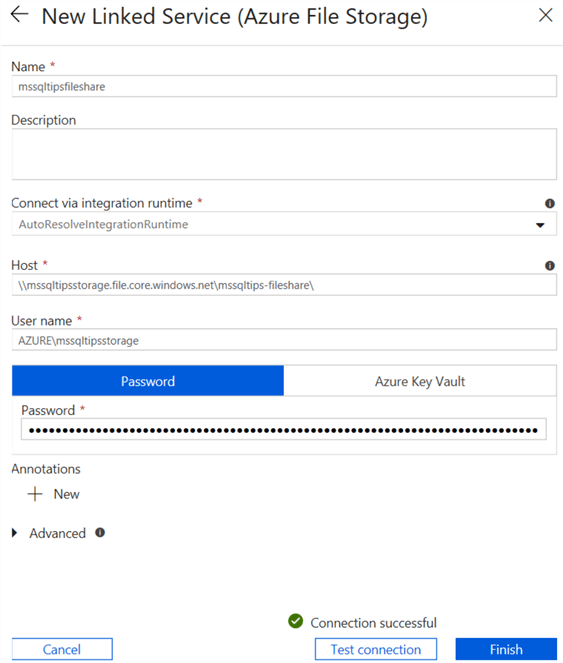
To create the connection, you need to specify the URL to the file share – the same connection string used in the SSIS package, but you also need to specify a username and password. These are the same credentials used on your machine to connect to the file share and in the SSISDB. You can find an example of setting up a Linked Service in ADF in the tip Create Azure Data Lake Linked Service Using Azure Data Factory.
Next Steps
- You can download the sample CSV file here.
- More tips about the Azure-SSIS IR:
- Configure an Azure SQL Server Integration Services Integration Runtime
- Executing Integration Services Packages in the Azure-SSIS Integration Runtime
- Parallel package execution in Azure-SSIS Runtime
- Automate the Azure-SSIS Integration Runtime Start-up and Shutdown - Part 1
- Azure-SSIS Integration Runtime Start-up and Shutdown with Webhooks - Part 2
- More tips about Azure Data Factory:
- You can find more Azure tips in this overview.
About the author
 Koen Verbeeck is a seasoned business intelligence consultant at AE. He has over a decade of experience with the Microsoft Data Platform in numerous industries. He holds several certifications and is a prolific writer contributing content about SSIS, ADF, SSAS, SSRS, MDS, Power BI, Snowflake and Azure services. He has spoken at PASS, SQLBits, dataMinds Connect and delivers webinars on MSSQLTips.com. Koen has been awarded the Microsoft MVP data platform award for many years.
This author pledges the content of this article is based on professional experience and not AI generated.
View all my tips
Article Last Updated: 2019-07-02


