By: Joe Gavin | Updated: 2019-06-26 | Comments (2) | Related: More > Database Administration
Problem
You're truing-up your SQL Server licenses and need a list containing CPU core information plus version, edition, etc. for each of your SQL Servers. Ideally you would like it ordered by server name in a nice neat .csv file. How can this be accomplished?
Solution
The following PowerShell script will create a .csv file with version, edition and CPU information based on a list of SQL Server names in a text file.
It was tested on PowerShell version 5 against SQL Server versions 2008R2, 2012, 2014, 2016, 2017 and 2019 / US English.
<#
script name: GetServerInfoAndCpuCount.ps1

Writes SQL Server name, version, edition, Service Pack level, CU level, version number, number of sockets, number of
cores per socket and number of cores from a list of SQL Servers specified in a file to a .csv file.
#>

$workdir = 'C:\scripts\GetServerInfoAndCpuCount' # change if you're using a directory other than C:\scripts\GetCpuCount
$outfile = 'ServerInfoAndCpuCount.csv'           # output file name
$servers = '.\servers.txt'                       # list of your SQL Servers

$EmailOn = 'n'                                   # y to email logs (case insensitive)

# $Email variables must be populated if $EmailOn = 'y'
$PSEmailServer = 'smtp.mymailserver.com'  # mail server
$EmailFrom = 'mailfrom@ mymailserver.com' # mail from - must be populated with properly formatted ([email protected]) but doesn't have to be real
$EmailTo = 'mailfrom@ mymailserver.com '  # mail to
$EmailSubject = 'ServerInfoAndCpuCount'   # mail subject

Set-Location $workdir
$sqlservers = Get-Content $servers | Sort-Object # read in and sort to order output

# sql query
$sql = "
DECLARE @ProductVersion NVARCHAR(30)

SET @ProductVersion = CONVERT(NVARCHAR(20),SERVERPROPERTY('ProductVersion'))

SELECT @ProductVersion =
      CASE SUBSTRING(@ProductVersion,1,4)
         WHEN '15.0' THEN 'SQL Server 2019'
         WHEN '14.0' THEN 'SQL Server 2017'
         WHEN '13.0' THEN 'SQL Server 2016'
         WHEN '12.0' THEN 'SQL Server 2014'
         WHEN '11.0' THEN 'SQL Server 2012'
         WHEN '10.5' THEN 'SQL Server 2008 R2'
         WHEN '10.0' THEN 'SQL Server 2008'
      END

SELECT @@SERVERNAME AS SQLServerName,
       @ProductVersion AS ProductVersion,
       SERVERPROPERTY('Edition') AS Edition,
       SERVERPROPERTY('ProductLevel') AS ProductLevel,
       SERVERPROPERTY('ProductUpdateLevel') AS ProductUpdateLevel,
       SERVERPROPERTY('ProductVersion') AS Version,
       cpu_count/hyperthread_ratio AS [Sockets],
       hyperthread_ratio AS [CoresPerSocket],
       cpu_count AS [Cores]
FROM sys.dm_os_sys_info
GO
"

# delete old output file if it exists
If (Test-Path $outfile){Remove-Item $outfile}

# gather info from each server in file and export to .csv
Foreach ($ss in $sqlservers)
{
   Invoke-Sqlcmd -ServerInstance $ss -Query $sql | Export-Csv $outfile -NoTypeInformation -Append
}

# email $outfile
If ($EmailOn -eq 'y')
{
   Send-MailMessage -From "$EmailFrom" -To "$EmailTo" -Subject "$EmailSubject" -Attachments "$outfile"
}
For our example I've created a directory called GetServerInfoAndCpuCount under C:\scripts. This matches the script variables above.
Create C:\scripts\GetServerInfoAndCpuCount.ps1 from the above PowerShell code.
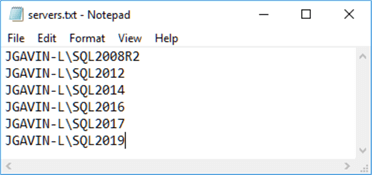
Next, create a file under C:\scripts\GetServerInfoAndCpuCount\ called servers.txt and enter each SQL Server name on its own line.
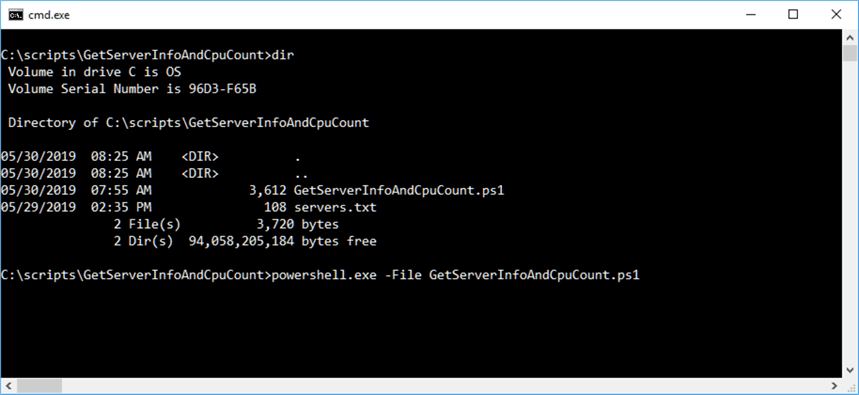
That's it. Run the script.
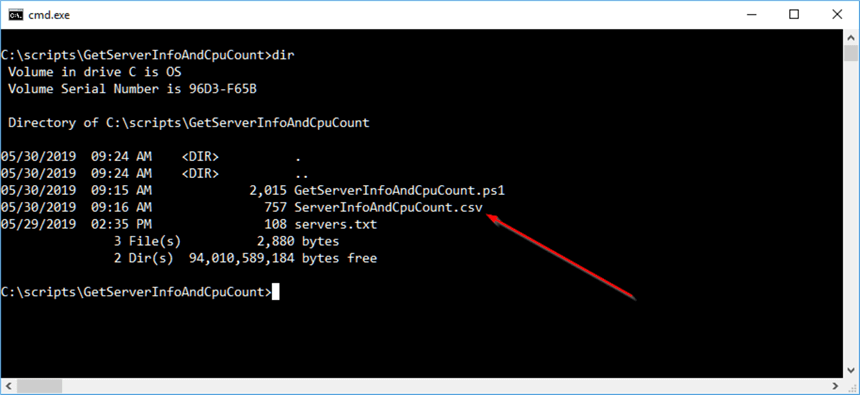
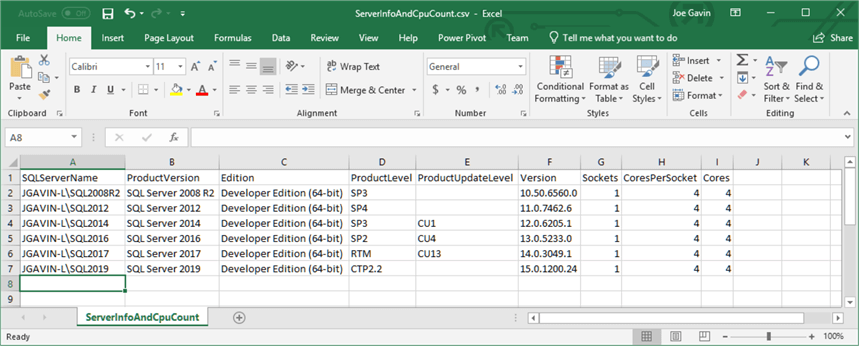
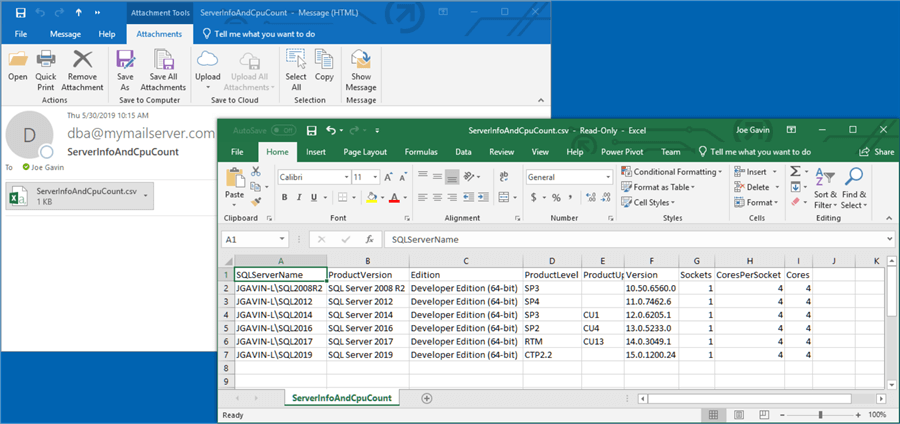
Open the output file ServerInfoAndCpuCount.csv. It shows us SQL Server names in alphabetical order, SQL Server version, Edition, Service Pack level, CU (if applied), number of CPU sockets, number of CPU Cores per socket, and number of CPU cores.
Automate Data Collection
This is fine for an ad-hoc query, but what if we need to need to automatically receive the .csv via email on a regular basis? That's easy. We can take it a step further and run it from a SQL Agent Job that will email the .csv as an attachment.
First, change $EmailOn variable from 'n' to 'y'. This will tell the Send-MailMessage line at the end of the script to run. Then we populate:
- $PSEmailServer with the name of your SMTP server
- $EmailFrom with a properly formatted email address in the form [email protected] (doesn't have to be a valid email, just properly formatted or SMTP will reject it)
- $EmailTo with the email group you want to send the report to
- $EmailSubject with the subject you want receivers to see - omitting any the variables when $EmailOn = 'y' will cause the Send-MailMessage cmdlet to fail. Send-MailMessage switches do not accept NULLs if they are specified
$EmailOn = 'y'                            # y to email logs (case insensitive)
# $Email variables must be populated if $EmailOn = 'y'
$PSEmailServer = 'smtp.mymailserver.com'  # mail server
$EmailFrom = 'mailfrom@ mymailserver.com' # mail from - must be populated with properly formatted ([email protected]) but doesn't have to be real
$EmailTo = 'mailfrom@ mymailserver.com '  # mail to
$EmailSubject = 'ServerInfoAndCpuCount'   # mail subject
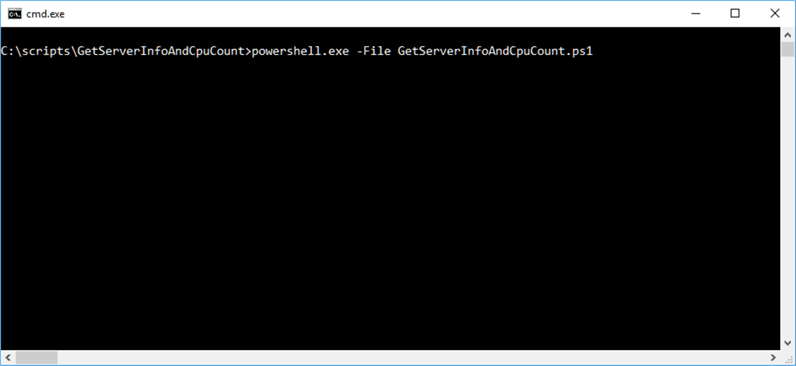
It's a good idea to manually execute the script to validate email settings to be sure we're adding a SQL Server Agent Job that will work as we want it to. Same as before, we'll run powershell.exe -File GetInfoAndCpuCount.ps1 from the from a command prompt in the C:\scripts\GetServerInfoAndCpuCount directory.
And here it is. The .csv has been emailed to us as an attachment.
Now we're ready to automate it in a SQL Server Agent Job.
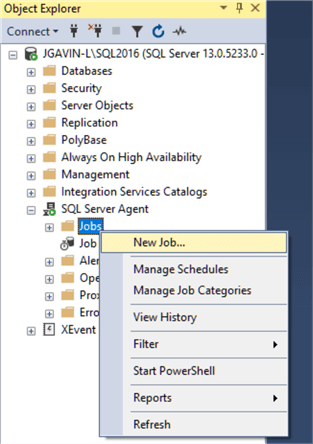
First, from SQL Server Management Studio, expand SQL Server Agent, right click on Jobs, and select New Job…
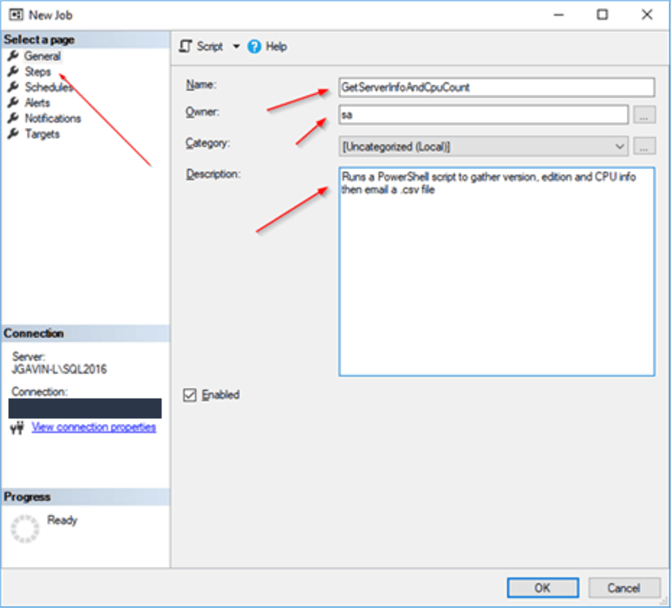
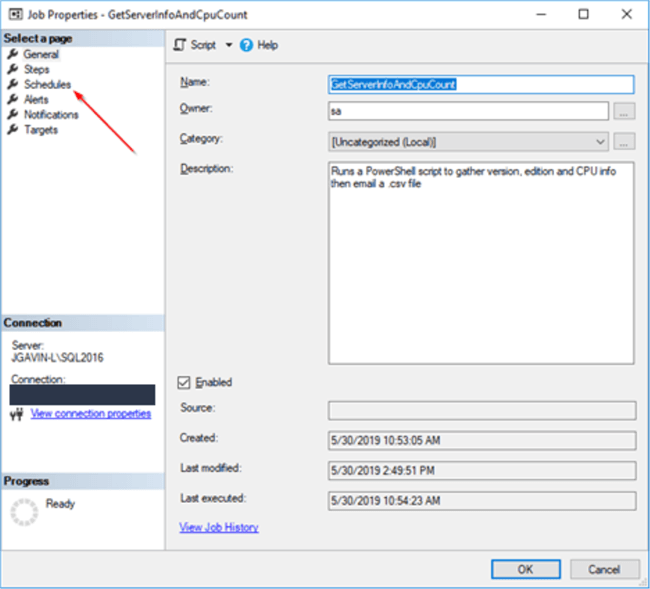
Name the Job, change owner to sa, and of course add a description so we'll remember what this job is for.
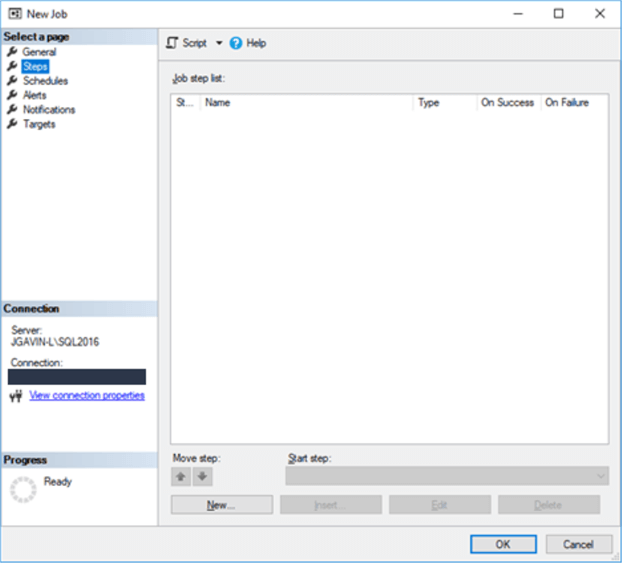
Click on the Steps page.
Click New...
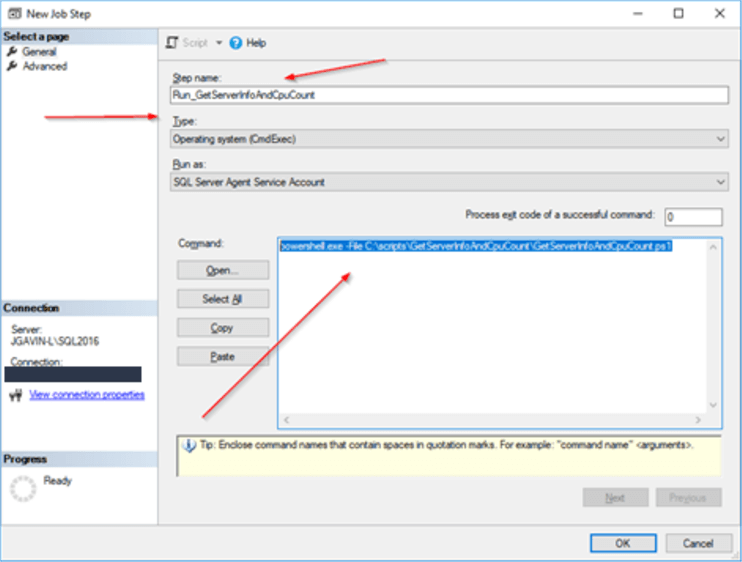
Enter Step_name, choose Operating system (CmdExec) in the Command dropdown and enter powershell.exe -File C:\scripts\GetServerInfoAndCpucount.ps1
Note: The reason we choose Operating system (CmdExec) instead of PowerShell is because we want to control the version of PowerShell we're using and presumably tested our script with. If we chose PowerShell from the dropdown it would use the version of PowerShell tied to the version of the SQL Server we're running the Job on.
Click OK.
Click on the Schedules page.
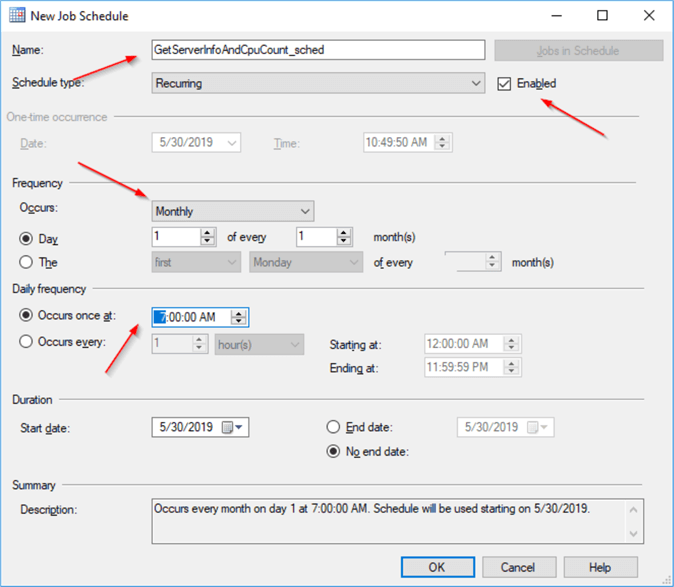
Enter Job Schedule Name, be sure Enabled is checked, choose how often you want Job to run in Frequency dropdown, then choose Time you want Job to run.
Click OK.
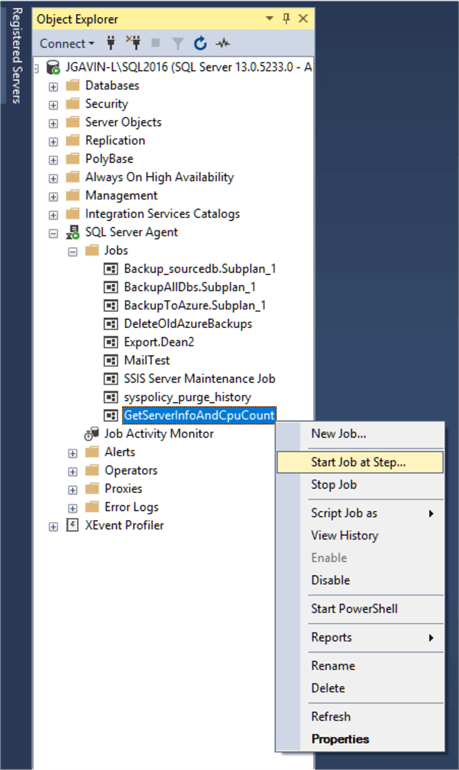
It's time to test it. Right click on the newly created job, choose Start Job at Step… (there is only one step so it will automatically run)
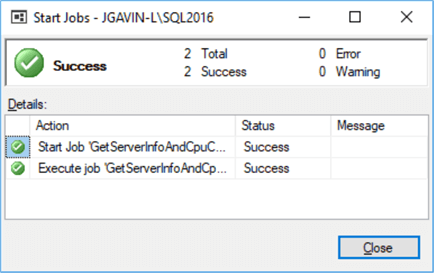
If both Actions return Success you should expect the email with the attachment.
Next Steps
- We've seen how to automate the execution of gathering CPU info in a .csv and emailing it as an attachment using PowerShell, T-SQL and SQL Server Agent.
- Following are some links with more information on PowerShell, SQL Agent
and collecting CPU information:
- PowerShell
- SQL Server Agent
- Collecting CPU information:
About the author
 Joe Gavin is from the Greater Boston area. He started working with SQL Server and Sybase in 1998 in the financial services industry and has been a SQL Server Database Administrator for a dairy cooperative since 2011. He graduated from Northeastern University in Boston with a Bachelor of Science in Engineering Technology (BSET) degree in Computer Technology. Joe has spoken at the Boston and Providence SQL Saturday events.
 This author pledges the content of this article is based on professional experience and not AI generated.
View all my tips
Article Last Updated: 2019-06-26


