By: Mohammed Moinudheen | Updated: 2019-10-03 | Comments | Related: > Azure
Problem
I have a number of Azure SQL Server resources to manage. My manager has asked me if it is possible to categorize the Azure resources based on the various departments within the company and also to consolidate the resource billing information by department within the organization. Is there any easy way this can be accomplished in Azure?
Solution
This tip assumes that you already have resources in your Azure environment. If you are new to Azure, you can subscribe to a trial account here which will give you access to Azure services for an year and a credit of USD $200. In this tip, we will learn about the concept of tags which is extremely useful to view detailed information and is handy when you have to deal with a huge number of resources in your subscription.
What are Azure tags?
Tags are basically applying metadata for your Azure resources which will help you to better organize your resources based on the metadata description. In Azure, tags are name\value pairs that you provide. For example, if you are creating an Azure SQL database, you can have a tag something like "Environment": "Pre-Prod". Azure resources can have multiple tags in order to classify the resources further.
Why create tags when we already have resource groups in Azure?
With resource groups in Azure, we can view the list of all the resources in that particular resource group quite easily. However, if we need to categorize the resources further based on a specific department within your organization, say for example, "Finance" or "HR", it would be quite hard to figure out what resources are for which department. The easier way of creating tags on Azure is by using policy management. This way you can automatically enforce a policy for creating tags on all your Azure resources at the time of deployment. By using Azure policies, you can ensure the tags to be of specific values and which meet your IT standards. However, in this tip, we will see a demo of creating tags and its benefits by using the Azure portal.
Creating tags using the Azure portal
In this screenshot, you can view the home page of the Azure portal.
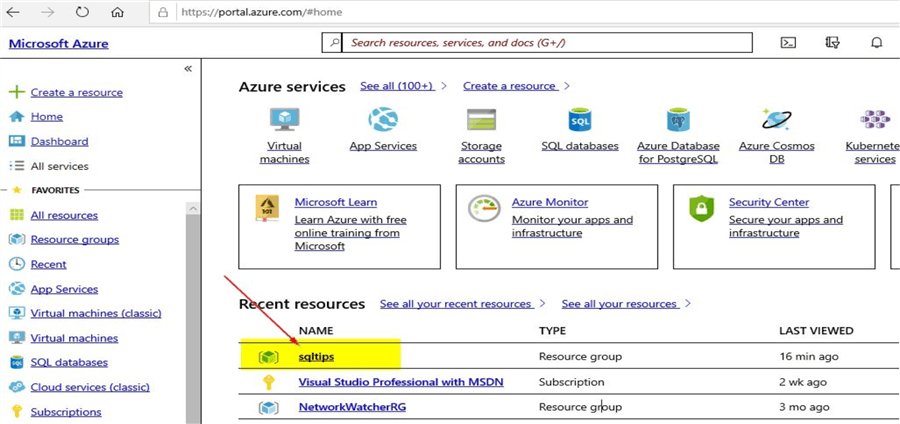
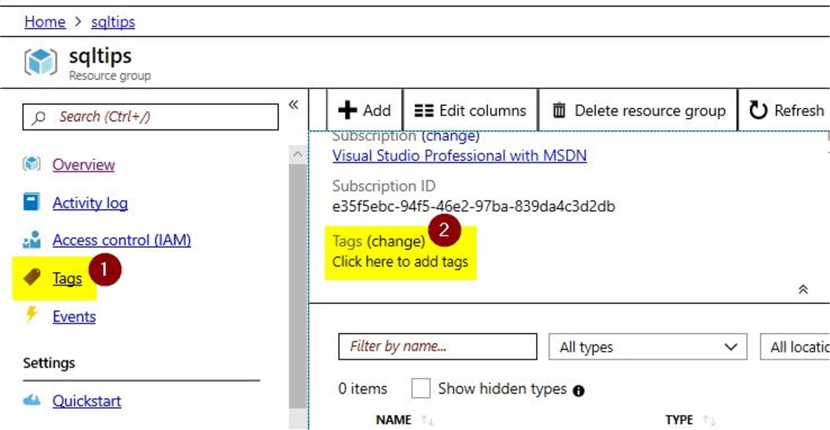
Click on the "sqltips" resource group to view details of the resource group. Once done, you will see this screen where you can click on the option to add "Tags". You can click on any one of the highlighted options.
Once done, you will see this screen where you can enter details for the tag name\pairs.
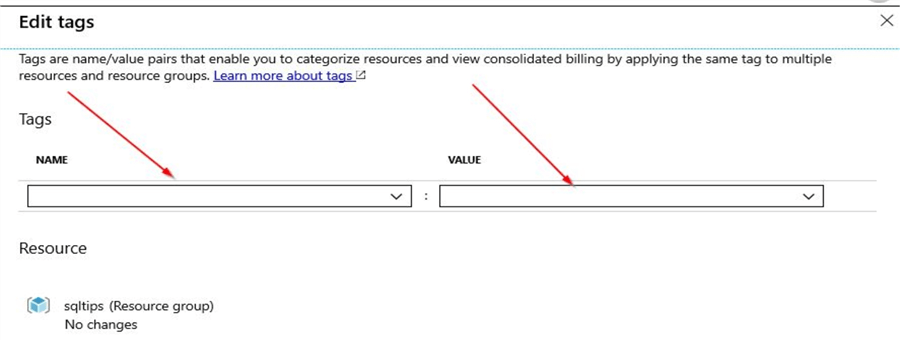
You can provide suitable tag name\value pairs. Here are a few examples. Once done, click on the save option.

Once done, you will see that the tags get associated to your resources as shown. Click on the ‘overview’ option to view the tag details.
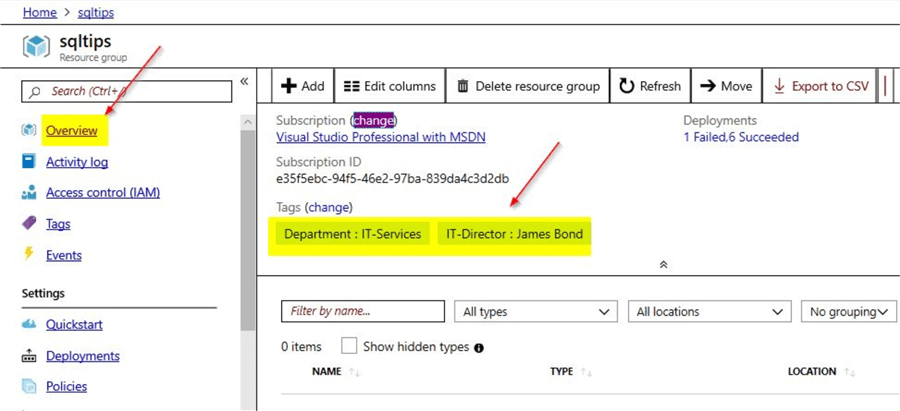
Similarly, do this for the other Azure resources.
View organized information on the Azure resources using Tags
Now, that you have assigned tags to a number of your resources, let's see the value that tagging adds to your resources. You can go to the option to search by tags on the Azure portal. On the main Azure portal, you can search for the option "Tags" on the search option as shown.
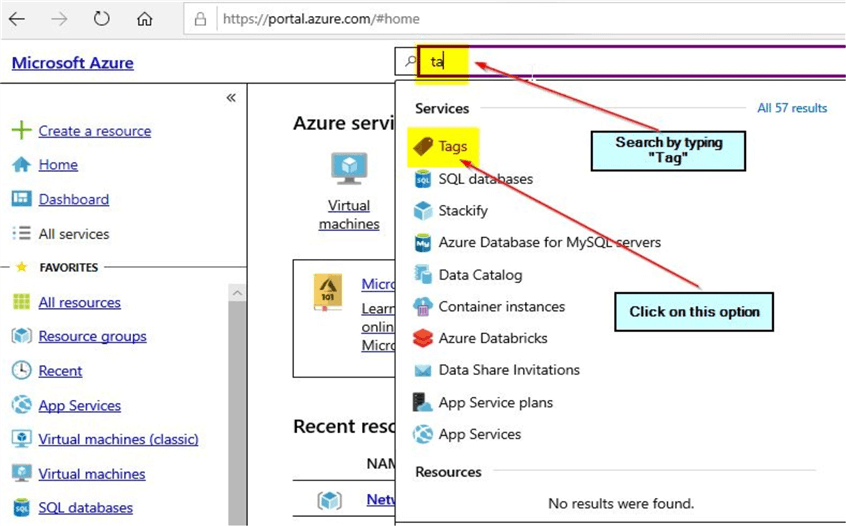
Click on the option "Tags" to view details of the tags that are available. Here is a screenshot:
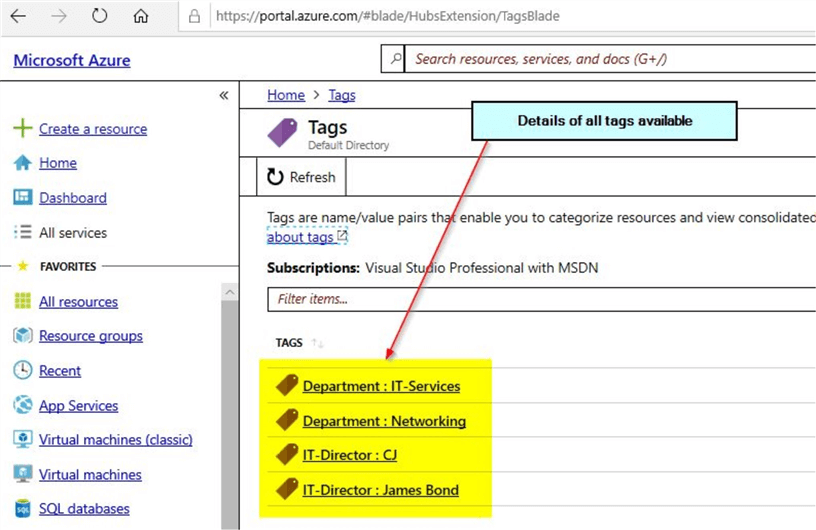
Next, you can click on any of the tags to view more information of the resources that belong to that particular tag. As an example, below is a screenshot on clicking the tag- "Department: IT-Services".
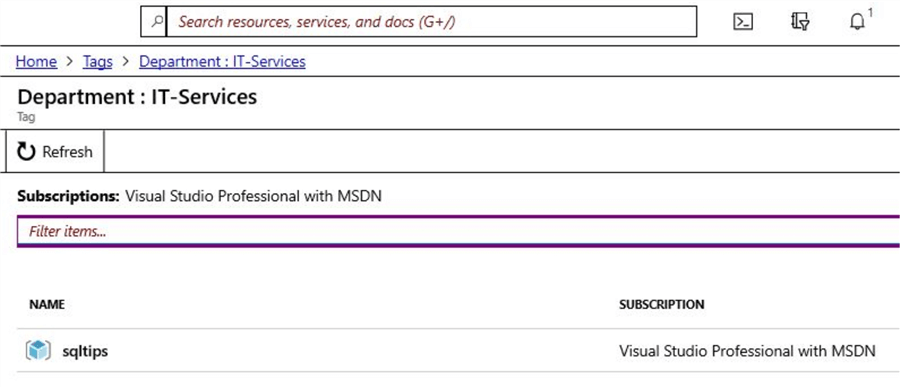
This way, it is easy for you to view information of the resources that belong to a particular department. In the next section, we will see how we can use tags to collect billing information and organize the billing information based on the tags used.
View billing information based on Azure tags used
In this section, we will see how easy it is to consolidate billing information based on the assigned tags for the resources. In the Azure portal home page, click on the option – "Cost Management + Billing".
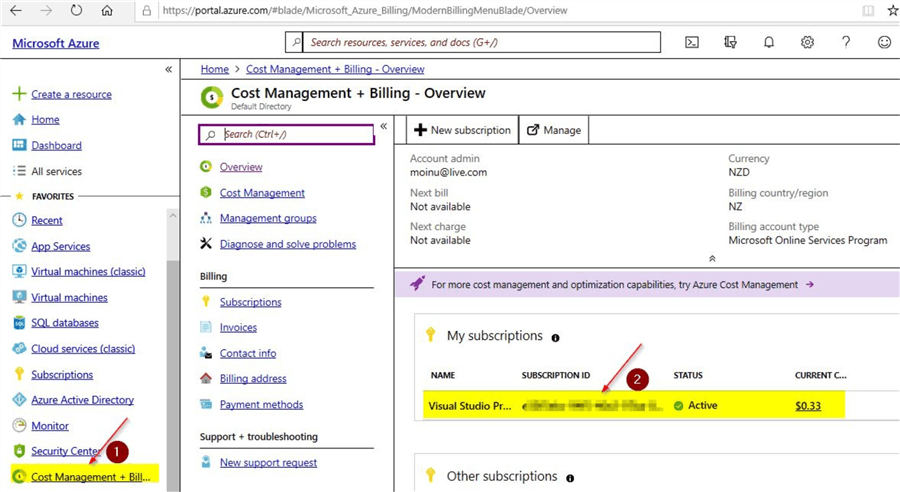
Once done, click on the subscription ID as shown. You can already see the current cost for the subscription which is $0.33. When you click on the subscription ID, you will see this screen.
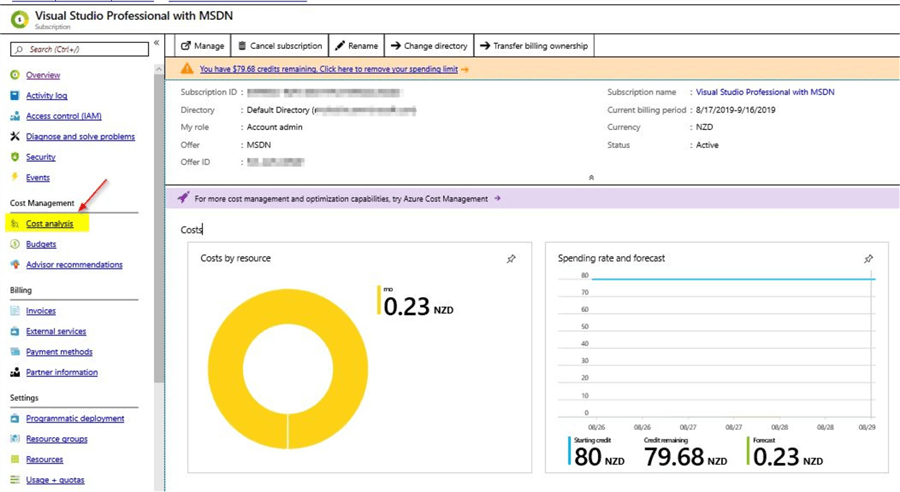
Under the billing information, you can view details of the costs associated with the resource along with the forecast and remaining credit. The information appears to be quite generic with no details of the resources, etc. For more details on the billing information, you can click on the option – "Cost Analysis". Here, you can view more details like the resources used and resource locations.
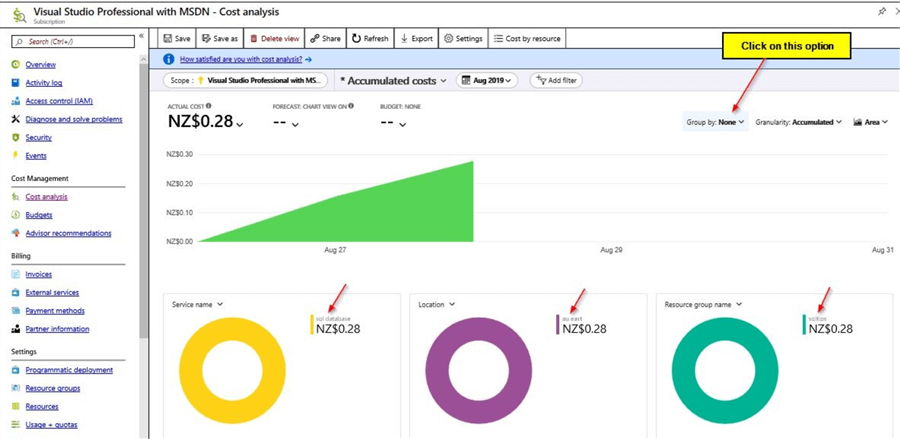
On the right-hand top corner, you have the "Group by" option. Click on the "Group by" option. You will see these options that are available.
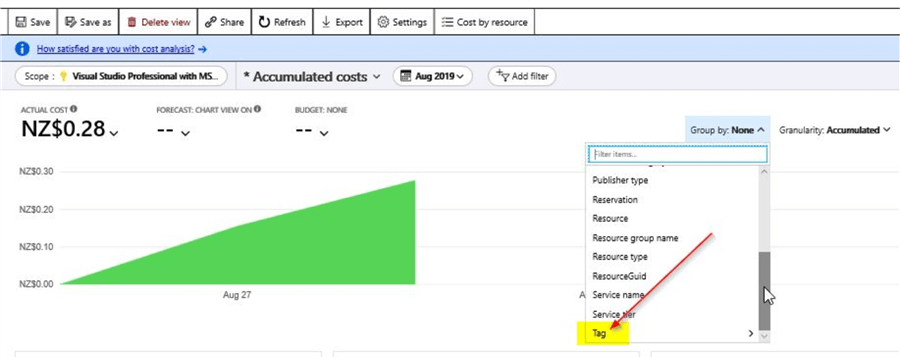
Under the group by menu, you will see several options that are available to view the billing information. One of them is the "Tag" option. When you click on the tag option, you will get the option to select the tags that are available.

As you know, we have created a few tags in this demo and you can view them as the options to select. Click on the tag you are interested in, in this case, I clicked on the "department" tag.

Here, you view the cost associated with the resources in the "department" tag. Also, there are several options to view the details of the billing information. In this case, I selected the "Column (stacked)" which provides the billing information in column details as shown. This way, you can get useful billing information based on the tags assigned to your resources and this would be extremely useful if you have to manage a huge number of Azure resources.
Next Steps
- In this tip, you learned about tags that can be used for your Azure resources
- Tags are basically name\value pairs which help you to categorize Azure resources
- Tags can be created in a few easy steps
- In this tip, you saw a demo on creating tags for a few SQL resources in Azure
- In the demo, you saw how easily billing information can be consolidated based on the assigned tags
- Try out this demo on your own Azure environment
- Refer to these other useful articles available on MSSQLTips related to Azure
About the author
 Mohammed Moinudheen is a SQL Server DBA with over 6 years experience managing production databases for a few Fortune 500 companies.
This author pledges the content of this article is based on professional experience and not AI generated.
View all my tips
Article Last Updated: 2019-10-03


