By: Joe Gavin | Updated: 2019-10-22 | Comments | Related: More > Database Administration
Problem
You're new to SQL Server and need to create a database. It sounds like a simple enough task, but how do we do it?
Solution
Let's step through the database creation process using SQL Server Management Studio (SSMS).
Note: If you're creating a database for the very first time and you have the rights to do it, it's assumed you're doing it on a test or development server and not on a production server.
Versions used here are:
- SQL Server 2017 Cumulative Update (CU) 16 Developer Edition installed on my laptop
- SQL Server Management Studio version 18.2 (latest as of this writing)
First, a little background on SSMS. It's the primary tool used to manage SQL Server. It comes with a vast amount of functionality built in to manage servers and develop SQL scripts. It started life as SQL Server Enterprise Manager and grew into SSMS as of version 2005. And prior to SQL Server 2016, SSMS was packaged with the SQL Server install media and it required the media to install it. As of SQL Server 2016 it's now a separate download. And even better, it's free. You can find the documentation and download link to the latest version here. SSMS has a short development cycle and new versions come out about every couple of months or so and the latest version will support all supported versions (and probably unsupported ones as well but we don't have any of those in our environment of course) of SQL Server. To install it, just click on the download link to get the installer. Execute SSMS-Setup-ENU.exe as an administrator and follow the prompts. It takes a little while to complete but when it's done, you'll have the latest SSMS on your machine.
Now that we know what the tool is and where it came from, we can get to work.
Creating a SQL Server Database with SSMS
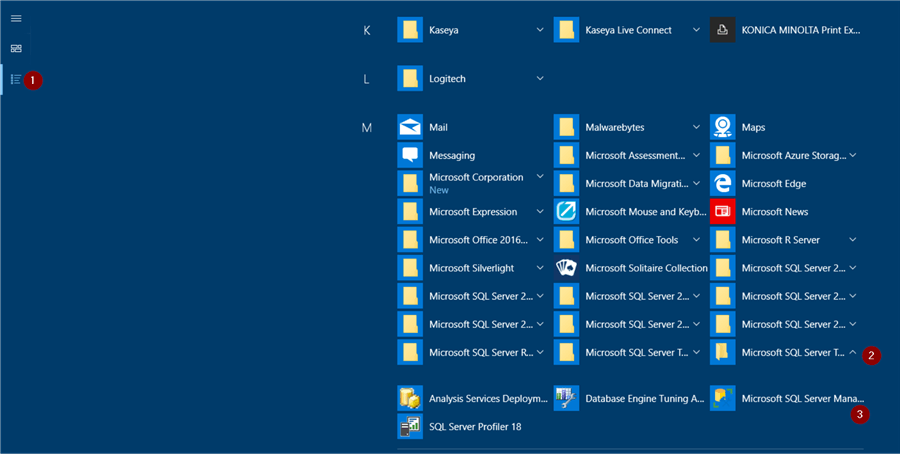
To open SSMS:
- All Apps
- Microsoft SQL Servers Tools
- Microsoft SQL Server Management Studio
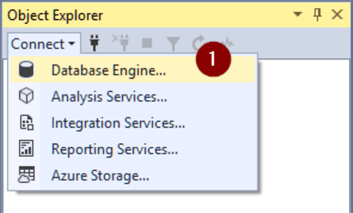
- Click Connect in the Object Explorer and choose Database Engine…
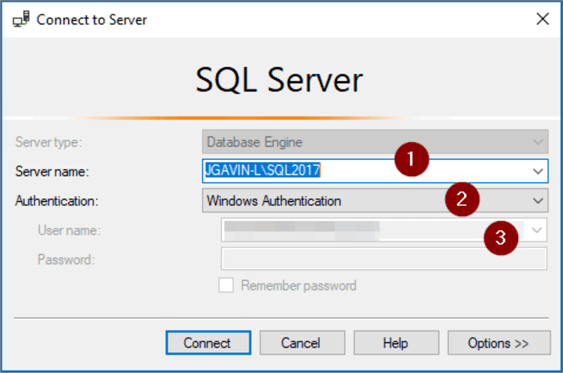
- Enter SQL Server name you're creating database on
- Choose authentication method
- Enter credentials (if you choose Windows Authentication this will automatically be populated with your Windows credentials) that has rights to create databases
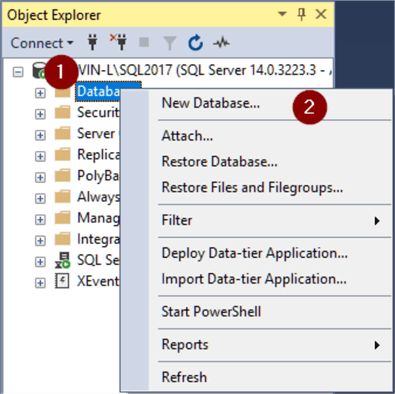
- Right click on Databases
- New Database…
- Enter database name (this will populate the Logical Name fields)
- Leave owner as <default> and you will be the owner or enter another login if needed
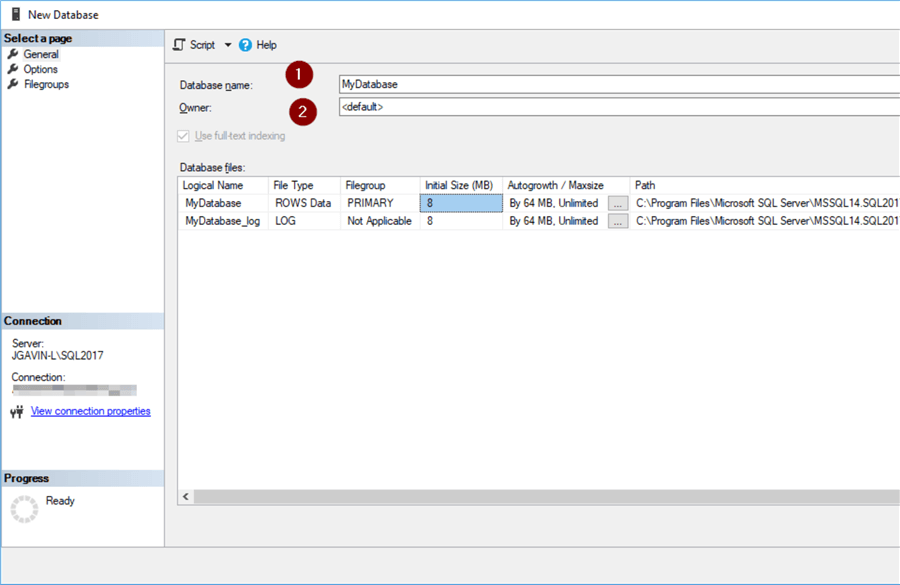
You could just click OK and the database will be created with the defaults. However, we probably want to go a bit further before doing the create as the default settings aren't necessarily the best settings, so let's continue.
Additional New SQL Server Database Configuration Options
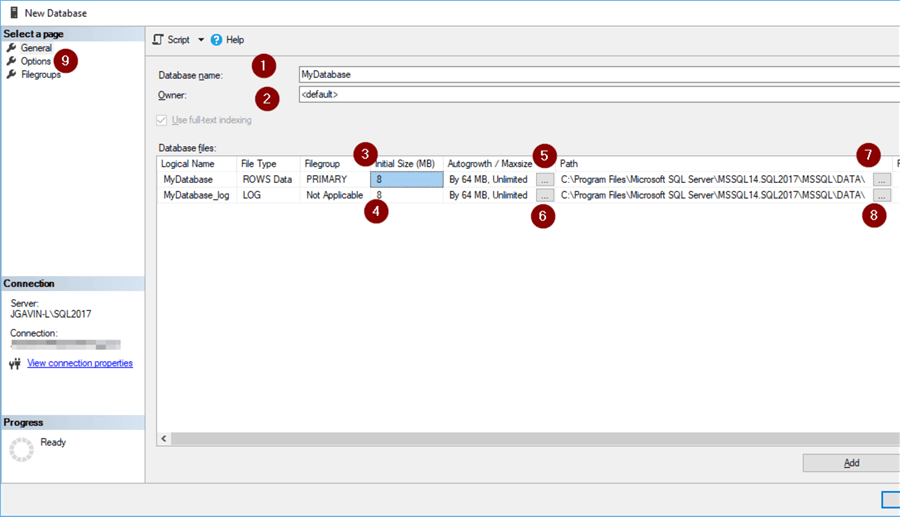
- Database Name
- Owner
- Set data file size to determine the initial file size of the data file – You could just leave it at the default, but it's best it's best to size it according to what you think it needs initially so it won't automatically grow right away.
- Set transaction log file size to determine the initial file size of the transaction log file – Same as with the data file, it's best it's best to size it according to what you think it needs initially so it won't automatically grow right away.
- Click this ellipse to set how much the data file will automatically grow by in the Change Autogrowth box that opens – SQL Server 2017 defaults to 64 MB. This is better than earlier versions, some of which defaulted to automatically grown by 1 MB at a time which meant there was a performance hit as the transaction stops while the file grows every time the file needed to grow by 1 MB which would be frequently.
- Click this ellipse to set how much the log file will automatically grow by in the Change Autogrowth box that opens – Same as data file growth.
- Make any changes to path for data file – I'm creating this database on my laptop, so everything is on the C:\ drive. You never want to see this this on a server. Typically, you create data files on one drive, say E:\ and logs on another, maybe F:\. C:\ is for the operating system.
- Make any changes to path for log file – As stated in the previous step I'm creating this database on my laptop, so everything is on the C:\ drive, but it bears repeating.
- Options for additional options see the next image below:
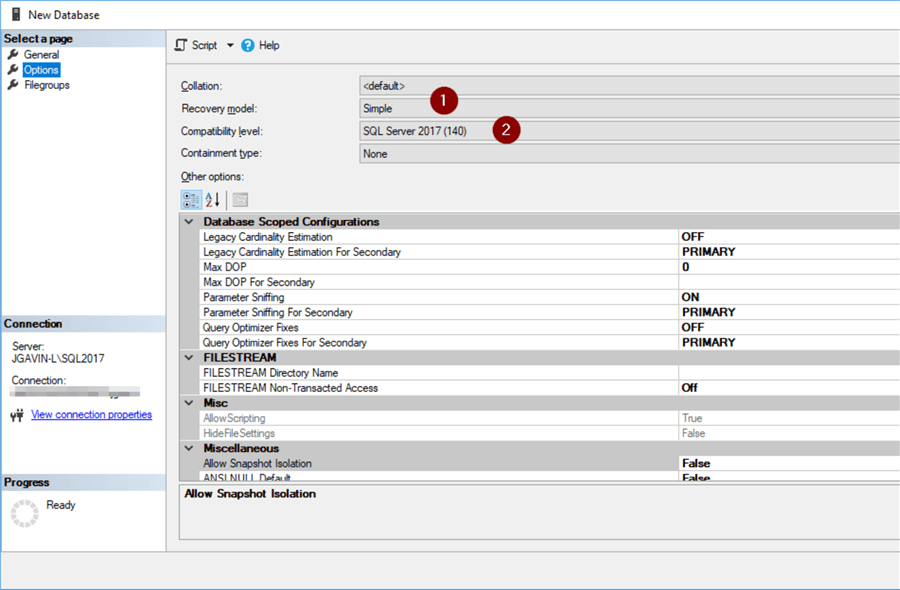
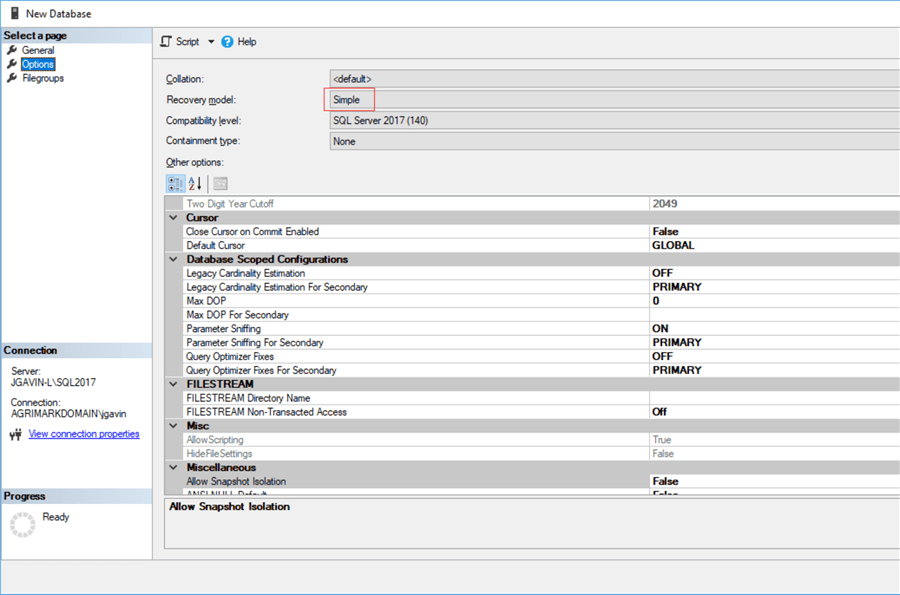
The Options settings will typically remain at the defaults.
- But the Recovery model could be changed here in the event transaction log backups are not taken to prevent the log file from growing out of control i.e. the database will be strictly used for testing. Otherwise transaction log backups will be needed.
- Change Compatibility Level to a lower version of SQL Server
Summary of New SQL Server Database Settings
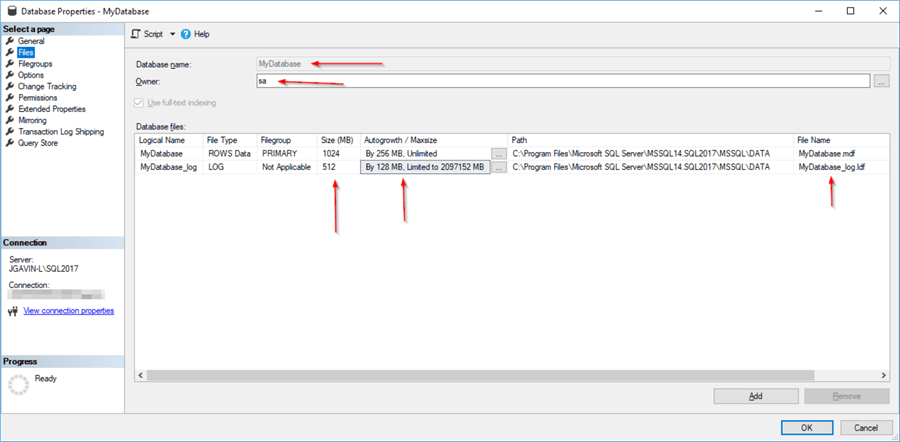
I've named my database MyDatabase, chosen sa as the owner, set initial data file size to 1024MB (1 GB), initial transaction log file size to 512 MB (0.5 GB), data file to automatically grow by 256 MB (0.25 GB) and log file to grow by 128 MB (0.125 GB).
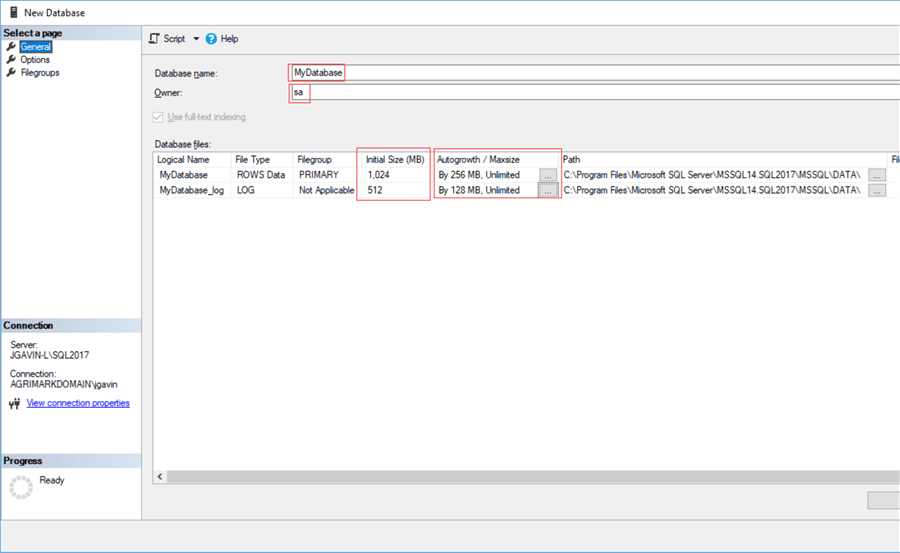
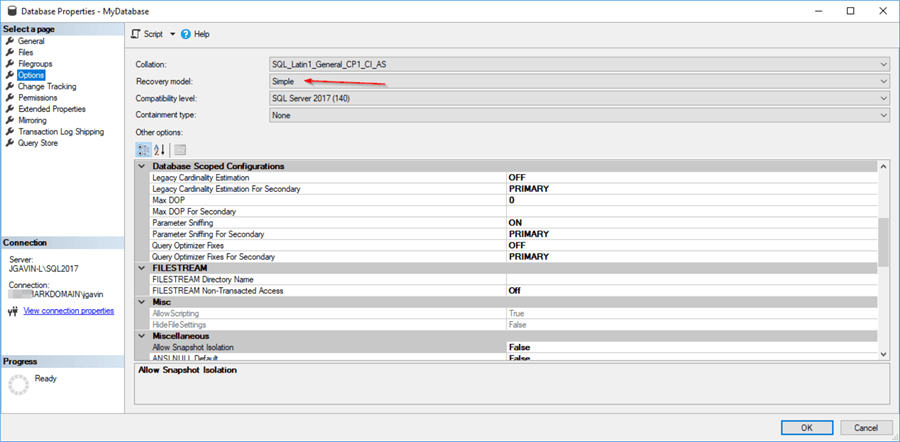
And on the Options page, I've set the Recovery model to Simple as I'm only going to be using this database for some basic testing and won't be backing up the transaction because there is no point in time recovery needed.
Time to hit OK to create the database.
Check New SQL Server Database in Object Explorer in SSMS
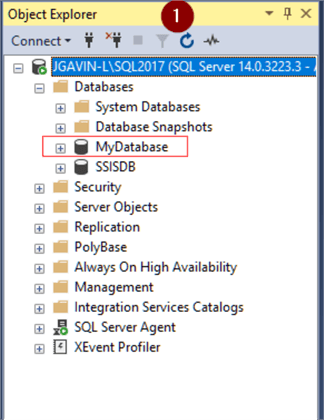
If we look under Databases in SSMS we can see the new database we created called MyDatabase.
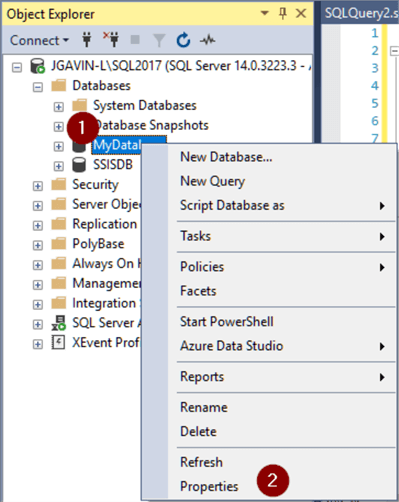
- Right click on our new database
- Choose Properties
The Files tab will show us the name, owner, file sizes and autogrow increments we chose. Also, we can see that it chose the physical file names based on the name we chose for the database.
And the Options page shows where we changed the Recovery model to Simple.
There are several other options for a database, but we'll leave that for another tip on another day.
Next Steps
Following are some links to more detailed information on SSMS, creating databases and recovery models:
- SQL Server Management Studio Tips - MSSQLTips
- SQL Server Recovery Models - MSSQLTips
- Create a Database – Microsoft Docs
About the author
 Joe Gavin is from the Greater Boston area. He started working with SQL Server and Sybase in 1998 in the financial services industry and has been a SQL Server Database Administrator for a dairy cooperative since 2011. He graduated from Northeastern University in Boston with a Bachelor of Science in Engineering Technology (BSET) degree in Computer Technology. Joe has spoken at the Boston and Providence SQL Saturday events.
 This author pledges the content of this article is based on professional experience and not AI generated.
View all my tips
Article Last Updated: 2019-10-22


