By: Koen Verbeeck | Updated: 2020-02-03 | Comments (25) | Related: > Azure Data Factory
Problem
In this two-part tip, we are created a metadata-driven pipeline which will copy multiple flat files from Azure blob storage to an Azure SQL Database. The flat files can have different delimiters and are stored in different folders and there are multiple destination tables as well.
Solution
In part 1 of this tip, we created the metadata table in SQL Server and we also created parameterized datasets in Azure Data Factory. In this part, we will combine both to create a metadata-driven pipeline using the ForEach activity.
If you want to follow along, make sure you have read part 1 for the first step.
Step 2 – The Pipeline
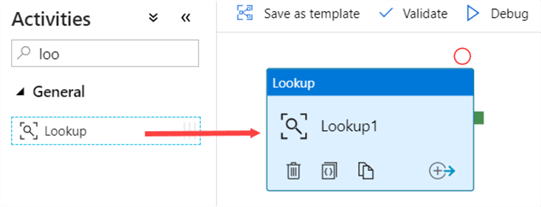
With the datasets ready, we can now start on the pipeline. The first action is retrieving the metadata. In a new pipeline, drag the Lookup activity to the canvas.
With the following query, we can retrieve the metadata from SQL Server:
SELECT
     b.[ObjectName]
    ,FolderName = b.[ObjectValue]
    ,SQLTable   = s.[ObjectValue]
    ,Delimiter  = d.[ObjectValue]
FROM [dbo].[Metadata_ADF] b
JOIN [dbo].[Metadata_ADF] s ON b.[ObjectName] = s.[ObjectName]
JOIN [dbo].[Metadata_ADF] d ON b.[ObjectName] = d.[ObjectName]
WHERE   b.[SourceType] = 'BlobContainer'
    AND s.[SourceType] = 'SQLTable'
    AND d.[SourceType] = 'Delimiter';
The advantage of datasets is you can use them dynamically with parameters, but you can also use it for any query connecting to the same database. This means we can use the dataset we created before as a placeholder for this metadata query (as long as the metadata and the destination tables are in the same database of course).
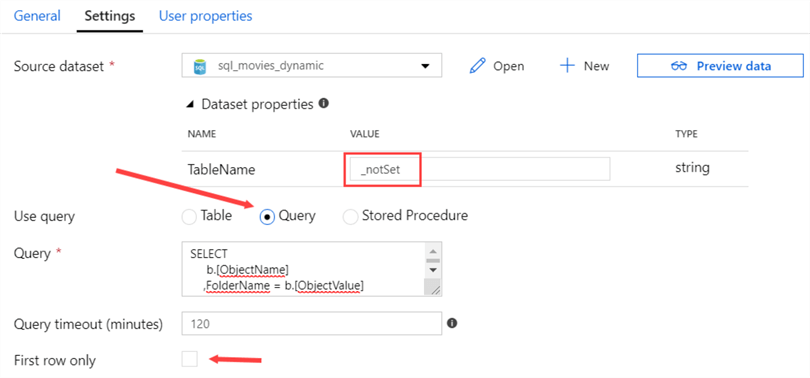
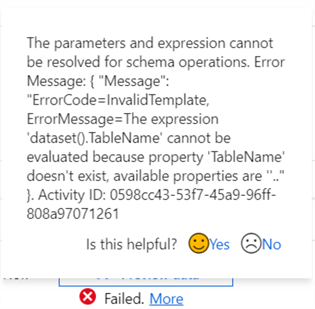
All we have to do is change the Use query property to Query and fill in the query below. Since the query is returning more than one row, don’t forget to deselect the First row only checkbox. We did define a parameter on the table name though, so we need to specify some value, otherwise an error is returned. This can be solved by specifying a dummy value, such as _notSet in this example.
We can preview the data:

If the dummy table name was not specified, the following error would have been returned by the preview:
Next, we add a ForEach iterator to the pipeline and connect it with the Lookup activity.

On the settings pane of the ForEach activity, click on Add dynamic content.
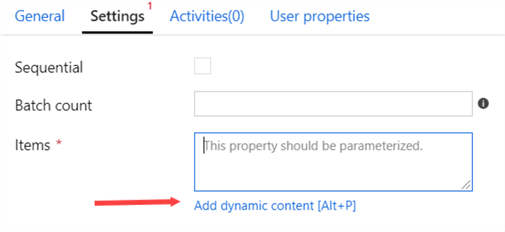
Here we’re going to select the output of the Lookup activity.
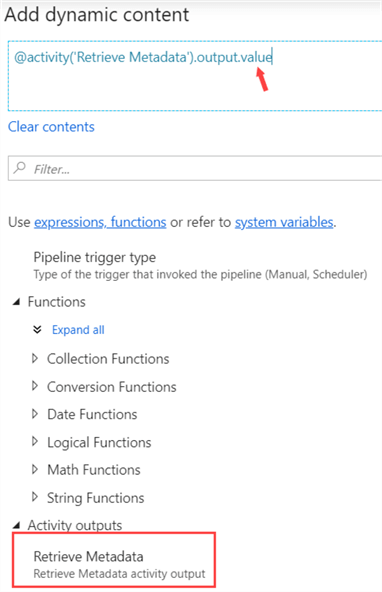
At the end of the expression, add .value so the full expression becomes:
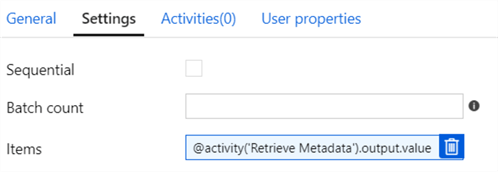
@activity('Retrieve Metadata').output.value
The settings tab should now look like this:
Go to the Activities tab and click on Add activity.
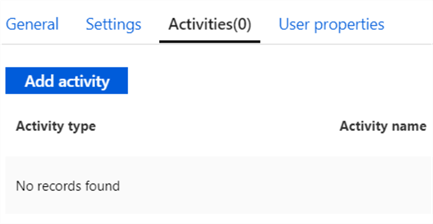
This will take you to a new pipeline canvas, where we add the Copy Data activity.

You can go back to the original pipeline by selecting the DynamicPipeline link at the top of the canvas. Go to the Source tab of the Copy Data activity and select the csv_movie_dynamic dataset. You have to specify the parameter values for the FolderName and the DelimiterSymbol parameters. This can be done using the following expression:
@{item().ObjectValue}
Here ObjectValue is a metadata column from the Lookup activity. You need to replace it with the actual column name you need. The tab for the source then becomes:
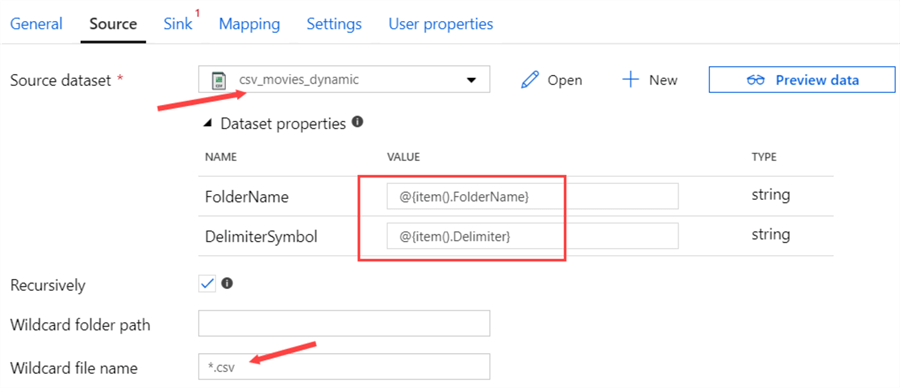
A wildcard for the file name was also specified, to make sure only csv files are processed. For the sink, we need to specify the sql_movies_dynamic dataset we created earlier.
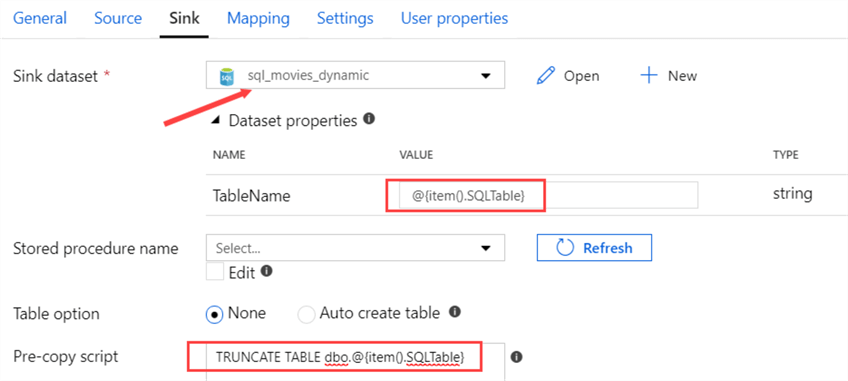
Here, we need to specify the parameter value for the table name, which is done with the following expression:
@{item().SQLTable}
It’s also possible to specify a SQL statement that will be executed at the start of the Copy Data activity, before any data is loaded. In the Pre-copy script field, we can specify an expression that will truncate the destination table with the following expression:
TRUNCATE TABLE dbo.@{item().SQLTable}
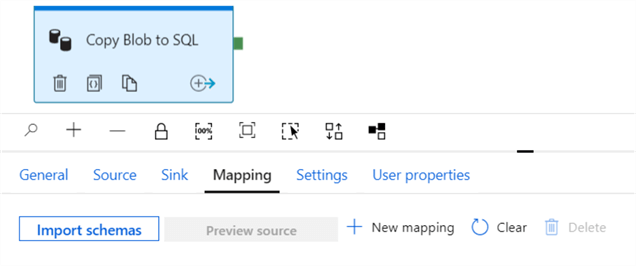
Make sure no mapping is specified at all in the Mapping tab. Again, this set-up will only work if the columns in the flat file are the same as in the destination table.
Step 3 – Debugging The Pipeline
Go back to the original pipeline (containing the Lookup and the ForEach) and hit the debug button at the top. If everything went successful, you’ll get an output like this:

By clicking on the output arrow for the Retrieve Metadata activity, we can view the metadata retrieved from the SQL Server database:
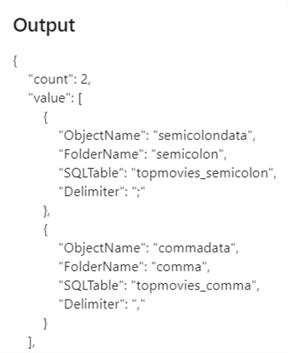
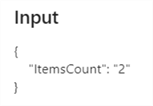
For the ForEach iterator, we can verify two items were declared in the input:
For the input of one of the CopyData activities, we can verify the truncate table statement for the sink was constructed correctly:
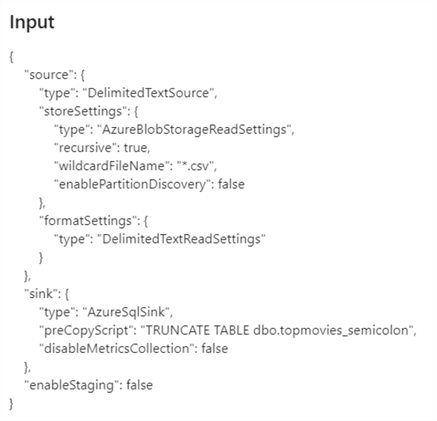
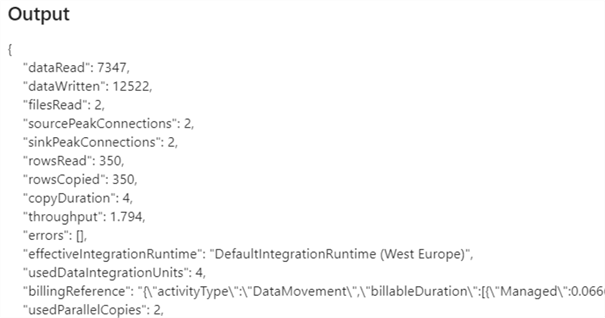
For the output of the CopyData activity (for the files with a semicolon), we can see two files were indeed processed in parallel:
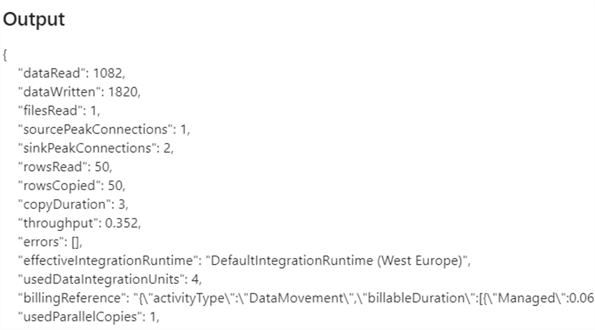
While for the other CopyData activity, only one file (with a comma) was processed:
When you click on the glasses next to one of the CopyData activities in the debug output, you can see more performance related information:
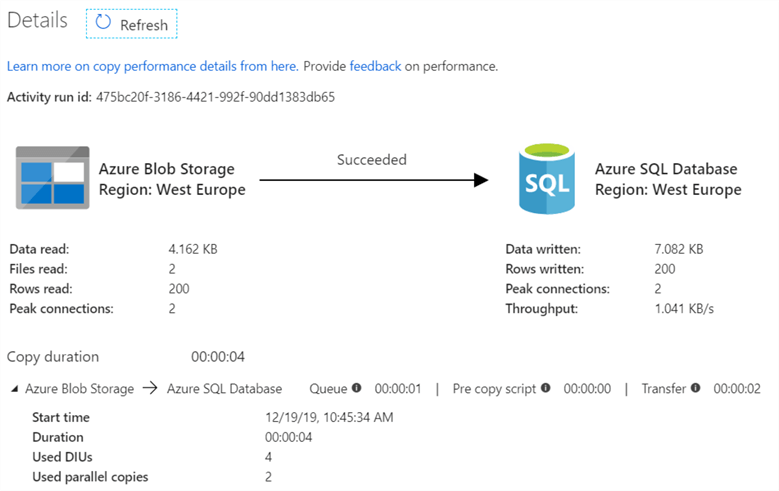
As you can see, two files were processed with a total of 200 rows for that one specific CopyData activity.
It’s important to notice there are actually two parallel operations in this set-up:
- The ForEach loop will process each blob folder separately in parallel (semicolon files vs comma files).
- In an iteration of the ForEach loop, the CopyData activity itself will process all blob files found in one folder also in parallel (2 files found with semicolon data).
Conclusion
In this tip we saw how we can build a metadata-driven pipeline in Azure Data Factory. Using metadata stored in a key-value pair table in SQL Server, we can use this data to populate parameters of the different datasets. Because of those parameters, we can use a single dataset dynamically to pick up multiple types of files or write to different tables in a database. The ForEach iterator loops over the metadata and executes a CopyData activity dynamically.
Next Steps
- If you want to follow along, you can download the flat files with the movie titles here. Make sure you also have read part 1 of this tip series.
- For more information about the activities in Azure Data Factory, check out the following tips:
- You can find more Azure tips in this overview.
About the author
 Koen Verbeeck is a seasoned business intelligence consultant at AE. He has over a decade of experience with the Microsoft Data Platform in numerous industries. He holds several certifications and is a prolific writer contributing content about SSIS, ADF, SSAS, SSRS, MDS, Power BI, Snowflake and Azure services. He has spoken at PASS, SQLBits, dataMinds Connect and delivers webinars on MSSQLTips.com. Koen has been awarded the Microsoft MVP data platform award for many years.
This author pledges the content of this article is based on professional experience and not AI generated.
View all my tips
Article Last Updated: 2020-02-03


