By: Eduardo Pivaral | Updated: 2020-02-27 | Comments | Related: > Azure
Problem
IoT (internet of things) allows any electric-powered device to have access to the internet, so we can monitor, control and communicate with such devices. One important thing about this technology is the ability to capture and save this data in a centralized database. One of the advantages of Azure is that it allows us to configure all our IoT infrastructure on the cloud and is capable of handling high volumes of data. But how can we save the captured information in an Azure SQL database? In this tip we will learn how.
Solution
You will need the following to reproduce this example:
- An Azure subscription (you can get one at https://azure.microsoft.com)
- An IoT device (I am using an ESP8266 board, NodeMCU specifically)
- An Azure SQL Database already in place, you can check how to create one here.
- Basic knowledge of T-SQL
Note: Electronic device programming is outside of the scope of this tip, so you should already have your IoT device up and running and ready to send data to the cloud.
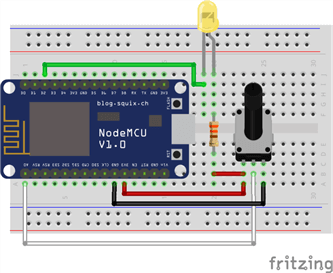
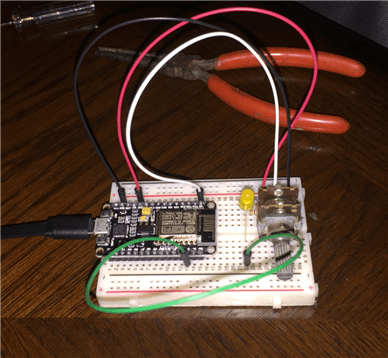
My NodeMCU device will capture a potentiometer reading and will send it to the cloud.
Setting up the IoT hub
Once you have your device ready and configured, go to the Azure Portal (https://portal.azure.com).
This is optional, but it is recommended to create a resource group for each project, so let's do that:
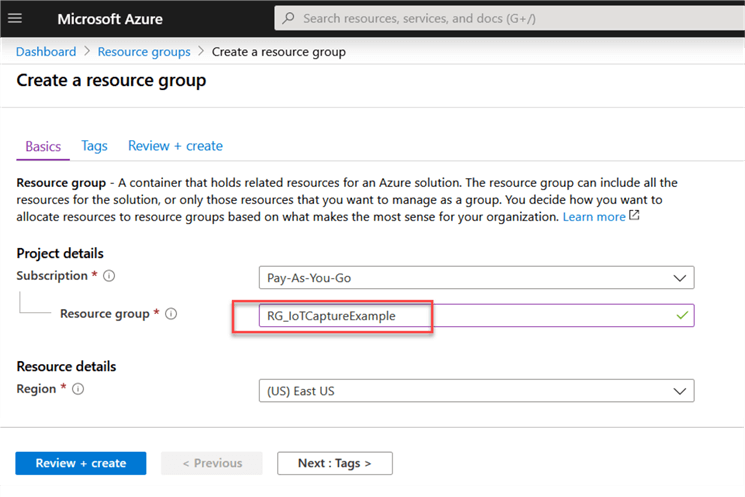
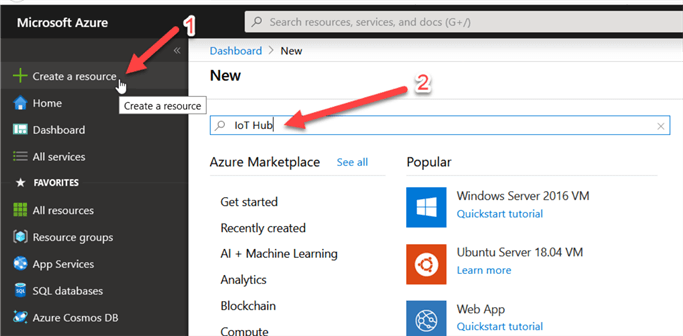
Once we have our resource group created (or if you will use your own RG), proceed to create an IoT hub.
Go to Create a Resource and then search IoT Hub:
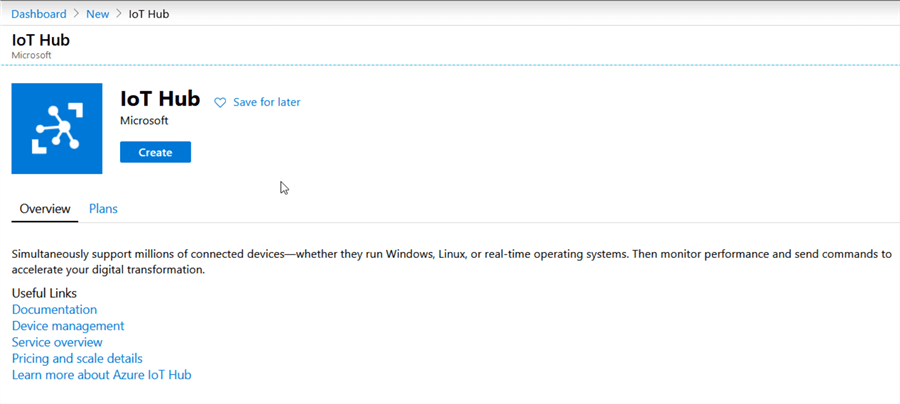
Click on Create:
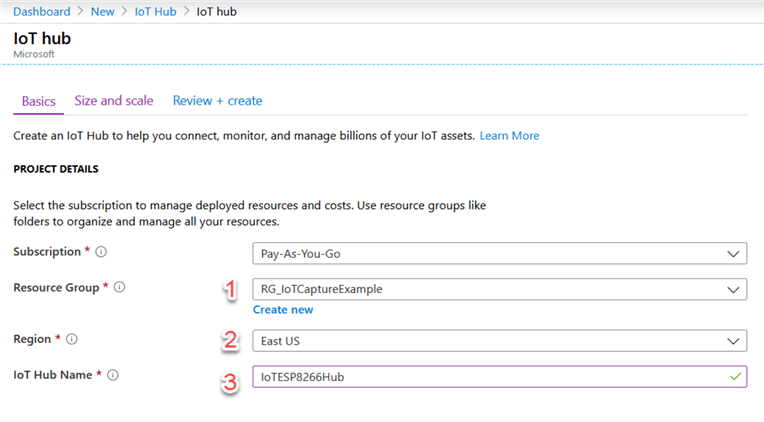
Provide your resource group, location and resource name (it is recommended to have all your related services in the same region):
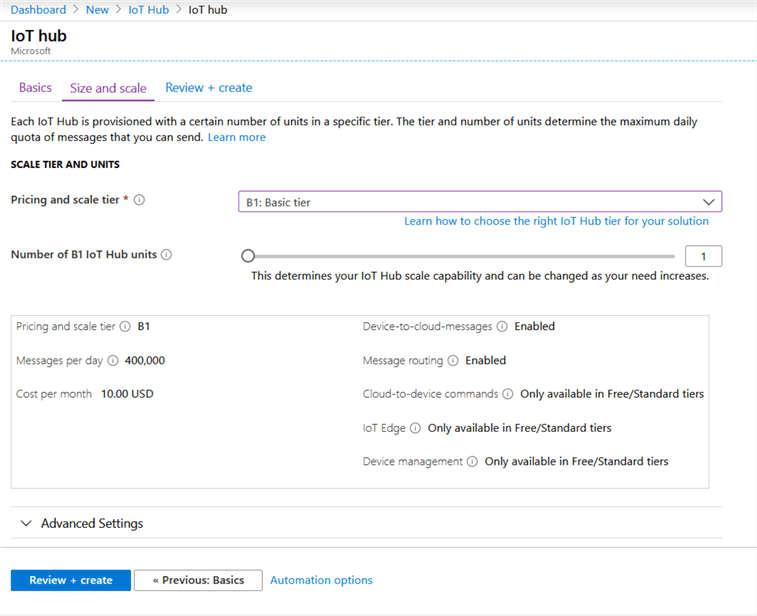
Select the pricing tier you want, for most D2C (Device to Cloud) applications, the basic tier is good to go. Please note that there is also a free tier available, but the number of messages you can send from the device to the cloud is limited to 8,000 messages a day (if you have just one device, that is around 5 messages a minute).
Once you have created your IoT hub, we will proceed to add our device.
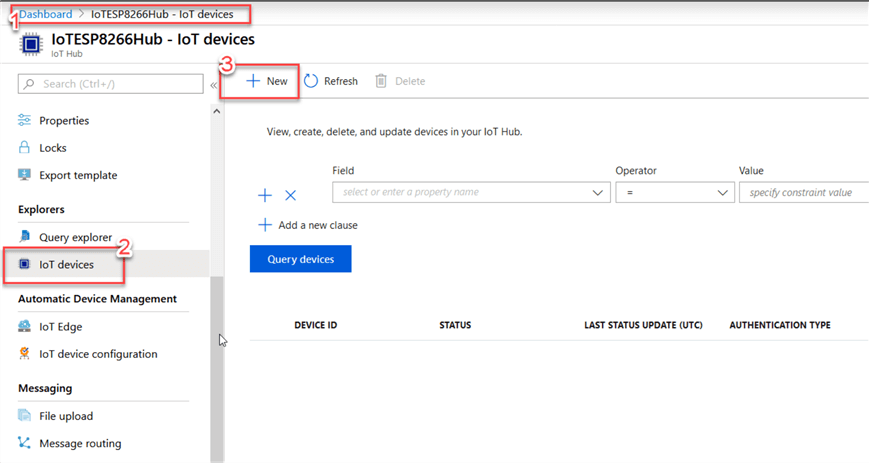
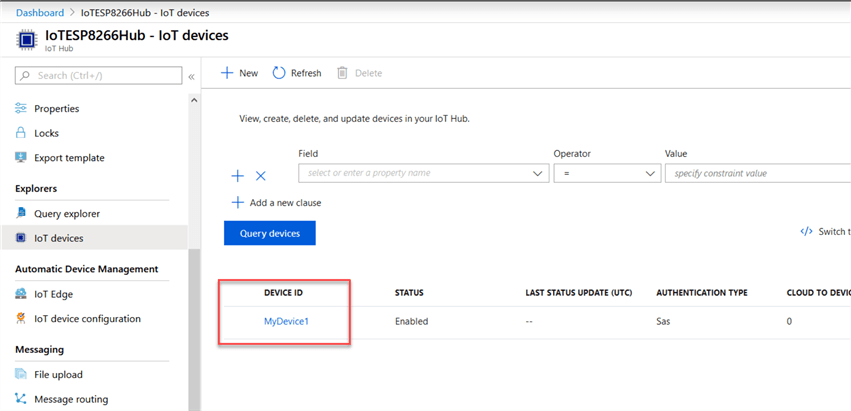
Navigate to your newly created IoT hub, then go to IoT devices and click on New:
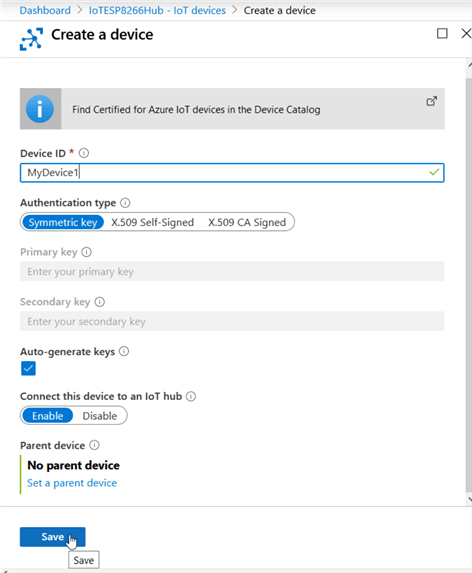
A new page will open, put a meaningful name for your device, select the authentication type your device will use (for my ESP8266, a symmetric key is ok). Leave the other options at their defaults, and click Save:
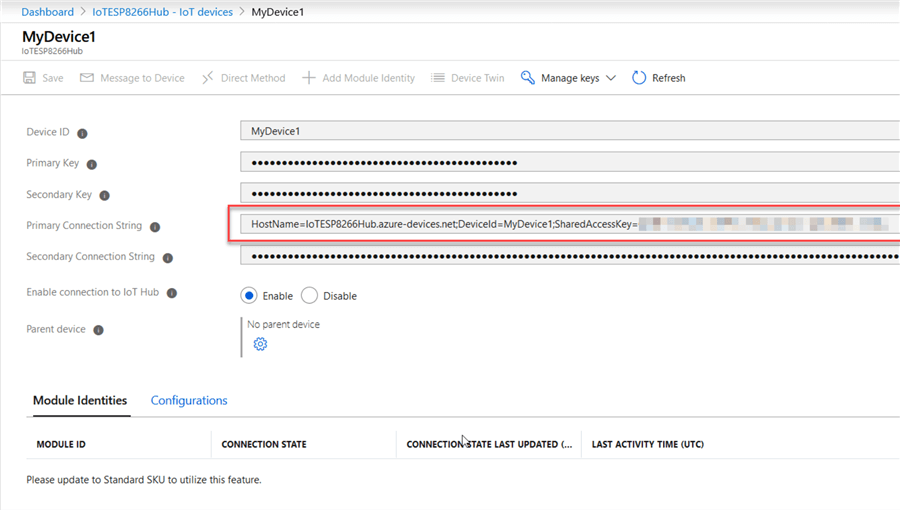
Once your device is created, you can obtain the connection string and access keys by clicking on it:
A new window will open where you can grab those keys to configure them on your device (for my ESP8266, I need the connection string to be added in the code of the program):
TIP: If you have a lot of devices to configure, you can check out the Microsoft documentation to do it in bulk.
Once you have your device registered it can connect to the IoT hub, we just need to route the data received to our SQL database. The method to route this information is by using a stream analytics job.
Setting up the Stream Analytics job
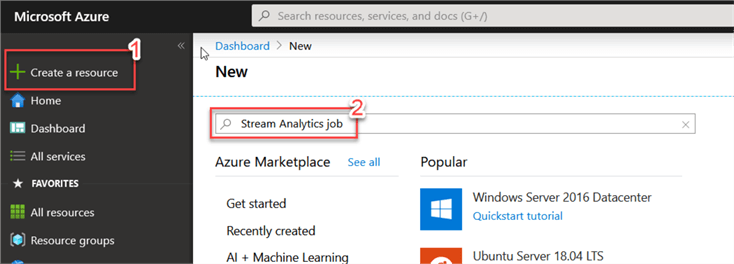
Go to Create a Resource, and then search for Stream Analytics Job:
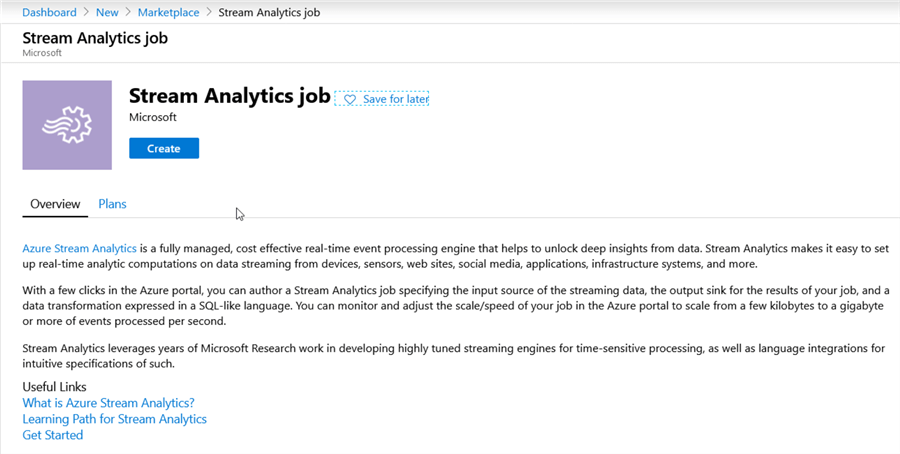
Click on Create:
Provide a meaningful name, then select your subscription, Resource Group, location and leave the other options at the defaults (streaming units allow you to specify the computational power you want to allocate, for just one device, 1 is ok). Then click on Create:
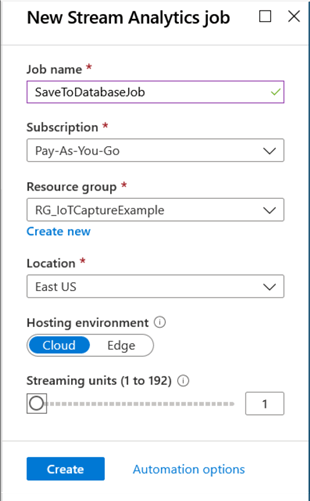
Once the resource has been deployed, we can proceed to configure it.
First, note that the job created is stopped by default, this is ok for now as the job must be stopped in order to configure it:
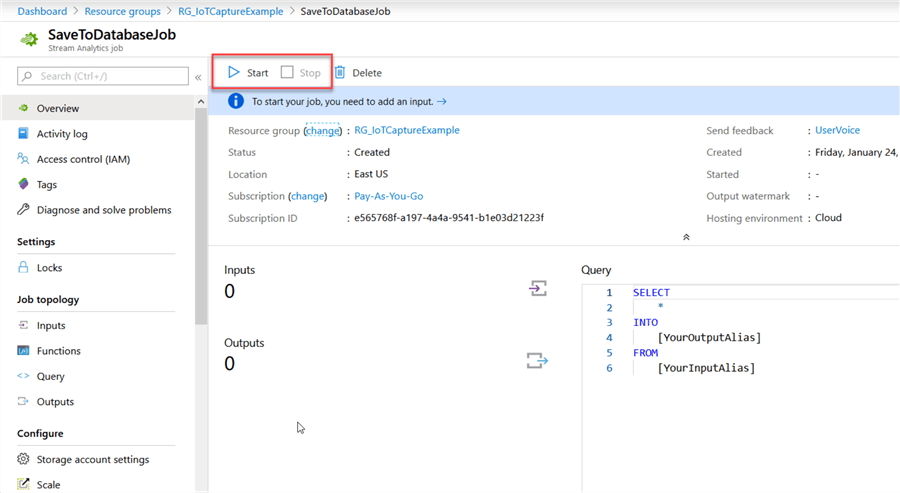
The first thing is to specify is the input of the job (our IoT hub).
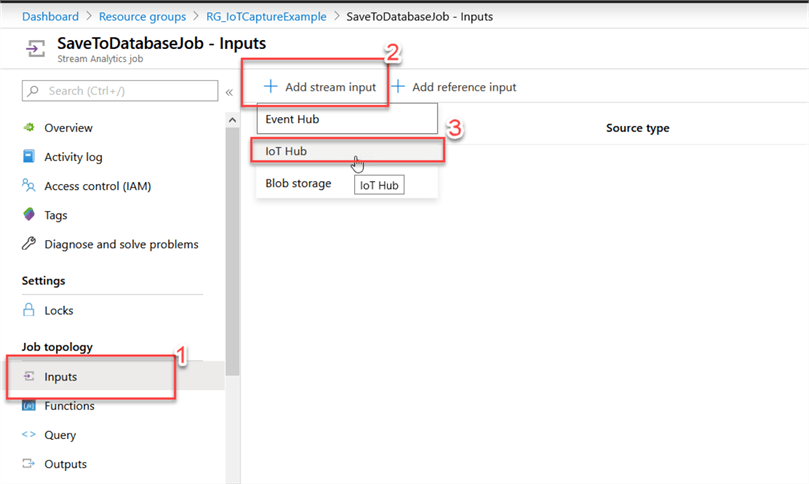
Go to Inputs, Add stream input and then IoT hub:
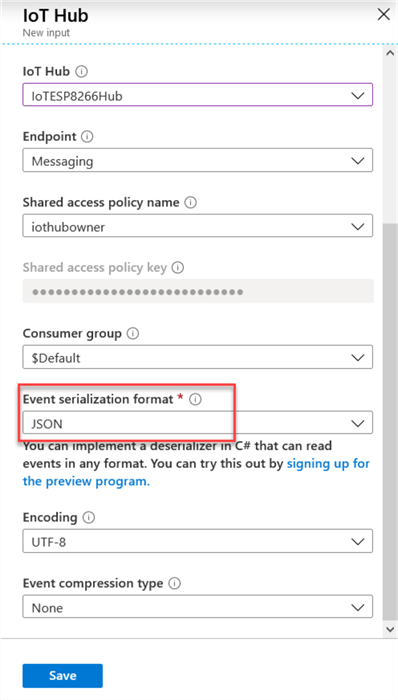
Provide your input a meaningful and short name since you will have to build your insert statement later, and then select your IoT hub previously created:
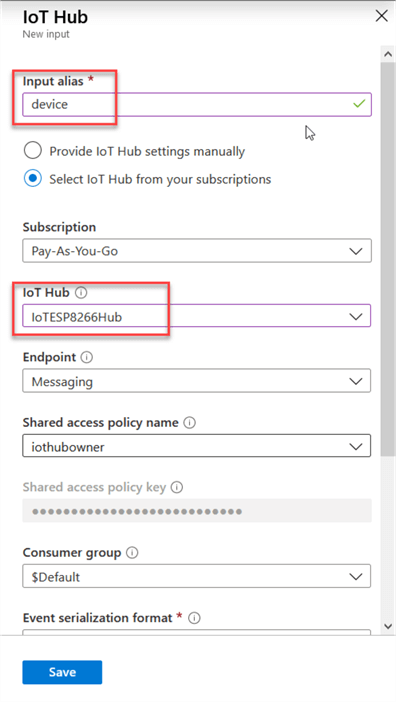
Provide an event serialization format (it depends on your device, but most of them work well with JSON), leave the other options as default and then click Save:
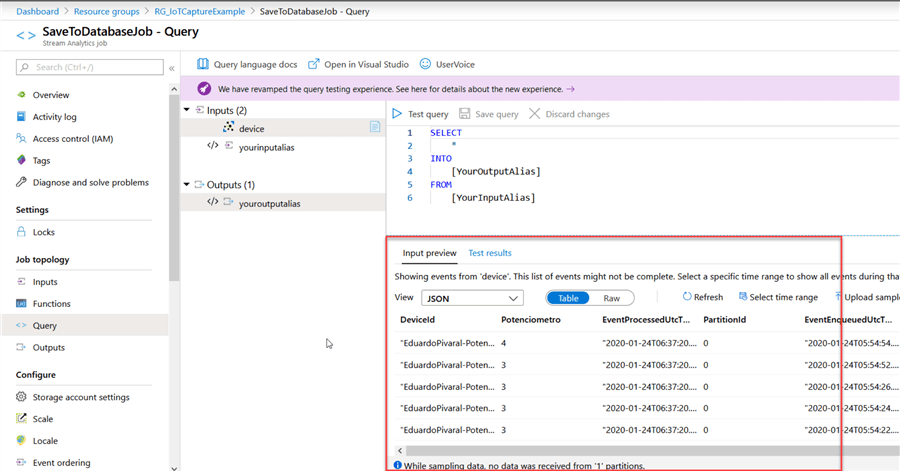
Once we have created our input, we can start watching the captured data. Go to Query and if your device is set up correctly you can start watching data in the Input Preview section:
At this point we need to have an Azure SQL database ready to obtain the data.
You can check out this tip on how to create an Azure SQL Database, I have already one created, so I will use it:
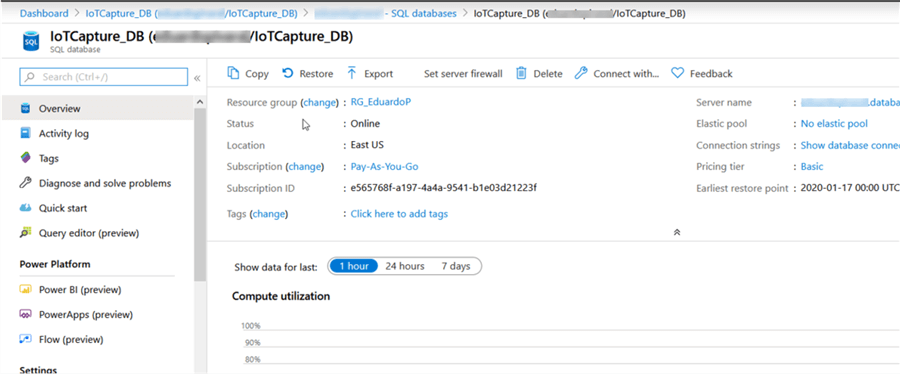
Once you have your database up and running, you need to create the table to store the data.
Connect to the Azure SQL DB using your preferred method (I will use SSMS):
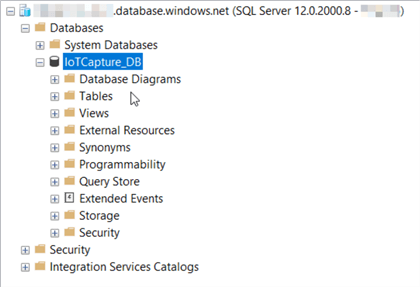
Then we need to create a table to store our IoT captured data, the table definition depends on your application design or personal preferences, but for this tip, we will capture and store the raw data.
TIP: If you need to figure out the format of the data being sent to the hub, you can go to the stream analytics job and take a preview to see what the data looks like:
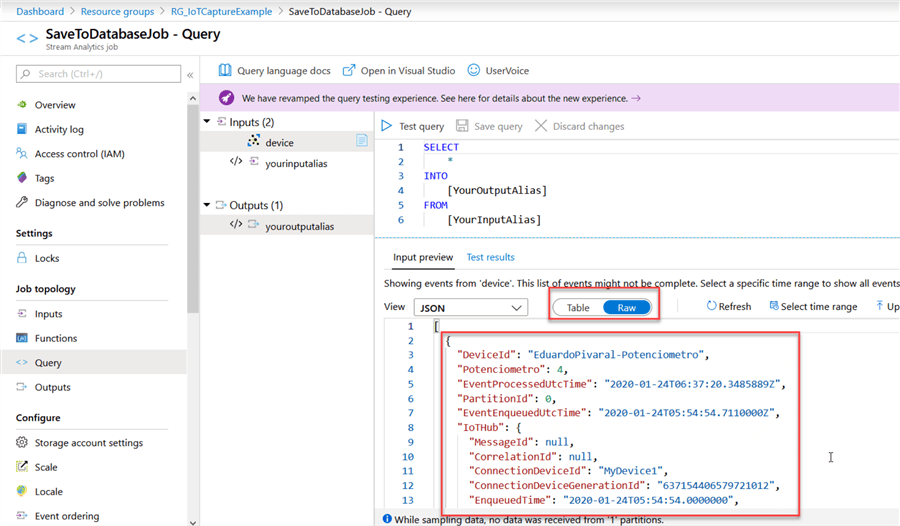
Once you have figured out the format of your captured data and determined the fields you want to save, you can proceed to create the table:
CREATE TABLE [dbo].[Potenciometro](
   [DeviceId] [nvarchar](200) NULL,
   [Potenciometro] [int] NULL,
   [EventProcessedUtcTime] [datetime2](7) NULL,
   [EventID] [bigint] IDENTITY(1,1) NOT NULL
) ON [PRIMARY]
GO
The table has been created successfully:
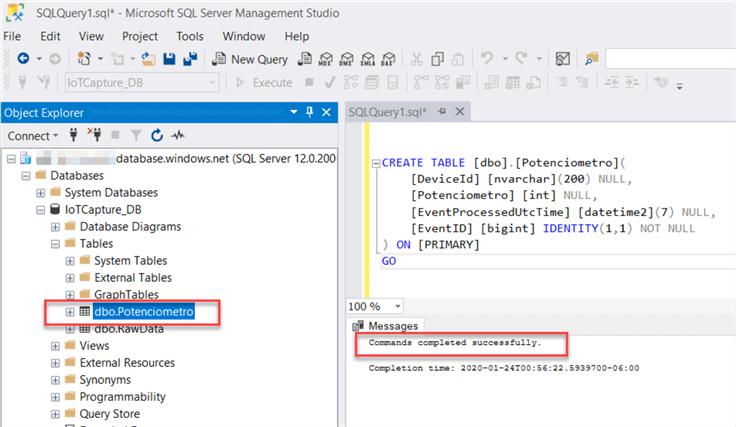
Now that the table has been created, we can return to our Stream Analytics job and create an output.
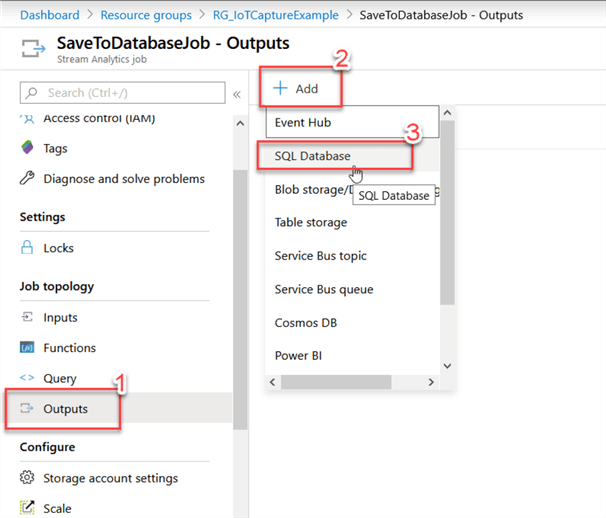
Go to the Stream Analytics Job, select Outputs, click on Add and then select SQL Database:
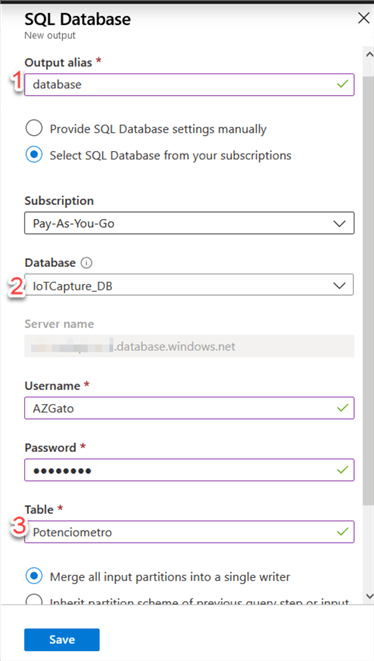
In the new window, provide a meaningful, short name, then provide your Azure SQL Database, enter the credentials to use, and then provide the table name you created in the previous step, then click on Save:
The last step is defining the mapping between the input and the output.
Go to the Stream Analytics Job and then go to the Query tab:
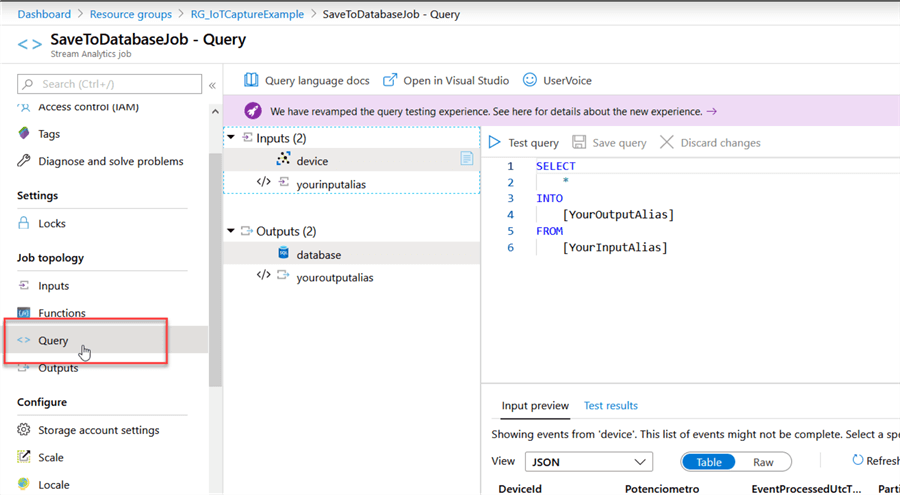
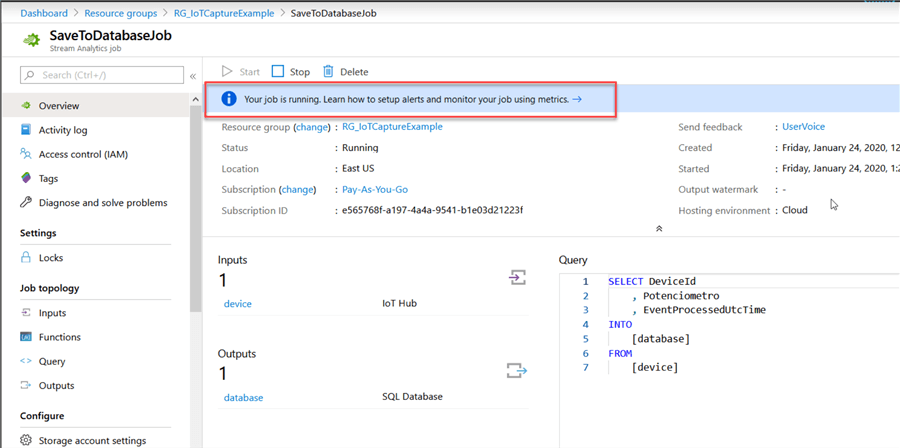
In the query window, replace the sample code for the fields you have defined for your table to create a correct SELECT INTO statement, also change the FROM to use your input alias, and the INTO to use your output alias.
For my example this will be the code:
SELECT DeviceId
    , Potenciometro
    , EventProcessedUtcTime
INTO
    [database]
FROM
    [device]
When you are ready, click on Save Query:
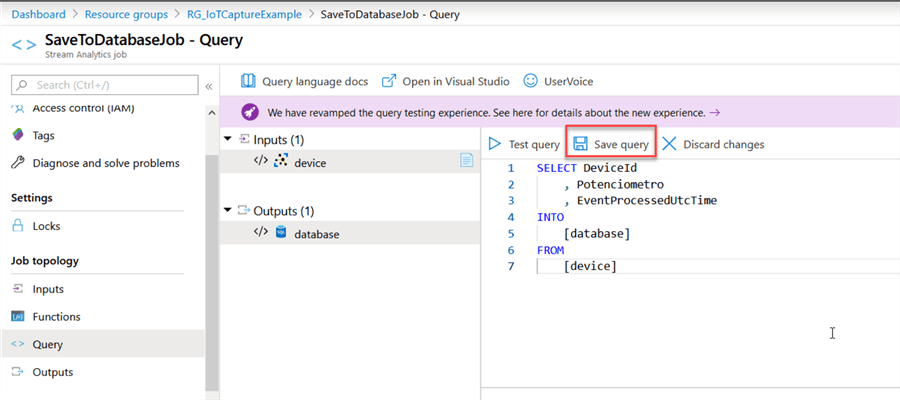
That is all the configuration, we are ready to start collecting data from our device and saving it to our database.
Testing the Results
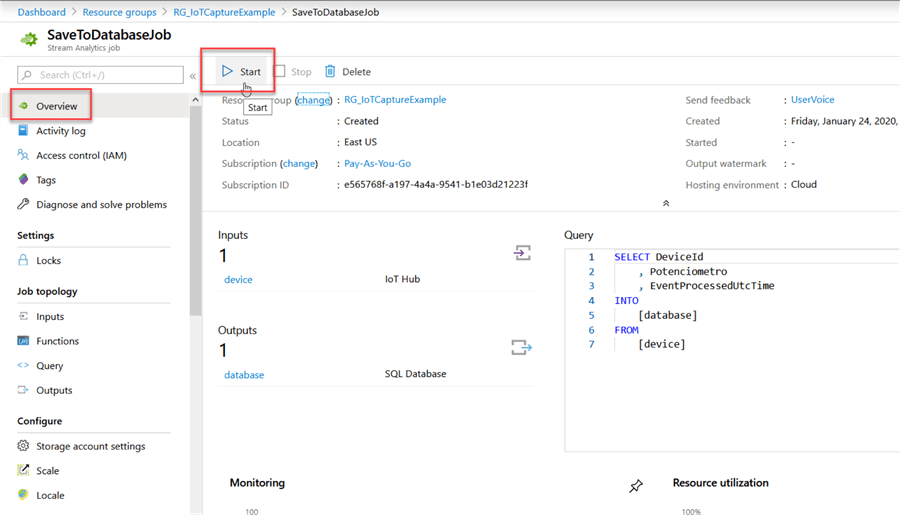
Once we have finished configuring the Stream Analytics Job, we must start it.
Go to Overview and then click on Start:
Select when you want to start it, for our example we will select Now:
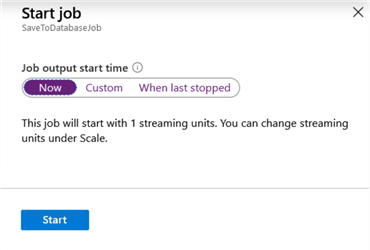
After a few seconds your job should start running.
Note: To avoid extra costs, stop the job when you don’t need it, because even if you are not collecting data, the running job will generate expenses to your subscription.
This is my device in action (you cannot see it, but the potentiometer is being moved and every slight change is stored on the database):
If everything is ok, you should be able to see the inserted data in your table, by performing a simple SELECT statement:
SELECT * FROM Potenciometro;
And the results:
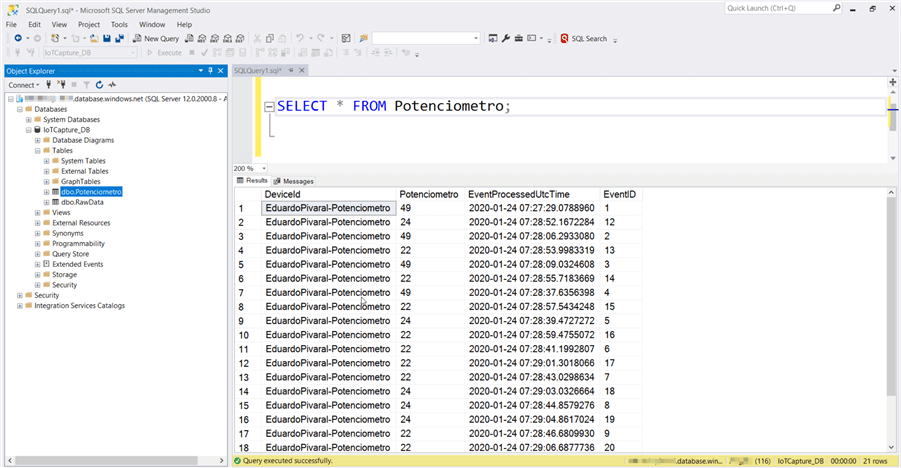
Once the raw data is stored in your Azure SQL Database, you can manipulate it as you want, or create reports with it as any database.
Next Steps
- Even when you just configure multiple devices, the IoT hub must be treated as just one input, so you can filter unwanted data using a WHERE clause in the Stream Job.
- There are other output options that you can explore as well.
- You can learn more about IoT hub here.
- You can read more about event hubs and Azure DB here.
About the author
 Eduardo Pivaral is an MCSA, SQL Server Database Administrator and Developer with over 15 years experience working in large environments.
 This author pledges the content of this article is based on professional experience and not AI generated.
View all my tips
Article Last Updated: 2020-02-27


