By: Koen Verbeeck | Updated: 2020-04-03 | Comments (12) | Related: > Azure Data Factory
Problem
I want to load data from different flat files stored in Azure Blob Storage to an Azure SQL Database. However, I only want to process new files. Files which already have been processed should be ignored. I cannot just delete them, since they are used by other processes as well. Can I achieve this requirement with Azure Data Factory?
Solution
With Azure Data Factory (ADF), we can copy data from a source to a destination (also called sink) using the Copy Data activity. In the source settings of this activity we can see there are a modified start and end datetime we can use to filter the files.
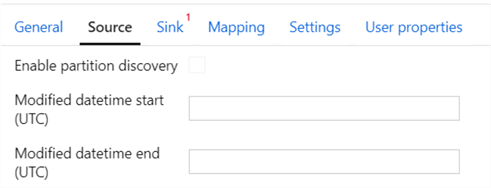
The question is: what do we need to enter in those text boxes? Luckily, ADF provides us with a wizard and a template to help us get started.
The Azure Data Factory Copy Data Tool
The Copy Data Tool provides a wizard-like interface that helps you get started by building a pipeline with a Copy Data activity. It also allows you to create dependent resources, such as the linked services and the datasets (for more information about these concepts, check out this tip - Azure Data Factory Overview).
In this tip, we’ll load data from a CSV file into a table in Azure SQL DB. The sample files can be downloaded here, while the destination table can be created with the following DDL statement:
CREATE TABLE [dbo].[topmovies](
   [Index] [BIGINT] NULL,
   [MovieTitle] [NVARCHAR](500) NULL
);
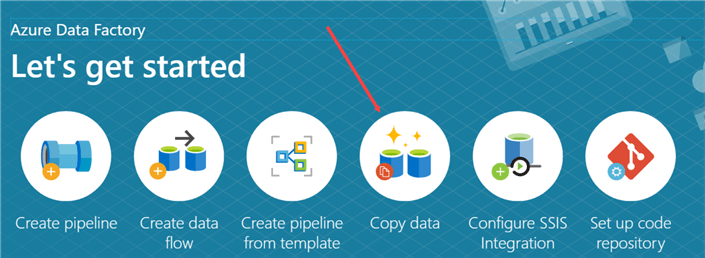
On the home page of ADF, choose Copy data.
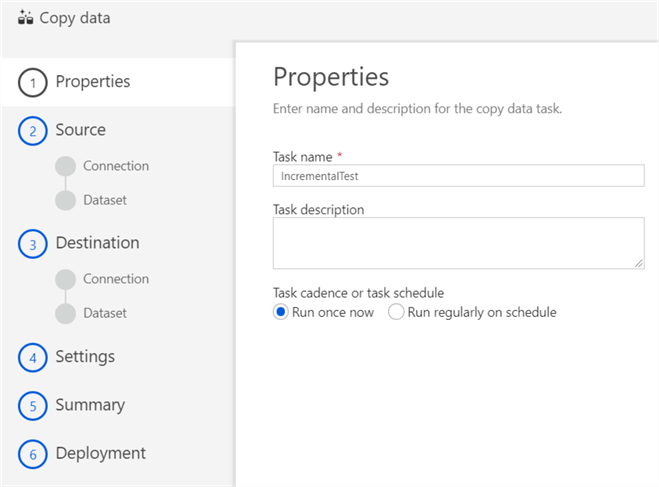
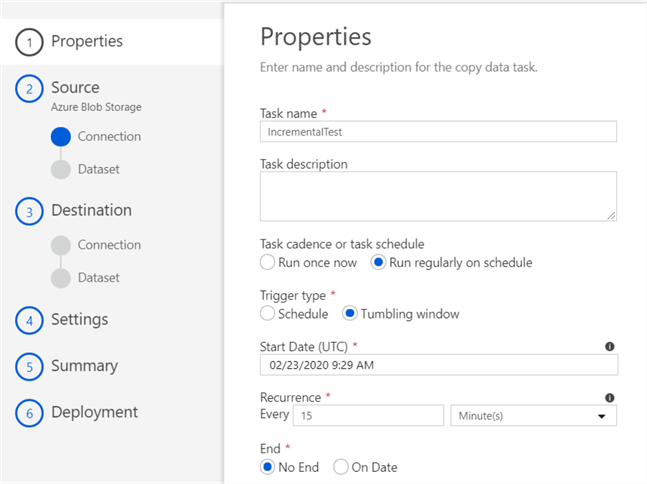
In the first screen, name the task. This will be the name of the pipeline later on. You also need to choose a schedule. For incremental load to work, you need to choose a regularly schedule. A one-time run will not work and any configurations for incremental load will be disabled in the later steps.
Regarding the schedule, you can either choose between a "normal schedule" as the trigger type, or a tumbling window. Here we can see a regular schedule:
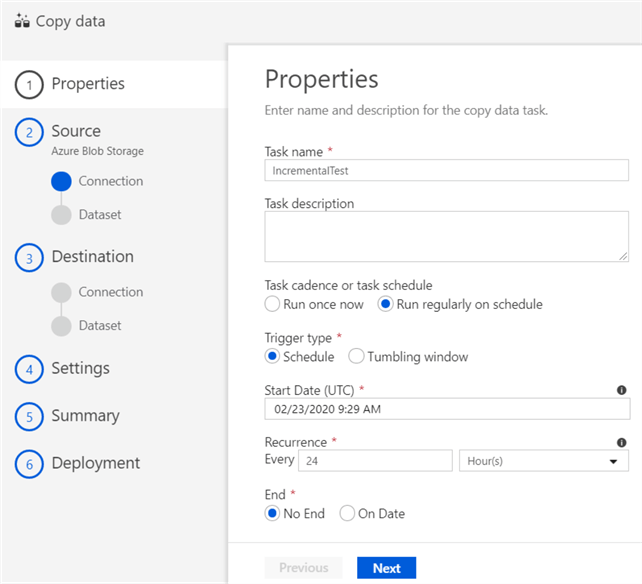
And here we have a tumbling window:
The tip Create Tumbling Window Trigger in Azure Data Factory ADF dives a bit deeper into tumbling windows and the difference with a schedule trigger.
In the next screen, you can choose between existing linked services, or the option to create a new one. If you don’t have a connection to Azure Blob Storage, you need to create it here. An example is given in the tip Transfer On-Premises Files to Azure Blob Storage.
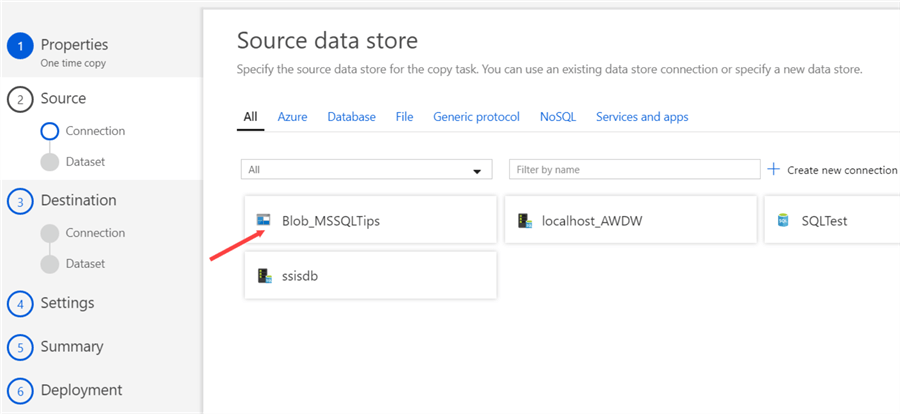
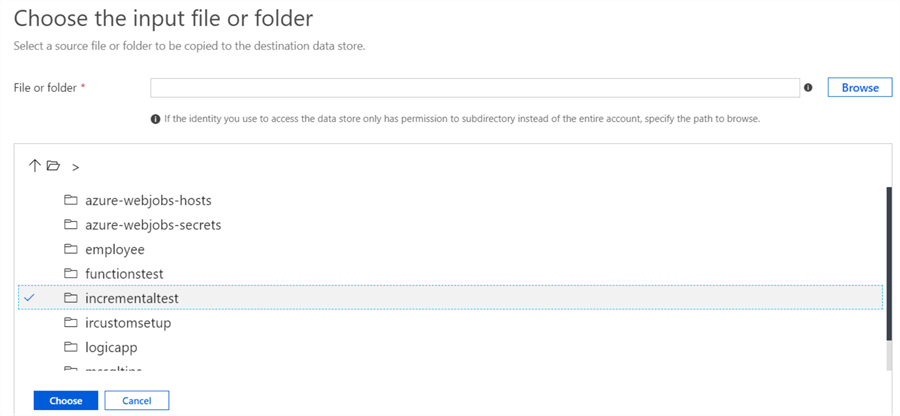
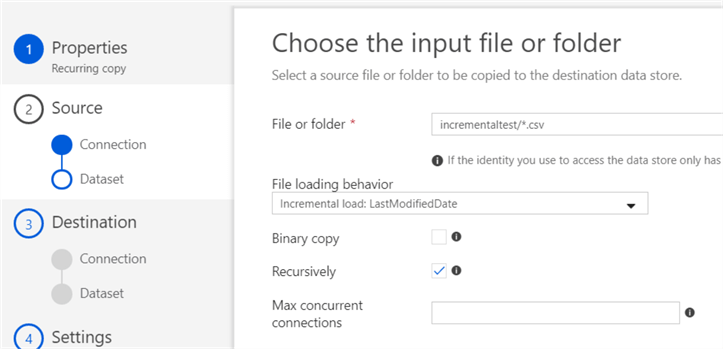
Once the connection to Azure Blob Storage is created, you need to specify the location of the files you want to copy:
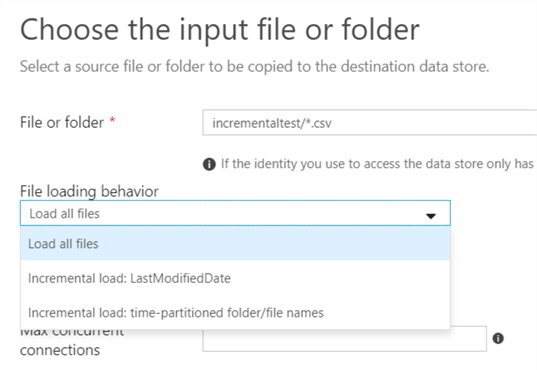
In the same screen, you can also specify the loading behavior. In our case, we definitely want the "Incremental load: LastModifiedDate" option.
If you’ve chosen a regular schedule, you can see the start and end of the window.
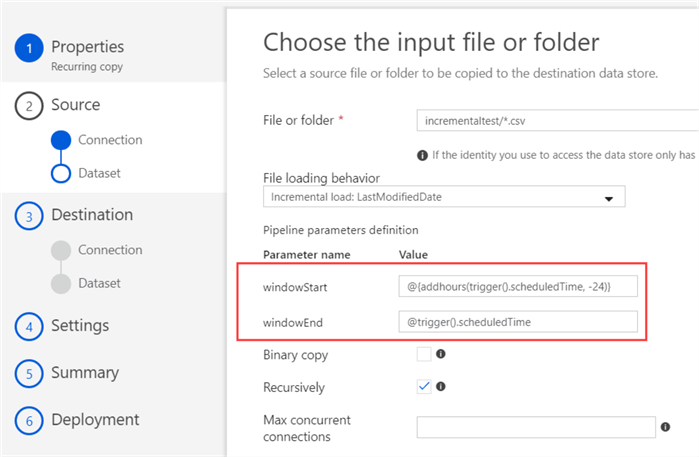
In the example above, the schedule runs every 24 hours, so every file with a modified date between the schedule time and the schedule time minus 24 hours will be picked up by ADF. In the case of a tumbling window, no parameters are shown. They’ll show up in a later step though.
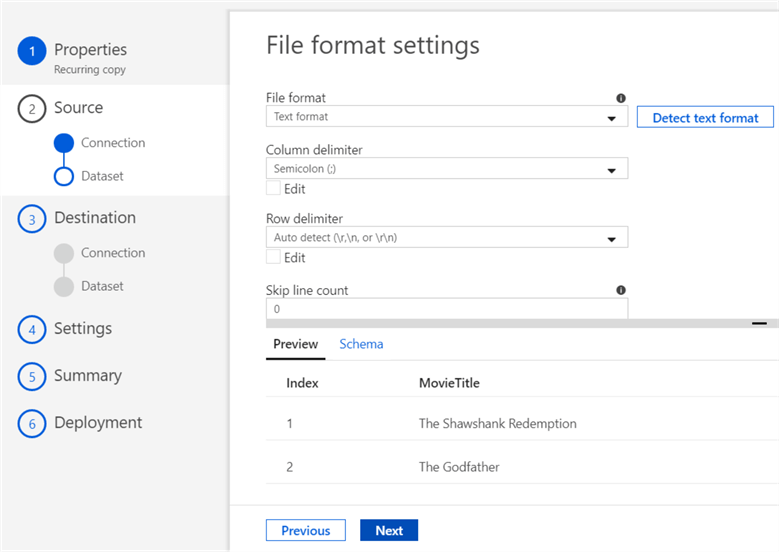
As the last step in the source configuration, you need the file format. If you’ve specified a folder or a specific file, you can choose the Detect text format, which will detect the settings for you and render a preview of the file at the bottom.
On the other hand, if you specified a wildcard pattern, such as myfolder/*.csv, you’ll get an error message:

In step 3 of the wizard, we’ll configure the destination. Choose Azure SQL DB from the list of available linked services, or create a new connection.
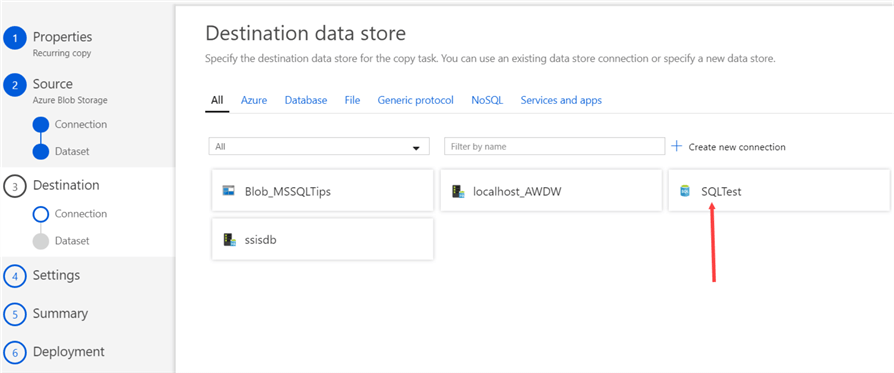
In the next step, choose the destination table:

If the metadata is known from the source file, the columns are mapped automatically onto those of the table:
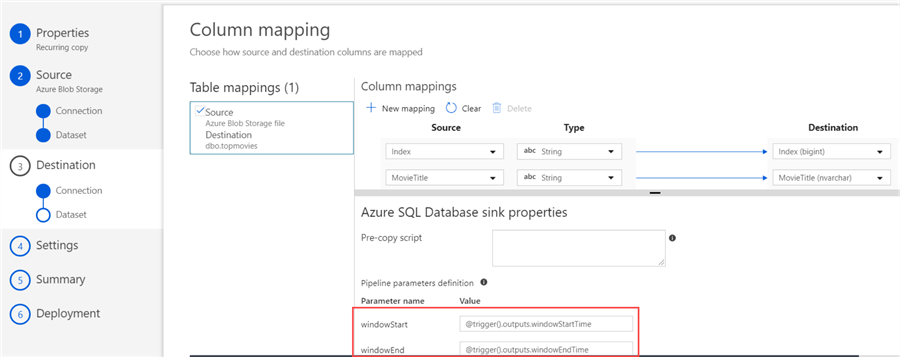
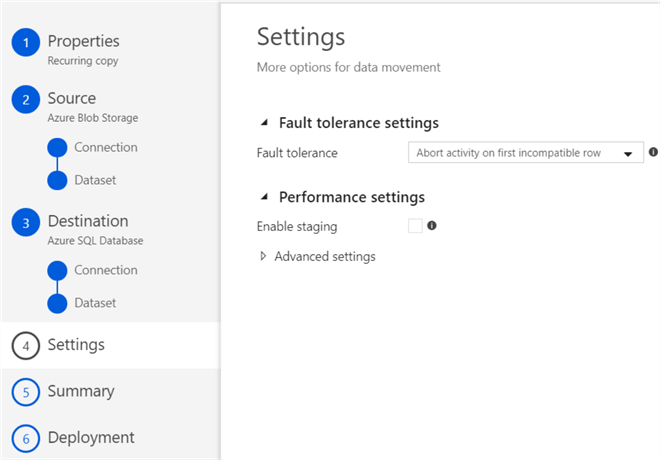
For a tumbling window, you can find the window parameters here. In step 4 of the copy data tool, you can specify a couple of data movement settings. You can leave everything to the default settings.
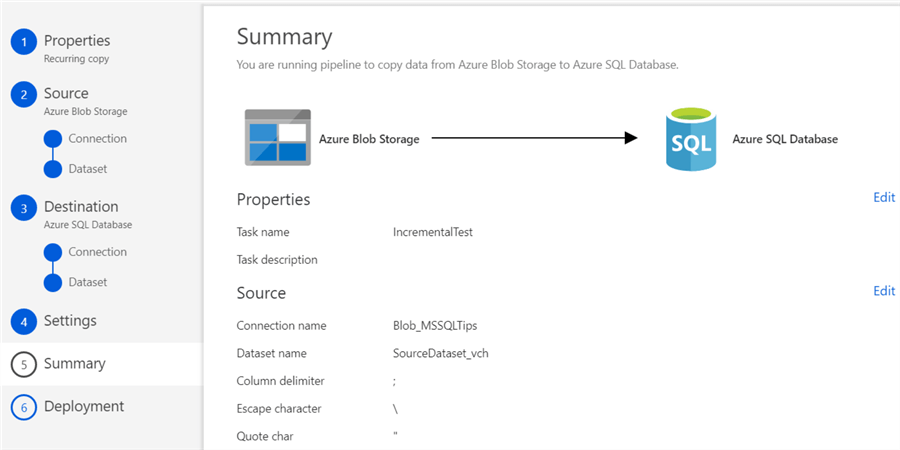
Step 5 gives you an overview of the to-be generated pipeline:
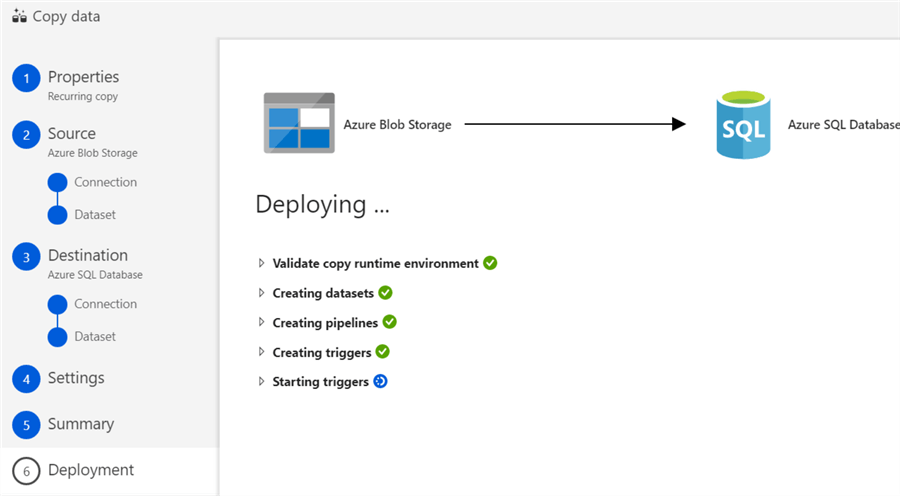
In the last step, everything is created and published to the ADF environment:
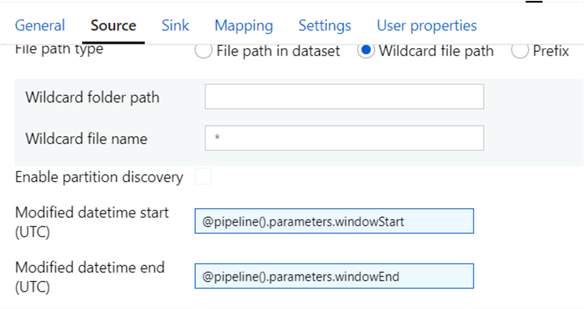
If we take a look at the Copy Data activity in the generated pipeline, we can see the tumbling window parameters are filled in in the source settings:
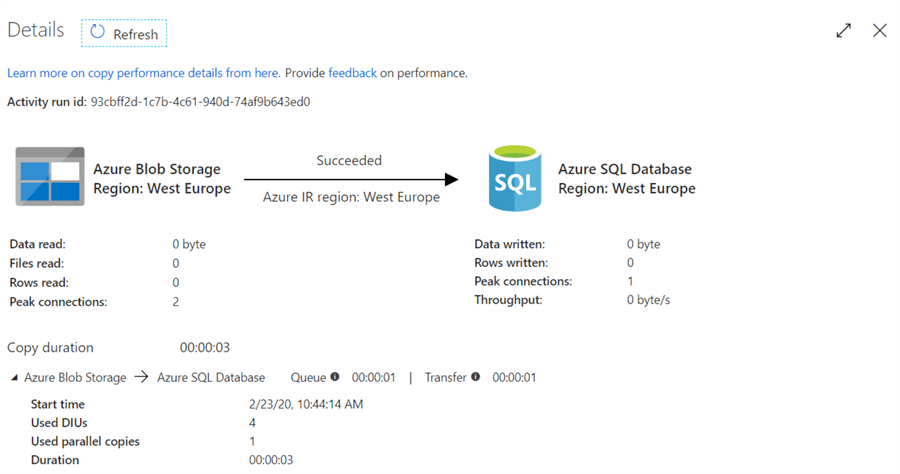
The first time the pipeline runs, it will only pick up files if there’s a modified data after the start date of the schedule. Files already present will be ignored.
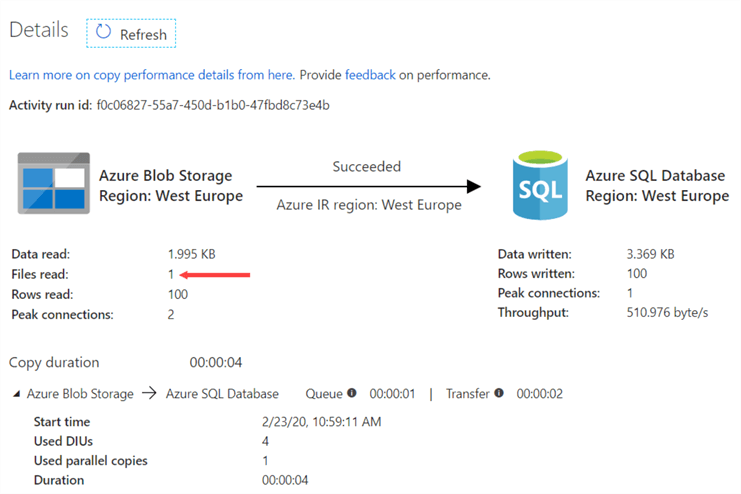
If a new file is added to the blob container, it will be picked up in the next run:
Using an Azure Data Factory Pipeline Template
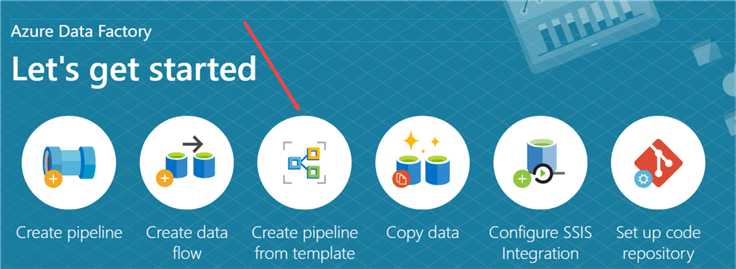
Another option to create a pipeline with this incremental load pattern is using a template. On the home page, choose Create pipeline from template.
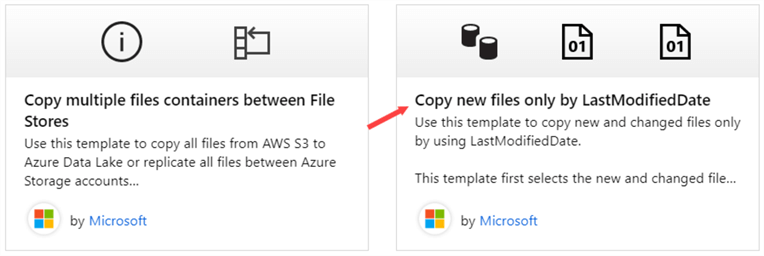
In the template gallery, choose the Copy new files only by LastModifiedDate template.
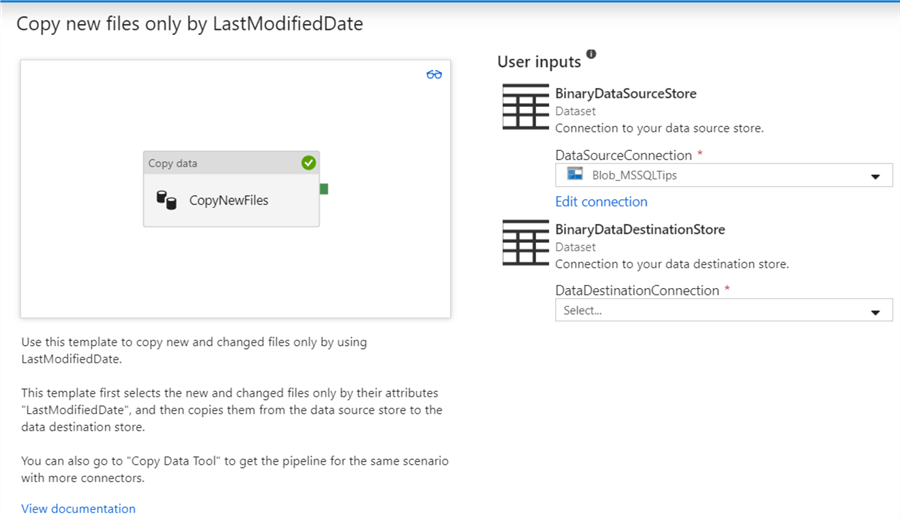
On the next screen, you can choose the source and the destination connections. A big difference with the Copy Data Tool is the template only supports binary sources, which rules out Azure SQL DB as a destination.
The template will create a pipeline with a Copy Data activity, together with a bunch of pipeline parameters:
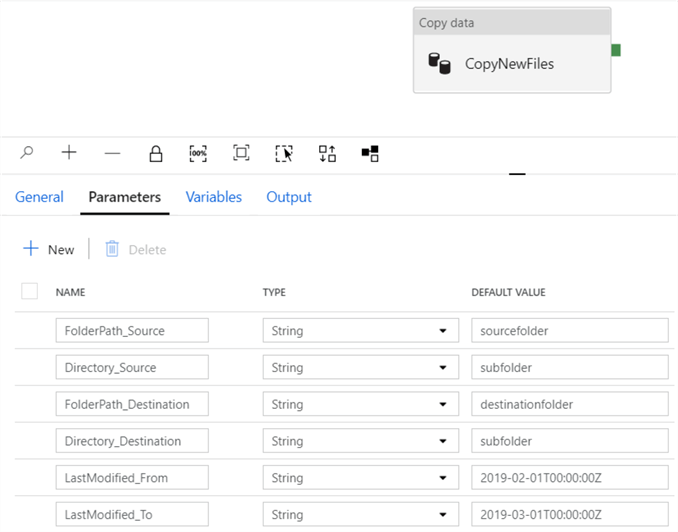
It’s up to the user to build a framework using this pipeline and parameters in order to implement the incremental load pattern.
Conclusion
In Azure Data Factory, we can copy files from a source incrementally to a destination. This can either be achieved by using the Copy Data Tool, which creates a pipeline using the start and end date of the schedule to select the needed files. The advantage is this setup is not too complicated. The disadvantage is that if files already exist before the schedule starts, they are not copied to the destination. Or, if you want to reload all files, you have to change the schedule (tumbling windows deal best with this scenario) or by re-copying the files so their modified date changes.
The other option is using the template. This sets the foundation of the incremental load pattern, but leaves everything else to the developer. The advantage is you can probably build this out to a more flexible framework than the one used by the Copy Data Tool.
Next Steps
- If you want to follow along, you can find the sample data here.
- There are already quite some tips on Azure Data Factory on the MSSQLTips website. You can find an entire list here.
- For more Azure tips, check out these articles.
About the author
 Koen Verbeeck is a seasoned business intelligence consultant at AE. He has over a decade of experience with the Microsoft Data Platform in numerous industries. He holds several certifications and is a prolific writer contributing content about SSIS, ADF, SSAS, SSRS, MDS, Power BI, Snowflake and Azure services. He has spoken at PASS, SQLBits, dataMinds Connect and delivers webinars on MSSQLTips.com. Koen has been awarded the Microsoft MVP data platform award for many years.
This author pledges the content of this article is based on professional experience and not AI generated.
View all my tips
Article Last Updated: 2020-04-03


