By: Vitor Montalvao | Updated: 2020-05-21 | Comments (2) | Related: > Azure
Problem
I’ve created an Azure Virtual Machine with a SQL Server installed and want to migrate an on-premises SQL Server database to this Azure VM. What are the steps to do this database migration?
Solution
This article explains the steps you need to migrate a single SQL Server database from your on-premises SQL Server instance to a SQL Server instance in an Azure VM.
NOTE: To simplify, I’m migrating a database from a SQL Server instance that has the same version as the SQL Server instance in the Azure VM. As long as the SQL Server instance you are migrating to is the same or later version the steps below will work.
Options to Migrate On-Premises SQL Server Database to Azure VM
There are various methods to migrate a SQL Server database to an Azure VM that has SQL Server installed.
In this article I’ll focus on the following:
- Backup and Restore Database
- Detach and Attach Database
Below are some other migration methods that will not covered in this article:
- Use the Add Azure Replica Wizard to create a replica in Azure and then failover, pointing users to the Azure database instance.
- Use SQL Server transactional replication to configure the Azure SQL Server instance as a subscriber and then disable replication, pointing users to the Azure database instance.
Migrate On-Premises Database Files to Azure
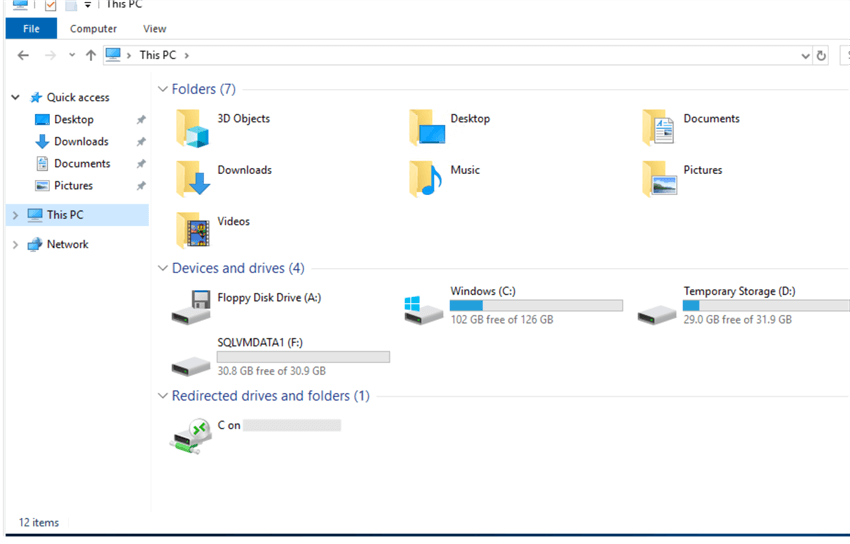
The methods I’m writing about in this article require copying files from your local machine to the target Azure VM. There are many ways to perform file copies, but one solution is to configure your remote connection to access your local drives. This method works well if the files are not too large. You can also look at using FTP or other methods to move the files from on-premises to Azure.
Below I show how to configure RDP to access the local file system.

By making the change above, your local drive will be available and accessible in the Azure VM that you are connecting to, so you can do a simple copy and paste of files.
Backup and Restore Method to migrate SQL Server to Azure VM
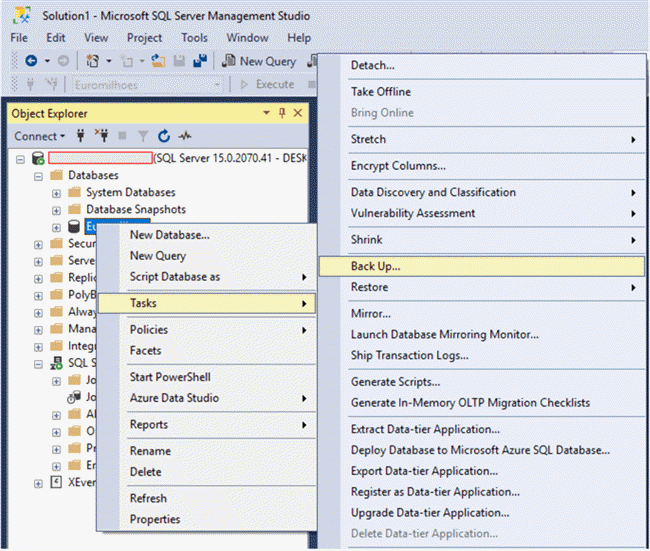
The first step of this method is to perform a backup of the desired on-premises SQL Server database that you want to migrate to Azure.
Just right click on the database in SQL Server Management Studio (SSMS) and select Tasks > Back Up...
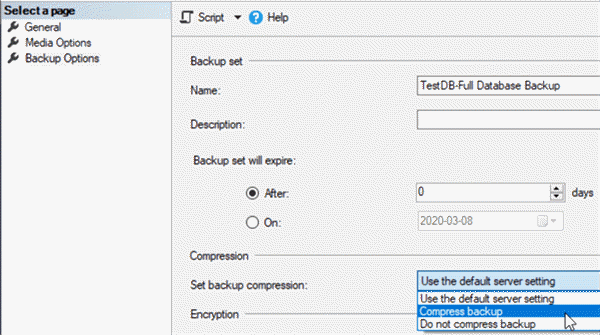
In the backup window, go to the Backup Options and chose the Compress backup option. Compressing the backup will save time when copying the backup file to Azure regardless of what file transport method you use.
NOTE: If your backup file is larger than 1TB, you must stripe it because the maximum size of a VM disk is 1 TB.
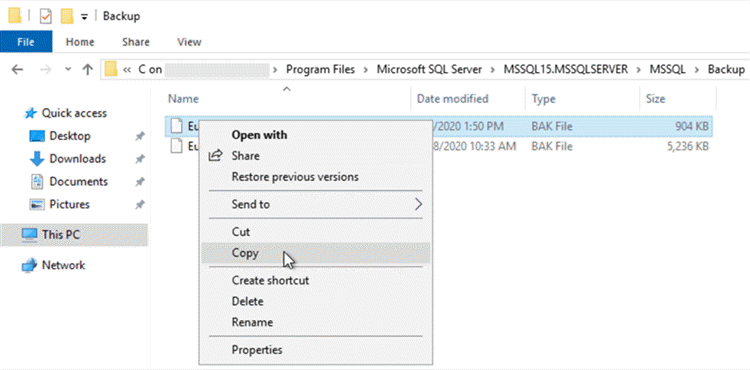
After the backup, you’ll need to copy the file to your Azure VM. There are many ways to perform this copy, below I just show a simple copy and paste.
Now you just need to copy the desired backup file from the local drive to a folder in the Azure VM.
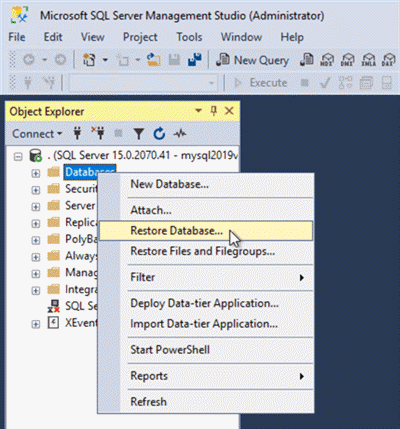
In your Azure VM, you can now restore the database from SSMS. Right click on Databases and select Restore Database...
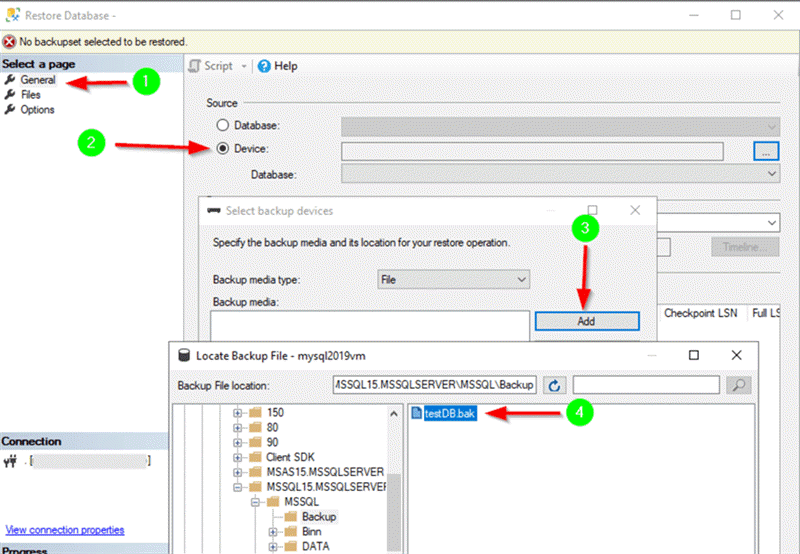
Locate the backup file in the restore options and run restore the database and the database should now be accessible in the Azure VM.
SQL Server Detach and Attach Database Migration to Azure
The first step of this method is to perform a full backup of the database(s) that you want to migrate to Azure just to ensure you have a database backup if anything goes wrong. For databases with the full recovery option it’s recommended to take a transaction log back before the full backup. After the backups are done you should shrink the transaction log file to reduce the file size to improve the copy time.
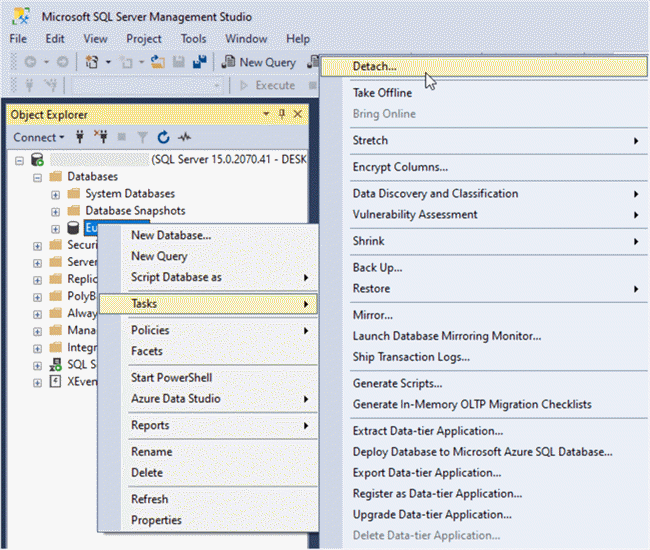
You can now detach the database(s) that you want to migrate to Azure from the on-premises SQL Server instance. To do so, right click on the database and select Tasks > Detach...
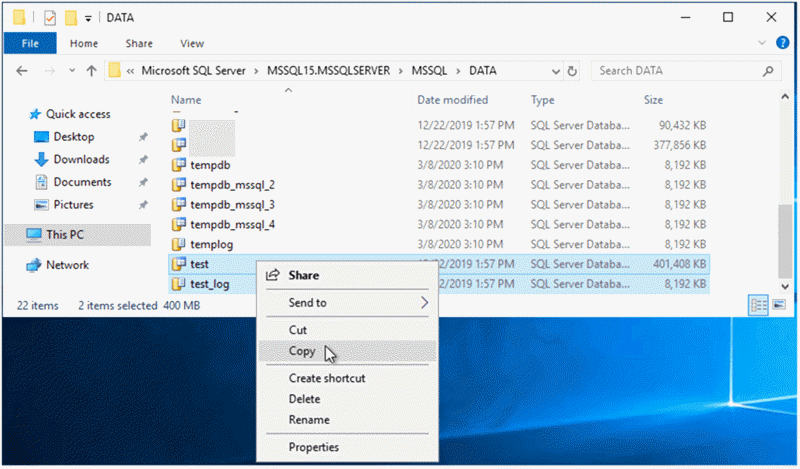
After detaching the database you’ll need to copy the respective database files (mdf and ldf files) to the Azure VM.
We will just do a simple copy and paste of the respective database data and log files from the local drive to a folder in the Azure VM.
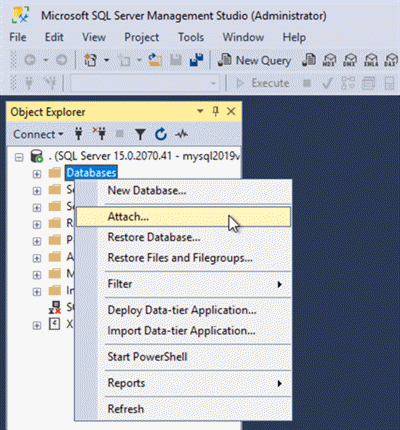
After the copy, you can now attach the database from SSMS in your Azure VM. Just right click on Databases and select Attach... and find the files you just copied to attach the database.
Verify the Migrated Database
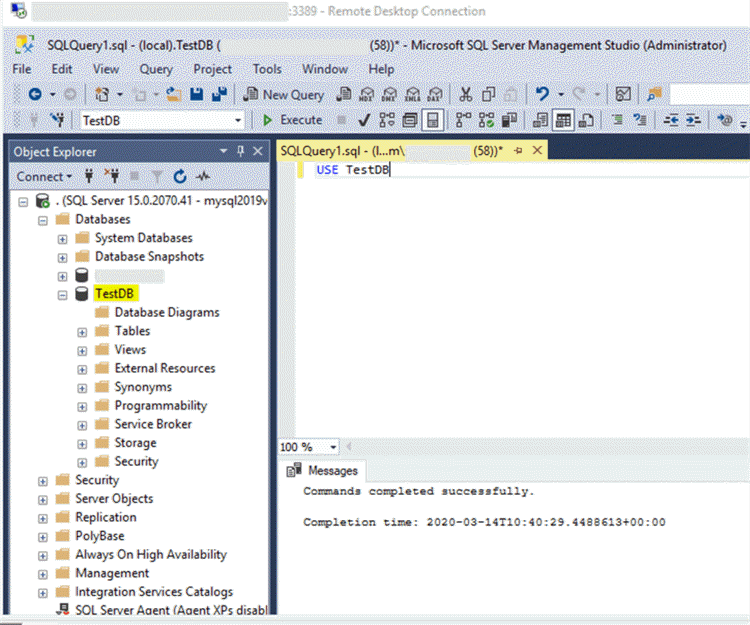
After the database has been attached or restored you should be able to access your migrated database in the SQL Server instance on the Azure VM as shown below.
Next Steps
- Check out these other Azure tips.
About the author
 Vitor Montalvão is a SQL Server engineer with 20 years of experience in SQL Server, specializing in performance & tuning, data modelling, migration and security.
This author pledges the content of this article is based on professional experience and not AI generated.
View all my tips
Article Last Updated: 2020-05-21


