By: Koen Verbeeck | Updated: 2020-05-06 | Comments (1) | Related: > Azure Data Factory
Problem
You can migrate existing SQL Server Integration Service (SSIS) projects to an Azure Data Factory environment and using an Integration Runtime, you can run your SSIS package in a managed service. However, what if your project is using the package deployment model? Is it still possible to lift-and-shift your project to Azure?
Solution
Azure Data Factory (ADF) allows you to migrate existing SSIS projects to a managed service. Using Integration Runtimes, packages can be executed in a cluster of virtual machines, all managed by ADF. The following tips explain how you can set up such an environment:
- Configure an Azure SQL Server Integration Services Integration Runtime
- Executing Integration Services Packages in the Azure-SSIS Integration Runtime
However, the Azure-SSIS IR uses a catalog stored in either an Azure SQL DB or a SQL Server Managed Instance. This means the SSIS projects needs to use the project deployment model (see the tips SSIS Project Deployment Model in SQL Server 2012 (Part 1 of 2) and Integration Services (SSIS) Convert from Package Deployment Model to Project Deployment Model for more information about the package and project deployment model in SSIS).
But what if your on-premises SSIS project still uses the package deployment model? Do you need to convert it to the project deployment model first? Although that is an option, you can now also create a new type of Integration Runtime; instead of using a SSIS catalog, you’ll use Azure Blob Storage to store your SSIS packages.
Azure-SSIS IR with Azure Files
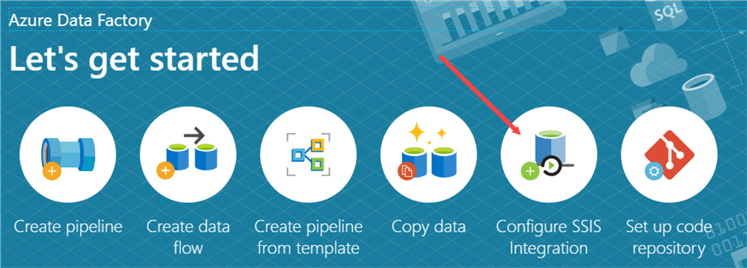
Let’s start with creating a new Integration Runtime (IR). In Azure Data Factory, click on Configure SSIS Integration.
This will open up the configuration of a new IR. Specify a name, location, the node size of the virtual machines, the number of nodes and the edition.
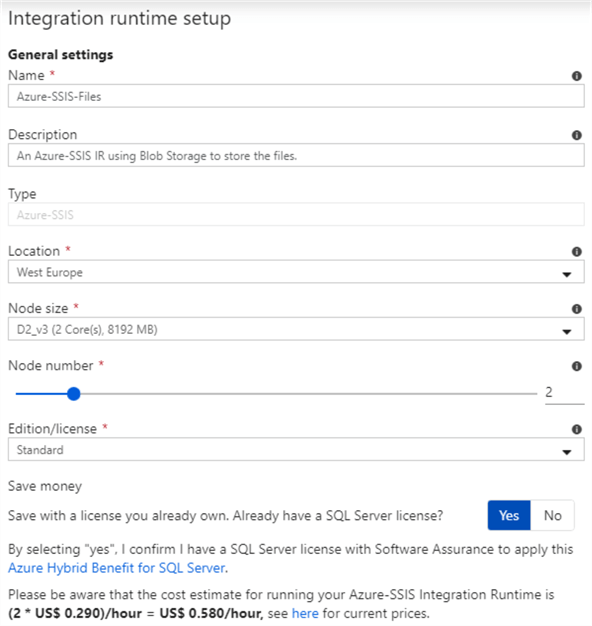
There are some tricks to save money, because you will be paying for every second the cluster of virtual machines is running:
- If you don’t use Enterprise SSIS features, keep the edition on Standard. There are only a few components that need Enterprise edition.
- If you already have a SQL Server license (for example from MSDN, partnership, volume licensing etc.), you can choose to use the Azure Hybrid Benefit, which severely reduces the cost of the IR.
- Think wisely about the number of nodes you actually need and the size of the node. If you have an ETL flow which focuses on executing SQL in a SQL Server database, you can choose a very small node size since most of the computational work is done by the database.
- Only start the IR when you actually need it and shut it down after the packages have done running. You can find an example in the tip Automate the Azure-SSIS Integration Runtime Start-up and Shutdown - Part 1, but recently the ADF team has published APIs that can do this for you as well. More information can be found in the documentation.
On the next screen, the following default is presented:
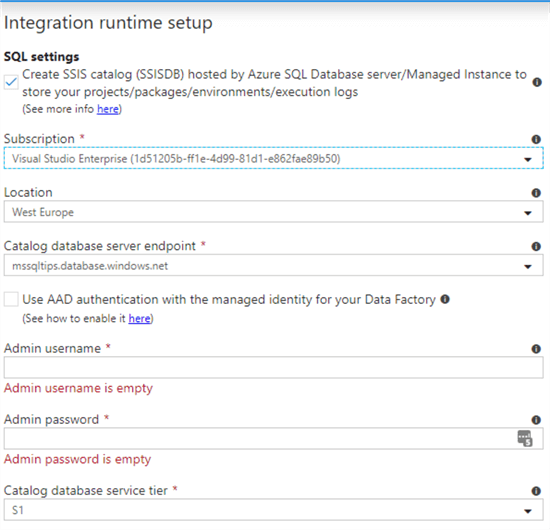
As mentioned before, this default uses a SSIS catalog to store the SSIS projects and packages. If you do not want this and you rather want to use the package deployment method, simply deselect the checkbox:

Hovering over the question mark icon with your mouse displays the following message:
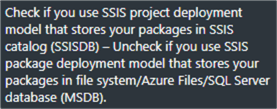
On the next package, you can configure some additional settings like the number of parallel executions:
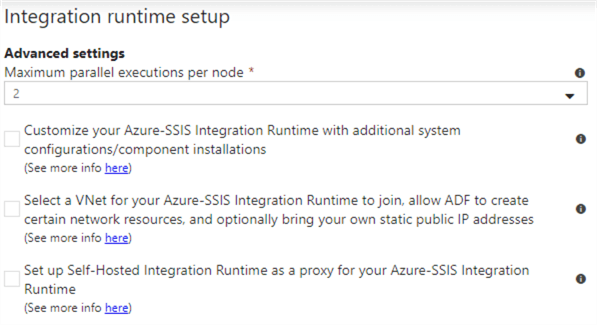
As the final step, you can review the configuration of the IR you’re about to deploy:
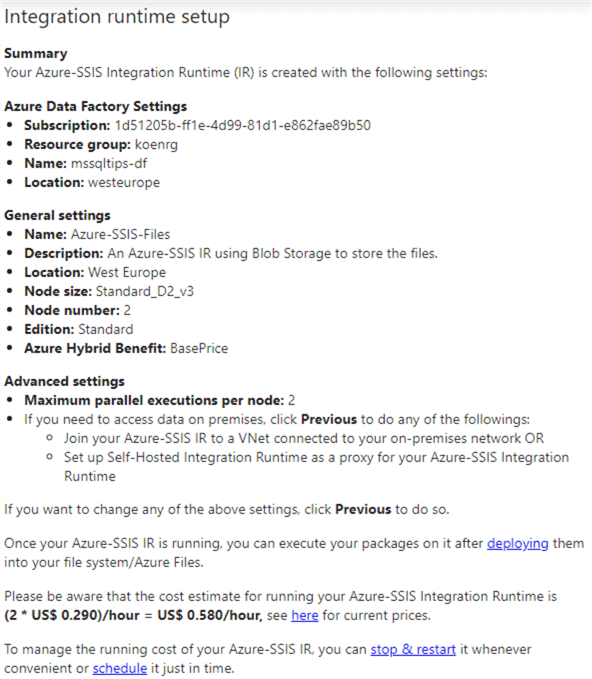
And that’s it. Your Azure-SSIS IR is now created.
Sample Project and Package
The test package holds a single Execute SQL Task. There are two variables created:
- TestMessage - This value has a default value "Hello World!", but it will be overwritten by a package configuration.
- SQLStatement - This variable uses an expression to compose a SQL INSERT statement that will insert the value of the TestMessage variable into a table.
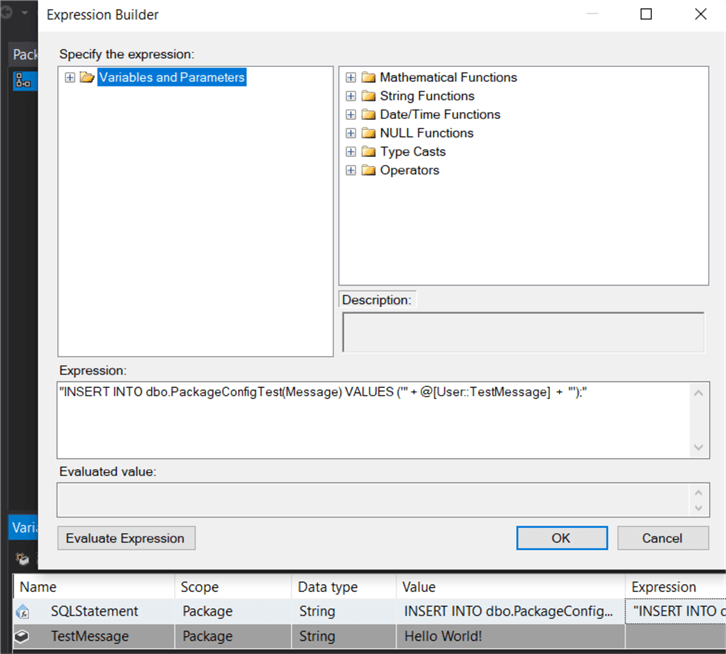
The Execute SQL Task executes the SQLStatement variable in an Azure SQL Database.
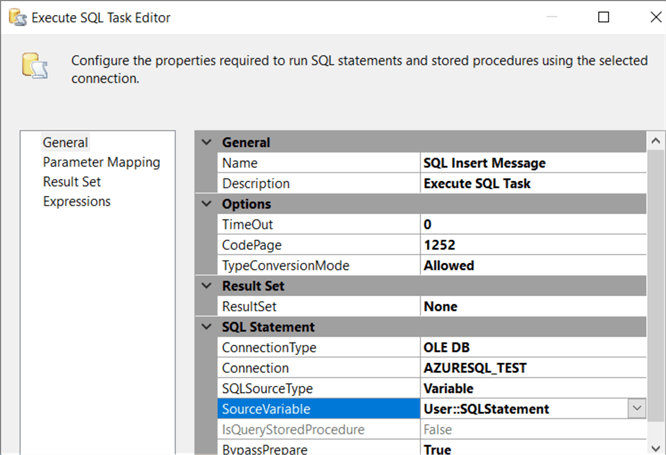
The table dbo.PackageConfigTest can be created with the following DDL statement:
CREATE TABLE dbo.PackageConfigTest
(ID INT IDENTITY(1,1) NOT NULL
,Message VARCHAR(100) NOT NULL
,LoadDate DATETIME2 NOT NULL DEFAULT SYSDATETIME()
);
Finally, a package configuration has been created that will update the value of the TestMessage variable using an XML config file:

The XML config file has the following contents:
<?xml version="1.0"?>
<DTSConfiguration>
  <DTSConfigurationHeading>
    <DTSConfigurationFileInfo GeneratedBy="mydomain\myuser" GeneratedFromPackageName="Package" GeneratedFromPackageID="{47735934-A4BA-4AA4-A372-4D2227D39C24}" GeneratedDate="3/23/2020 9:57:28 AM"/>
  </DTSConfigurationHeading>
  <Configuration ConfiguredType="Property" Path="\Package.Variables[User::TestMessage].Properties[Value]" ValueType="String">
    <ConfiguredValue>Hello MSSQLTips!</ConfiguredValue>
  </Configuration>
</DTSConfiguration>
The package itself is protected with the protection level EncryptSensitiveWithPassword, to secure the connection string to the Azure SQL DB.
When the package is run with the config disabled, the following data is inserted into the test table:

With the package config enabled, we get the following result:
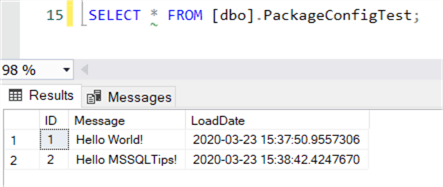
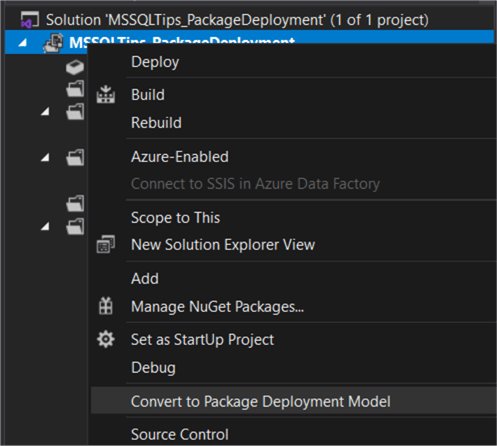
You can download the package and the config file here (the password is mssqltips). Make sure to add it to a project configured to use the package deployment model, since it is not the default:
Deploying the Package to Azure
This step is fairly straight forward. You just copy the package and the config file to an Azure File Share. You can use the free tool Azure Storage Explorer.
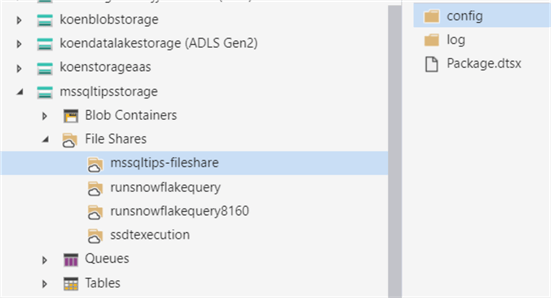
You can find more information about Azure File Shares (formerly called Azure File Services) in the tip Using Files Stored in Azure File Services with Integration Services - Part 1.
Execute a Package in Azure Data Factory
To test the integration runtime, we’re going to run the test package in an Azure Data Factory pipeline. In a pipeline, add the Execute SSIS package activity. In the settings pane, choose the IR we created earlier and select the file system as the location for the package.
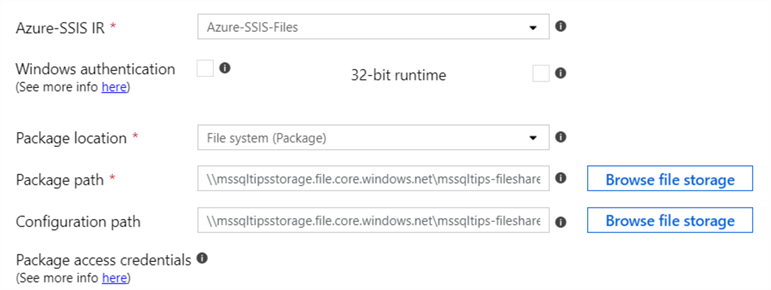
Browse to the package location and the location of the config file. You can use the browse file storage button to use a user interface to browse to the files.
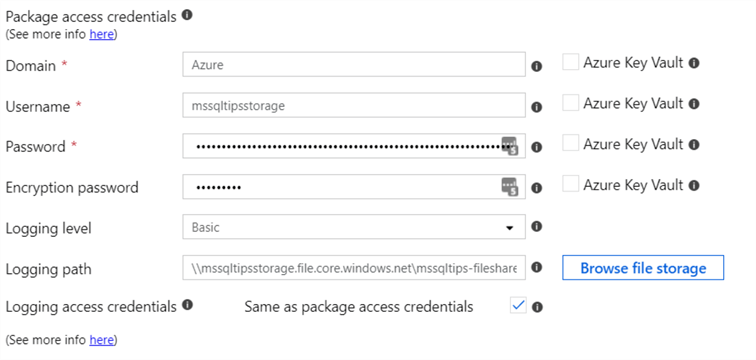
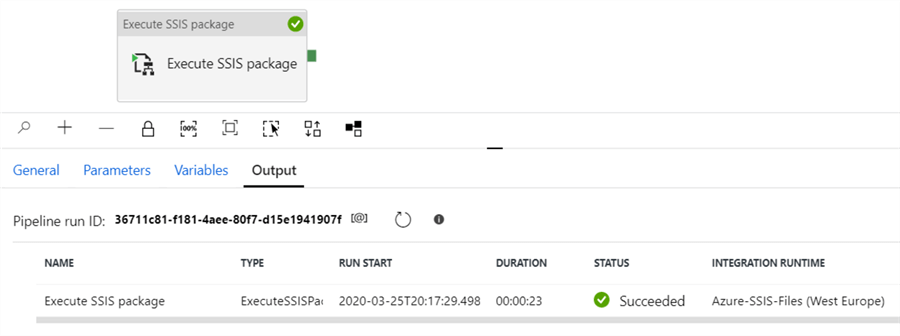
Next, configure the access credentials needed to access the Azure Storage location (in my case it was already pre-filled) and specify the password for the protection level (mssqltips). You can also set up a location for the log files. The pipeline can now be executed:
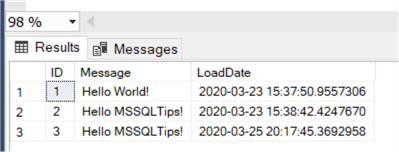
We can see a new row was added to the test table, using the XML config file to change the message:
In the log folder, we can find the following information:

Surprisingly, it is not one big log file like we’re used to in the package deployment model (more info in this tip), but rather a structure that reminds us of the logging used in the SSIS catalog.
Next Steps
- If you want to follow along with this tip, you can download the sample files here. The password of the package is mssqltips.
- If you want to create an IR for the project deployment model, check out the tip Configure an Azure SQL Server Integration Services Integration Runtime.
- For more SSIS tips, check out this overview.
- For more Azure tips, check out these articles.
About the author
 Koen Verbeeck is a seasoned business intelligence consultant at AE. He has over a decade of experience with the Microsoft Data Platform in numerous industries. He holds several certifications and is a prolific writer contributing content about SSIS, ADF, SSAS, SSRS, MDS, Power BI, Snowflake and Azure services. He has spoken at PASS, SQLBits, dataMinds Connect and delivers webinars on MSSQLTips.com. Koen has been awarded the Microsoft MVP data platform award for many years.
This author pledges the content of this article is based on professional experience and not AI generated.
View all my tips
Article Last Updated: 2020-05-06


