By: Scott Murray | Updated: 2020-07-15 | Comments (2) | Related: > Power BI
Problem
What are the Power BI workspace permissions and roles and how are they used?
Solution
Power BI includes a complex security infrastructure that encompasses data level detail such as that used for Row Level Security (see these tips on Row Level Security in Power BI: 1) Power BI Table Based Row Level Security and 2) Power BI Row Level Security.
Row level security is maintained at the dataset level. Furthermore, APP permissions grant report consumers that ability to access a Power BI APP. In between these levels are the various workspace report level permissions which maintain various access paths to the workspace itself. However, these permissions are often not seen directly as many end users interact with a report via the APP; other users will connect directly to the report in the workspace.
Let us get started with seeing some examples of how workspace permissions work. However, before we get into the examples, you need to be sure to download the latest version of Power BI desktop. Additionally, we will be using the WideWorldImportersDW database as a basis for our data sources; this database can be downloaded from GitHub. If you need a refresher on bringing data into Power BI please see: Querying SQL Server Data with Power BI Desktop.
One initial caveat that should be noted is that the items we discuss are related to the "new" workspace experience that was implemented in early 2020. Be sure you have upgraded to the latest version of the Power BI service (which should happen automatically). Also, as we develop our methods for granting access and setting up permissions be sure to remember we are establishing a way to collaborate with our report and dashboard consumers.
Create New Workspace on Power BI Service
We will start with creating a new workspace on the Power BI Service.
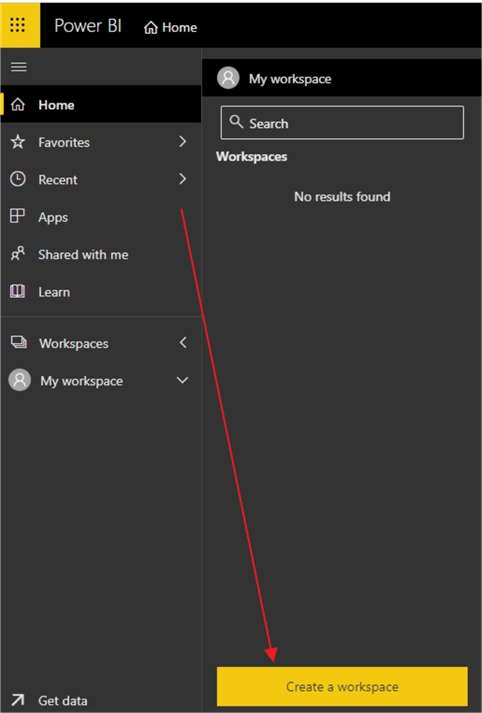
Next, the workspace is named and then saved.
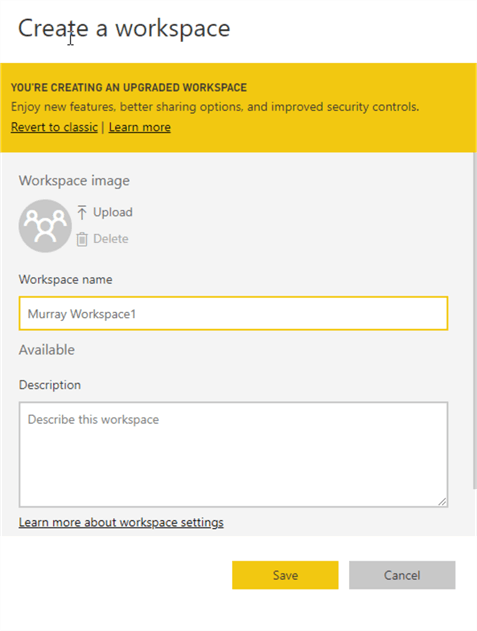
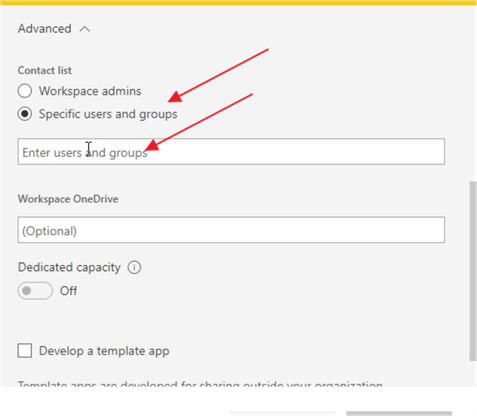
You will notice that during the workspace creation, no permissions are shown nor are any options really available except a default image and description along with a few advanced options, one of which is to fill in a workspace contact list. The list is used as a notification method if issues arise with the workspace.
Power BI Workspace Access
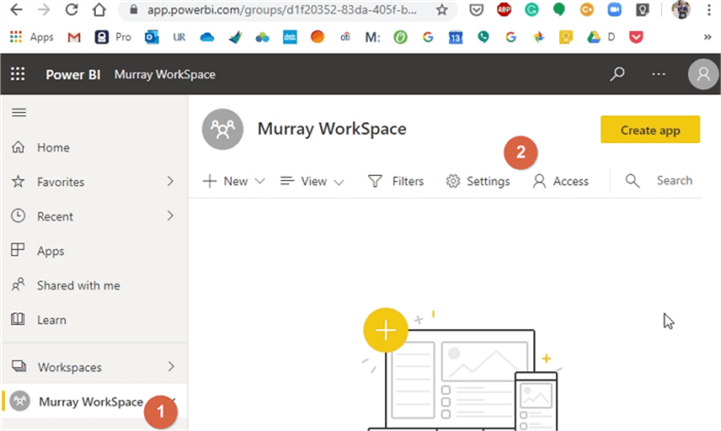
Now that the workspace is created, we can now review the permissions used in the workspace. You will need to select the desired workspace, then the ellipse, and finally Workspace Access.
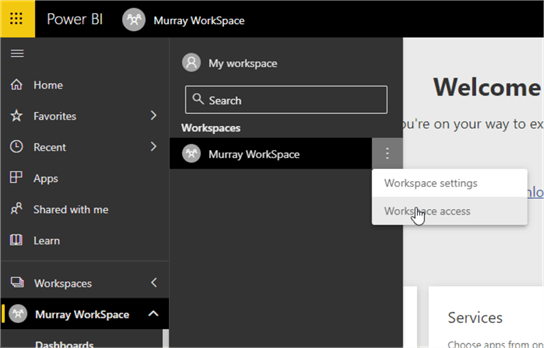
Alternately, the Access pane can be opened by selecting the workspace and then clicking the Access button.
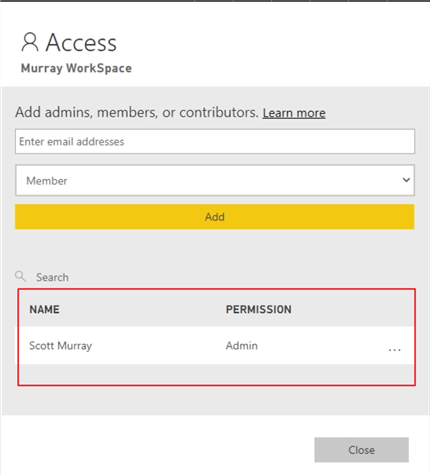
Initially, the content administrator / workspace creator is the only user that has a permission of Admin. However, others can be added.
Power BI Roles
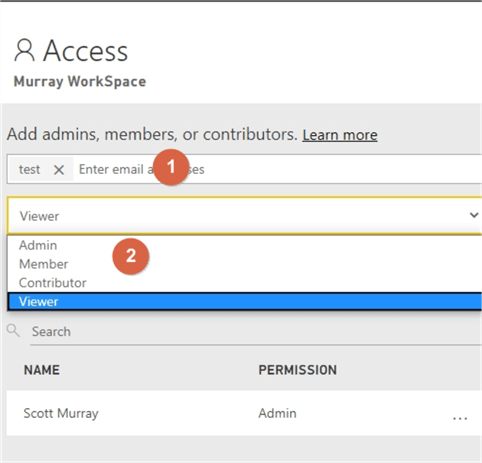
As shown below, you can add users or groups (Active Directory or Distribution Lists) to the workspace, but simply starting to type the name of the user or group; Power BI will use Intellisense. In my example, I am adding the user named "test"; next, the role must be selected. Four roles are available:
- Viewer - This role provides read only access to workspace items. Read access does provide report / dashboard consumers the ability to not only view, but also interact with visuals. Interaction does not mean changing a visual. Also note that users in this view do not require a Pro License to view reports if the workspace is in Premium mode. Without Premium content a Pro License is required. (see this tip for some details on license details (Power BI: What I wish I knew when I started?).
- Contributor - This role can access and interact with reports and dashboards. Additionally, this role can create, edit, copy, and delete items in a workspace, publish reports, schedule refreshes, and modify gateways.
- Member - This role can access and interact with reports and dashboards. Additionally, this role can create, edit, copy, and delete items in a workspace, publish reports, schedule refreshes, and modify gateways. Finally, members of this role can also feature dashboards on the service, share items, allow others to reshare items, publish or republish and APP. This role is also able to add other users to the viewer or contributor role.
- Admin - This role can do all the functions above plus add and remove all users including other Admins.
A few other notes about the viewer role (and by default all the other roles inherit these features) include: 1) a user still can export the report to PDF, Power Point or print the report page 2) even though row level security is set at the dataset level, it still applies to users in the viewer role (even though they are unable to see the dataset). In addition to the above permissions, you would also require Build permissions on the Dataset in order to create a report from a workspace dataset or copy a report. We will discuss the Build permission late in this tip.
After entering the user email address or name, selecting the role, then clicking on Add, Power BI creates the user’s access attached to the appropriate role. In the below example the Test user now has viewer access to the workspace.
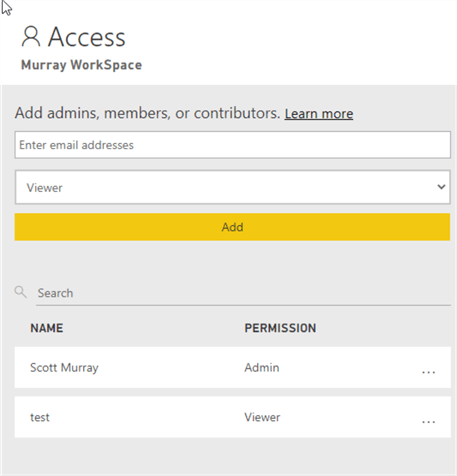
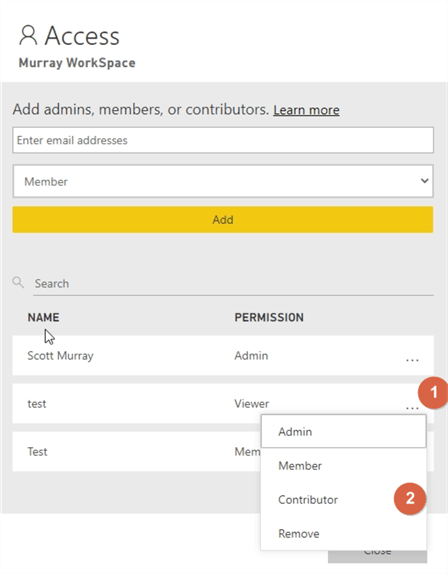
Clicking on ellipse next to the user allows for either the removal of a user or the ability to change the role for that user.
Power BI Permissions for Objects in the Workspace
Up to this point we focused on the permissions at the Workspace; now we will drop one level down and discuss permissions for the objects in the Workspace, including the new Build permission mentioned previously. Specifically, these permissions are set on the datasets. Specifically, two additional permissions exist at the dataset level 1) Reshare which allows for the user to share (or reshare) the dataset with other Power BI users and 2) Build which allows users to not only view the dataset, but also build their own reports based on that dataset. Build permissions are automatically granted to users within the Contributor, Member, or Admin roles set at the workspace level.
Alternately, Build and Reshare permissions can be assigned to individual users. To set these permissions, navigate to the desired workspace and then to the dataset list. Next, click the ellipse next to the workspace and select Manage permissions.
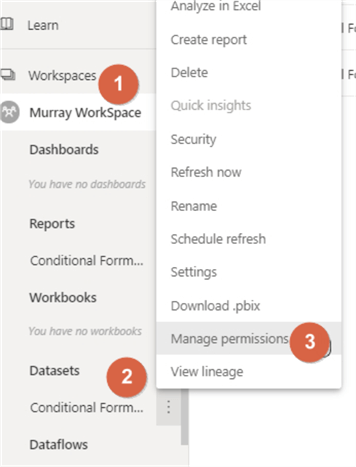
As shown on the Manage Permissions screen below, you will notice the users which were previously added to the workspace permissions show in the dataset list. Each user assigned roles are shown in the permissions column.

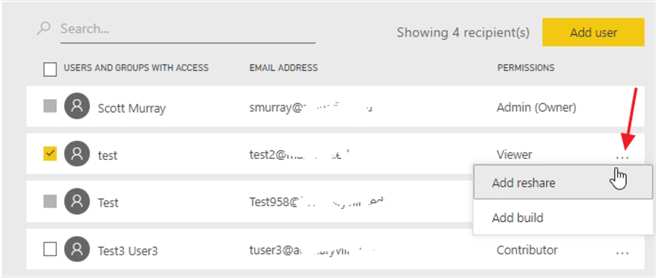
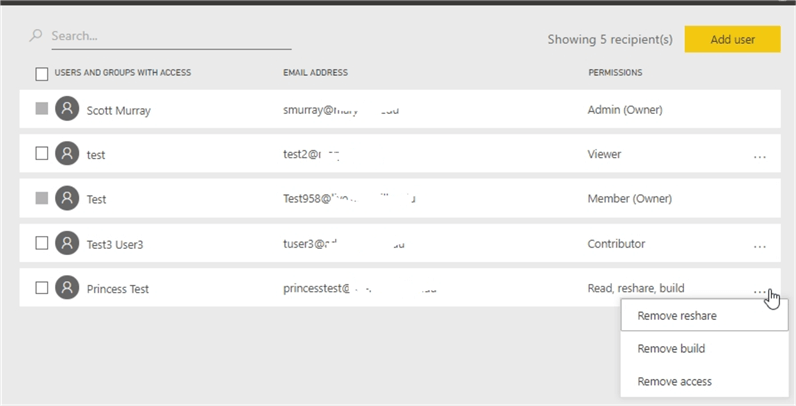
To add additional permissions for the user, select the ellipse to the right of the permissions column. Either Reshare or Build can be added to the user’s access permission.
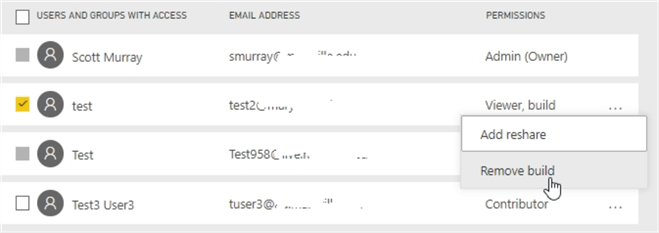
Similarly, once added, either permission can be removed.
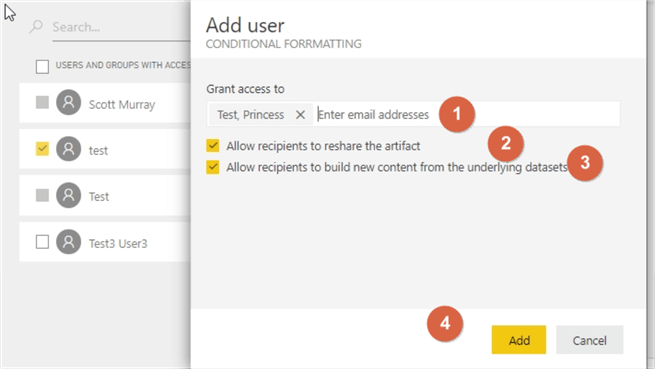
If a user was not added to the workspace, then that user can be added manually via the Add User button.

The username or email address can be filled using Intellisense and then selected. Although not blatantly clear, the two check boxes provide the user with the Reshare and Build permissions, respectively.
The user is added to the dataset permissions with Read access along with the selected Reshare or Build permissions. However, this user has not been granted permissions at the workspace level.
In this tip, we covered the basics of workspace permissions including specifics of what each workspace permission grants at the role level. Additionally, we have dived into the process of setting the Reshare and Build permissions at the dataset level.
Next Steps
- All Power BI Tips
Learn more about Power BI in this 3 hour training course.
About the author
 Scott Murray has a passion for crafting BI Solutions with SharePoint, SSAS, OLAP and SSRS.
This author pledges the content of this article is based on professional experience and not AI generated.
View all my tips
Article Last Updated: 2020-07-15


