By: Scott Murray | Updated: 2020-09-23 | Comments (1) | Related: > Power BI
Problem
How can the new Power BI Deployment Pipeline help with deploying dashboards and reports from Development to Test to Production?
Solution
A recently introduced feature in Power BI has upended the deployment and release process for Power BI files. The new process, called the Power BI Deployment Pipeline, provides a clear path for moving a report and its related data source from Development to Test to Production.
The process does not replace any local source control methods that you are using for your PBIX files (you are using some source control process, correct? One Drive or SharePoint could potentially be excellent options for retaining prior versions). By using the Deployment Pipeline, you can easily manage the prototyping and testing process that needs to be in place for your Power BI workspaces within the Power BI service.
Of course, with any new feature in Power BI, and especially ones that are still in preview mode (this feature is still in preview mode as of this tip’s initial publication) several caveats and restrictions exist. First, and foremost, you must have Premium capacity permissions and the workspace must live within the Premium capacity to utilize the Deployment pipeline. Next, the deploying user must have permissions to create workspaces to move reports and data sets through the deployment pipeline and the deploying user must also be an admin for the workspace to be deployed; likewise, the workspace must be using the new workspace "experience". Finally, a workspace can only live on a single pipeline at a time.
As all the work for this particular feature occurs on the Power BI Service; thus, we will not be working with Power BI Desktop. However, if you need the latest version of Power BI Desktop (PBID), you can download the latest version of Power BI desktop.
To get started using Deployment Pipelines, you simply navigate to the Power BI home page for your organization and click on Deployment pipelines link on the left side menu. To create the Deployment pipeline, you would click the Create a pipeline button.

Next, you specify the pipeline name and add a description.
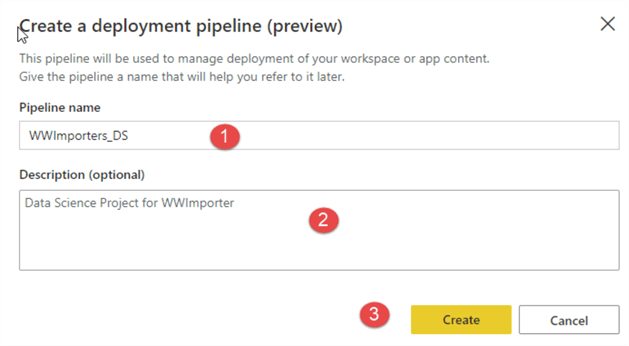
Now with the Deployment pipeline created, we have to assign an existing workspace to our deployment pipeline.
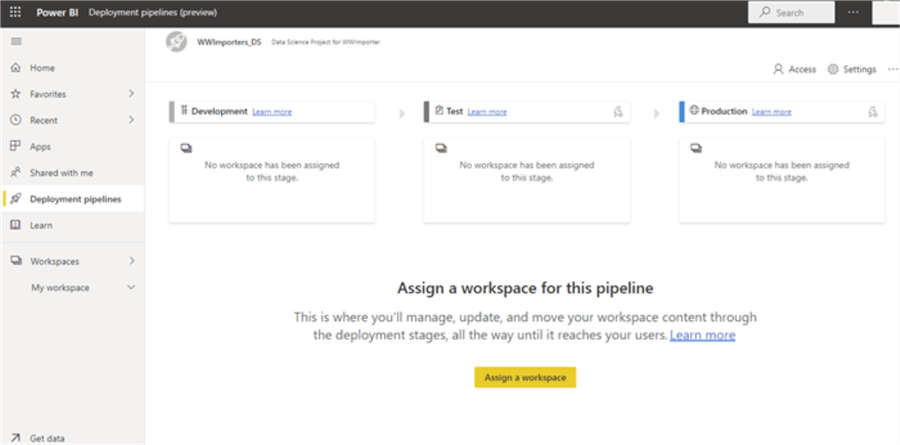
At this point in the process, we first select the workspace that will be assigned to the pipeline. Remember only workspaces in a premium capacity will be available to assign; additionally, the workspace must be using the new workspace experience. Finally, the assignment requires setting the stage to assign to the workspace, Development, Test, or Production and clicking Assign. Even if a workspace is assigned incorrectly, we can move the deployment backwards or delete it completely form the pipeline (we will cover those options later in this tip).
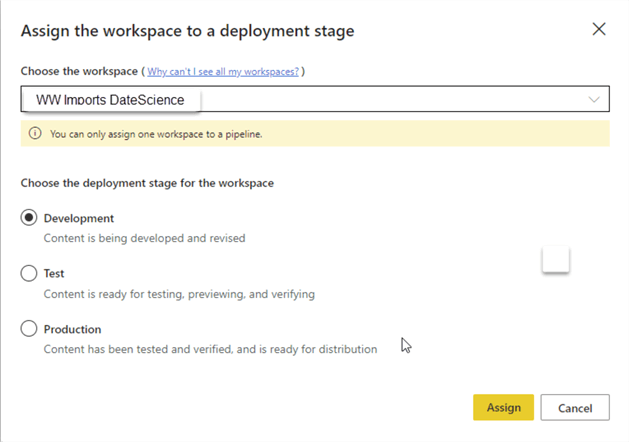
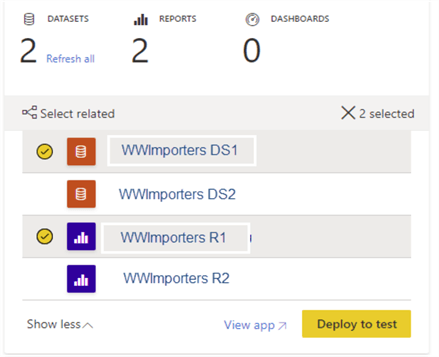
In the below illustrations, the workspace was assigned to the Development stage. The workspace contained two reports and two datasets. The workspace is assigned as a whole package with all reports and datasets. Notice the Deployment button in the bottom, right corner of the window. The deployment button would push the workspace from Development to test. In the below examples, all items are moved from Development to Test.

As an alternative, the deployment can be limited to just a select number of reports, date sets, and dashboards; for example, just one report and its related dataset. You may also notice the refresh options in the above and below illustrations. When a workspace is assigned / deployed, it may require the dataset to be refreshed to get the most current data. Such instances often would occur if the structure and the related data sets were changed in the original Power BI file. You must deploy related items together, so for instance, a report cannot be deployed to the next stage without its related data set.
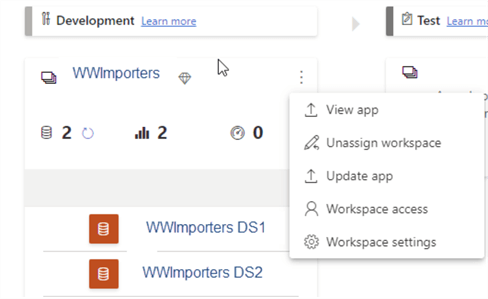
In addition to the deployment option, clicking on the ellipse in the upper right corner of the Development stage box, allows the developer to:
- Navigate to the root app
- Unassign the workspace (remove from the pipeline)
- Update the app
- Set workspace access permissions and settings.
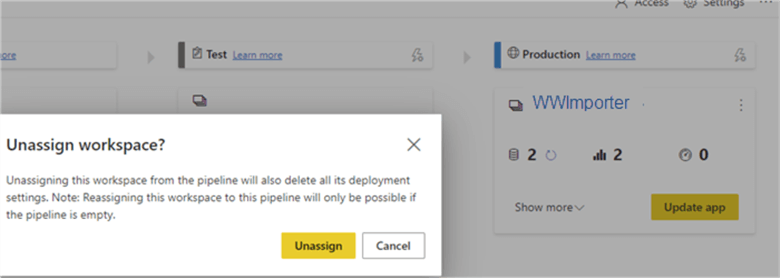
If the Unassign workspace option is selected, it removes all the related workspace deployment settings.
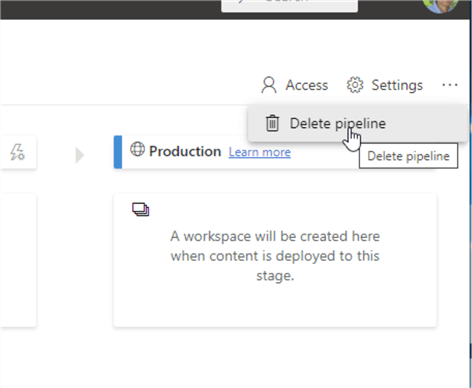
As an alternative to unassigning the workspace, the entire pipeline can be deleted by clicking on the ellipse / three dot button in the upper right corner of the Power BI window. Once deleted, though, the pipeline details are removed completely, similar to unassigning a workspace.
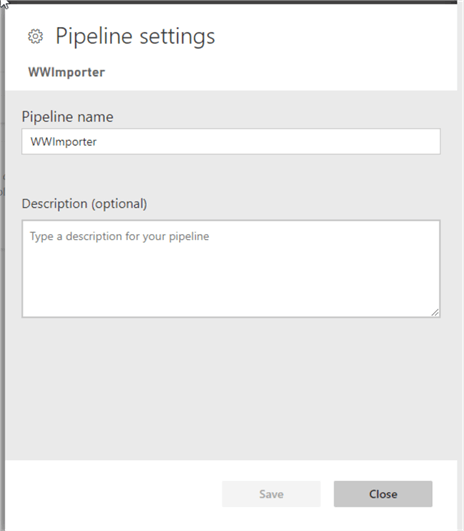
Clicking on the Settings gear button allows the developer to change the pipeline name or descriptions, as noted below.
If a workspace is in the Test or Production state of the pipeline, one additional option is available; this option, "Deploy to previous stage", provides the ability to move the workspace back one step in the pipeline staging process.

Certainly, once in production, the workspace can be used to update the App related to the workspace.
When running through the pipeline process, one of the main errors that will surface is related to permissions, specifically the permission to create workspaces. This particular issue is shown in the below illustration.

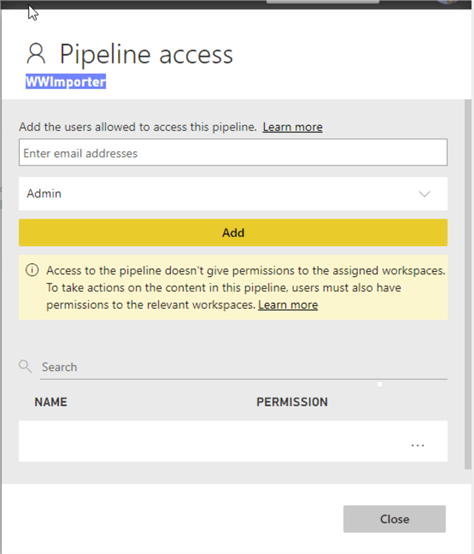
It should also be noted that deployment pipeline permissions are not the same as workspace permissions nor App permissions. A pipeline admin can grant permissions to another user via the Access button in the upper right corner of the Power BI window.
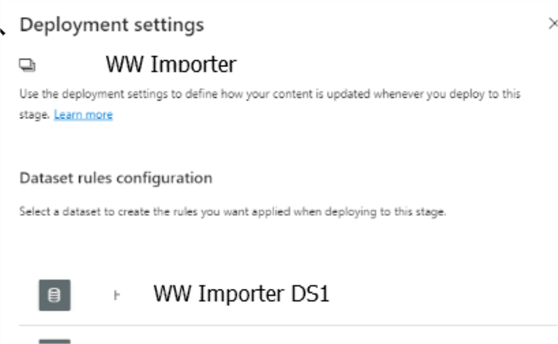
One final option to consider within deployment pipelines is the ability set rules around the data set refresh process. Data set rules are established by clicking on the lightning button in the upper right corner of the deployment stage. In order to take advantage of data set rules, parameters for items such as the database source must set via a parameter in the root file.

After clicking on the lightning button, the related data set must be selected.
After selecting the data set, you can select the Rule option, and then click on Add rule button. These tips from Koen Verbeeck could be helpful in understanding setting up data sources in Power BI: Power BI Desktop Data Source Considerations and Power BI Datasets. Power BI offers the option to set database rules either via parameters rule or data source rules.
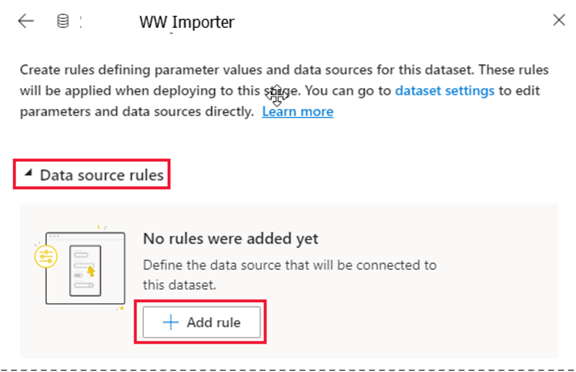
Finally, we can tell the pipeline stage to utilize a new connection string for the server and database details. These situations would be especially helpful when you have Development, Test, and Production databases that need to be used in each of the respective stages of deployment. Thus, in the below example, we are switching the data source to our localhost and the WideWorldImportsDW database.

In this tip we summarized the new deployment pipeline feature within the Power BI service. The deployment pipeline provides a rich way to move a report or dashboard prototype through the stages of the report development.
Next Steps
- Check out all of the Power BI Tips on MSSQLTips.com – Enjoy!
Learn more about Power BI in this 3 hour training course.
About the author
 Scott Murray has a passion for crafting BI Solutions with SharePoint, SSAS, OLAP and SSRS.
This author pledges the content of this article is based on professional experience and not AI generated.
View all my tips
Article Last Updated: 2020-09-23


