By: Rajendra Gupta | Updated: 2020-12-01 | Comments | Related: More > Integration Services Development
Problem
SQL Server Integration Service (SSIS) packages improve flexibility for the database professionals to import and export data in the format of their choice. SSIS packages are a popular tool in SQL Server for extract, transform and loading data. SSIS packages provide data transformations from various data sources and destinations such as OLE DB, ODBC, Excel, CSV, flat file, XML, ADO.NET, etc. Once you use the external data destination, the SSIS package sends data in the respective data destination.
Have you heard about the RecordSet Destination? Why use this destination in a SSIS package? Let’s explore in this article.
Solution
A RecordSet Destination stores data in memory using an SSIS package object variable. It does not save this data to the external data source. Once we have data in the RecordSet destination, we can use it in SSIS containers such as a Foreach Loop. In the Foreach container, it uses a foreach ADO enumerator for processing each row. It processes each row one by one and moves to the next row after processing.
You can configure the SSIS tasks such as Script Task or Send Mail Task inside the Foreach Loop Container. For example, suppose you develop an SSIS package to send the email to customers on a pre-defined format. Now, you get inputs from the business about the customer’s email id in a flat-file source. You process the flat file in SSIS package, store data in the RecordSet destination and process each customer’s data to send the email using the Foreach ADO enumerator.
Let’s explore the RecordSet destination using a demo.
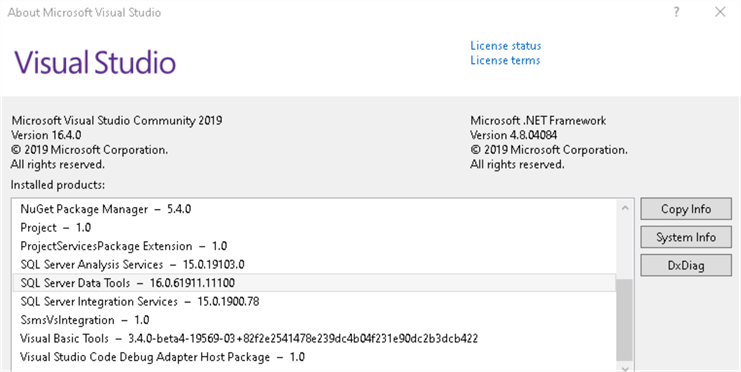
For this tip, I use Visual Studio 2019 with Integration Service in the SQL Server data tools. You can browse Download SQL Server Data Tools (SSDT) for Visual Studio for it.
Design an SSIS package to use the RecordSet Destination
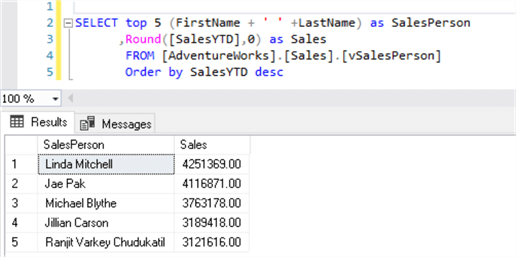
To use the RecordSet destination, we need to import data from a SSIS data source. In this tip, we will use the [AdventureWorks] sample database to fetch the records. Download the sample database here.
This query gets 5 records from the view [vSalesPerson] from the [AdventureWorks] database in a descending order based on the [SalesYTD] values.
SELECT top 5(FirstName + ' ' +LastName) as SalesPerson
      ,Round([SalesYTD],0) as Sales
       FROM [AdventureWorks].[Sales].[vSalesPerson]
       Order by SalesYTD desc
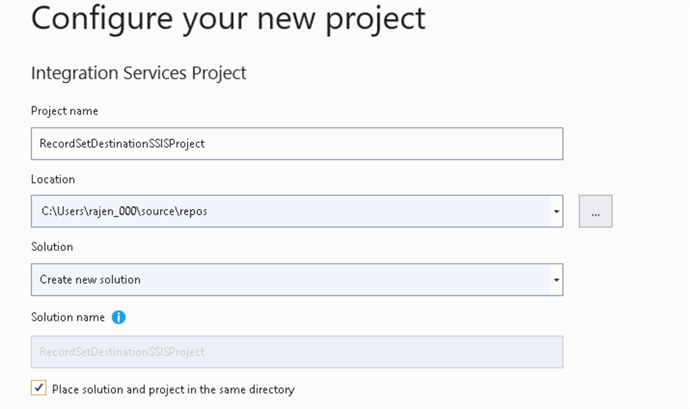
Now, launch Visual Studio 2019 and create a new Integration Service project.

Specify a project name and directory to configure the new project.
Data Flow task configurations
In the Control Flow, drag the Data Flow Task from the SSIS toolbox, as shown below.

Before we perform the Data Flow Task configuration, right-click on the blank screen in the Control Flow and select Variables. In the SSIS packages, we use the variables to store one or more values. These values can be referenced in the SSIS package components.
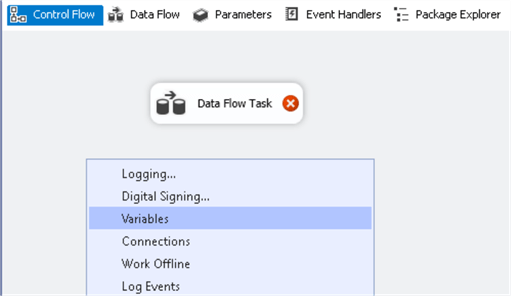
In the variables, we create a new variable ObjSales, and its data type should be Object. The variable scope should be "Package", as shown below.

Now, double-click on this data flow task and add the OLE DB Source.

In this OLE DB Source, perform the following configurations:
- Specify the SQL Server connection in the OLE DB connection manager. For the SQL Server connection, it requires instance name, authentication mode. If you use SQL authentication, enter your user name and password as well.
- Change Data access mode as SQL command because we want to fetch data using a T-SQL statement.
- Enter the T-SQL specified above in the SQL command text.
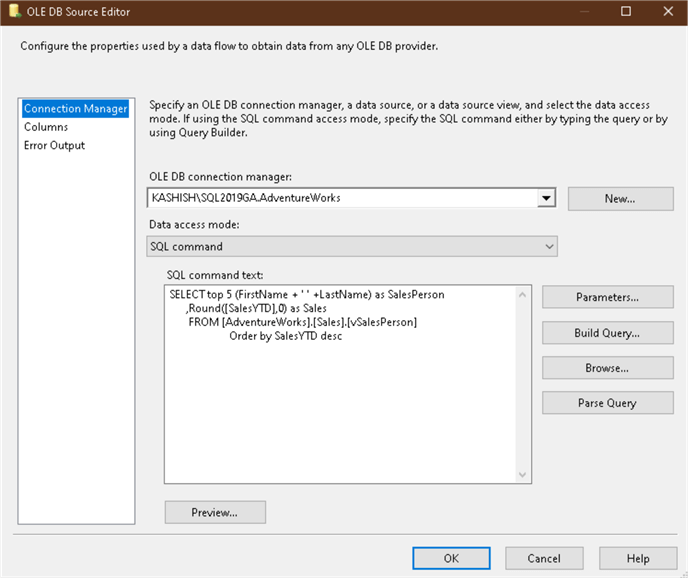
You can click on the Columns tab and verify that the query has two output columns – [SalesPerson] and [Sales].
RecordSet Destination Configuration
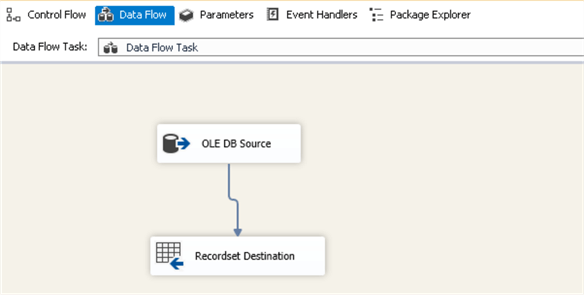
Now, add a RecordSet Destination task and join it with the OLE DB Source.
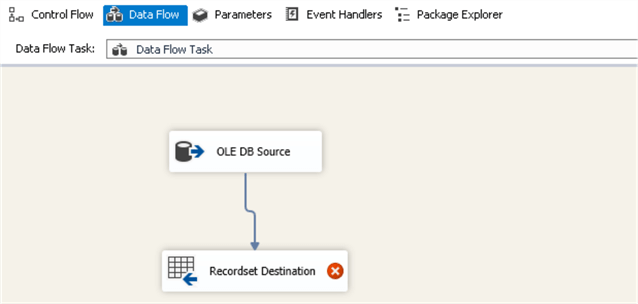
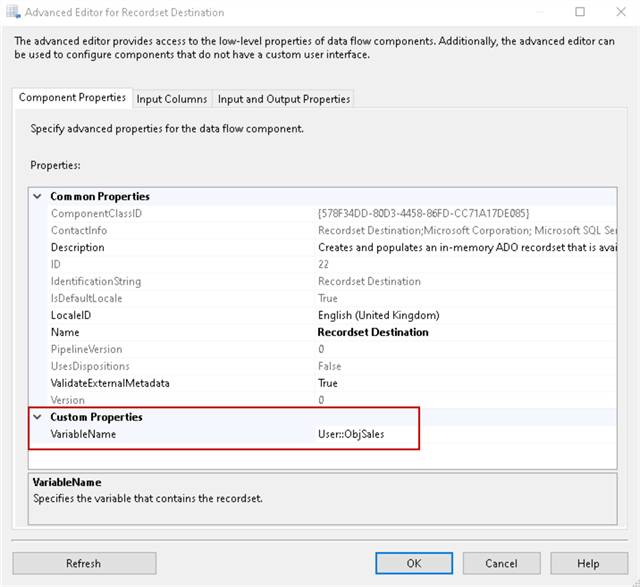
Open the RecordSet Destination editor and select the user-defined object variable [User:ObjSales] we created earlier.
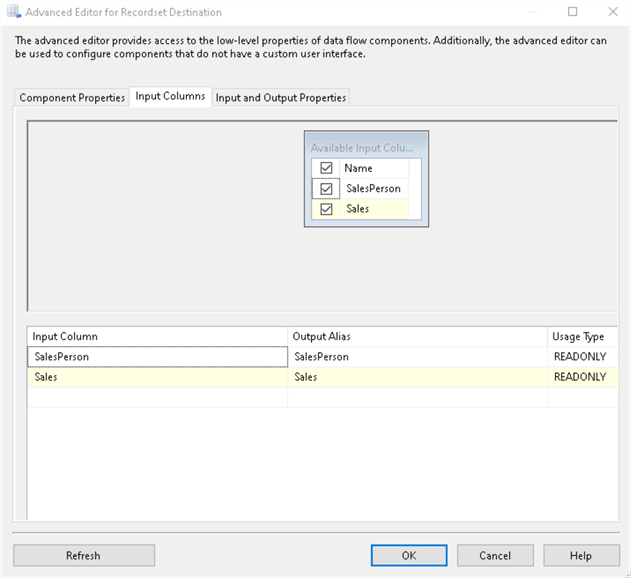
Click on the Input Columns tab and select both columns that we retrieve from the SELECT statement. A RecordSet Destination stores the columns values as an object.
Click OK, and it completes data flow configurations.
Add a Foreach Loop Container
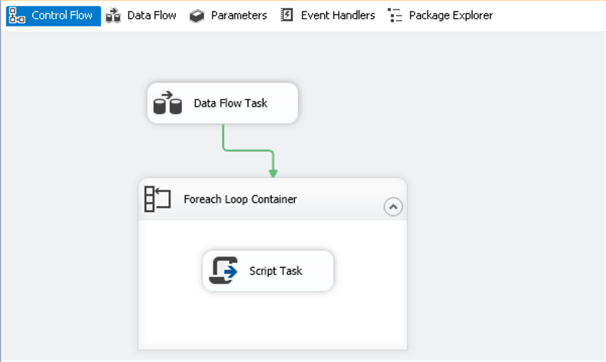
Switch to the Control Flow and add a Foreach Loop Container from the containers folder. Join this Data Flow Task with the Foreach Loop Container. This Foreach Loop Container runs as per the number of rows in the data flow task output. For example, if we have 5 rows in the data flow task output, the foreach loop runs 5 times, once for every output row of the data flow task.

Open the Foreach Loop editor and navigate to Collection. In the collection page, perform the following:
- Select the Enumerator as Foreach ADO Enumerator.
- In the Enumerator configuration, select the object variable [ObjSales] that we created earlier.
- Enumerator mode - Rows in the first table.
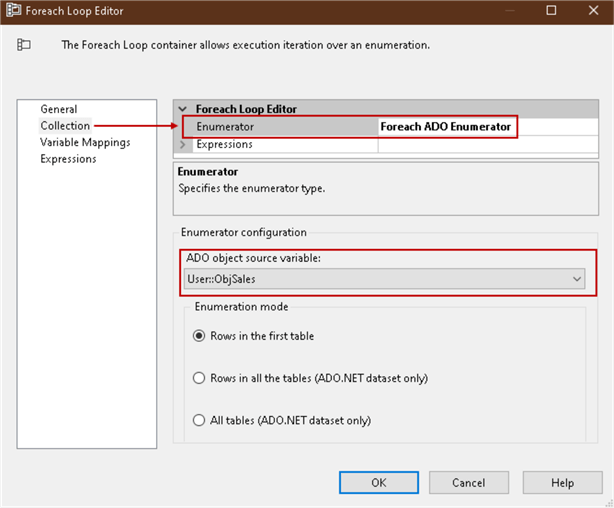
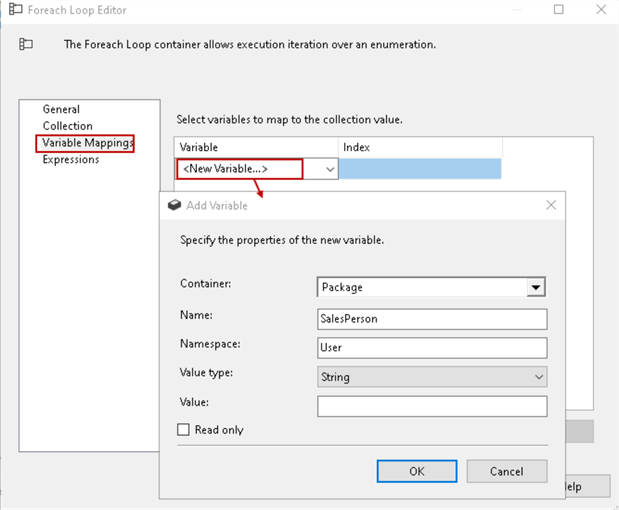
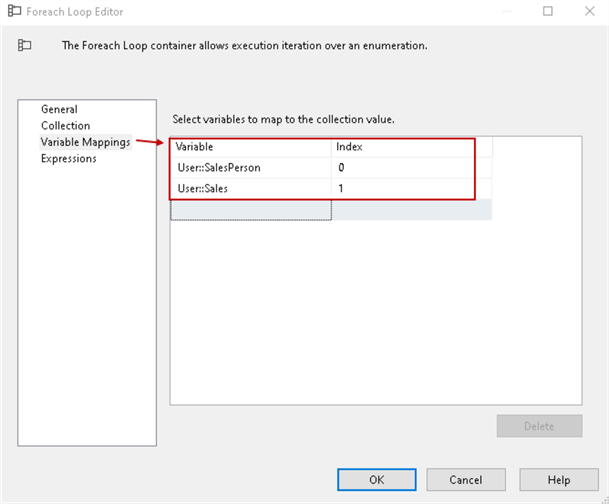
Now, click on Variable Mappings and create two variables for the [SalesPerson] and [Sales]. You must use the appropriate data type for your data.
For [SalesPerson] variable, we use the string data type in the SSIS package variable, as shown below.
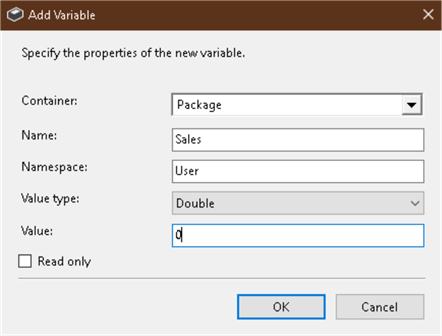
Add another variable for [Sales] with the data type [Double]. In this data type, we need to specify a default value. You can enter the default value - 0.
We have now mapped two variables, as shown below. Here, the index value shows the column position.
Now, we can add a Script Task or Send Mail Task inside the Foreach Loop Container. The foreach container runs the script task for each row one by one.
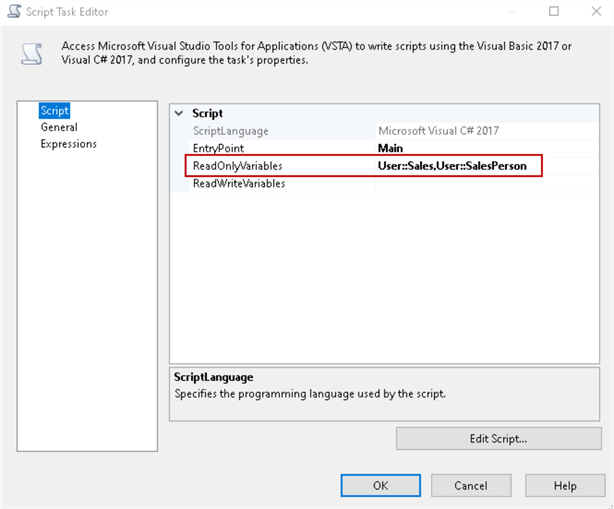
In the script task editor, map the read-only variables as the variables we defined for Salesperson and Sales. To map the variables, select these variables from the drop-down list in the [ReadOnlyVariables] column.
Click on Edit Script to enter a script in Microsoft Visual C#. In this script, we specify the script to add a message box and display a salesperson name along with sales value.
It opens another Window to write your C# code. Here, we use MessageBox.show() to display values of the SalesPerson and Sales from the RecordSet destination object. In the below code, we use the Dts.variables to display the value for both columns.
string title = "RecordSet Destination";
            MessageBox.Show("SalesPerson  " + Dts.Variables["User::SalesPerson"].Value + "   " + "  Sales  " + Dts.Variables["User::Sales"].Value.ToString(), title);
              ;
Save the script in the editor and close it.
Our SSIS package configuration is complete now. We can execute the package and view data in the message box.

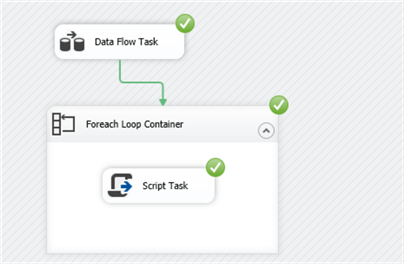
Once we execute the SSIS package, it runs the script task inside the Foreach Loop Container for each data row of the data flow task. It pops up a message box for each value and then moves to the next row.
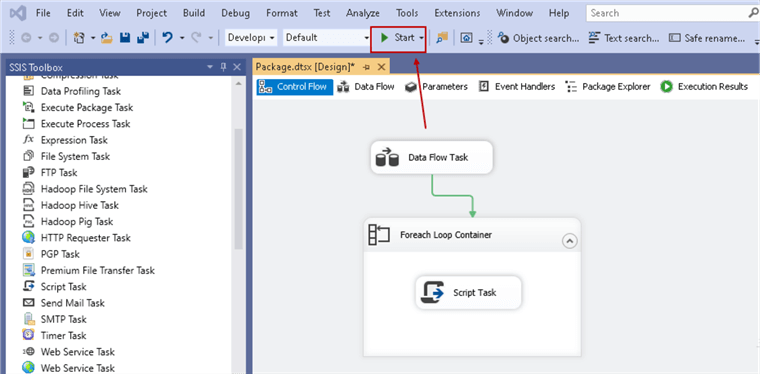
Click on Start for package execution. You can see a pop up that displays the values for both [Salesperson] and [Sales] from our select statement output.
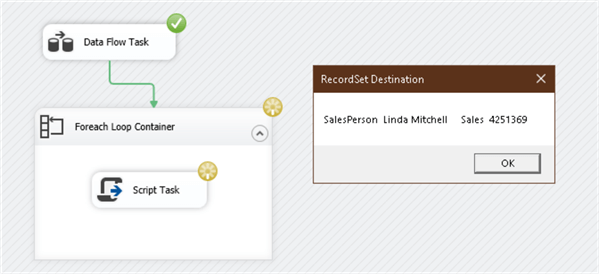
Click OK and it displays the next set of values.
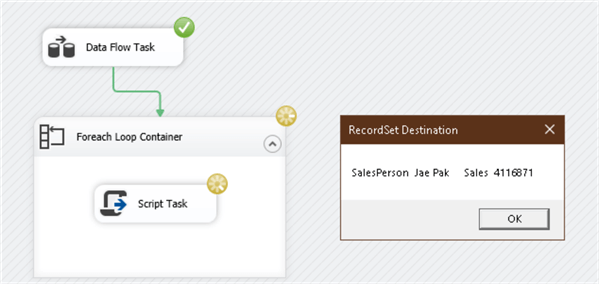
Once it displays all records in the message box, the package execution completes.
Next Steps
- Use the following tips to use the SSIS Send Mail Task in the Foreach Loop Container:
About the author
 Rajendra Gupta is a Consultant DBA with 14+ years of extensive experience in database administration including large critical OLAP, OLTP, Reporting and SharePoint databases.
This author pledges the content of this article is based on professional experience and not AI generated.
View all my tips
Article Last Updated: 2020-12-01


