By: Rajendra Gupta | Updated: 2020-11-10 | Comments (6) | Related: > Amazon AWS
Problem
In a traditional SQL Server, we use database mail for sending emails. It can contain informational messages, jobs failures, query output in the email body or as an attachment. It uses the Simple Mail Transfer Protocol (SMTP) protocol for sending the emails.
We plan on migrating an on-premises SQL Server database to AWS RDS SQL Server. Recently, AWS started support for Database Mail for SQL Server. How do we enable and configure it? Let's explore in this tip.
Solution
In this tip, we use the Amazon Simple Email Service (SES) for the SMTP server. You can use other SMTP servers if required.
Configure Amazon Simple Email Service (SES)
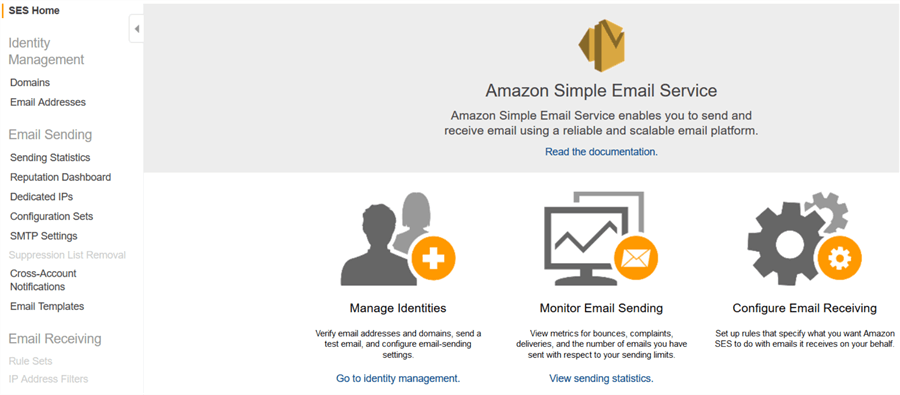
Log in to the AWS Web Console, go to Services and Simple Email Service. It opens the following home page for SES service.
In the left-hand menu bar, click on SMTP settings. It displays an SMTP server name, port as per your AWS region.
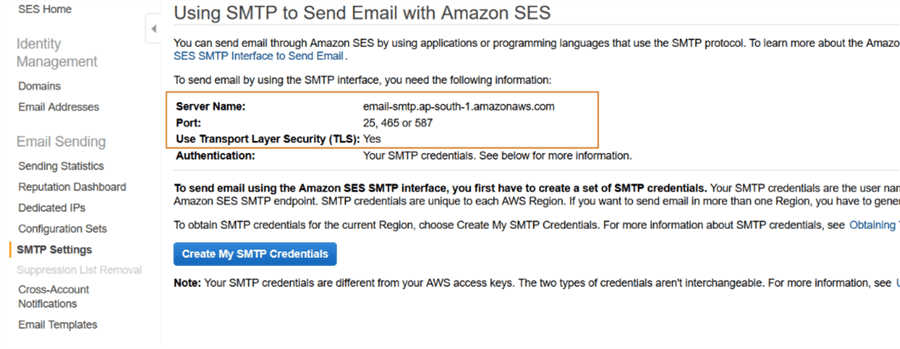
For the authentication purpose, we need to create the SMTP credentials. We use these credentials while setting up the database mail profile for RDS. Click on Create My SMTP Credentials.
It creates an IAM User name and password for you.

You can copy the SMTP user name and password in database mail account.

Verify a New email address
In the SES console, click on the Email address. We need to set up an email address and verify it. Therefore, make sure you have access to the email address to view and read the emails.
Click on Verify a New Email Address.

Specify your email address and click on Verify this email address.
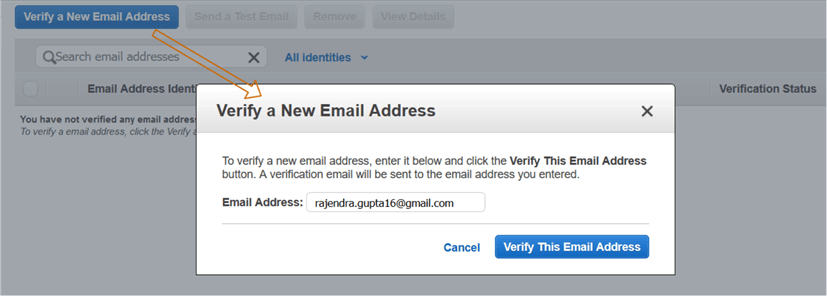
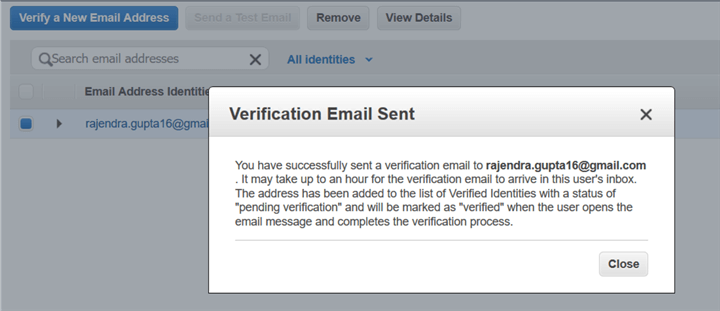
It sends you a verification email.
Open your mailbox, and the email looks like below.
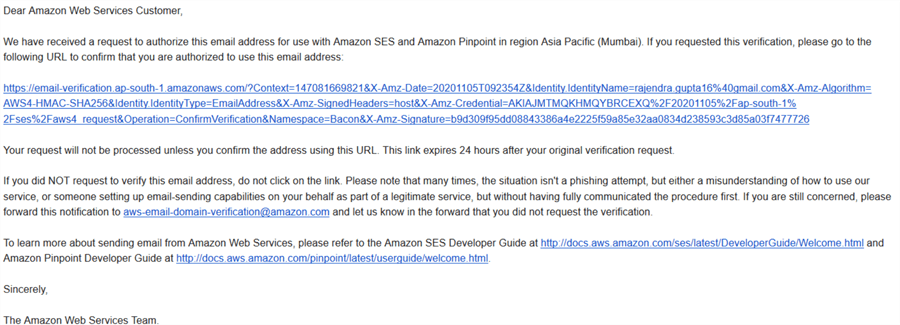
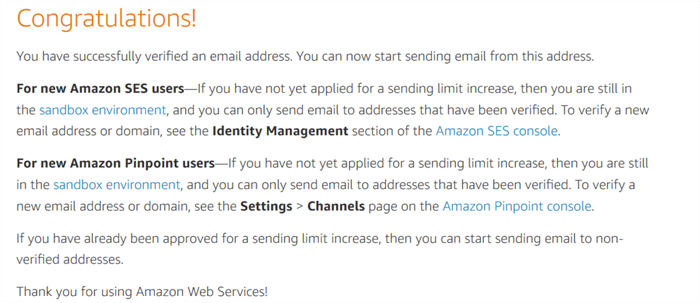
Click on the URL, and you get a Congratulations message after successful verification.
In the SES console, the status changes to Verified, as shown below.

Configure Database Mail for RDS SQL Server
In this article, I have the following RDS SQL Serve instance:
- DB identifier: rdsdemo
- Engine: SQL Server Standard edition
- Region: ap-south-1c
- size: db.t3.large
- Status: Available

AWS Parameter Group
RDS uses the parameters groups to enable the Database mail on RDS SQL Server. In the RDS dashboard, click on the parameter group, and you get a list of default and previously created parameter groups.

RDS does not allow you to modify a default parameter group. Therefore, create a new parameter group and select your SQL instance version and edition in the parameter group family.
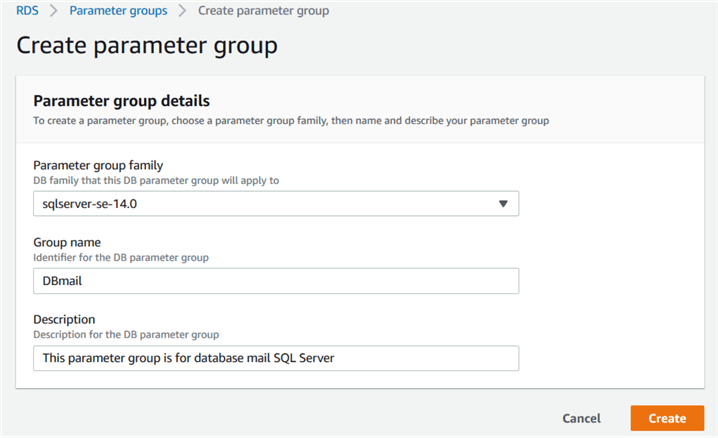
We have created a new parameter group [dbmail].

Currently, this parameter group does not contain any user configurations. Click on the parameter group and add database mail xps from the available parameters.

Click on Edit parameters, change its value to 1 (to enable) and save the changes.

Now, we need to integrate this parameter group with our RDS instance. Select the RDS instance and click on Modify.

In the modify RDS instance page, navigate to additional configuration, Database Options and change the parameter group to [DBmail].
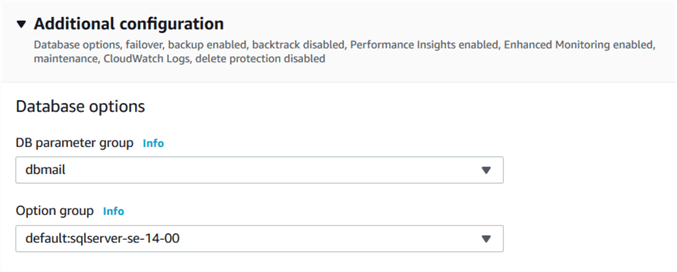
You can schedule the changes to be applied during the next maintenance window or apply it immediately.
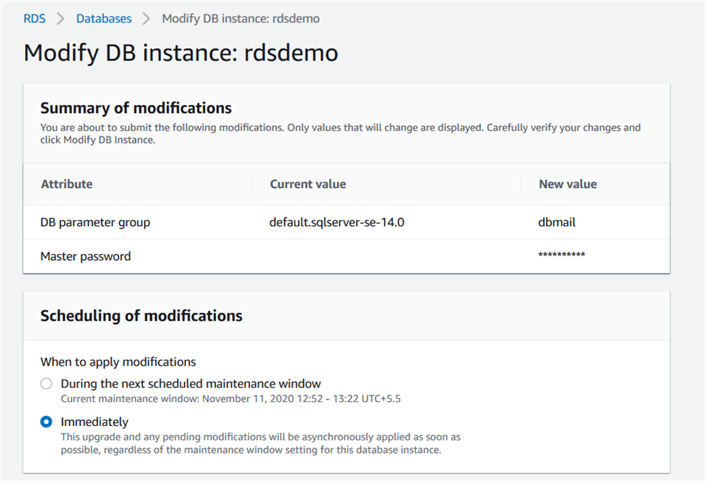
It modifies your RDS instance as per the new parameter group.

At this point, our RDS instance is capable of using the Database Mail feature. However, we need to set the Database Mail profile and account with our SMTP settings. We cannot use the GUI for Database Mail profile creation. It needs to be done using T-SQL.
Configuring Database Mail
To configure the Database Mail, connect to RDS using SQL Server Management Studio, and run the following queries.
- Create a new database mail profile using the stored procedure msdb.dbo.sysmail_add_profile_sp. Specify a database mail profile name and its description.
use MSDB
GO
EXECUTE msdb.dbo.sysmail_add_profile_sp
@profile_name = 'RDSMail',
@description = 'This profile is for RDS DB mail testing purpose';
Use the stored procedure msdb.dbo.sysmail_add_principalprofile_sp to grant permissions for database mail profile. In this procedure, we use the public role in the MSDB database association. Your profile name should be same as you specified in the previous step.
use msdb
go

EXECUTE msdb.dbo.sysmail_add_principalprofile_sp
@profile_name = 'RDSMail',
@principal_name = 'public',
@is_default = 1 ;
In this step, we create a new Database Mail account with the SMTP information.
EXECUTE msdb.dbo.sysmail_add_account_sp
@account_name = 'MyAccount',
@description = 'Test the DB mail feature of RDS SQL Server',
@email_address = '[email protected]',
@display_name = 'Automated Mailer',
@mailserver_name = 'email-smtp.ap-south-1.amazonaws.com',
@port = 587,
@enable_ssl = 1,
@username = 'AKIASEPWAFS62Q3TNYWB',
@password = 'BPHOgKndJrX730hHJi8R3aukR0+p6Lz/9xLMdfnI+4vz' ;
It uses the following parameters:
- @account_name: Specify the account name.
- @email address: Specify the email address from which the mail needs to be sent.
- @display_name: It is the display name for your email address.
- @mailserver_name: Enter the SMTP address that you obtained earlier from Amazon SES.
- @port: Give the port number of your SMTP. In my case, we get it from the Amazon SES portal.
- @enable_SSL: Specify the value as 1 for SSL.
- @username and @password: Enter the IAM user credentials for SMTP authentication.
Associate the Database Mail profile and account
In this step, we integrate the Database Mail profile with the account.
use msdb
go

EXECUTE msdb.dbo.sysmail_add_profileaccount_sp
@profile_name = 'RDSMail',
@account_name = 'MyAccount',
@sequence_number = 1 ;
Send a test email and validation
We can use another stored procedure msdb.dbo.sp_send_dbmail to send the email from database mail. In this query, you need to specify the profile name, recipient email address, email subject and its body.
EXEC msdb.dbo.sp_send_dbmail
@profile_name = 'RDSMail',
@recipients = '[email protected]',
@body = 'This is a test email from DB mail feature of RDS SQL Server',
@subject = 'RDS SQL Server DB Mail Status Check';
GO
It triggers an email from the Database Mail account and returns a mail item id. In the below screenshot, it shows the mail item id 3.
You can query the msdb.dbo.sysmail_allitems table for the particular mail item id and check the status. Its status should be sent, as shown below.
SELECT sent_status,* FROM msdb.dbo.sysmail_allitems WHERE mailitem_id=3
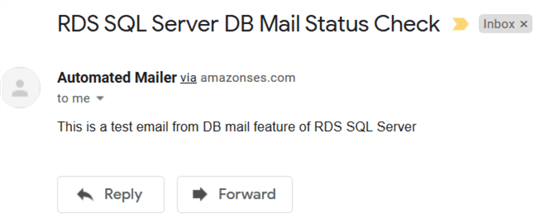
Here, is the email triggered from the database mail and received in my Gmail account.
In the top, it shows Automated Mailer via amazonses.com.
- Automated Mailer is the display name of the account.
- amazonses.com is the SMTP email for Amazon SES service.
We can use HTML formatted emails as well for RDS DB mail similar to a traditional SQL Server. In the below script, we do the following tasks.
- Create an RDS SQL Database [EmployeeData].
- Create a SQL table [Employee1] and insert a few records into it.
- Define an HTML format for DB mail.
- Use DB mail to send the email to the specified email address.
CREATE DATABASE EmployeeData
Go
Use EmployeeData
Go

CREATE TABLE [dbo].[Employees1](
   [EmpID] [int] NULL,
   [Employee Name] [varchar](100) NULL,
   [Gender] [char](1) NULL,
   [Department] [varchar](100) NULL
)
GO

INSERT INTO [Employees1]
SELECT 1,'Rajendra','M','IT'
UNION ALL
SELECT 2,'Kavita','F','HR'
UNION ALL
SELECT 3,'Mohan','M','Admin'

DECLARE @xml NVARCHAR(MAX)
DECLARE @body NVARCHAR(MAX)

SET @xml = CAST(( SELECT [EmpID] AS 'td','',[Employee Name] AS 'td','',
[Gender] AS 'td','', Department AS 'td'
FROM [EmployeeData].[dbo].[Employees1]
ORDER BY [EmpID]
FOR XML PATH('tr'), ELEMENTS ) AS NVARCHAR(MAX))

SET @body ='<html><body><H3>Employees Data</H3>
<table border = 1>
<tr>
<th> Emp ID </th> <th> Employee Name </th> <th> Gender </th> <th> Department</th></tr>'

SET @body = @body + @xml +'</table></body></html>'

EXEC msdb.dbo.sp_send_dbmail
@profile_name = 'RDSMail',
@recipients = '[email protected]',
@body = @body,
@body_format ='HTML',
@subject = 'Employees Data';
GO
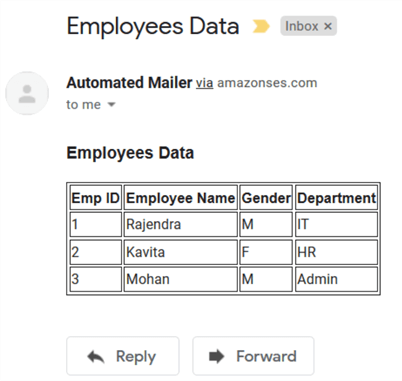
It sends the following HTML formatted email from the RDS SQL Server instance.
Next Steps
- If you have SQL Server RDS instance in AWS, make sure you configure Database Mail for useful notifications.
- Check out the following tips:
About the author
 Rajendra Gupta is a Consultant DBA with 14+ years of extensive experience in database administration including large critical OLAP, OLTP, Reporting and SharePoint databases.
This author pledges the content of this article is based on professional experience and not AI generated.
View all my tips
Article Last Updated: 2020-11-10


