By: Joe Gavin | Updated: 2020-12-16 | Comments | Related: > Tools
Problem
Microsoft Visual Studio (VS) is an Integrated Development Environment (IDE) used to develop and publish applications, cloud services, web apps, mobile apps, and SQL Server Integration Services projects.
If you're going to be using Visual Studio, you need to decide which edition to install and what to expect from the installation process.
Solution
We'll look at the three editions available to help decide which one to use and how to download the installer. We will then walk through the installation process on a machine with Windows 10 Professional desktop.
Visual Studio Minimum Hardware and Software Requirements
Operating System
- Windows 10 version 1703 or higher (Home, Professional, Education, or Enterprise)
- Windows 8.1 with update 2919355 (Core, Professional, or Enterprise)
- Windows 7 SP1 with latest Windows Updates (Home Premium, Professional, Enterprise, or Ultimate)
Hardware
- 1.8 GHz or faster processor - quad-core or better recommended
- 2 GB of RAM (2.5 GB minimum if running on a VM) - 8 GB is recommended
- 800MB of disk space but installation can be up to 210 GB - 20-50 GB is typical
- Video card that supports a minimum display resolution of 720p (1280 by 720) - 1366 by 768 or higher is recommended
Visual Studio Editions
Visual Studio 2019 is available in three editions"
- Community Edition
- $0.00
- Individual use
- Developer can use Visual Studio Community to create their own applications, free or paid
- Organization use
- Unlimited number of users provided that it's used for:
- Classroom learning
- Academic research
- Contributing to open source projects
- Non-enterprise organizations (defined as having less than 250 PCs or $1,000,000 in annual revenue) can have up to 5 users
- Unlimited number of users provided that it's used for:
- Available for Microsoft Windows
- Professional Edition
- $45 per month for monthly subscription or $1,199 for the first year and $799 per year to renew for standard subscription (as of this writing)
- Entry level commercial edition
- Can be used by enterprise organizations for any development work
- Available for Microsoft Windows and Mac
- Enterprise Edition
- $250 per month for monthly subscription or $5,999 for the first year and $2,569 per year to renew for standard subscription (as of this writing)
- Professional edition plus a number of additional development tools including:
- Live Dependency Validation
- Architectural Layer Diagrams
- Architecture Validation
- Code Clone
- IntelliTrace
- Code Map Debugger Integration
- .NET Memory Dump Analysis
- Snapshot Debugger
- Time Travel Debugging (Preview)
- Live Unit Testing
- IntelliTest
- Microsoft Fakes (Unit Test Isolation)
- Code Coverage
- Embedded Assemblies
- Xamarin Inspector
- Xamarin Profiler
- Available for Microsoft Windows and Mac
Install Visual Studio
Obtain the Installer
First, we need to download the installer. Follow this link to obtain the latest version of Visual Studio 2019: Download Visual Studio 2019
Click on the download link for your chosen edition.

Depending on the edition, you will download one of the following files (where __xxxxxxxxxx.xxxxxxxxxx refers to the version):
- vs_community__xxxxxxxxxx.xxxxxxxxxx.exe
- vs_professional__xxxxxxxxxx.xxxxxxxxxx.exe
- vs_enterprise__xxxxxxxxxx.xxxxxxxxxx.exe
If you are just starting out with Visual Studio, I presume you will be using Community Edition. The installation for any of the three editions is the same with the exception of what edition and version it says you are installing on the installation screen. We will download and install Community Edition for our walk-through.
Run the Installer
Let's get started.
- Double click on the downloaded executable to start the installation

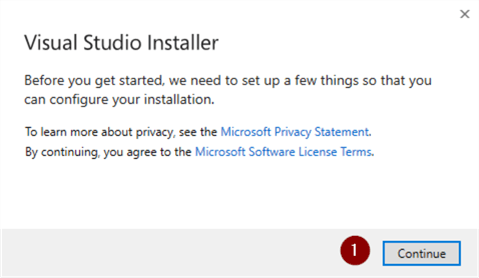
- You will see a screen telling you a few things that need to be set up to configure the installation.

On the next screen, scroll through and choose which Visual Studio Workload(s) you want to install. Workloads are essentially individual tool kits that each have special tools for the type of development you will be doing. Workloads can be added or removed after installation by running the installer again.
For this tip I want to keep the example as simple as possible. I only checked off the 'Data storage and processing' Workload because I want to create a SQL Server database project when the installation is done.
- Select Workload(s)
- Individual Components – if you want to individually Visual Studio components

This is where you add any individual components if you don't want to use Workloads to customize your Visual Studio installation.
- Language packs – if you need additional language support

The installer matches the language of the operating system by default. You can change the language by selecting it and following the prompts. We will use the default.
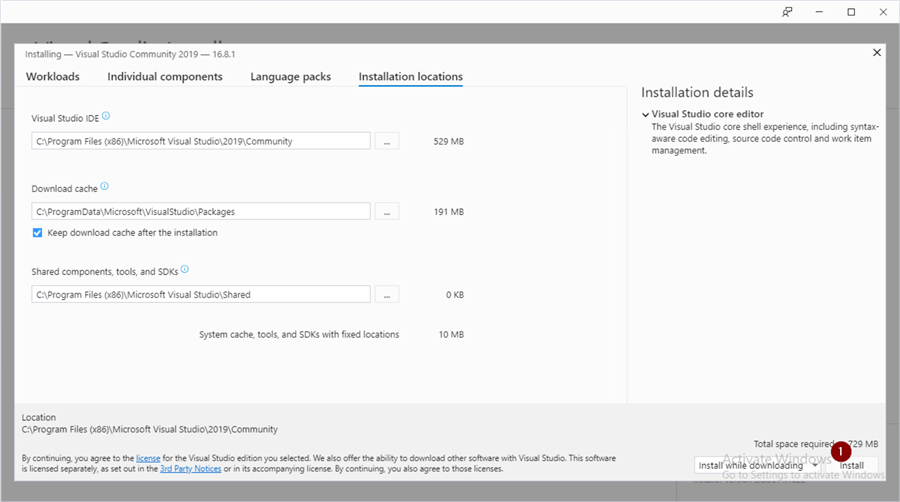
- Installation location – to change default installation locations

On this screen we can change the installation drive and / or directory for the Visual Studio IDE; download cache; and shared components, tools and SDKs. We're installing it on a desktop that only has a C:\ drive so we will be keeping the defaults.
- Install

The screen that opens will show the download and installation progress.

Launch Visual Studio and Create a New Project
When the download and installation is complete, you will see the product and version installed and can now launch Visual Studio.
- Launch

On the next screen we can clone a repository, open a project or solution, open a local folder, or create a new project. For this example, we will create a new project.
- Create a new project

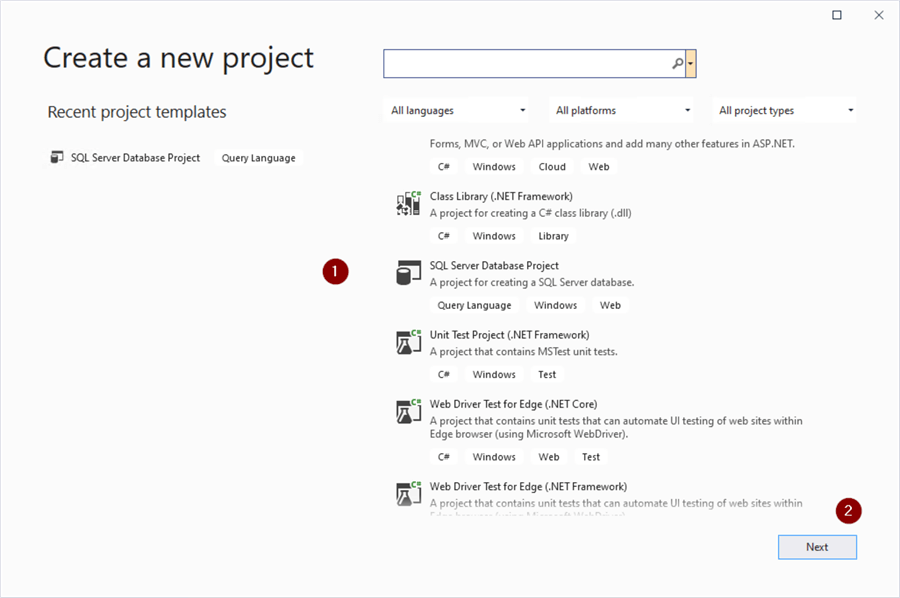
The 'Create a new project' screen opens and we can choose what type of project we want to create.
- SQL Server Database Project
- Next

- Name your project
- Create

The Visual Studio window will open.

Next Steps
We have compared the three Visual Studio 2019 editions, learned how to install them, and learned how to create a new project. Here are some links to more Visual Studio 2019 tips on MSSQLTips.com:
- Adding Custom Stored Procedure Templates to SQL Server Management Studio and Visual Studio 2019
- Learning Python in Visual Studio 2019
- Deploy SQL Database from Azure DevOps with an ARM Template and DACPAC File
- Azure DevOps CI CD using GitHub Repo and Visual Studio Azure SQL Database Project
- Git Stash SQL Server Database Code Changes using Visual Studio 2019
About the author
 Joe Gavin is from the Greater Boston area. He started working with SQL Server and Sybase in 1998 in the financial services industry and has been a SQL Server Database Administrator for a dairy cooperative since 2011. He graduated from Northeastern University in Boston with a Bachelor of Science in Engineering Technology (BSET) degree in Computer Technology. Joe has spoken at the Boston and Providence SQL Saturday events.
 This author pledges the content of this article is based on professional experience and not AI generated.
View all my tips
Article Last Updated: 2020-12-16


