By: Haroon Ashraf | Updated: 2020-12-30 | Comments | Related: > Database Design
Problem
As a SQL Server database developer, I would like to understand how to use Gitflow workflow to meet the growing demand of new database related features requested by our customers.
Solution
The solution is to use Gitflow workflow Feature branching model with a SQL Database project.
Prerequisites
This tip assumes the following:
- Understanding of Gitflow workflow concepts and implementation
- Understanding of Gitflow Feature Branching
- Azure DevOps account to create Projects
- SQL Server Data Tools (SSDT) to create and manage SQL database project
Please read the following tips to get an introduction of Gitflow workflow if you are not already familiar with it
- Basics of Gitflow Workflow for SQL Database Projects Part 1
- Basics of Gitflow Workflow for SQL Database Projects Part 2
You can create an Azure DevOps account by clicking this link: Free Azure DevOps account.
Applying Gitflow Feature Branching
If you have neither read the tips mentioned above nor are you familiar with Gitflow feature branching model, it is highly recommended to go through the reference tips above first. However, it is not difficult to understand this style of database code branching if you have used Git source control before.
Recap: Gitflow Feature Branching
This is the kind of database code branching model which is used to build features requested by customers from time to time. Once you are done, a feature (database code related to that feature) is sent to the dev branch (merged with dev code).
A Gitflow workflow in a feature branch is straight away created from the dev branch and then merged back with dev branch once the work is done. It will then be removed as it is no longer required.
Git Feature Branch Workflow vs Gitflow Workflow Feature Branch
It is important not to confuse Git Feature Branch Workflow with Gitflow Workflow Feature Branch as they both work differently.
For example, Git Feature Branch Workflow is well suited for you to receive requirements for new features, but you have to think of other things such as a bug fix as a feature. This can be a bit tricky to understand, but it works well in that context and more importantly you can branch off from the master to begin your work and then merge your feature back with the master branch.
On the other side, Gitflow Workflow Feature Branch has an advantage as it offers separate branching for other pieces of code such as bugs and releases. Plus, it is well integrated into Gitflow workflow for long term benefits.

Real World Scenario: Search Customer Feature
Let's now apply the Gitflow Workflow Feature branching model considering a real world scenario in which you have been asked to add a new Search Customer Feature to the database system which holds the information about the products and customers.
We are assuming that this database was created long ago and already has a Customer and Product table that is all managed through a SQL Database Project and the database project code is managed through an Azure DevOps project repository using Git source control.
Please go through this tip to find more detailed information about the project setup steps mentioned in this tip.
Creating a DevOps Project
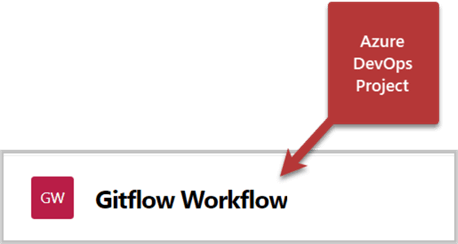
Please sign into your Azure DevOps web portal and create a project called Gitflow Workflow:

Creating a Repository
Please create a new repository or rename the default repository as gitflow-feature:

Creating a dev branch
We are first going to create a dev branch to replicate the scenario where we have both dev and master.
Click on the master branch of the repo and then click on new branch:

Create a new branch called dev:

Connect to the dev branch of the Azure DevOps Project locally
Once the dev branch is created in the Azure portal please copy the repository in Visual Studio to work locally:

Next, create a local dev branch from the remote dev branch in the Team Explorer window of Visual Studio as shown below:

A dev branch is created and the current code branch is going to be switched from master to dev.
Create SQL Database Project under a Solution
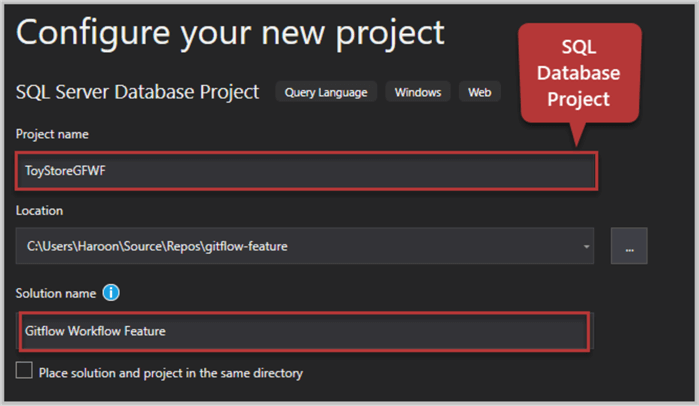
Create a new SQL Database Project ToyStoreGWFW in a solution you name as Gitflow Workflow Feature:

Switch to the Solution Explorer to view the blank project:

Add Product and Customer Table
Since we are currently switched to the dev branch of the database code, let's assume that it contains some work in the form of two tables which we can imitate by adding two tables to the database project.
Please add product table to the SQL Database Project using the following code:
CREATE TABLE [dbo].[Product]
(
   [ProductId] INT NOT NULL IDENTITY,
    [Name] VARCHAR(50) NOT NULL,
    CONSTRAINT [PK_Product] PRIMARY KEY (ProductId)

)
Similarly create another table called Customer with the help of the following T-SQL script:
CREATE TABLE [dbo].[Customer]
(
   [CustomerId] INT NOT NULL IDENTITY,
    [Name] VARCHAR(50) NOT NULL,
    CONSTRAINT [PK_Customer] PRIMARY KEY (CustomerId)

)
Save (local) dev branch changes
Let's commit these changes to the remote dev branch by adding the comment "Customer Product tables added" followed by selecting Commit All and Push option.

The project after the changes is shown below:

Debug the Project to deploy changes
Press F5 to build and deploy changes to the debug database. The debug database is seen as follows:

Understanding new Search Customer Feature Request
Now we are going to demonstrate how a new feature request fits into the whole scenario which has the following situation from a database code perspective:
- master branch is empty (no production ready code yet)
- dev branch has two tables Customer and Product
- A new feature request has just arrived
Create a new feature branch (search-customer-feature)
We are going to sync the local dev with remote dev (although we already know they are in synch because we have just pushed the local changes to the remote repository) since this is good practice before creating a new branch from another branch.
Create a feature branch named search-customer-feature from the dev branch:

Based on the choices above, as soon as a local feature branch is created, it is ready to be used for your feature development work.
Create a SearchCustomer stored procedure in the feature branch
The newly requested feature can be introduced in the form of a stored procedure which serves the purpose.
Right click on the SQL Database Project and click Add > Stored Procedure.
Create a stored procedure named SearchCustomer using the following code:
CREATE PROCEDURE [dbo].[SearchCustomer]
   @Name VARCHAR(50)=''
AS
   SELECT C.CustomerId,C.Name FROM dbo.Customer C
   WHERE C.Name LIKE '%@Name%'
RETURN 0
This is illustrated as follows:

Commit changes to the feature branch (remote repository)
Let's save these changes to the remote repository in the (feature branch).
Press the pen icon at the bottom of the Visual Studio (status bar) or use the shortcut key CTRL+ALT+F7 to save the newly built stored procedure and add the comments "Added SearchCustomer stored procedure", followed by clicking Commit All and Push:

Merge feature branch changes with dev branch
We have just finished the feature and it is time for the hand-over session. We need to integrate our changes in the feature branch with the dev branch.
This requires a pull request. Please go to Team Explorer – Home click on Pull Requests:

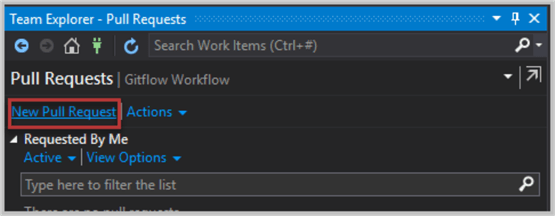
Next, click on the New Pull Request link which will take you to the Azure Web portal:

Create a new pull request, after making sure you are merging search-customer-feature branch with dev followed, by clicking the Create button:

Once you initiate the process, all merge conflicts (if any) are shown to you. This is not something we are expecting since we know that we have worked on different things in different branches. We are good to go.
You can also choose (this is recommended) to delete the feature branch once the merge is complete as highlighted below:

After some time, you are going to see the following results:

View the database code finally saved to the dev branch:

Congratulations! You have successfully implemented Gitflow Workflow Feature Branching starting from a fresh feature branch from dev followed by pushing your changes back to dev.
Next Steps
- Please check SQL Database Project with Git Feature Branch Workflow tip and compare it with this tip to see if you prefer one over the other and feel free to add comments at the bottom of this tip
- Please go through this tip and see if you can replace it with Gitflow Workflow Feature Branch model
- Keeping this tip in mind, try to merge your dev branch code mentioned in the previous point with the master branch
- Try adding Search Product Feature by creating search-product-feature branch from dev using the sample database in this tip
- Please go through Basics of Gitflow Workflow for SQL Database Projects Part 1 and Part 2 to improve your Git skills further
- Please refer to this tip to see detailed steps of how to use dev branching with SQL Database project and try adding the work done in the reference tip to the current project
About the author
 Haroon Ashraf's interests are Database-Centric Architectures and his expertise includes development, testing, implementation and migration along with Database Life Cycle Management (DLM).
This author pledges the content of this article is based on professional experience and not AI generated.
View all my tips
Article Last Updated: 2020-12-30


