By: Xiaowei Cao | Updated: 2021-03-12 | Comments (8) | Related: > Reporting Services Migration
Problem
There comes a time when you need to upgrade a SSRS report server to new hardware with the newest Windows version, newest SQL Server version and newest SSRS version. To help minimize downtime, we can do a side by side install, then do the database migrations and finally rename the servers, so the front end applications do not need to change anything such as connection strings or URLs. In this article, we walk through how you can do this for SQL Server Reporting Services.
Solution
We will walk through the steps of this process. In this example we upgrade and migrate a report server that hosts SQL Server 2017 and SSRS 2017 to a new server with the newest Windows version and SQL Server 2019 and SSRS 2019 standard editions. Most steps can be done ahead of time without affecting production use. The process should work with other versions of a report server upgrade and migration as well.
Step by Step to Upgrade and Migrate SSRS Reporting Server 2017 to 2019
For convenience in this article we will call the old server name MyServer and new server MyServerB.
Step 1 - On new server MyServerB, we will install the newest Windows version, newest database engine 2019 standard edition and the newest cumulative update. Since these are common steps frequently done by DBA, I will not describe the details here.
Step 2 - On new server MyServerB, we will download and install Microsoft SQL Server 2019 Reporting Services.
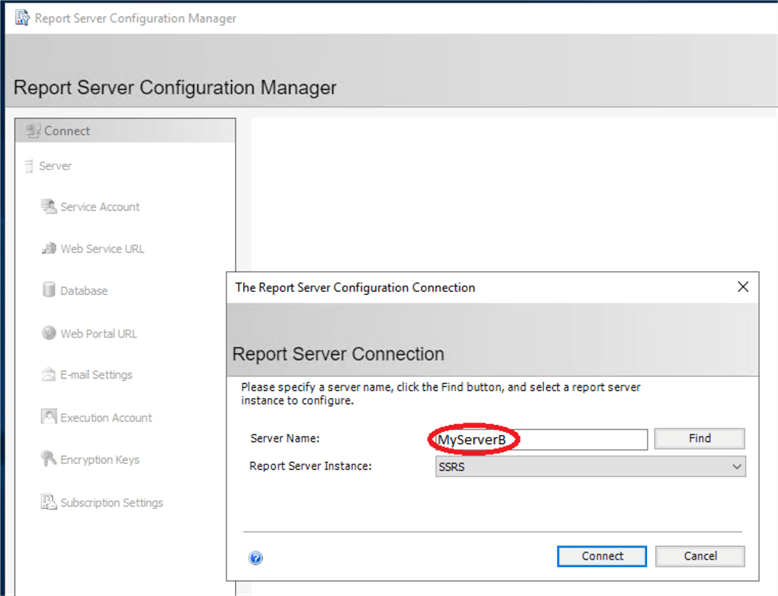
Step 3 - On new server, we will configure the reporting service. Open Report Server Configuration Manager, enter server name and click Connect.

Go through each tab on left hand menu:
- On Service Account tab, either use a virtual account or a domain account, then click apply.
- On Web Service URL tab, I use the default values on the screen and click apply.
- On Database tab, click change database create a new report server database, for
database server name use the default: ReportServer, then click next, next again
on credentials screen, next on summary screen. This process will create the new
databases ReportServer and ReportServerTempDB on the local database server.
- Note: the reason I chose to create the new databases here the first time on the new server is that it will create automatically SSRS related database roles and permissions in master and msdb database, as well as in the two new report server databases. You can also restore databases from old server the first time, but you will need to manually add the RSExecRole and grant permissions. See here for more detail.

- On E-mail Settings tab, fill in your FTP server and sender address, click apply.
- On Execution Account tab, I fill in a domain account that is different with service account and hit apply.
- On Encryption Keys tab, Subscription Keys tab, PowerBI Service tab I just use default and apply.
Now the initial reporting service configuration is completed on the new server and the service is running without any reports yet.
Step 4 - On the old server MyServer, do a backup of the two databases: ReportServer and ReportServerTempDB.
Step 5 - On the old server MyServer, open Report Server Configuration Manager, do a backup of the Encryption Keys, save to a file and give it a secure password.

Step 6 - On the new server MyServerB, restore the two databases ReportServer and ReportServerTempDB from the backups of previous step. Then change the database compatibility to 2019 in database property options.
Now if you open SSMS and run a query like this in the ReportServer database, you will see something like below:
SELECT * FROM ReportServer.dbo.Keys

I want to delete the key of the old server MyServer, so that we only keep the key of the current server MyServerB.
So I run this:
DELETE FROM ReportServer.dbo.Keys
WHERE MachineName='Myserver'
You can also use the rskeymgmt.exe tool to manage and remove the key. You can find more details here. This step is important, if you don’t do it you will get an error when you open the web portal later.
Step 7 - On the new report server we will do some re-configuration of the SSRS service. This is because the database has changed.
On the database tab, click change database choose an existing reporting server database, click next Server Name: MyServerB click next in the Report Server Database, choose ReportServer click next until you finish.

Step 8 - On the Encryption Key tab, click restore, find the path of the backup file of the encryption key from the old server, fill in the password and click OK.
Now the migration is complete and you can open the web portal and test your reports. In my example the URL is http://MyServerB/reports
You can do all above steps on the new server ahead of time without the need of an outage window of the current production server.
You can repeat step 4-8 as many times as you want before outage time is required to test your reports on the new server and keep the new reports up to date.
Make New Server the Production Server
The downtime only occurs for the real migration, since we want to reuse the old server name, we need to swap the server name on both the OS and SQL Server level.
Step 9 - Swap the Windows server name and reuse the old server IPAddress. This step is usually done by Network admins.
After the server name swap, the old server MyServer is changed to MyServerC and the new server is changed to MyServer from MyServerB. The old server can still be kept for a while in case we need to do some comparison or if we need to roll back. You can also turn off the services on the old server.
Step 10 - Change SQL Server name on the new server. In SSMS connect to the new server and run this:
SELECT @@SERVERNAME
-- The result is: MyServerB

--drop old server
EXEC SP_DROPSERVER 'MyServerB' --old server name

--add new server, make sure local is specified.
EXEC SP_ADDSERVER 'MyServer', 'local' --new server name

--Restart SQL Server services

SELECT @@SERVERNAME
-- The result is: MyServer
Step 11 - We need to reconnect the database again since the server name has been changed.
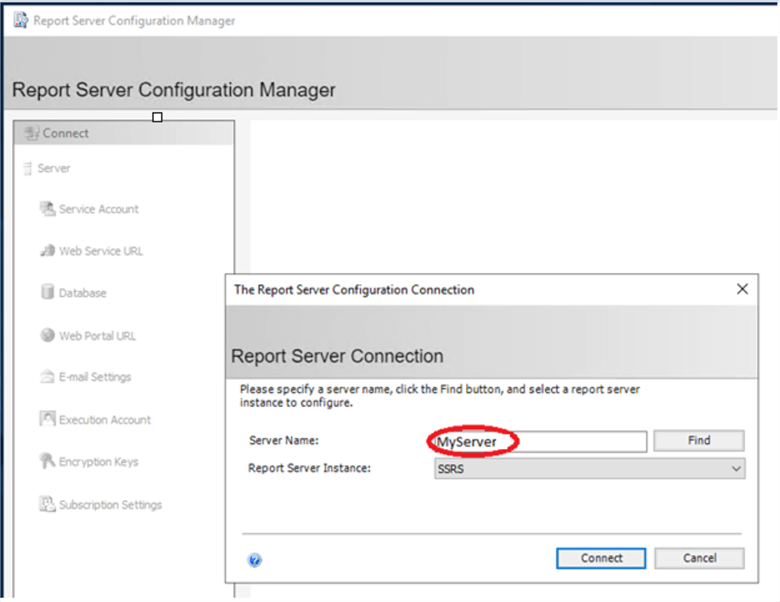
Login to new server MyServer, open Report Server Configuration Manager, you will see the server name has been changed to MyServer. Click Connect.

On the database tab, click change database and choose an existing reporting server database, then click Next.
For Server Name make sure it is MyServer. Note the server name should be changed from MyServerB to MyServer. Select ReportServer in the dropdown and click next through screens and click finish.
Step 10-11 may also need to do done on the old server in case you want to also use the old server, otherwise you can turn off the services on the old server.
Test the Final Migration
Step 12 - Go to the reporting server web portal and test your reports.
The entire migration process has been completed and we can reuse the server name without any changes on the application end. All the steps can be done ahead of time except the steps where we need to swap the server names. This greatly reduces system down time and also gives you plenty of time for testing the migration and reports.
At this time the new report server should be ready for production use.
Next Steps
Read more articles about reporting service
- Upgrade reports (SSRS)
- SSRS Encryption Keys - Back Up and Restore Encryption Keys
About the author
 Xiaowei Cao has been a SQL DBA and developer for 15+ years, supporting varies environments and has a passion for all aspects of SQL server including the DB engine, SSIS, SSRS, and SSAS.
This author pledges the content of this article is based on professional experience and not AI generated.
View all my tips
Article Last Updated: 2021-03-12


