By: Kenneth A. Omorodion | Updated: 2021-05-24 | Comments | Related: More > Integration Services Data Flow Transformations
Problem
For those that have worked extensively with SQL Server Integration Services (SSIS), there have been situations when there is a need to get data from sources like SQL Server database, Oracle database, or any other sources and then load the data to a flat file location in a local folder or a SharePoint folder. This process is rather straightforward initially, but we start having issues when there are columns within the datasets being migrated that have lots of delimiters between words in the column which could result in new line break issues.
With new line breaks, sometimes the SSIS package will parse and run without issues, but the output files will not be in the format as expected with column values spilling over to other columns.
Solution
To demonstrate this, as usual I have separated the steps as follows:
- Create a table in SQL Server and populate with dummy data
- Create an SSIS Package that migrates this data to a Flat File location in a local folder in a CSV flat file
- Explore the initial issues that may have surfaced
- Explore solutions to the remove the carriage return issues
What is a "New Line Break"
A newline is a character used to represent the end of a line of text and the beginning of a new line. However, what if we are working with Columns and Rows and we have a column which has long text like an email string and this breaks into a new line (spills over into another column) where the column is not yet terminated. This was the case as shown below.
As mentioned earlier, the lengthy string nature of a column ensures this issue is caused. SQL Server 2012 and beyond behaves in such a way that it preserves the carriage return (\n\r) and therefore splits the row into multiple rows when exported into Excel or CSV. This Wikipedia article explains more about it, but I will concentrate on how we can solve the problem at hand.
STEP 1: Create a table in SQL Server and populate with dummy data
To demonstrate this, let's create a table in SSMS and then populate it with data as shown using the code below.
USE SampleDB;
GO

CREATE TABLE NewLineDemo1
(
  [ID] INT NOT NULL
      ,[Name] VARCHAR(15)
      ,[Type] VARCHAR(15)
      ,[BenefitTitle] VARCHAR(15)
      ,[Description] VARCHAR(MAX)
      ,[Status] VARCHAR(250)
);

INSERT INTO NewLineDemo1 (ID, Name, Type, BenefitTitle, Description, Status)
VALUES (123456, 'BEN-000001', 'Regular', 'Title1', 'Distribution of office hardware tools, seats, and lightings, There is always several titles associated with a benefit name and several ways to log them in a database within sql server. There is always several titles associated with a benefit name and several ways to log them in a database within sql server', 'Available, Distributable and Ready'),
 (234567, 'BEN-000002', 'Regular', 'Title2', 'Distribution of office hardware tools, seats, and lightings, There is always several titles associated with a benefit name and several ways to log them in a database within sql server. There is always several titles associated with a benefit name and several ways to log them in a database within sql server', 'Available, Distributable and Ready'),
 (345678, 'BEN-000003', 'Regular', 'Title3', 'Distribution of office hardware tools, seats, and lightings, There is always several titles associated with a benefit name and several ways to log them in a database within sql server. There is always several titles associated with a benefit name and several ways to log them in a database within sql server', 'Available, Distributable and Ready'),
 (456789, 'BEN-000004', 'Regular', 'Title4', 'Distribution of office hardware tools, seats, and lightings, There is always several titles associated with a benefit name and several ways to log them in a database within sql server. There is always several titles associated with a benefit name and several ways to log them in a database within sql server', 'Available, Distributable and Ready'),
 (567891, 'BEN-000005', 'Regular', 'Title5', 'Distribution of office hardware tools, seats, and lightings, There is always several titles associated with a benefit name and several ways to log them in a database within sql server. There is always several titles associated with a benefit name and several ways to log them in a database within sql server', 'Available, Distributable and Ready');

SELECT * FROM [SampleDB].[dbo].[NewLineDemo1]
The output of this script would be as shown below.

We can immediately see that the columns "Description" and "Status" have comma delimiters between words. We will describe how this will cause a problem later. In your case this could be an "Email" column or other long text string columns. Within a SQL Server table it is well sorted into each column, but how would this be when migrated to a Flat File using SSIS is what we will see next.
STEP 2: Create an SSIS Package that migrates this data to a Flat File location in a local folder in a CSV flat file
To create the SSIS package, we will be using SQL Server Data Tools or Business Intelligence Data tools in Visual Studio. So, we need to open Visual Studio, and then create a new Integration Services project as described below. I will not talk much on how to create a new project as its not in the scope of this article, but I will jump into aspects relating to this article.

For the diagram above I have used a Data Flow task on the control flow window, and an OLE DB Source for my data source connection. Then I connected directly to the "NewLineDemo1" table created earlier.
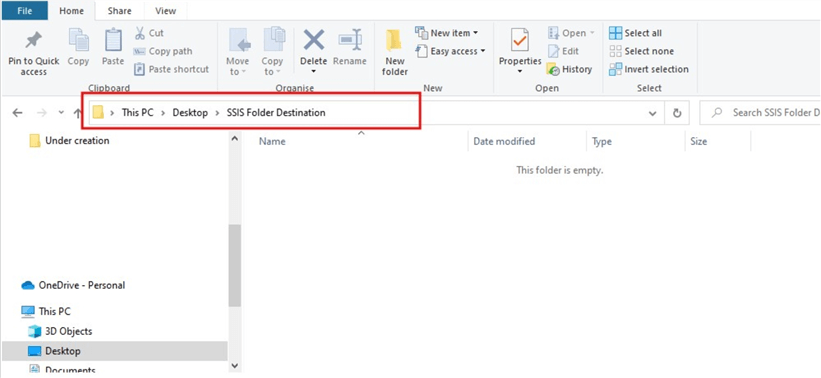
To connect to destination folder, I need to first prepare the destination by creating a folder in a destination path I have chosen, in this case its within my desktop, but yours might be within a SharePoint location or a local folder location.
I have created a folder named "SSIS Folder Destination" on my desktop as seen in the diagram below.

I now need to make a connection to this folder path in SSIS destination Connection Manager as shown in the diagram below.

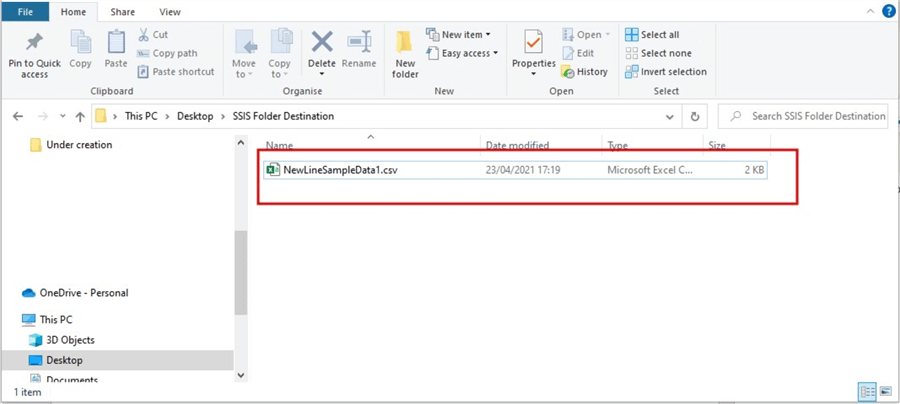
Next, I gave the Connector a Descriptive name and copied and pasted the folder path into the "File name" section of the Flat File Connection Manager Editor and added a name for the CSV file "NewLineSampleData1.csv" as shown below. The path will therefore be "C:\Users\xxxx\Desktop\SSIS Folder Destination\NewLineSampleData1.csv" which will automatically create a .csv file in the destination folder.

After these items are setup accurately, the package should look like the diagram below.

Next, we need to run the package and see the output CSV file in the folder path we specified as seen in the diagram below.

STEP 3: Explore the initial issues that may have surfaced
When we initially open the file loaded to the folder location in Step 2, we can observe that there are issues with how we saw the data in SSMS and how it is sorted in columns now in the csv file as shown below.

To make it clearer, I will expand the column widths to see the issues properly as seen in the diagram below.

As can be seen in the diagram above, the "Description" and "Status" columns are spilling over into other columns because of the "New Line break" phenomenon. Thus, end users cannot make use of this dataset as is without the need for further work to reorder the columns properly, which can be a pain. But, that's the purpose of this article, let's now see the ways to resolve this issue since we now know where the issues are arising from.
STEP 4: Explore solutions to remove the carriage return issues
Like most Data Developers would say, it's best to solve such problems from the source. So, we need to go back to the SQL Server source and do the magic there.
Within SSMS, we need to write a script that would be used as a source in SSIS, this script would deal with the line breaks in the two columns causing the issues by replacing any comma delimiters with a space delimiter and also it replaces the Carriage Return char(13) and the line feed char(10) thereby eliminating the new line issues. See the SQL code below.
USE SampleDB;
GO
SELECT [ID]
      ,[Name]
      ,[Type]
      ,[BenefitTitle]
      ,REPLACE(REPLACE(REPLACE([Description],',', ''), CHAR(10),''), CHAR(13), '') Description
      ,REPLACE(REPLACE(REPLACE([Status],',', ''), CHAR(10),''), CHAR(13), '') Status
FROM [SampleDB].[dbo].[NewLineDemo1]
We now need to copy this code and use in SSIS on the OLE DB Source task as seen below.

Next, to ensure we don't get an error saying there is already a file named "NewLineSampleData1.csv" we need to configure the path to create a new .csv file named "NewLineSampleData2.csv", although we can automate this part to either overwrite the existing file or create a new one with a datetime stamp, however for the purpose of this article we just need to create a new file by configuring the Flat File Connection Manager as shown below.

When the updated SSIS package is run, a new file should be loaded into the folder created earlier alongside the first file loaded as seen in the diagram below.

When the CSV file is now opened, we should have a well sorted file columns as it was in the original T-SQL output, but the commas in the sentences in the "Description" and "Status" columns would be eliminated as they were the reasons for the issues. See the new output below.

When the above file is expanded, we would have the file below.

In summary, in this article, we have successfully demonstrated how to create a Flat File dataset from SQL Server sources, how to troubleshoot any new line break issues, and how to configure SSIS packages to automate the process.
Next Steps
- Read more about how the OLE DB Source in SSIS works here.
- You can get more details on Flat File Destination in SSIS here.
- You can get more information on the REPLACE function in SQL Server works here.
- Get an overview on SSIS Control Flow here.
- Get an overview on SSIS Data Flow here.
- Read more on Integration Services Paths here.
- Learn more about how to create a new project or solution in SSIS here.
- Try this tip out in your own data as business requires.
About the author
 Kenneth A. Omorodion is a Business Intelligence Developer with over eight years of experience. He holds both a bachelorís and masterís degree (Middlesex University in London). Kenneth has the MCSA, Microsoft Data Analyst - Power BI and Azure Fundamentals certifications. Kenneth is a Microsoft Certified Trainer and has delivered corporate training on Power BI, SQL Server, Excel and SSRS.
This author pledges the content of this article is based on professional experience and not AI generated.
View all my tips
Article Last Updated: 2021-05-24


