By: Kenneth A. Omorodion | Updated: 2021-06-03 | Comments (1) | Related: > Power BI
Problem
One common business requirement after publishing a Power BI report to the service is that users might want to know when there is a change or updates in their report. This is particularly helpful when the dashboard is needed frequently, but the dataset feeding the reports are updated at different intervals during the day.
For instance, in an organization where different teams are in different regions or countries, data might be entered into the organization's database at different times depending on the teamsí location and other factors. So, business users would usually appreciate an automated alert that lets them know when there has been a change in the dataset feeding their dashboards or reports. One very simple way of doing this is by using Power Automate to send the business users email alerts as we will demonstrate in this tutorial.
This technique is not new, but for those whose business requirement is specific to the one demonstrated in this article, do follow the step-by-step solution.
Solution
In this tutorial, we are going to use a source dataset in a SharePoint folder, in your case it might be any other data sources, but the approach is the same. The only difference would be what type of triggers you would use in Power Automate.
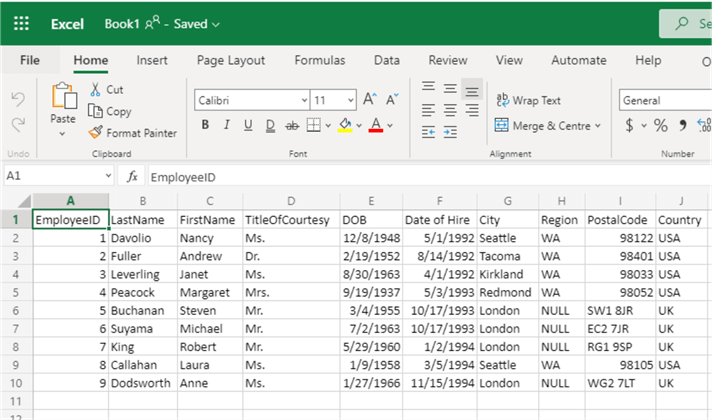
The dataset we will be working with is as seen in the diagram below. It is saved and expected to be updated either via an automated process or manually. When using a SQL database as source, this should be expected to be updated using automated processes.
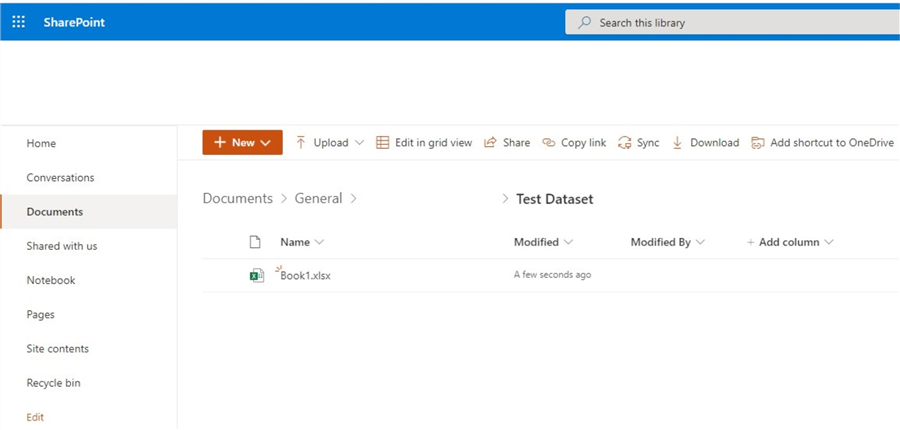
We can also see the dataset "Book1" within the SharePoint folder as seen in the diagram below.
To demonstrate the whole process, as usual I have separated the steps as follows:
- Log in to Power Automate and choose a way to make your flow
- Provide a name for the flow and choose a trigger for your flow
- Configure the trigger flow
STEP 1: Log in to Power Automate and, choose a way to make your flow
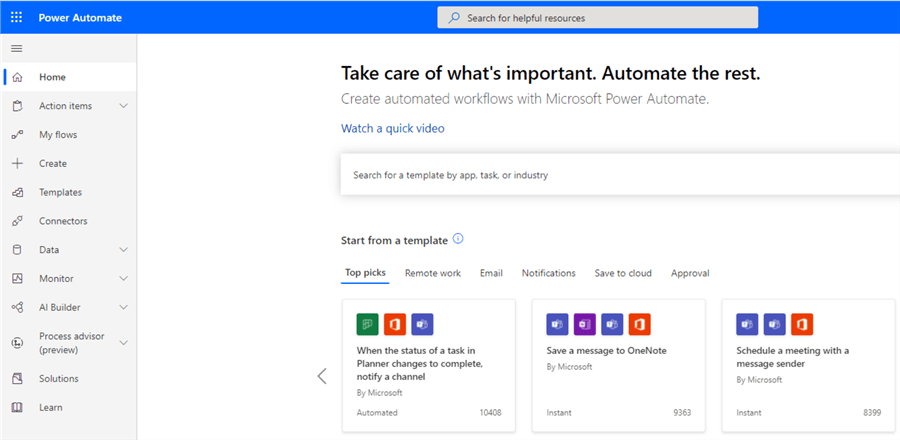
Log in to Power Automate using this link. On first log in, you should be able to see something like the diagram below.
Then, on the left-hand pane we need to select on "Create" as seen in the diagram below.
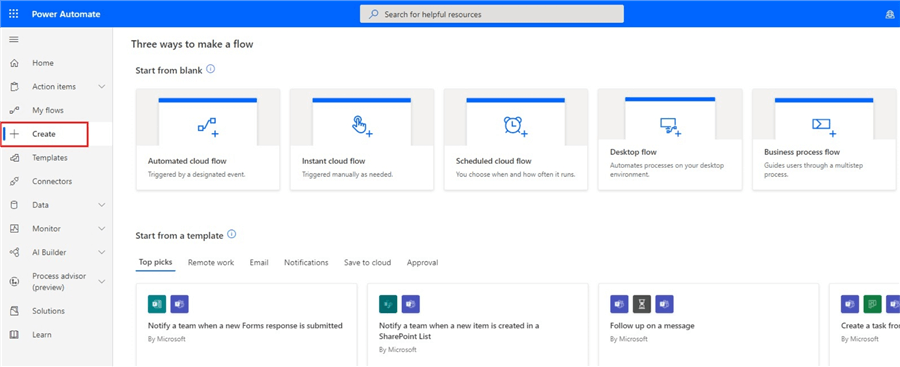
There are three ways currently to make a flow in Power Automate as follows.
- From blank

- From a template
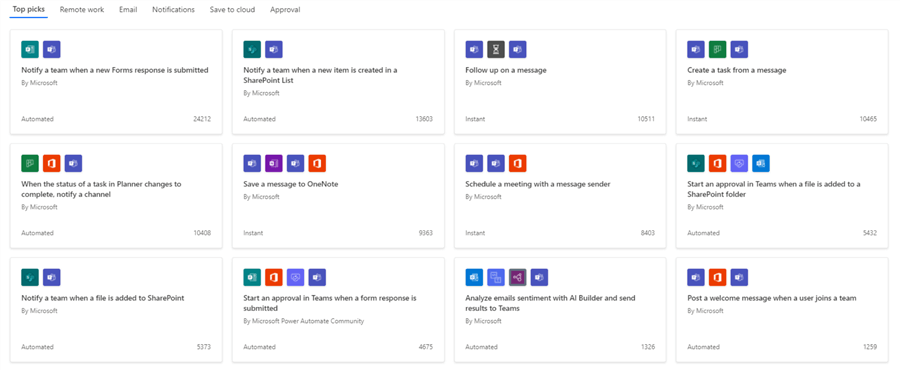
- From a connector

We can choose to start from any of the three in this project, but for the purpose of this demo lets choose to start from a blank flow. Since we are trying to automate the process, we will use the "Automated cloud flow" option of the blank flow.
STEP 2: Provide a name for the flow and choose a trigger for your flow
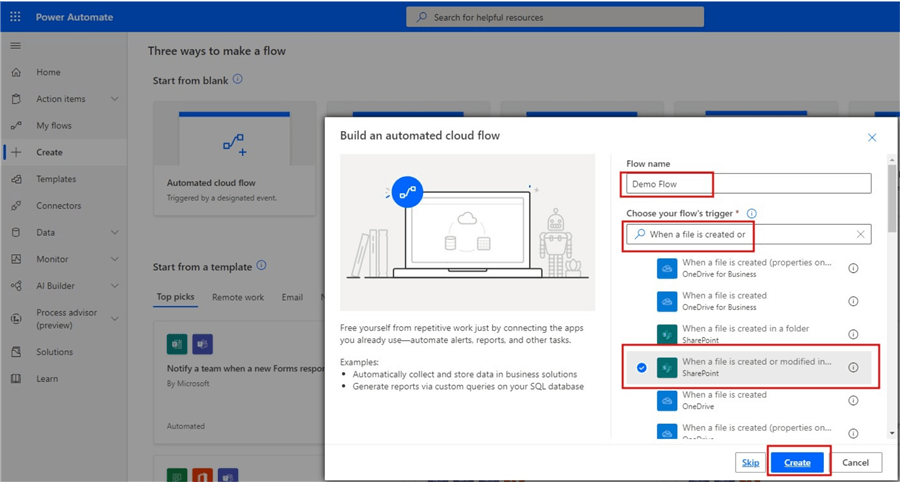
After clicking on "Automated cloud flow", we need to provide a name for the flow and choose the trigger for the flow. I have named this flow "Demo Flow", we will choose the trigger "When a file is created or modified" in SharePoint. This chosen trigger only triggers when there is a change in the dataset we have in the source, which in this case is the file in the SharePoint folder. Whenever a file is created or anytime the dataset is modified, the trigger is activated in Power Automate.
STEP 3: Configure the trigger flow
After choosing the trigger flow "When a file is created or modified" in SharePoint, we then need to configure it. The initial view is as seen below.

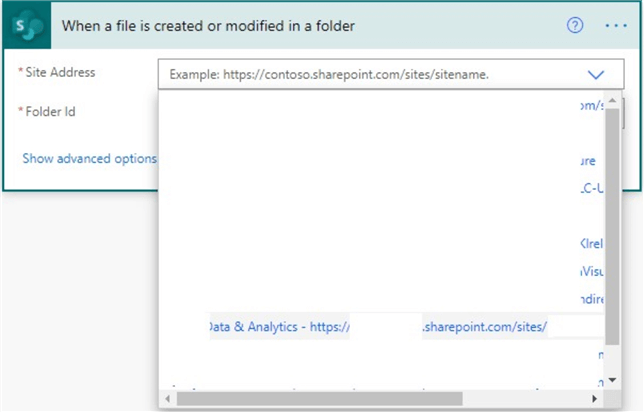
We need to click on "1" in the diagram above to select from a list of SharePoint site addresses. As I have access to several SharePoint addresses, I am going to scroll through the list and select the address my data file is in as seen in the diagram below.
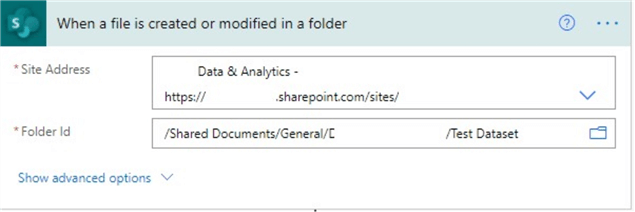
Next, we need to click on "2" in the initial diagram to navigate to the "List Name" as seen in the diagram below.
STEP 4: Choose an Operation that refreshes dataset in Power BI Service and configure it
In this tutorial, it is expected (or assumed) that we have already created a report in Power BI Desktop with the dataset in the SharePoint folder, and published the dataset to Power BI Service workspace or Dashboard as the business requires.
For this tutorial, the published report for the dataset we are using is as seen in the diagram below, showing the total count of employees in the table.
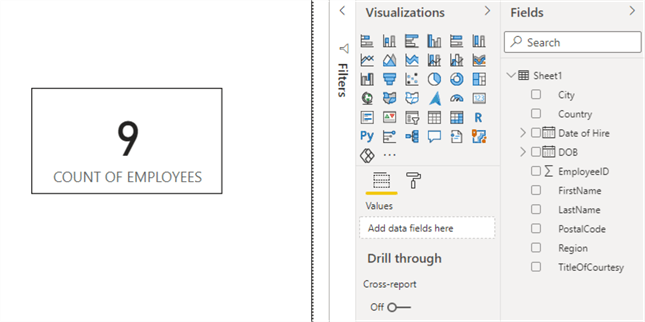
We should expect that count to increase when we add more employees later.
We now need to configure an Operation in Power Automate that refreshes this dataset and report in Power BI Service as soon as the trigger in this Power Automate flow is triggered. To do this, we need to click on "New step" as seen in the diagram below.

Then, we need to search for "Refresh a dataset" in the search box within the "Choose an operation" step of the flow as seen in the diagram below. This will narrow the connectors that will be available to those that refreshes a dataset. The one we need in this case is the "Refresh a dataset" for Power BI which is currently still in preview as seen in the diagram below.
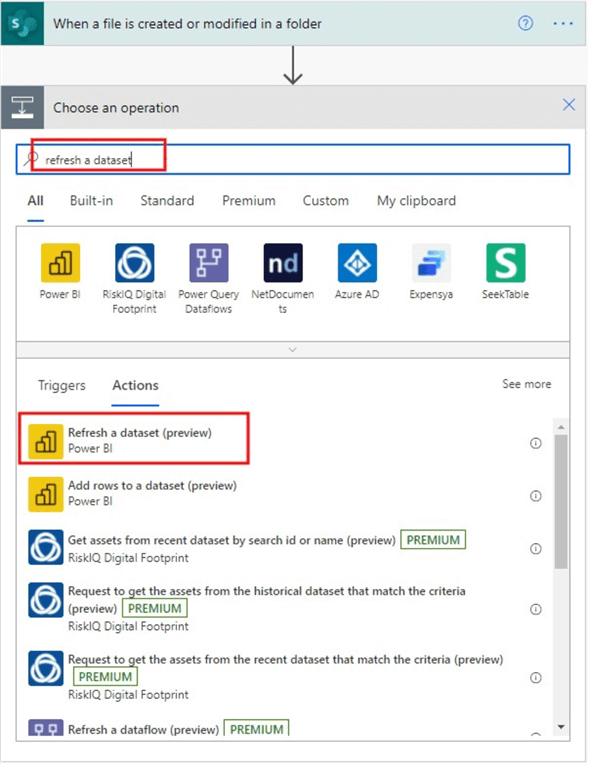
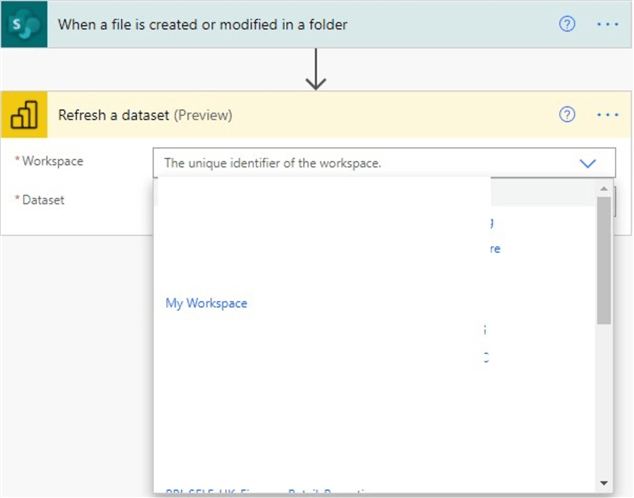
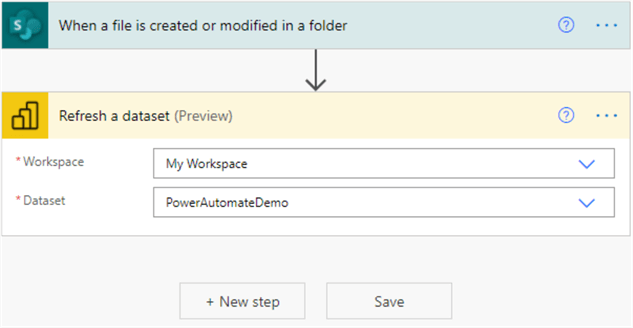
Next, we need to now configure the "Refresh a dataset" flow step as seen in the diagram below.

Click on the "1" in the diagram above to be able to choose the Workspace where the dataset has been published in the Power BI Service as seen in the diagram below.
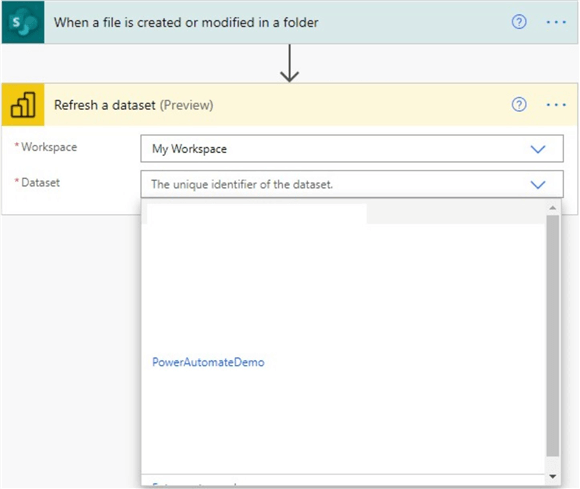
Next, click on "2" in the initial diagram above to choose the dataset name, which in this case was called "PowerAutomateDemo" as seen in the diagram below.
STEP 5: Choose an operation that sends an email alert for data refresh and configure it
This would be the last step of the flow. We need to click on "New step" as seen in the diagram below.
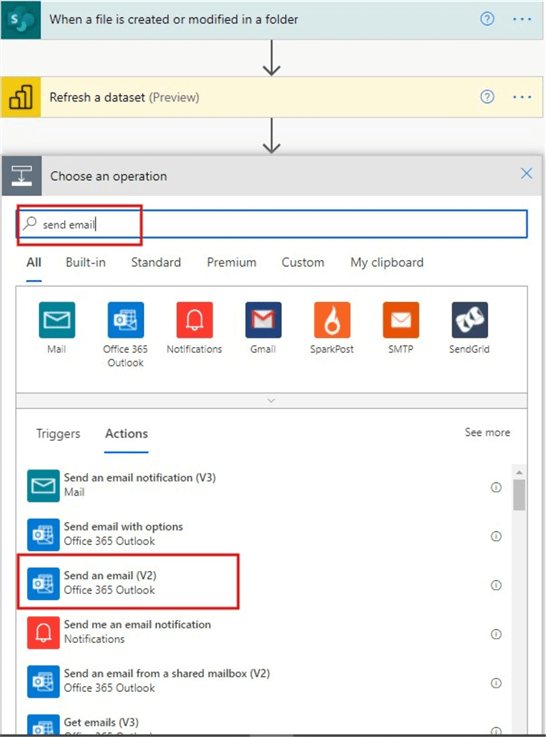
On clicking on "New step" you should be able to see something like the diagram below. Since we are looking to send an email alert to an Outlook email account, we need to type "Send email" in the search bar within the new flow step so we can narrow down the options. In this case we are choosing the "Send an email (V2)" for Office 365 Outlook as seen in the diagram below.
The diagram below shows how to configure the send email step.
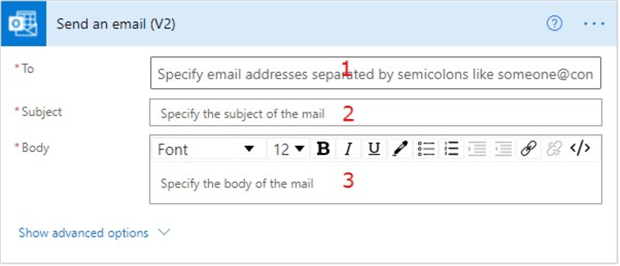
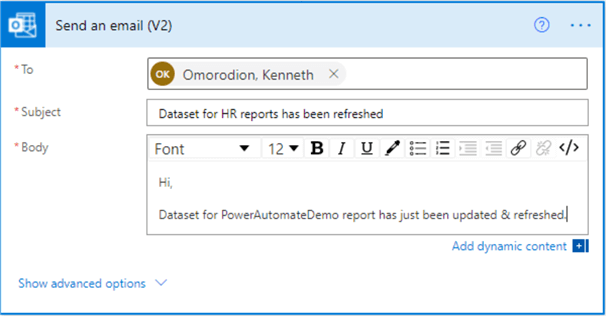
For the "To" or "1" space, we need enter the email addresses of each recipient of the email alert. In this example, I am only going to enter my Outlook email address, but you can enter more than one email here. See diagram below.
For the "Subject" or "2" space, we need to enter a subject for the email alert as it meets your need. In this example, I am only going to enter "Dataset for HR reports has been refreshed". See diagram below.
For the "Body" or "3" space, we need to enter a message that the end users would be seeing. Again, this depends on your business needs. See diagram below.
STEP 6: Save the flow and test it
Having configured all the required steps in this simple Power Automate demo, we now need to save the flow and test it to verify it works as required.
To save the flow, see the diagram below.
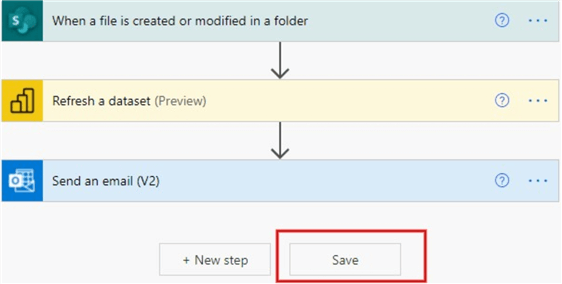
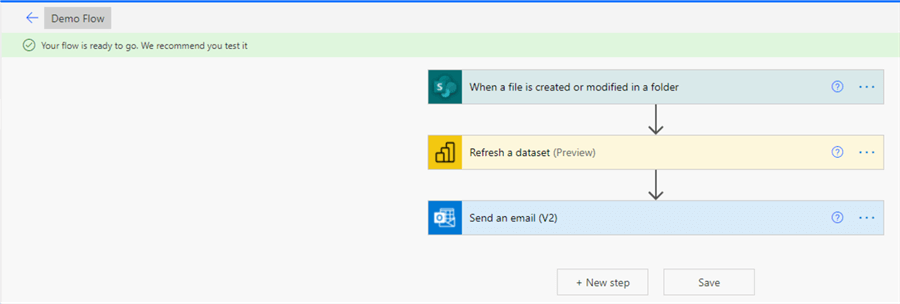
After saving the flow successfully, a message should show at the top left of the page as seen below.
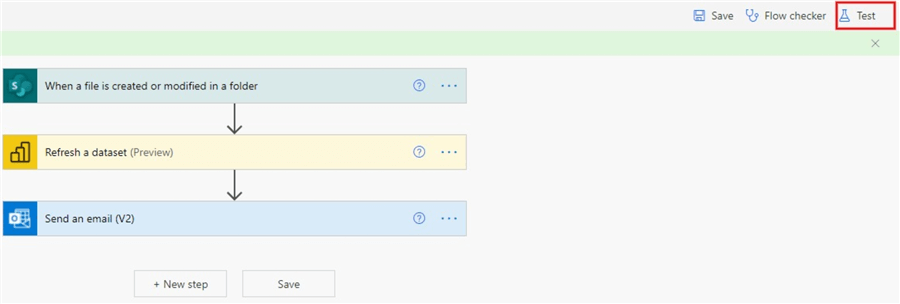
We then need to test the flow by clicking on "Test" at the top right-hand corner as shown in the diagram below.
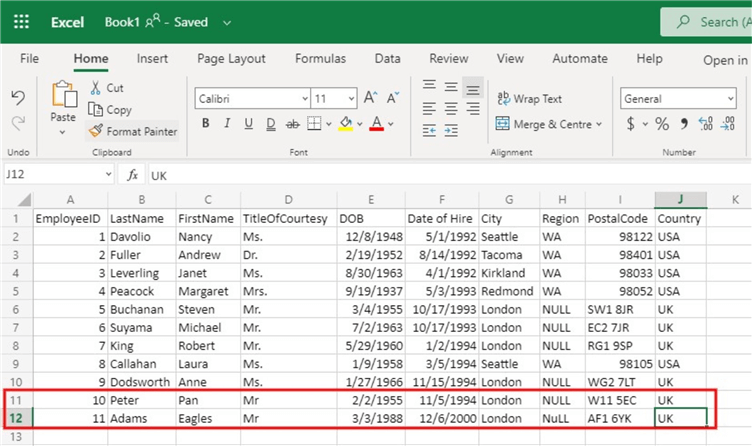
There are two ways to test the flow: manual or automatic. We will be using manual in this case because we will need to modify something in the SharePoint file manually to trigger the flow process. This needs to be done immediately.
As can be seen in the diagram below, I have added two more rows to the dataset in the SharePoint folder. This has immediately triggered the flow by first refreshing the report in Power BI Service, and then sending me an email alert about this modification of the dataset.
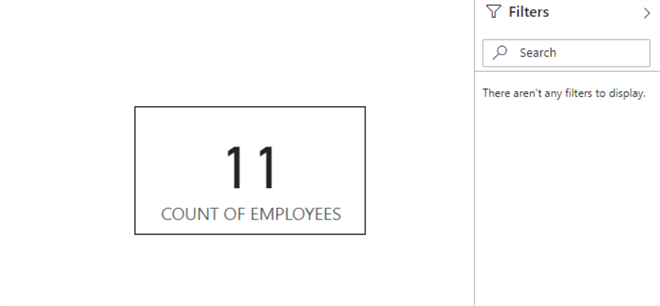
As can be seen in the diagram below, the card visual for count of employees that was nine earlier is now eleven as we added two more rows of employee details to the dataset. Please note that you might need to configure Data Source Credentials in Power BI service to ensure the refresh in Power BI Service is successful, otherwise it will fail. See my article on how to do this.
Likewise, an email alert was sent to my Outlook account as seen in the snapshot below.

The flow can be seen to have ran successfully in this case as seen in the diagram below.

In summary, in this tutorial, we have successfully demonstrated how to create a Power Automate trigger to refresh our reports dataset once there is a change or modification in the source dataset in SharePoint. We also configured an alert to be sent to our Outlook email once this flow steps is completed. As mentioned earlier, this can be further improved to source the data from a relational database or other common data repositories. The messaging on the email can also be customized to your business need.
If you are not using Outlook as your email service, you can look to configure the alert to go to other services like Gmail or even Teams.
Next Steps
- See this Microsoft documentation page on all you need to know on Power Automate.
- You can get more information on what to do with Power Automate here.
- If you need to get some other awesome examples of Power Automate in action see here.
- Try this tip out in your own data as business requires.
Learn more about Power BI in this 3 hour training course.
About the author
 Kenneth A. Omorodion is a Business Intelligence Developer with over eight years of experience. He holds both a bachelorís and masterís degree (Middlesex University in London). Kenneth has the MCSA, Microsoft Data Analyst - Power BI and Azure Fundamentals certifications. Kenneth is a Microsoft Certified Trainer and has delivered corporate training on Power BI, SQL Server, Excel and SSRS.
This author pledges the content of this article is based on professional experience and not AI generated.
View all my tips
Article Last Updated: 2021-06-03


