By: Koen Verbeeck | Updated: 2021-06-03 | Comments | Related: > Azure Data Factory
Problem
In this tip, we'll explain you what the Azure Data Factory offering in Azure is and walk you through the product with an example.
Solution
According to the Microsoft documentation, Azure Data Factory (ADF) is: A fully managed, serverless data integration service. Visually integrate data sources with more than 90 built-in, maintenance-free connectors at no added cost. Easily construct ETL and ELT processes code-free in an intuitive environment or write your own code.
In short: it's a data integration service in the Microsoft Azure cloud used by data engineers for data warehouse, machine learning, business intelligence projects and more.
In simple terms, you might say ADF is Integration Services (SSIS) in the cloud. Although there are definitely some similarities, ADF is so much more. For example, scheduling and monitoring is built into the service. But, much like SSIS Packages, ADF is an orchestration tool: it allows you to schedule (or be triggered by an event) tasks involving the ingestion, transformation or management of data from multiple data stores both on-premises and cloud data.
In this tip, we'll exclusively talk about ADF v2. There has also been a version 1, which was quite different from version 2. Version 1 should not be used anymore.
Installing ADF
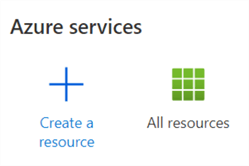
To get started with ADF, you need to go to the Azure Portal. Click on "Create a resource".
Search for "data factory" and select it from the list:
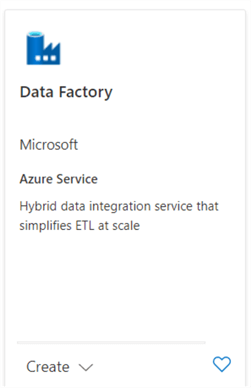
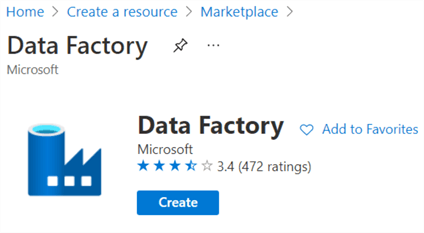
Click on the Create button to launch the wizard for creating a new ADF environment:
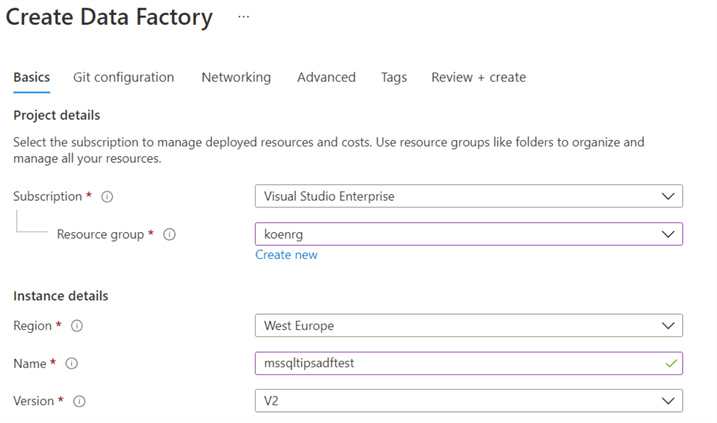
Choose a subscription, a resource group, a region, the name and the version. Make sure to choose version 2.
If you want, you can integrate the ADF environment with a Git repository – either Azure Devops or GitHub – or configure more advanced network settings and encryption, but all this is out of scope for this tip. Click on "Review + Create" to finish the setup. Once Azure has deployed the resource, you can view it through the portal.
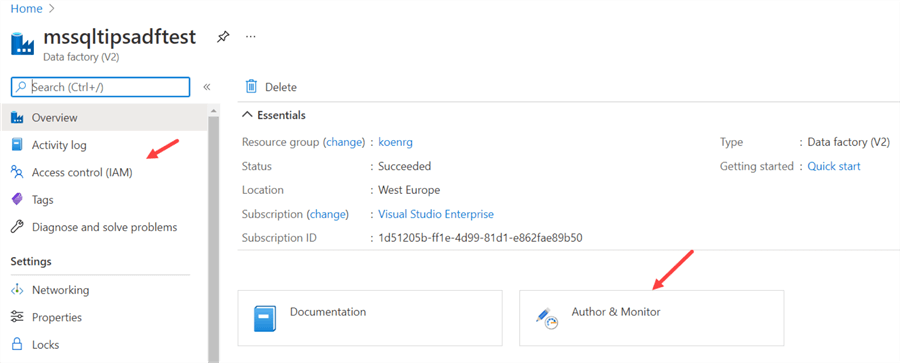
Typically, you won't be spending too much time here. You can set security on your ADF environment through the Access control pane. The development of ADF artifacts is done in the Author & Monitor application. Click on it to go to the ADF environment. A separate browser tab will open and you've arrived in the ADF development environment.
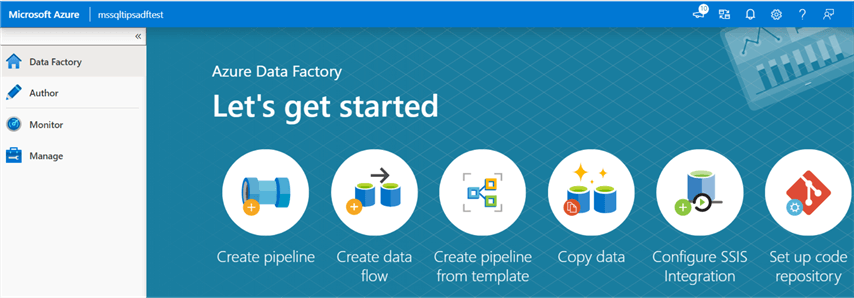
There are many resources to get you started: videos, templates and tutorials. Take your time to browse through the home page and see what's available.
Create your first Pipeline
The backbone of ADF are the pipelines. You can compare those to control flows in SSIS. A pipeline will execute one or more activities. There are many different activities, such as executing a stored procedure, calling an Azure Function, copy data from a source to a destination and so on. Here's an example pipeline:

As you can see, some activities are executed once a previous activity has finished successfully (the green arrows), while other activities will only start if the previous activity has failed (the red arrows). This is, again, very similar to the precedence constrains in SSIS.
Let's try to copy data from Azure Blob Storage to an Azure SQL Database. In an Azure Storage account, I've created a blob container and uploaded a simple csv file. You can do this on your own account using Azure Storage Explorer. The following tip explains the process: Azure Storage Explorer Overview.
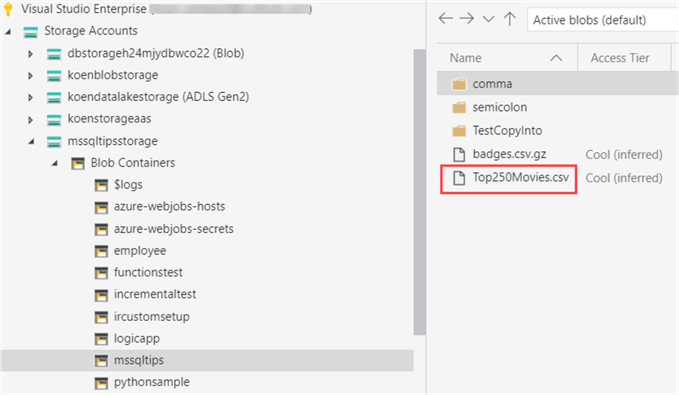
The file has the following content (only one single column with a header):
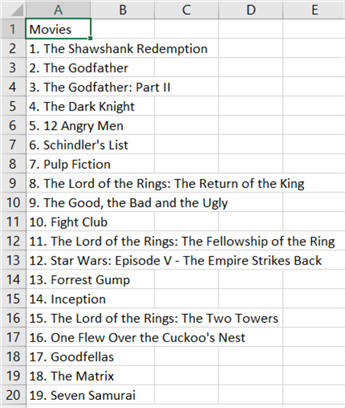
In an Azure SQL Database, we can create the destination table with the following T-SQL statement:
CREATE TABLE [dbo].[Top250Movies](
   [Movies] [NVARCHAR](250) NULL
);
Before we start with the pipeline, we need to create two linked services and two datasets. A linked service defines the connection information to a certain data source. You can compare this with a connection manager in SSIS. A dataset in ADF – which is tied to a linked service – defines the data source in more granular detail. For example, if the linked service is SQL Server, the dataset will define a table, its columns and the different data types. If the linked service is Azure Blob Storage, a dataset can define a csv file (its location and the columns), but perhaps also a json file, a parquet file and so on. You can compare a dataset with an data source/destination component in SSIS. You can find a good overview of the concepts in ADF in the tip Azure Data Factory Overview.
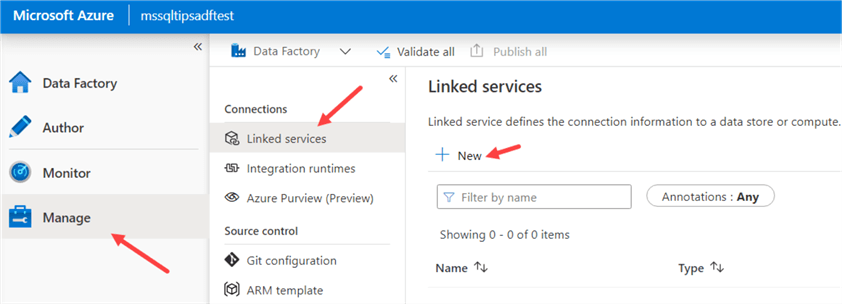
To create a linked service, go to the Manage section of ADF, then Linked Services and click on New.
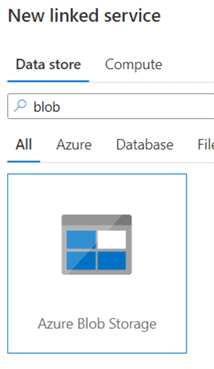
Search for Azure Blob Storage:
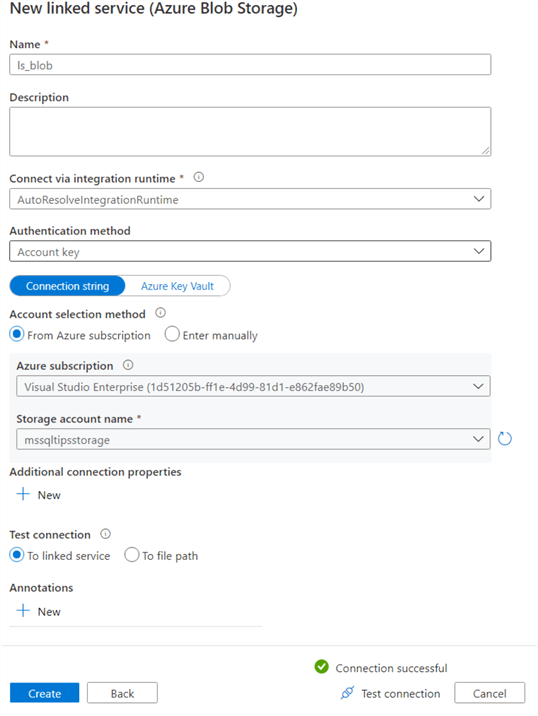
Specify a name and a method to connect to your storage account. The account key authentication method is probably the easiest method to connect. Just select the subscription and the storage account name and test the connection.
We can repeat the process to create a linked service for an Azure SQL DB:
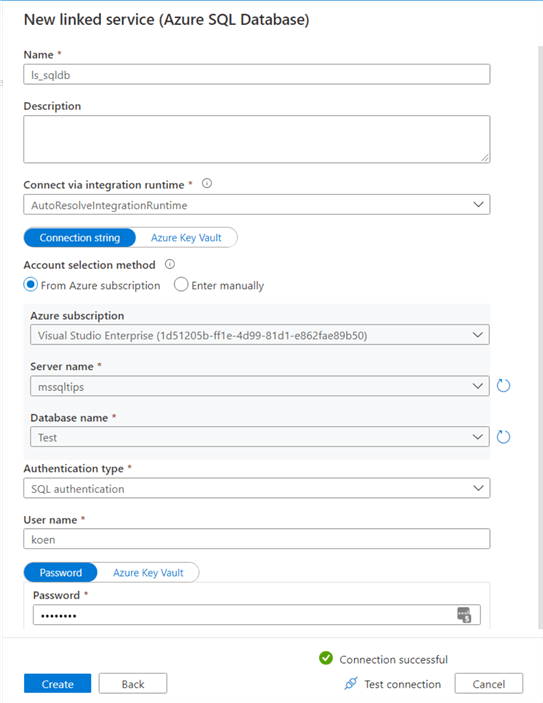
For this linked service we used SQL authentication to connect to the database. Now we can create the datasets. Go to the Author tab of ADF and create a new dataset.
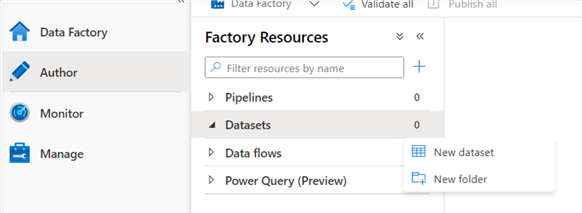
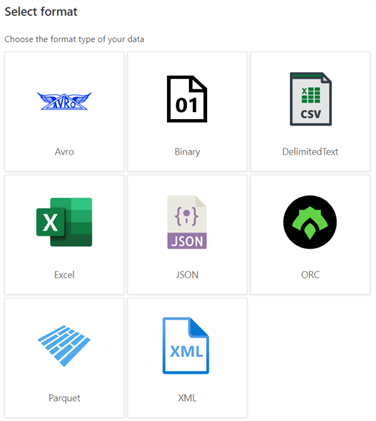
Search for blob storage again and select Azure Blob Storage. Next, we need to choose the format, which in our case is DelimitedText:
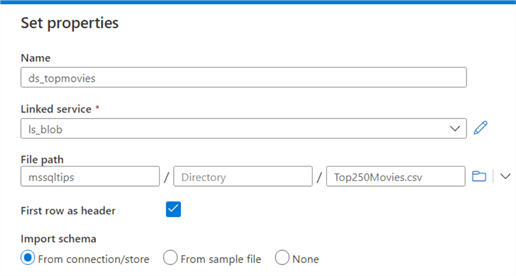
The dataset needs to be linked to the linked service we created earlier. Then you can specify the file path and if the file contains a header. The schema of the file can be imported using the connection or a sample file.
Once the dataset has been created, you have more configuration options:
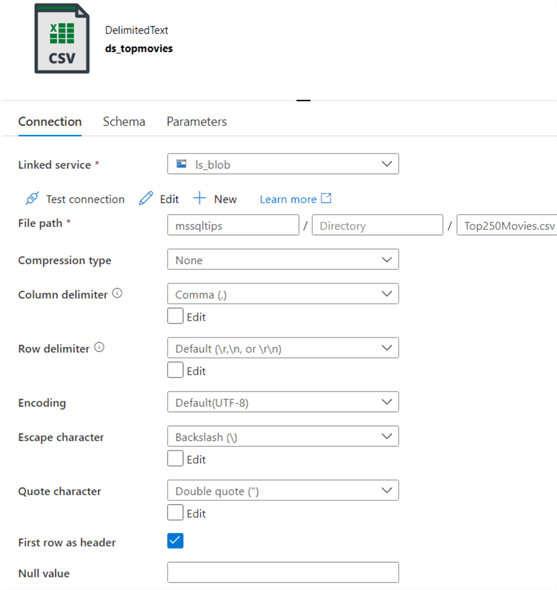
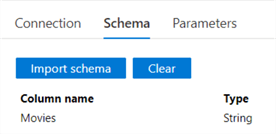
In the schema tab you can see there's only one column of the string data type:
Similarly, we can create a dataset for our table in Azure SQL DB.
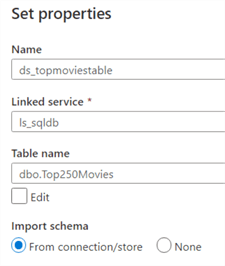
As with the csv file, the schema is imported into ADF:
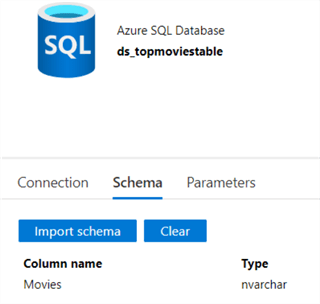
When ADF is not connected to a Git repository, you need to publish the changes so they can take effect.

Now the preliminary work is finished, we can finally start on our data pipeline. Click on the ellipsis next to Pipelines and choose to create a new pipeline.
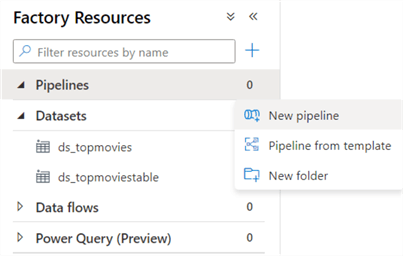
As you can see, there are many different activities. The tip Azure Data Factory Control Flow Activities Overview lists a few of them, and you can find more tips in this overview.
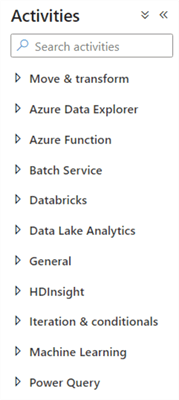
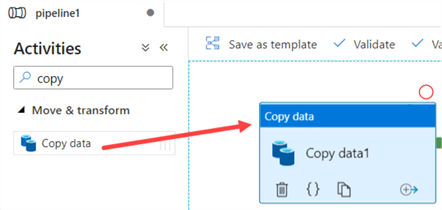
Search for the Copy Activity and drag it unto the canvas.
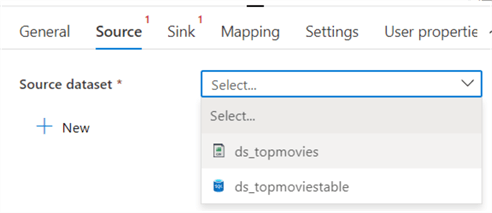
In the Source tab, select the blob dataset we created earlier:
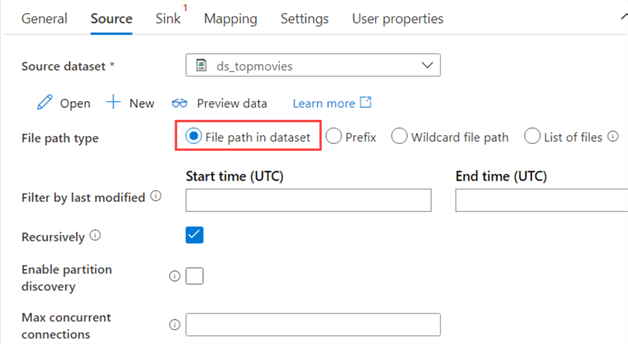
Make sure the option "file path in dataset" is selected, since our dataset directly points to the file we want to read.
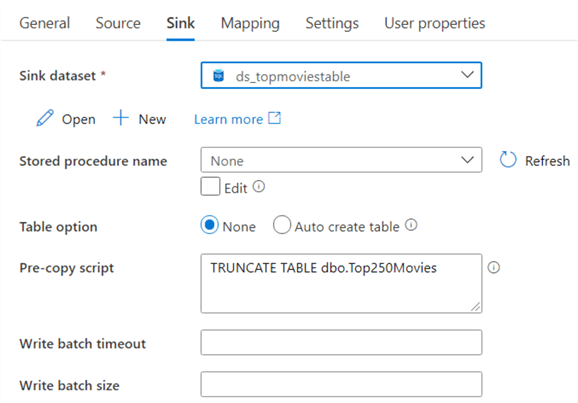
In the Sink tab, select the Azure SQL DB dataset. We don't need a stored procedure, but we can configure to empty the table before the data is copied by executing a TRUNCATE TABLE statement.
In the mapping tab, you can import the schemas from the dataset to review if the columns are mapped correctly.

The pipeline is now finished and it can be published to persist the changes. To test the pipeline, we can hit the debug button at the top:
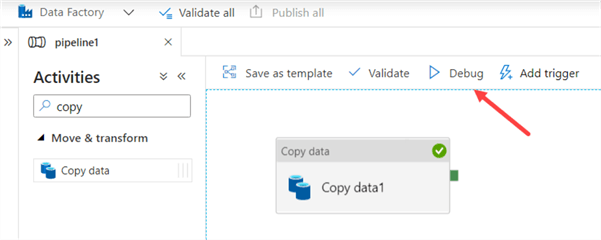
After a couple of seconds, the pipeline should have finished successfully.

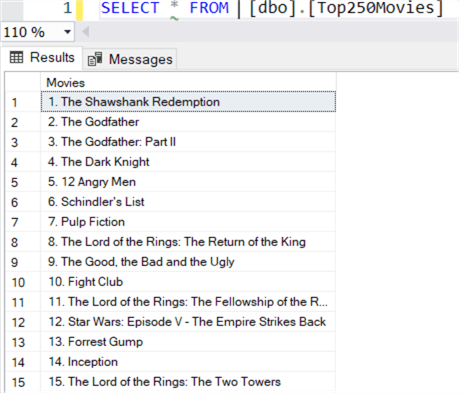
We can review the table in the Azure SQL DB to make sure the records have landed:
Conclusion
In this part we've introduced you to the Azure Data Factory service and showed you how you can create linked services, datasets and a pipeline for data movement from Azure Blob Storage to an Azure SQL DB. Stay tuned for part 2, where we'll discuss the role of ADF in the Azure data landscape, monitoring, error handling and the integration runtimes.
Next Steps
- For a video introduction to ADF, check out Building Data Pipelines with Azure Data Factory to Move Data.
- In the example we copied a single file, but you can make pipelines more dynamic.
- There are many tips on ADF on this website, you can find them all in this overview.
About the author
 Koen Verbeeck is a seasoned business intelligence consultant at AE. He has over a decade of experience with the Microsoft Data Platform in numerous industries. He holds several certifications and is a prolific writer contributing content about SSIS, ADF, SSAS, SSRS, MDS, Power BI, Snowflake and Azure services. He has spoken at PASS, SQLBits, dataMinds Connect and delivers webinars on MSSQLTips.com. Koen has been awarded the Microsoft MVP data platform award for many years.
This author pledges the content of this article is based on professional experience and not AI generated.
View all my tips
Article Last Updated: 2021-06-03


