By: Mohammed Moinudheen | Updated: 2021-10-26 | Comments (1) | Related: > Azure
Problem
I am aware that automatic backups occur for Microsoft Azure SQL Database and that we could use the automatic backups to perform point in time restores of the database. However, I would like to know if the Azure SQL Database can be exported or backed up locally so that I can restore the database on-premises?
Solution
This tutorial assumes that you already have resources in your Azure environment and you are familiar with the Azure portal. If you are new to Azure, you can subscribe to a trial account here, which will give you access to Azure services for a year and a credit of USD $200. It is assumed, that you already have an Azure SQL Database. If you don't have an Azure SQL Database, you can refer to this tip to configure it which has step by step instructions for creating an Azure SQL Database.
Database Backup Options for Azure SQL Database
There are multiple ways by which we can backup or export an Azure SQL DB in order to restore the database locally based on your requirements (i.e. automation, disaster recovery, etc.). In this tip we will explore functionality from some of the popular options that are available.
- Use the export option in the Azure portal
- Sqlpackage utility
- Export data-tier application option using SSMS
- Import/export data option using SSMS
- dtexec option
- bcp option
Export option using the Azure portal
This is a straightforward process using the Azure portal. You can make use of the 'Export' option that is available on the portal when you click on the Azure SQL database.

Once you click on the 'Export' option, you will see this screen where you can select the Azure storage that is available.
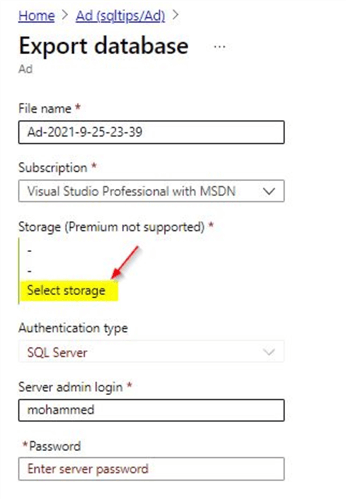
Once you click on 'Select storage', you will be able to view the storage accounts that are available. When you select the storage account of your choice, you will be able select the container as well.

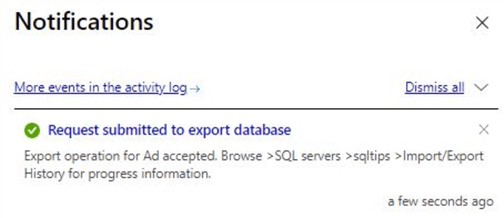
Once you make the selection, you will get confirmation that the export process has started on the notifications tab.
To check the progress of the export process, you can check the Import/Export history that is available from the Azure portal. When you click on the logical SQL Server, you will be able to view Import/Export history under Data Management.
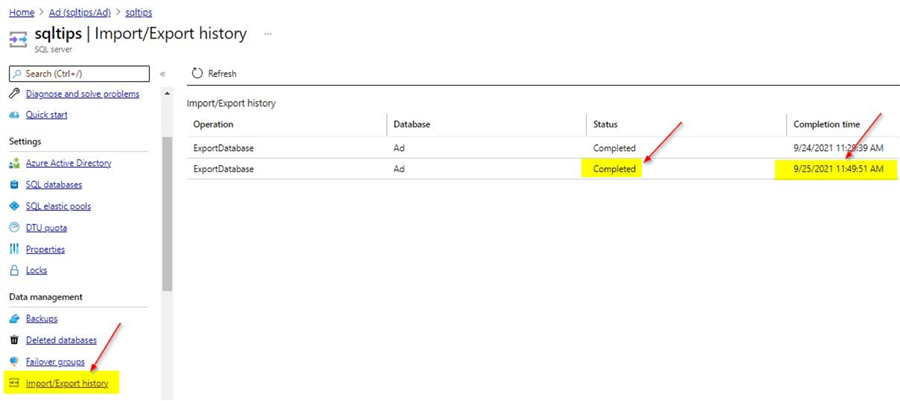
As you can see from the screenshot, the export process has completed for the Azure SQL database. Now, you can go to the storage account that you had selected earlier to confirm that the export file is available.
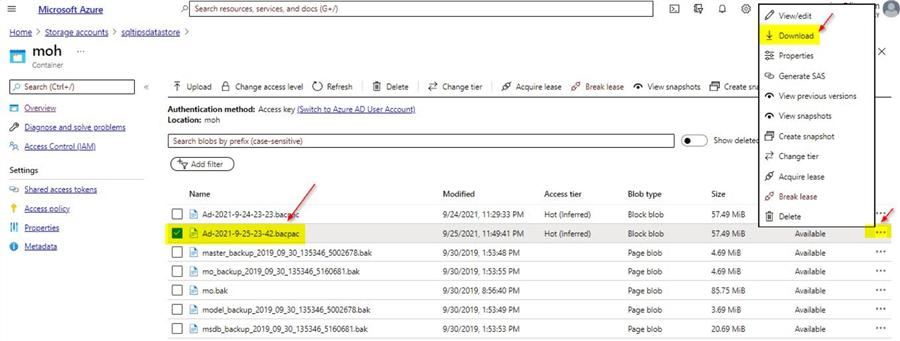
You can see that the bacpac file is available in the storage account you specified. Once you click on the ellipsis option on the right corner, you will get the option to download the bacpac file.
The export process may take time for large databases and also there must be no write activity during the export process in order to have a consistent bacpac file. The export process itself may get slow for large databases and may not complete in time. It is recommended to make use of the sqlpackage utility in order to overcome these shortcomings.
Making use of sqlpackage utility in order to export an Azure SQL DB
Sqlpackage utility is another easy option available to export Azure SQL database to a bacpac. Sqlpackage utility is available after you install SQL Server Management Studio (SSMS) or you can download and install the latest version from this link. After the installation, you will see the SqlPackage.exe is available in the install folder. In my case, it is available in this folder C:\Program Files\Microsoft SQL Server\150\DAC\bin.
You can get the version of the install by using the command prompt. Change directory to the Sqlpackage install location and run the below command.
-- First go to the path location
sqlpackage.exe /Version
You will see this output.
As you can see this is the latest build version available at this time. The build versions can be validated from this link.
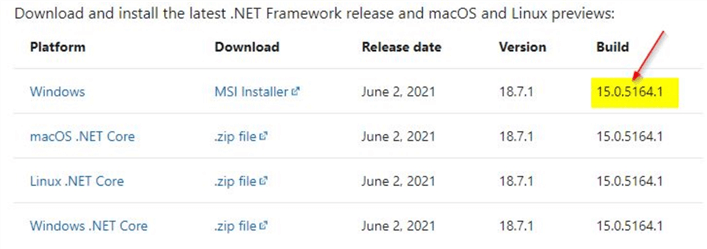
Another advantage of SqlPackage is that it is a cross platform tool and is available on other platforms as shown in the screenshot above.
You can make use of the below command to export the Azure SQL database to a bacpac.
-- Replace details accordingly for the parameter
sqlpackage.exe /a:Export /ssn:tcp:ServerName.database.windows.net /sdn:DBName /su:UserName /sp:Password /tf:C:\Update Correct Path\DBName.bacpac /p:Storage=File
Actual parameter names for the short forms used above are as below.
- /a : Action
- /ssn: Source Server Name
- /sdn: Source Database Name
- /su: Source User
- /sp: Source Password
- /tf: Target File
- /p:Storage: Type of Storage
Once the above command executes successfully, you will get a confirmation on the command prompt as below.

As you can see the export process completed successfully and the Azure SQL database bacpac file gets exported to the target file location. You can also make use of a SQL Agent job to run this process. In the SQL job step, make sure to use the type: Operating System (CmdExec). Make sure to use 'SQL Server Agent Service Account' in the 'Run As' option. If you are running the SQL job from an on-premises server, the SQL Agent service account also needs to have sufficient access on the target file location. In the command section, you can make use of below command. You can explicitly provide the SqlPackage.exe path in the command.
-- Replace details accordingly for the parameters
C:\Program Files\Microsoft SQL Server\150\DAC\bin\sqlpackage.exe /A:Export /ssn:tcp:ServerName.database.windows.net /sdn:DBName /su:UserName /sp:Password /tf:C:\ Update Correct Path\DBName.bacpac /p:Storage=File
Below is a screenshot of the SQL Agent job step.

Once the job completes, you will see the Azure SQL DB bacpac file exported to the specified target file location.
Using SSMS to export bacpac file
Using SSMS, we can make use of the Export data-tier application option to export the Azure SQL database to a bacpac. This is a popular option used as the export process is through a GUI. You can connect to the logical SQL Server and right click on the Azure SQL database > go to Tasks > click on the 'Export data-tier application' option.
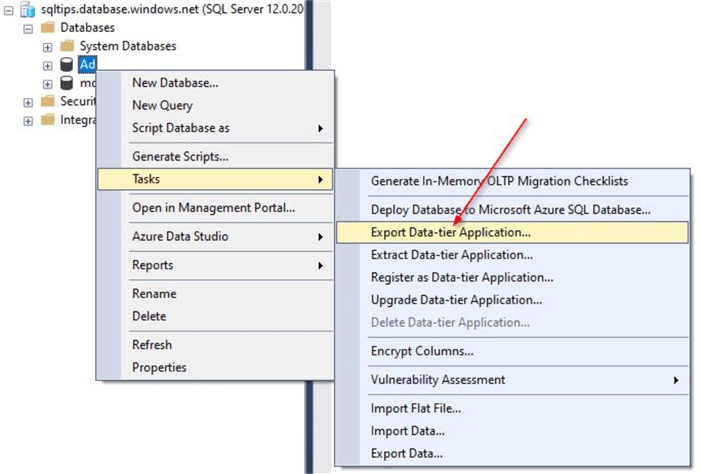
This will start the wizard window, where you can provide the details for the export settings. Enter the location for the bacpac file.
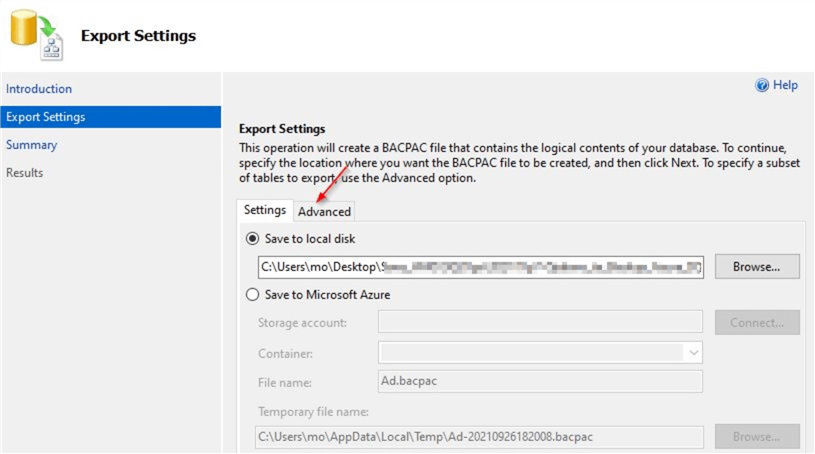
In order to select a subset of tables for exporting, click on the 'Advanced' option where you can make the required selections.
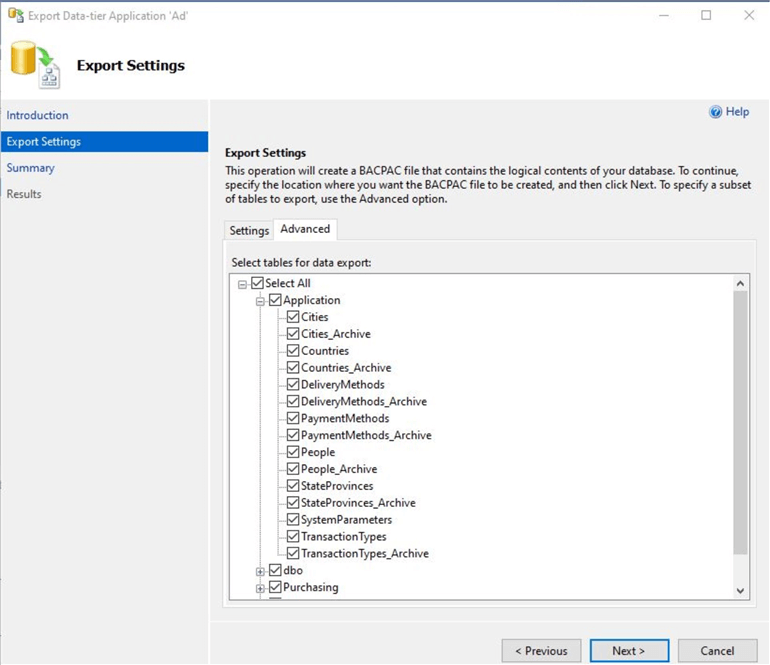
In this case, I selected all the tables and selected 'Next'. You will see this window, where you can review the settings and click 'Finish'.
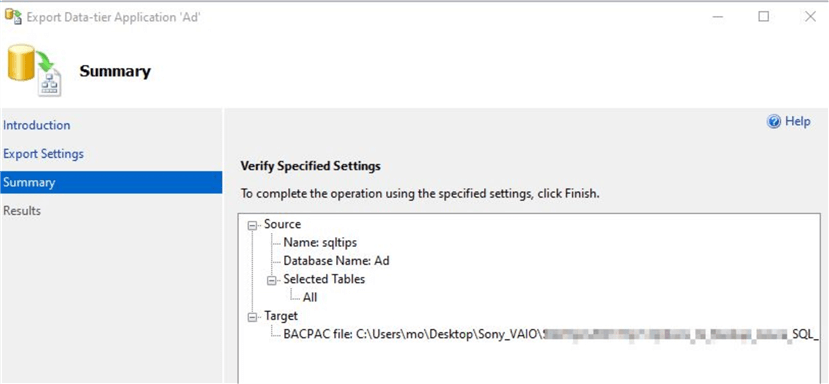
Once you click 'Finish', the export process will start which will initiate the extraction process.
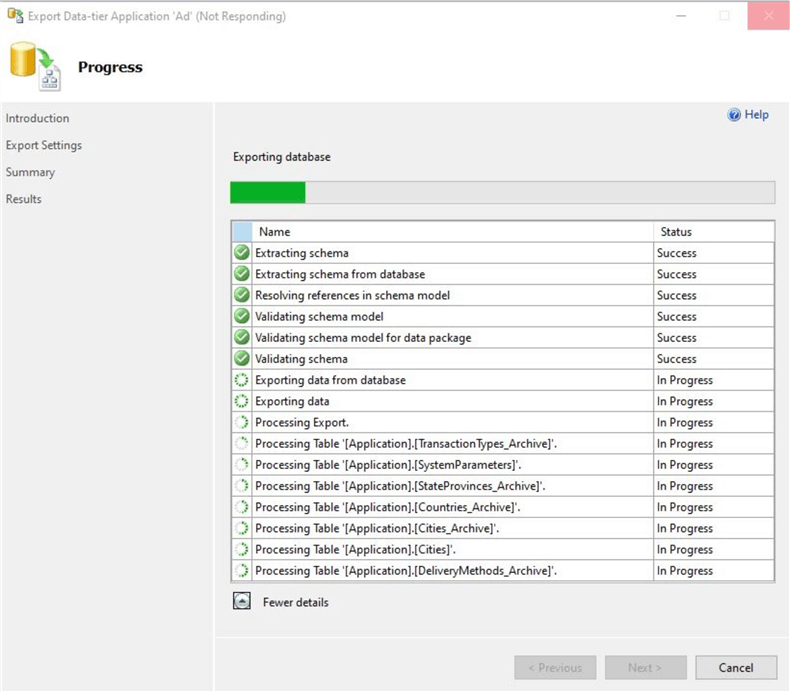
Once this process completes, you will be able to view the bacpac file in the location specified.
What do we do with the bacpac?
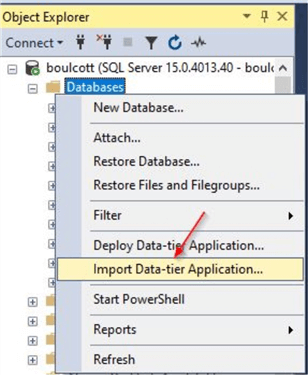
The bacpac file as you know contains both the schema and data. The easiest option to import the bacpac file is through SSMS. Once you click on the database node under the SQL Server and right click, you will see the option – 'Import data-tier application'. Just follow the wizard and make use of the bacpac file that you exported for completing the import.
Summary
In this tip, you saw multiple ways by which we can export an Azure SQL database to a bacpac using the options below.
- Use the export option in the Azure portal
- sqlpackage
- Export data-tier application option using SSMS
In the next tip, we will explore the remaining options.
Next Steps
- You can try out the steps described in this tip to perform an export of an Azure SQL database
- This tip describes the export process using the Azure portal, SqlPackage and SSMS
- Explore the remaining export options in the next tip
- In order to read more on Azure topics, you can refer to the Azure section on MSSQLTips
About the author
 Mohammed Moinudheen is a SQL Server DBA with over 6 years experience managing production databases for a few Fortune 500 companies.
This author pledges the content of this article is based on professional experience and not AI generated.
View all my tips
Article Last Updated: 2021-10-26


