By: Carla Abanes | Updated: 2022-05-09 | Comments (1) | Related: > Amazon AWS
Problem
For this article, I will share with you how you can launch your SQL Server Failover Cluster instance complete with shared storage on Amazon FSx via the AWS Launch Wizard.
Solution
SQL Server failover cluster instance configuration offers a highly available database engine platform for your relational database needs. This architecture is also cost effective as it can be done using SQL Server Standard Edition in an active-passive setting.
In a SQL Server Failover Cluster Instance configuration, shared storage is needed that can be mounted on each of the nodes participating in the cluster. For this purpose, an Amazon FSx will be deployed to store the mdf and ldf files for the system and user databases.
In my previous article I shared how you can easily launch and build a SQL Server Always On configuration on AWS. The configuration for Always On involves the use of SQL Server Enterprise Edition in an active-active setup.
Launch Wizard for SQL Server
AWS offers an easy way of deploying, configuring and setting up SQL Servers Always On either for Availability Groups or a Failover Cluster. This can all be done via the AWS Launch Wizard which we will cover in this article to setup SQL Servers running on Failover Cluster Instances.
If you need to use your own SQL Server license (BYOL), this is covered in the AWS Launch Wizard where you can select a prepared AMI of EC2 instance running OS and your licensed SQL Server Standard Edition. Make sure to prepare this AMI before going to the console for the AWS Launch Wizard.
AWS Launch Wizard is free and has no additional cost, but you will have to pay for the provisioned resources. To check availability in your region you can visit the AWS Launch Wizard page here.
To get started with AWS Launch Wizard to deploy SQL Servers Failover Cluster Instance, sign in to the AWS Console. If you do not have an AWS account yet, you create and activate an account here.
Prerequisites
- Coordinate with your Active Directory administrator to get the information for your organization's AD domain settings. You will need the DNS IP address, a domain user and password that has permission to create local objects in active directory. This is for the failover cluster configuration that will be configured.
- Select a SQL computer name that is compliant with your organization's naming convention for host names and service accounts. You will need this information in the AWS Launch Wizard.
- Create an SNS topic for notifications regarding the deployment.
- Create a AWS key pair under the AWS EC2 dashboard. You will need this to login to the SQL Server nodes via RDP.
- If you plan to use your own SQL Server Standard license, prepare an AMI (image) of an existing EC2 where you have pre-installed your licensed SQL Server.
It is also recommended that if you already have an existing AWS VPC setup to follow the tips in this article. However, creating a new AWS VPC is also included in the launch wizard.
So let's get started!
Create SQL Server FCI via AWS Launch Wizard
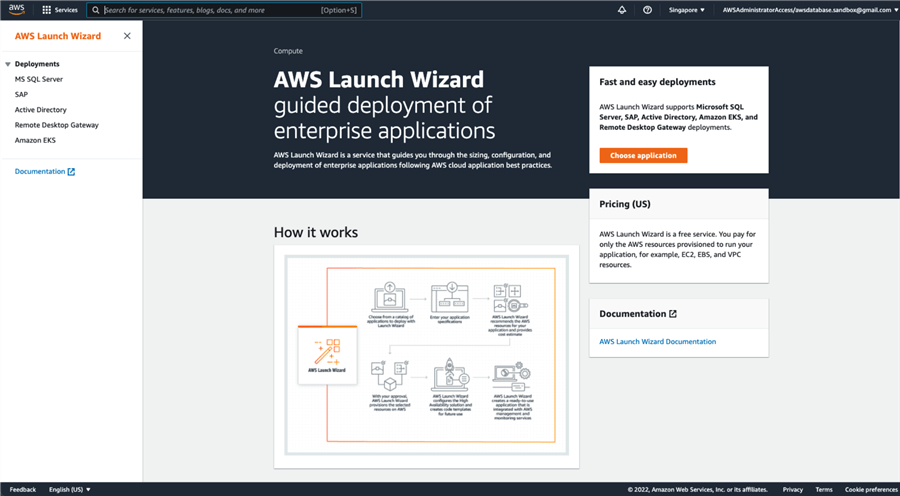
Sign in to your AWS console. From the AWS Management Console, navigate to AWS Launch Wizard by searching for it on the top search bar.
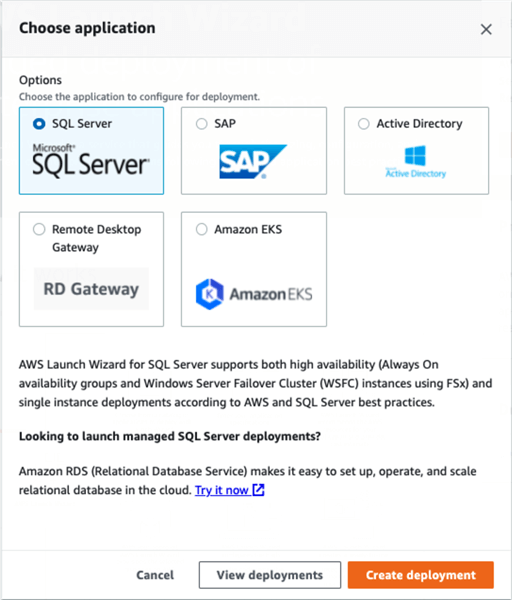
From the applications, choose the SQL Server and click 'Create Deployment'.
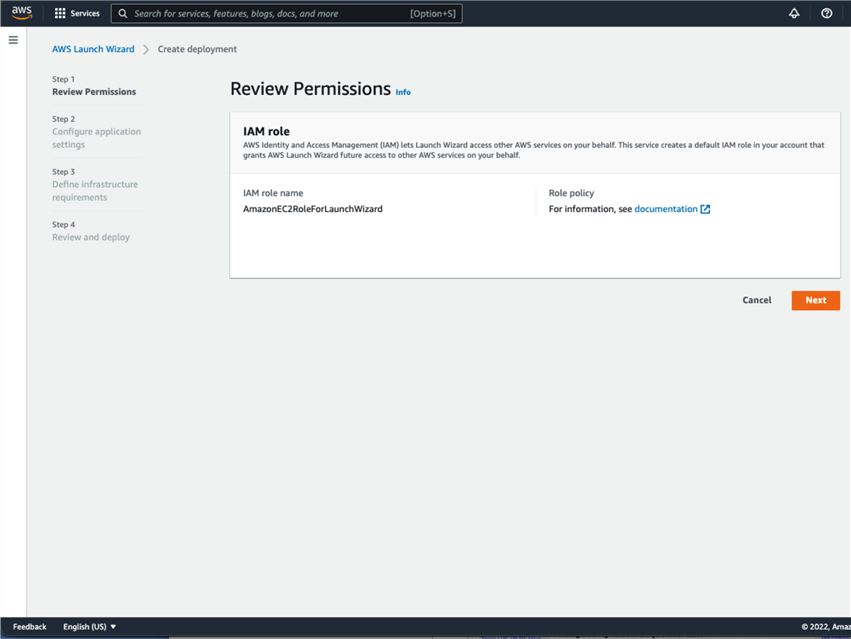
The AWS console will now navigate to the 'Create Deployment' wizard. On the left side menu, the 4 steps are enumerated.
Step 1 is to review the permission that AWS will create for its use in launching the AWS resources. Click 'Next' to go to Step 2.
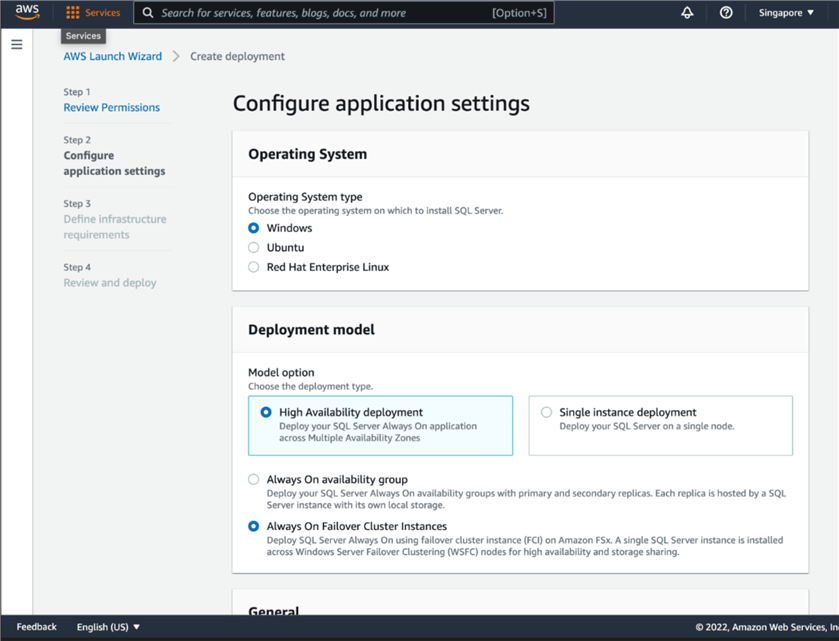
Step 2 is to configure application settings. Here you will define the operating system, deployment model. Select the option for 'High Availability Deployment' and 'Always On Failover Cluster Instances'.
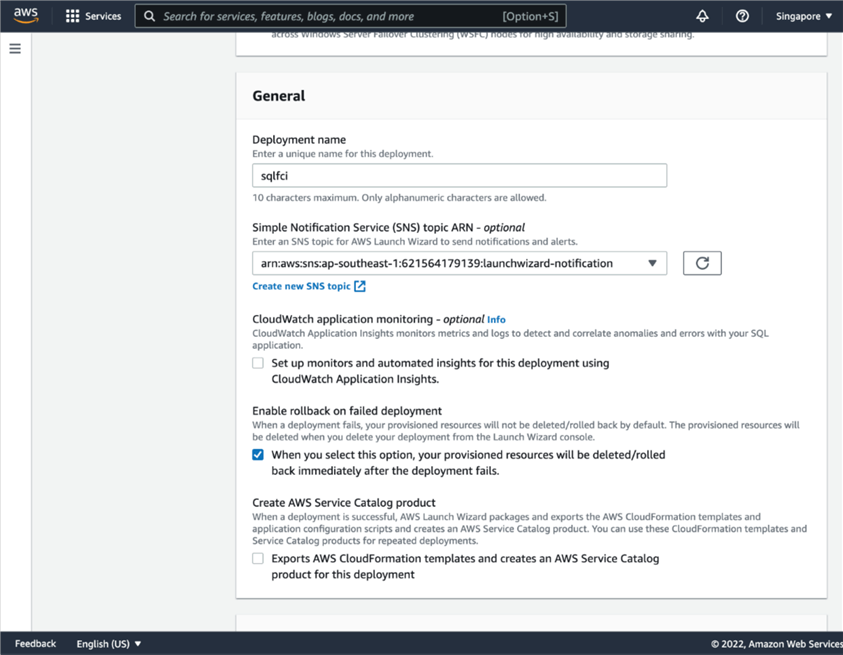
In the 'General' section, you will need to key in the deployment name, select SNS to use for the email notification, check the box for 'Enable rollback on failed deployment' to make sure that clean-up of AWS resources is executed in case this deployment fails.
In the 'Connectivity' section, you will need to select the AWS key pair to use for RDP connectivity, select the VPC and subnets where the EC2 instance will be deployed. You have to make sure that in your selected VPC, internet connectivity is allowed from the private subnets as the Microsoft packages for configuration are downloaded from the internet.
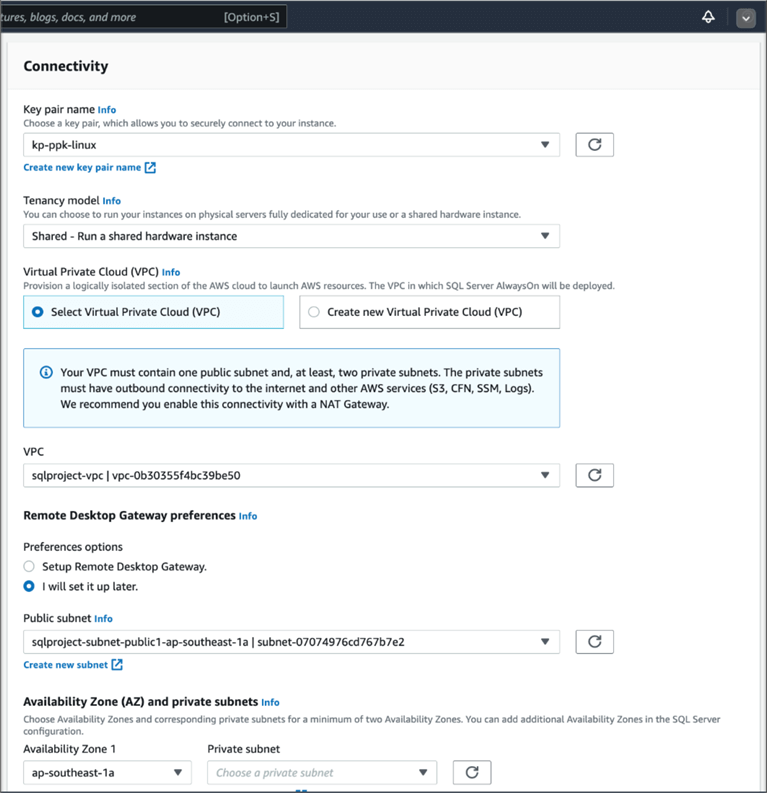
For more information on VPC and connectivity to the internet from the private subnets, click here.
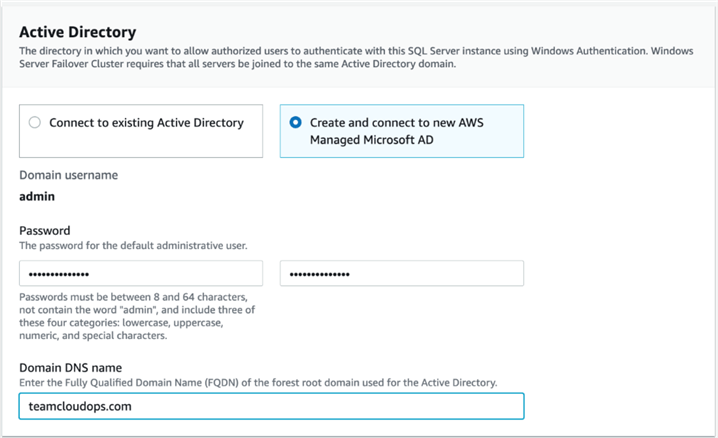
In the 'Active Directory' section, select the option to 'Create and connect to new AWS Managed Microsoft AD', enter your preferred password and domain name. If you are planning to deploy and connect to your organization Active Directory, you can select the 'Connect to existing Active Directory'.
In the 'SQL Server' section, select the option to 'Create new SQL Server service account', key in your preferred username and password. Note that this account will also be added to the active directory users you have selected in the 'Active Directory' section.
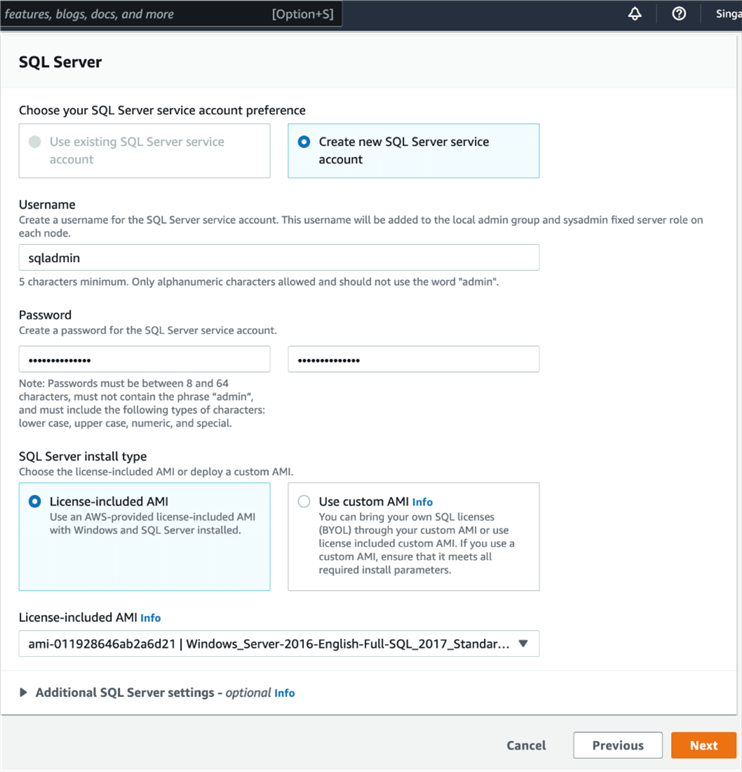
For the AMI to use, you can select from the 'License-included AMI' a SQL Server standard edition of your choice.
Step 3,, you will need to define the storage and compute for the EC2 instances that will be deployed. Here you also specify the FSx shared storage capacity. For the purpose of testing you can select the minimum size of 32GB.
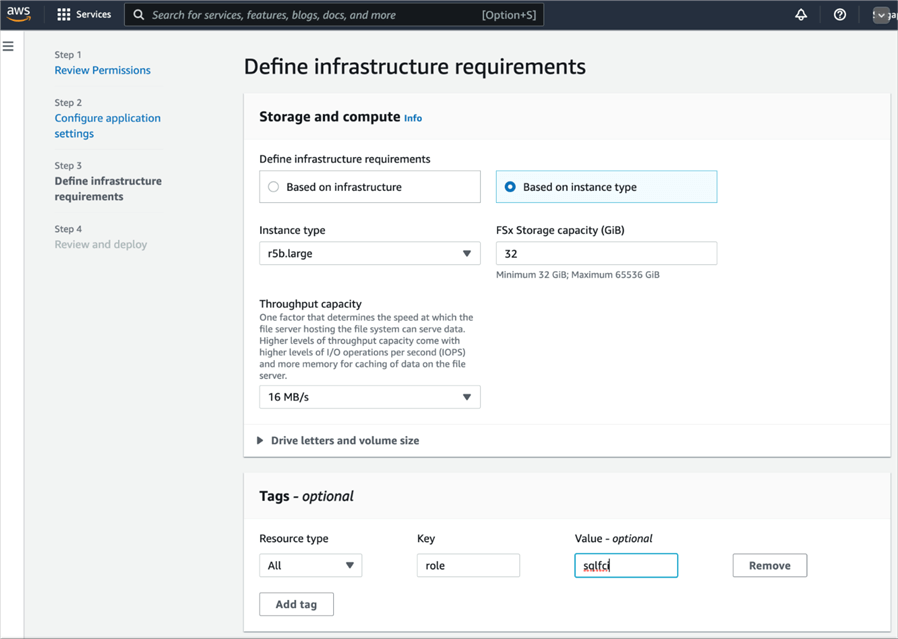
Amazon FSx will be used as the shared storage for the SQL Server system and user databases. For this deployment architecture, the shared storage will not need to swing from one node to another node during failover as this shared storage can be mounted or mapped to each of the participating nodes in the cluster at the same time.
Make sure to apply proper tags to this deployment so you can easily identify the resources for this deployment.
Step 4,, make sure to review the settings and the cost for this deployment. If you find all settings are correct, click 'Deploy' to start the deployment.
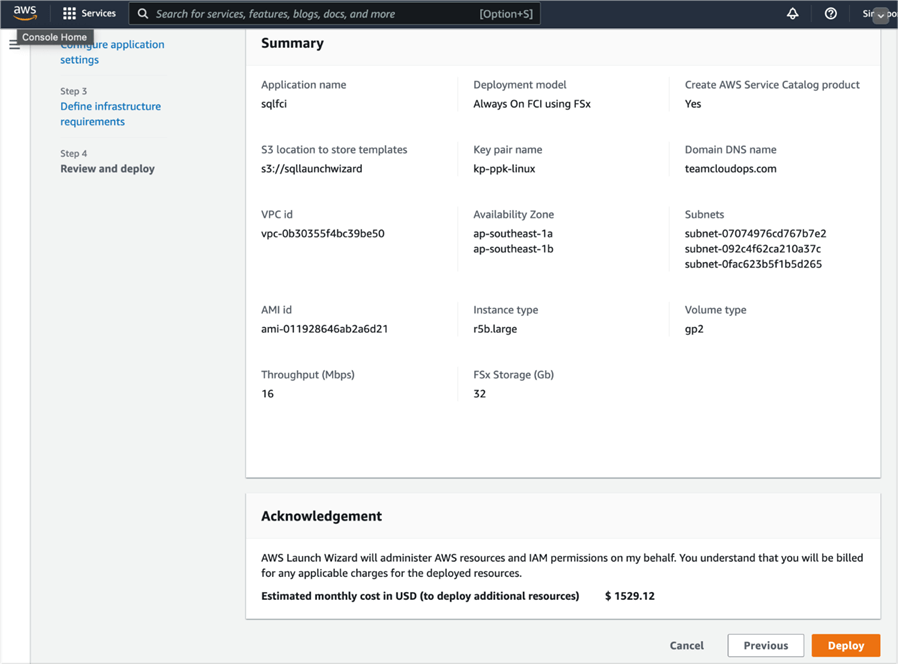
Monitor the Deployment Process
The entire deployment of all the many AWS resources that need to be setup may take a couple of hours. This is all done for you, so you can take a break and get a cup coffee or check emails.
On the AWS console, you can navigate to the CloudFormation dashboard to monitor the deployment progress.
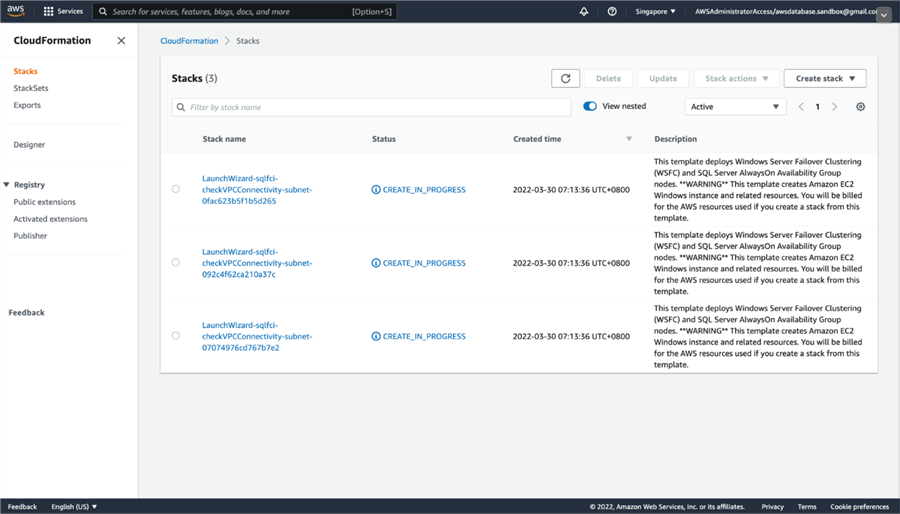
You can verify that the new directory service is also created by navigating to the AWS Directory Service dashboard.

To check the deployment of Amazon FSx, navigate to the dashboard by searching for 'FSx' in the search bar.

Test and Verify the Failover Cluster Instance
When the deployment successfully completes, it's time to test and verify the configuration. Log in to the 2 servers via RDP with the key pair that you prepared in the prerequisite section.
For my setup, I verified the cluster setup in the Failover Cluster Manager console. I wanted to see that the SQL Server role is present and that the service is online for the active server and offline for the passive server, just how the failover cluster instances are expected to work.
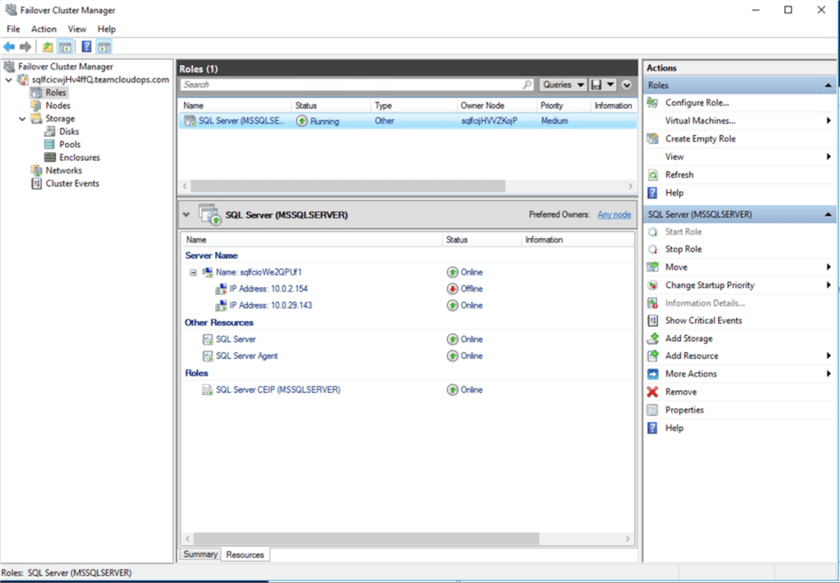
I also verified by logging in to the passive server to verify that SQL Server is not running. Please see my second EC2 instance below.
From the second server, I can also connect to the SQL Server FCI.
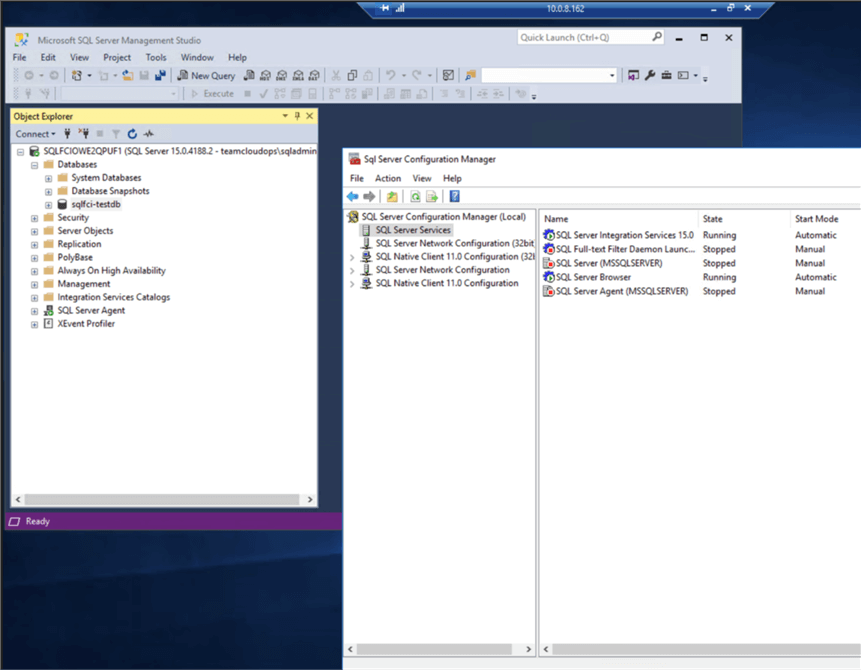
The exciting thing about running SQL Server FCI on AWS, is that the failover event is much faster and smoother as there is no storage to shift and bring online from the current active server to the passive server. The data and log files are located in the Amazon FSx file share for Windows Servers.
Let's see how we should map the Amazon FSx shared storage on both nodes. In the AWS Console, navigate to the Amazon FSx dashboard by searching for Amazon FSx from the services in the menu.
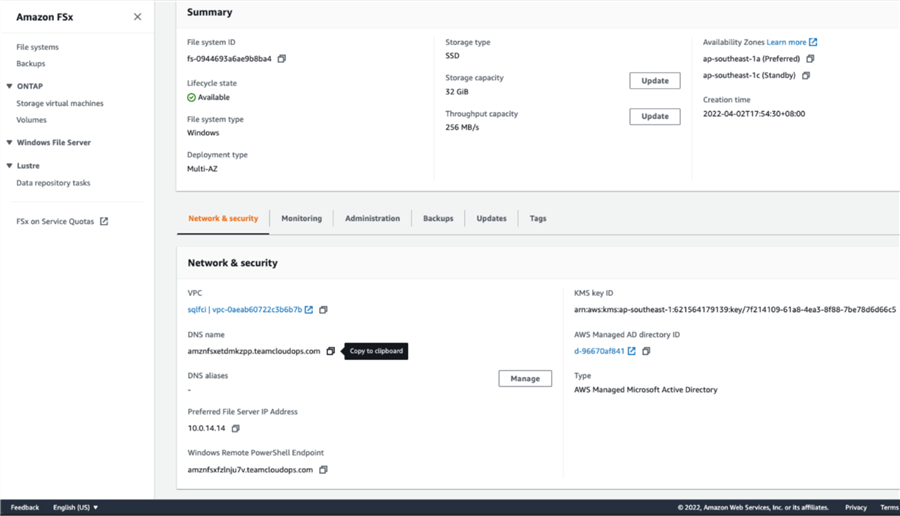
From the Amazon FSx dashboard, select the File Systems from the left pane menu and select the name of the file system that was created during the launch wizard. Then on 'Network & Security' tab, copy the DNS name to your clipboard for later reference. See my screenshot above.
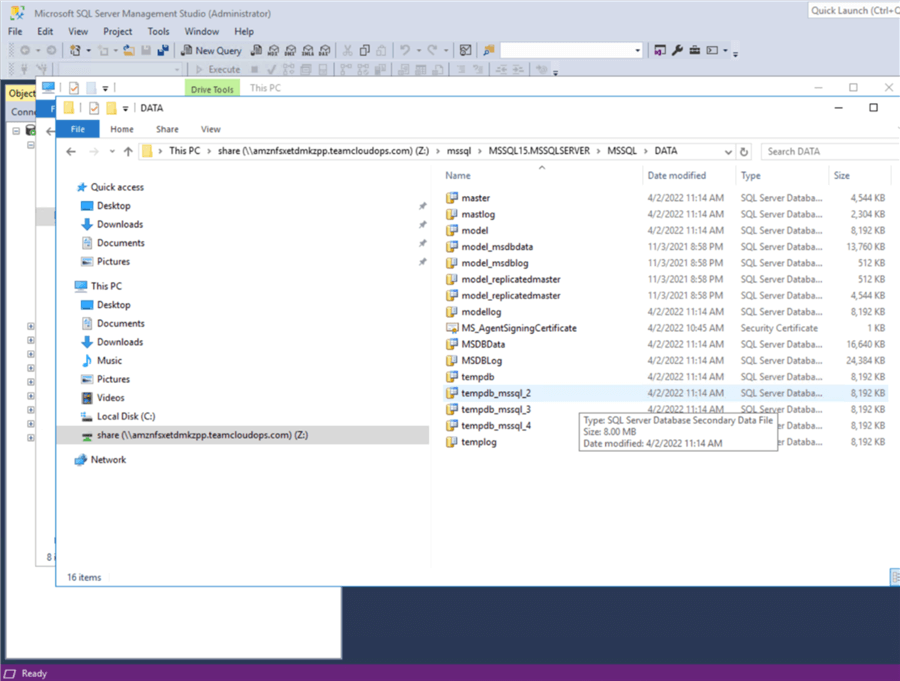
Log in to both of the SQL Server nodes and open up Windows file explorer. Right click 'This PC' and select 'Map Network Drive'. This will open a new popup window similar to the screenshot below. Type in the 'Folder' name in the similar format as the example:
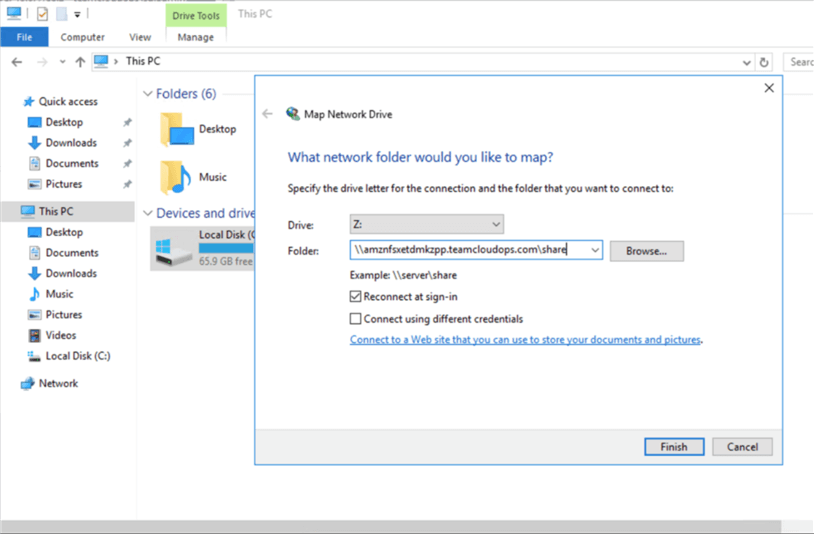
Once that is completed, you will be able to locate where the system data and log files are and also where the user data and log files will be. I created a test database and have verified the location of these data and log files. Refer to the below 2 screenshots.
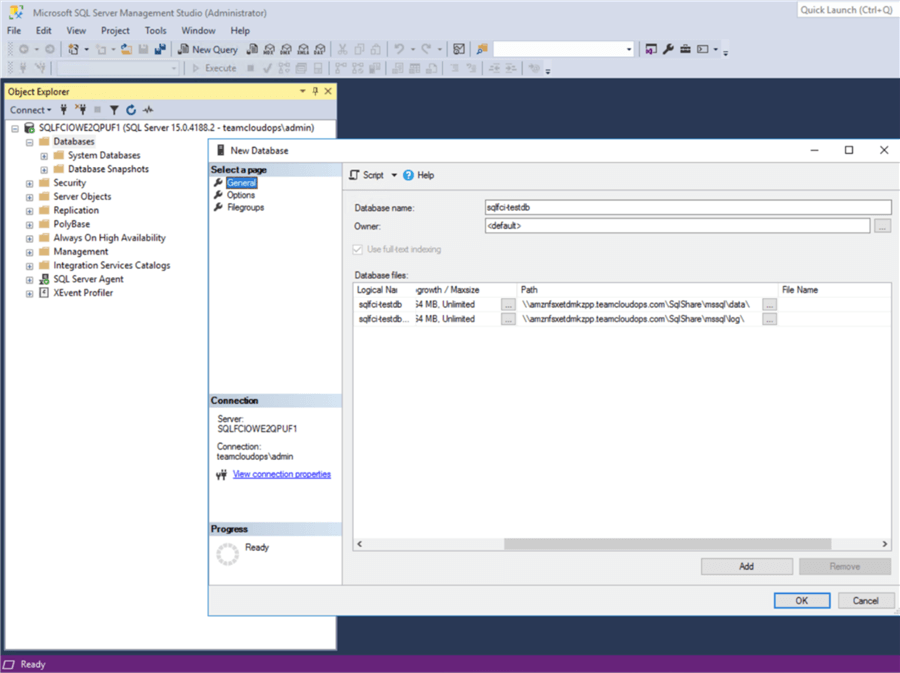
When you have completed validating the deployed SQL Server FCI settings, you can delete your deployments in the AWS Launch Wizard dashboard to make sure you do not incur costs for this test environment we setup.
Conclusion
In this article, I guided you on how you can easily deploy SQL Server Failover Cluster Instances on AWS. Using AWS Launch Wizard offers a guided and well documented way of configuring highly available SQL Servers on AWS.
Deploying SQL Server FCI with an Amazon FSx file share for Windows lowers the cost of running your SQL Servers as you can opt to use SQL Server Standard Edition.
Next Steps
- For more tips on managing your SQL Server estate running on AWS
- For more tips on monitoring your SQL Server running on AWS
- For more information on AWS Launch Wizard
- For more information on using Amazon FSx
About the author
 Carla Abanes is a certified Microsoft SQL Server Database Administrator with extensive experience in data architecture and supporting mission critical databases in production environments.
This author pledges the content of this article is based on professional experience and not AI generated.
View all my tips
Article Last Updated: 2022-05-09


