By: Eric Blinn | Updated: 2022-05-12 | Comments | Related: 1 | 2 | More > Database Administration
Problem
It is generally considered bad practice to make remote desktop connections to Windows machines running SQL Server. These connections open up security vulnerabilities and use system resources that would be better used by the SQL Server service. In fact, as the landscape moves away from full versions of Windows and towards low or no UI options such as Windows Core, Linux, or containers as the architecture, RDP connections may not even be available.
Solution
In order to meet these requirements, this tip will work through a series of common scenarios that lead people to make remote desktop connections to SQL Servers. For each scenario, I will offer alternative approaches that do not involve making RDP connections.
Running SQL Server Management Studio (SSMS)
In older versions of SQL Server, SSMS came bundled with the SQL Server installer. This led many to install SSMS on their SQL Servers and run it from there. Whenever a user needed to run SSMS they would remote into their SQL Server, start SSMS, and do their work. These RDP sessions would be constantly open.
Several years ago, Microsoft unbundled SSMS from SQL Server and made it an independent download. The more modern Azure Data Studio (ADS) is also delivered this way. This author had hoped this change in delivery would discourage administrators from installing these tools on SQL Servers themselves. Sadly, that has not been the case in many environments as some continue to hold on to the idea that SSMS is a "server tool".
Instead of installing SSMS or ADS on the SQL Server itself, consider installing it with other applications. It can and should be installed on an application server, jump box, or directly on the client machines of the users. This will drastically reduce the need to make remote connections to the SQL Server.
Installing SQL Server
The most common way that administrators install SQL Server on a Windows machine is to run the installation GUI on a Remote Desktop Session. Linux and container-based installations are very different as there is no remote desktop service available. This section of the tip will explain how to install SQL Server on a Windows machine without making an RDP connection.
The first step to understanding how to do a remote installation is to understand how the interactive installation works. One of the last steps of the aforementioned GUI installer shows the path to an INI file. This INI file holds the answers to all of the questions the installer asked previously including the feature set, paths, and service account information.
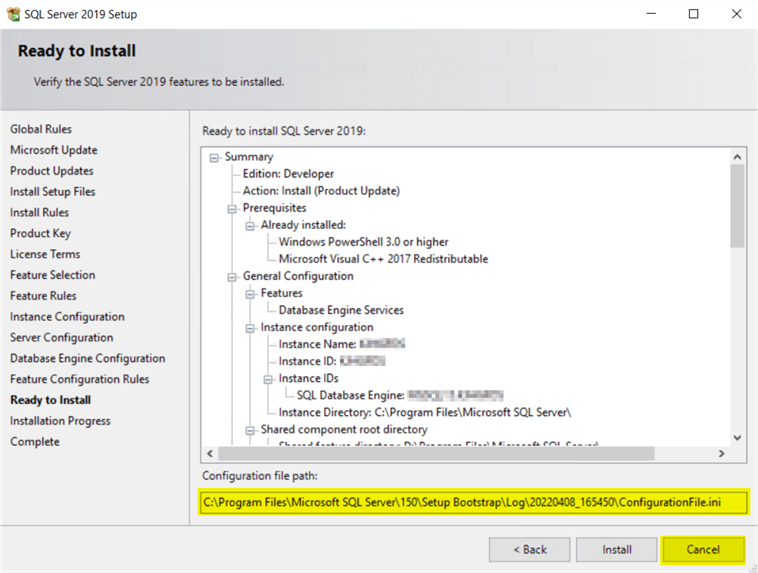
Clicking the final "Install" button essentially calls an unattended installer which reads the settings from that INI file. Sergey Gigoyan's article shows in great detail how to run the installer, generate and save the INI file, and then rerun the installer using the values from that INI file. It can be a great reference if the installer UI is unfamiliar.
To complete the installation without ever connecting to the server, the first step is the same as in the linked tip above. Just run the SQL Server GUI installer on a desktop or jump box. Rather than click the "Install" button, click the cancel button. Even though the installation was canceled, the INI file will persist. Having that INI file allows a future install to skip all of those interactive actions and jump right to the install.
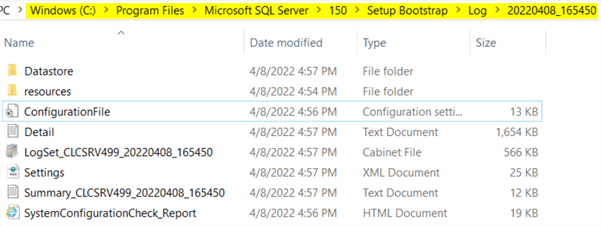
Copy that INI file to the target server using a file share. If the desktop or jump box does not have all the same drive letters or security options, there may be some paths or accounts that need to be changed. That is ok. The INI file is very intuitive and can be modified using a text editor as needed (see sample below).
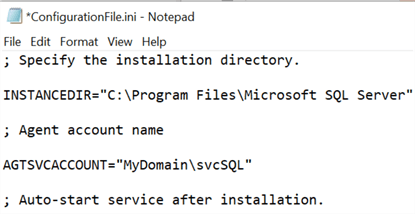
Once the SQL Server image is mounted and the configuration file is in place on the target server, simply call setup.exe with some extra switches to point it at the INI file. This can be completed via a PowerShell remote session or a command line on the server itself as is available on Windows Core.
For the PowerShell option, start by using the Enter-PSSession cmdlet to create the remote connection to the target machine and then use & shortcut to call setup.exe. Read more about PowerShell remoting and Enter-PSSession in this tip.
Enter-PSSession TargetServer
The setup.exe command line will look something like this line below. Note that the INI file does not save passwords that may have been typed in during the execution of the installer application. They need to be included during the call of setup.exe. Microsoft's documentation offers a full description of how to make the setup.exe call for all of the many different installation options.
& I:\Setup.exe /SQLSVCPASSWORD="***" /AGTSVCPASSWORD="***" /ConfigurationFile=ConfigurationFile.INI
That's it. The installer will take it from there. When the installer is done, use the Exit command to exit the remote session.
Exit
Patching SQL Server
There are several ways to patch SQL Server without using a remote desktop connection to the SQL Server itself to download and then double-click the installer.
One popular method is to use enterprise patch management software. These applications are often used in larger companies to manage OS-level updates, but can usually include SQL Server patches as well. If such a tool is available then using it can make a lot of sense.
If that type of software isn't available or if the people in charge of the SQL Servers prefer to control the updates independently then there are other options. This author prefers to use PowerShell.
To install a SQL Server update using PowerShell, follow these simple instructions. Each step can be done from a desktop or jump box. None of them should be done on the SQL Server via remote desktop.
First, download the installer from Microsoft and note the KB number. This link is for SQL Server 2019 CU15. It is KB5008996. Save the downloaded exe file to a file share that will be accessible from the SQL Server. That share does not need to be on the SQL Server itself, but it can be.
In PowerShell, install the free dbatools module using the Install-Module cmdlet. This step only needs to be done once. Subsequent updates can skip this step as the module will remain installed.
Installing the dbatools module will introduce the Update-DbaInstance cmdlet which installs patches to SQL Servers remotely. Full documentation for that module can be found here.
Below is a sample call for a server called MySQLServer. It will install CU15 for SQL 2019 using the KB number found in a prior step. It will restart the server as necessary. Finally, it will search for the installation media in the file share listed. Do not put the full exe in the path as the cmdlet expects a folder – not a specific file – and does its own search of any files found within.
Update-DbaInstance -ComputerName MySQLServer -KB 5008996 -Restart -Path \\MyFileServer\SQLInstallers
Running this cmdlet will bring up several interactive elements including a request for an account and password that has rights to install the patch. This author has found these requests to be very intuitive.
There are many other ways to call this cmdlet including options to update multiple servers at once or to update without any human interaction. The dbatools documentation spells several of these options out. They tend to require more PowerShell programming skills and aren't for everyone.
Reading the error log
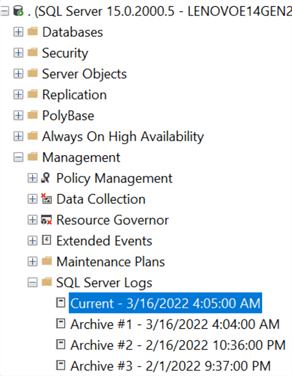
The SQL Server event log is viewable via SSMS. As shown previously in this tip, SSMS can and should be installed on a machine other than the SQL Server itself.
The Windows error log of a SQL Server can be a little bit harder to get to. First, open the event viewer on any machine that has the snap-in installed. This can be on a user's desktop or a jump box. Notice that the logs are for the local machine by default.
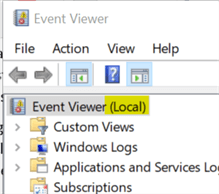
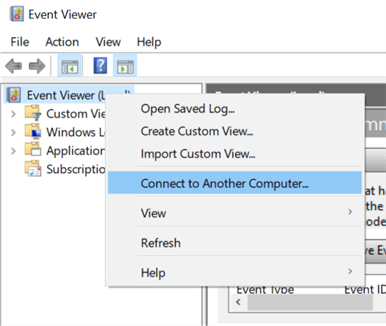
Right-clicking on that line offers a context menu with an option to Connect to Another Computer.
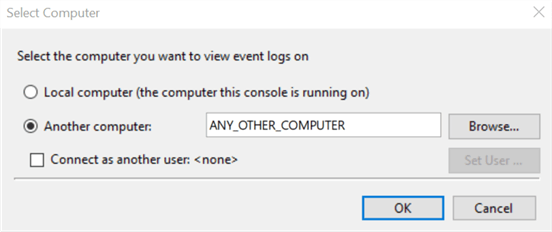
Selecting that option brings up a window that allows the user to type in the name of the server of which the log needs to be reviewed.
From there, the event viewer will show the log entries for the remote computer and can be used in the same way that it would be locally. Keep in mind that network latency can cause this application to respond more slowly than it would when used locally.
Another item to keep in mind is that the event viewer will remember which server was last selected the next time the program is opened. It is not a bad idea to switch the event viewer back to the local computer before closing it to avoid any confusion the next time it is opened.
Final Thoughts
Hopefully, these tips are useful and help discourage you from making remote desktop connections to your SQL Servers.
Next Steps
- SSMS Installation Walkthrough
- Installing SQL Server Using a Configuration File
- Using PowerShell to Create Remote Connections to a SQL Server
About the author
 Eric Blinn is the Sr. Data Architect for Squire Patton Boggs. He is also a SQL author and PASS Local Group leader.
This author pledges the content of this article is based on professional experience and not AI generated.
View all my tips
Article Last Updated: 2022-05-12


