By: Rahul Mehta | Updated: 2022-10-04 | Comments | Related: > Azure
Problem
A Data Lake is a centralized location to store all kinds of data, including structured and unstructured data. Usually, a key requirement is to move data from on-premises to the Azure Cloud. So, what are the options to move files to the cloud?
Solution
There are several data types in structured and unstructured formats: text files, object files, media files, documents, tabular data, structured data, etc. The most common unstructured data migrated are text, binary, or object files. There are several ways to copy on-premises data to Azure Data Lake Gen2, but for this article, we are going to focus on three common methods:
- Using Portal
- Using Storage Explorer
- Using AzCopy
What is Data Lake Storage Gen2
According to Microsoft, "Azure Data Lake Storage Gen2 is a set of capabilities dedicated to big data analytics, built on Azure Blob Storage." In other words, a Data Lake is a location where data can be collected, ingested, transformed, analyzed, published, and distributed to different entities. Azure Data Lake is a modern way of storing huge amounts of data like big data and others on top of Azure Blob Storage. You will not be able to find a separate Azure Data Lake Storage option in Services. It is blended with an Azure Storage account as hierarchical services.
Now that we understand Data Lake Storage, let’s start with multiple options to ingest data from on-premises to Azure Data Lake.
Moving Files Using the Azure Portal
One of the simplest yet powerful ways to ingest data from on-premises to Azure is using the Azure portal.
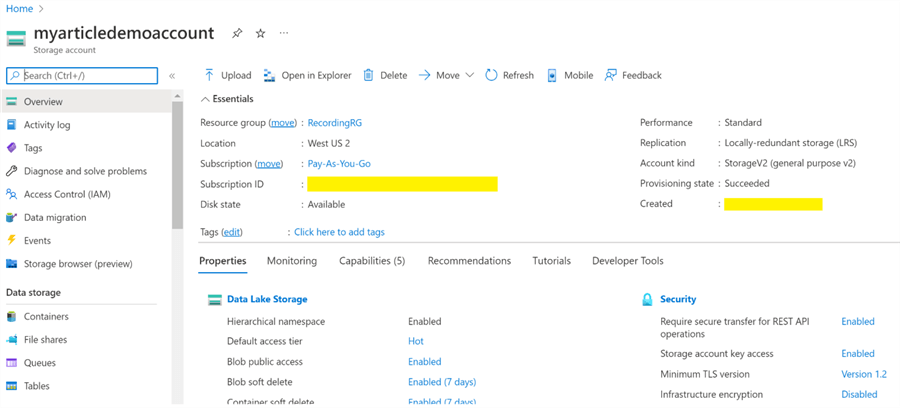
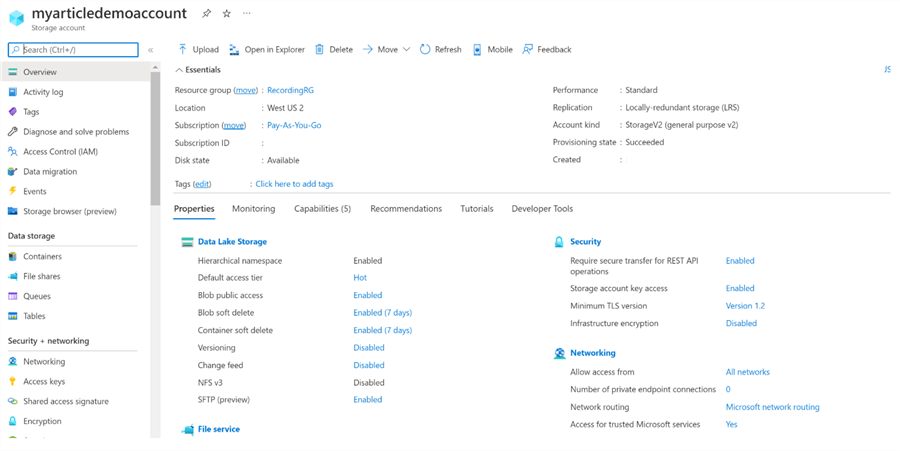
The Azure portal directly facilitates ingesting files from on-premises into your Data Lake storage. To do so, one must have an Azure Data Lake Storage Gen2 account created. I have already created an account, so I am going to use it as shown below.
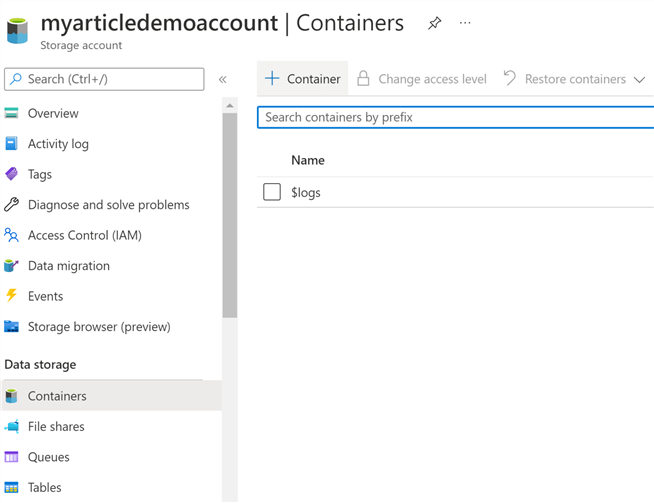
Let’s create a container that will store our files. To create a container, select "Containers" from the left panel, then "+ Container" from the top menu to open the wizard.
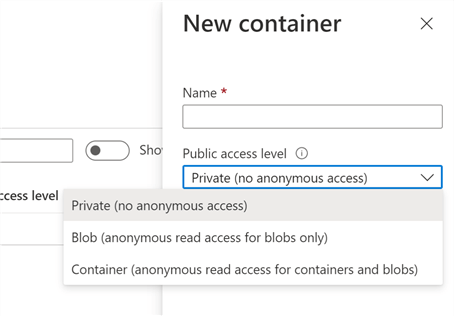
Once clicked, a panel like the one below will appear.
- Add a meaningful name in "Name".
- For "Public access level", there are three options to choose from:
- Private for restrictive access
- Blob for read access for blobs
- Container for anonymous read access
For our scenario, we will choose the "Container" option for now. Keep the rest of the options as-is and click on "Create" to create a container.
Once created, it will show an image similar to the one below:
Remember, Azure allows the creation of a hierarchical format to store data.
Let's go ahead and create a "Directory". To do so, click on the newly created container and select the option "+ Add Directory" as shown below.
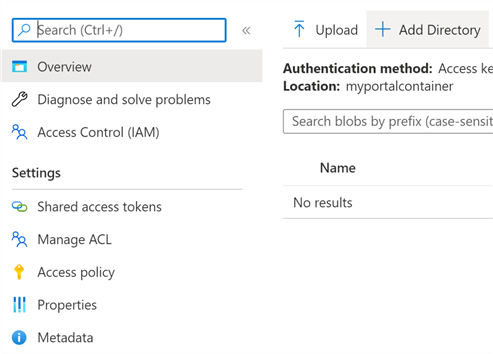
Give a meaningful name to the directory and click on "Create" to generate the new directory. Once successfully created, it will appear like this:
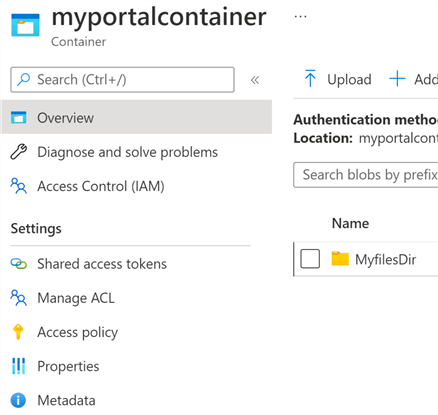
Azure allows certain features like managing access, defining policies, metadata, etc., for directories. For now, let’s keep the features as-is. To fill the directory using the data from on-premises, click the "Upload" button, and a panel to select the files will pop up. Select the location of the files, as shown below.
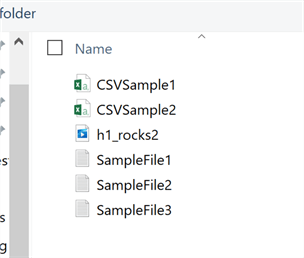
For this article, we will select all the available files shown above.
Azure has even more options available, select "Advanced" to view these options.
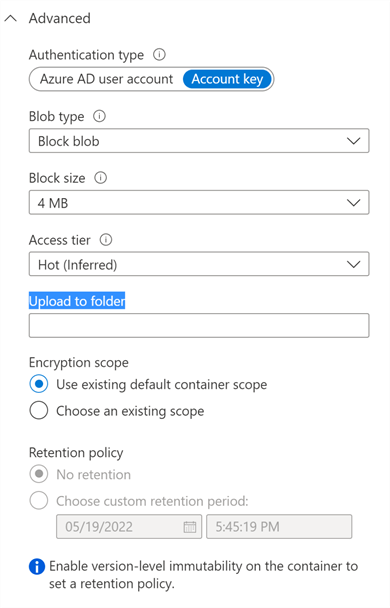
In the previous image, the following are configurations:
- Authentication type: By default, the Account key is selected, so the authentication will be done to access files. However, one can also use an Azure AD user account if restrictions are needed for a particular set of users.
- Blob type: Block, Page, and Append Blob. Choose the appropriate blob type depending on the type of data.
- Blob size: Ranges from 64k to 100MB.
- Access tier: Although we have selected our storage account at the time of creation to be of a certain access tier, Azure allows us to choose a different access tier for ingestion data.
- Upload to folder: It is possible to upload data from a different folder by noting the correct path of the folder.
- Encryption scope: Either choose container encryption scope or any other defined scope for data to be ingested.
- Retention policy: This allows you to define how long data can be retained. However, to allow it, one needs to enable version-level immutability.
For now, let’s keep the standard advanced settings as-is. Click on "Upload" to ingest the files. It will take only a few seconds to upload the data. Once uploaded, it should look like this:

Thus, in this way, we can ingest files from Azure Data Lake Containers.
Moving Files Using Azure Storage Explorer
For the second option, Azure provides a storage explorer to perform the same operation. To do so, go to the Storage account | Overview screen and click on the "Storage Browser" option.
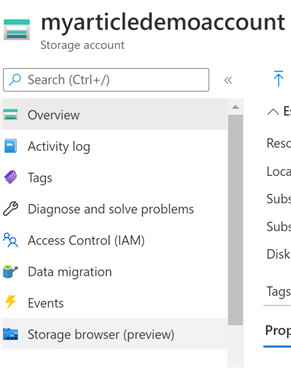
A screen will appear showing multiple options to see different files in your account like Blob, File Shares, Queues, Tables, etc. It will also show how to create different kinds of metrics. For our current purpose, we will choose the option available at the bottom, "Open Azure Storage Explorer".
Note: Azure Storage Explorer must be installed first to proceed. To do so, Azure provides a link to download Azure Storage Explorer for the appropriate operating system. It is a simple wizard to follow and install. For this article, we are assuming it is already installed.
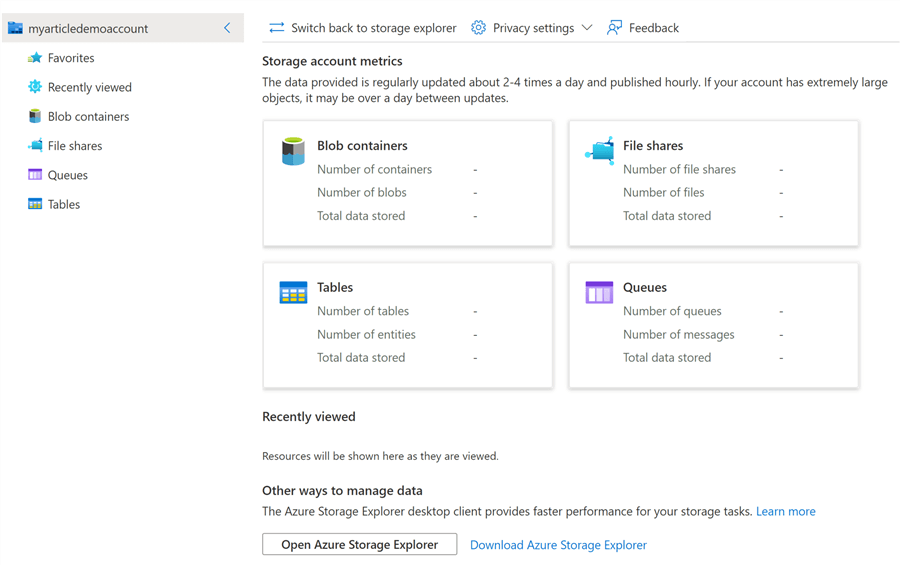
You will be prompted to open with Azure Storage Explorer. Select the option.

Once Storage Explorer opens, you might get an error asking you to sign in to access resources.

Sign in with your Azure credentials.

Many options will appear. For our current purpose, select "Subscription" and "Azure" to sign into the next screen.
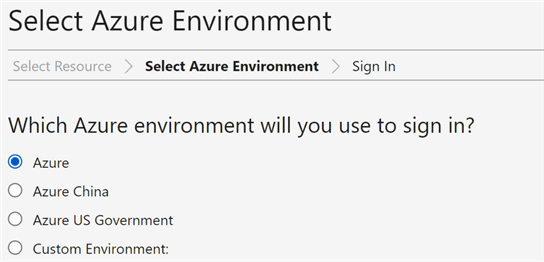
Once you click Next, it will ask you to select an Account and validate it in the browser. A message will state that authentication was successful.
Go back to Storage Explorer. You will see the screen below.
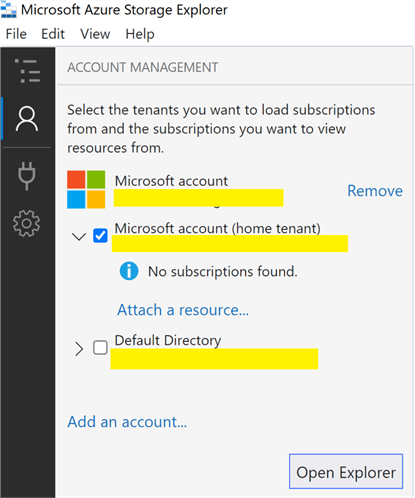
This screen means you have successfully logged into Storage Explorer. Now you can click on "Open Explorer" or "List" (first) icon on the left panel to open Storage Explorer. It will show the Data Lake we created in Azure. Make sure to select all accounts you want to see. This is highly essential.
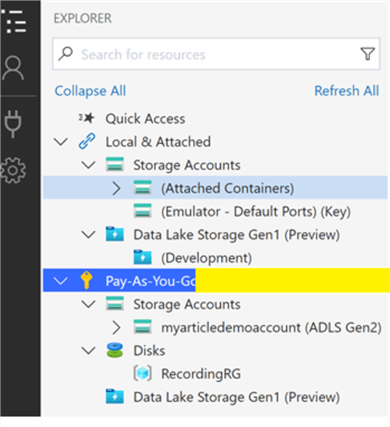
Once every step is correctly executed, you may see the above image that shows the "Pay-As-You-Go" account of mine, which is connected, and you can also see the storage account in it.
The below image shows the files we uploaded as well.

Now let’s ingest files from Storage Explorer. Click on "New Folder" and name it "fromstorageexplorer".
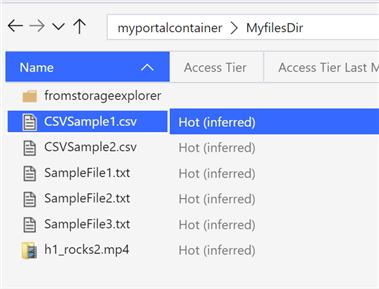
Now you can see the folder created. Let’s open the folder and upload the files by clicking on "Upload" and "Files".
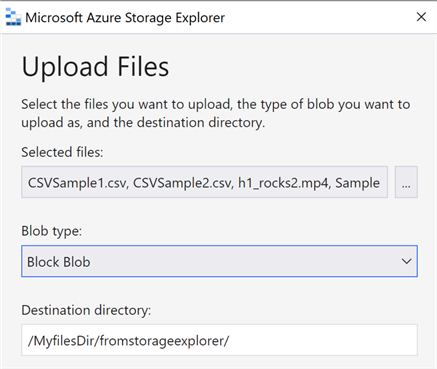
Note: We don’t get the same options as we do from the Azure portal. For now, we will go ahead and select "Block Blob" and keep the destination directory "AS-IS" and upload it. Once successfully uploaded, you will see the files in Storage Explorer and Azure, as shown below.
Note: The upload can be relatively slow based on network bandwidth.
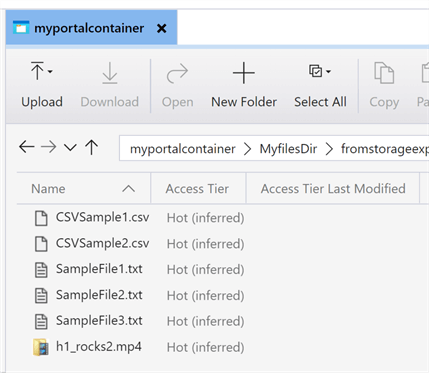
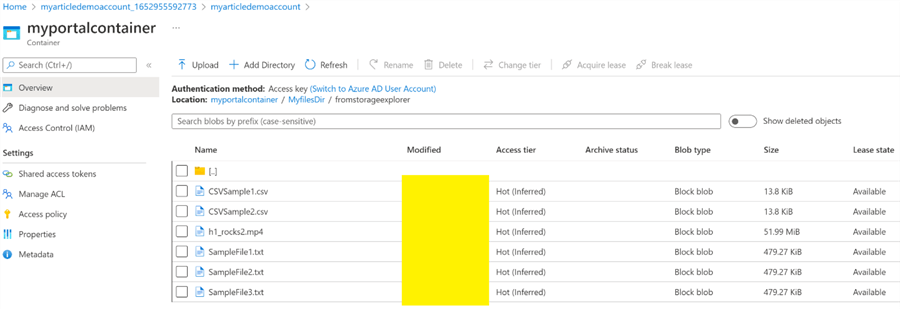
In this way, you can ingest data from Storage Explorer.
Moving Files Using AzCopy
AzCopy is a command line utility that can be used even to copy data into Data Lake Blob storage containers. Let’s go through it step by step.
First, we need to download AzCopy and extract it. Once extracted, open it from a command prompt, as shown below.

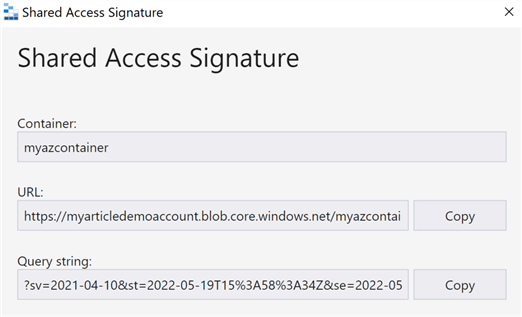
Let’s get the Shared Access Signature (SAS) URL which will allow the AzCopy command to ingest files into the blob container via the shared access signature. To do so, go to Storage Explorer and select our Blob container.
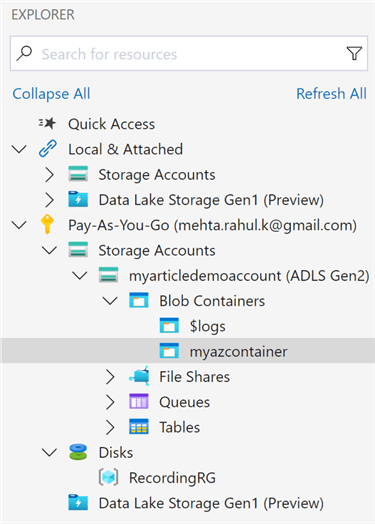
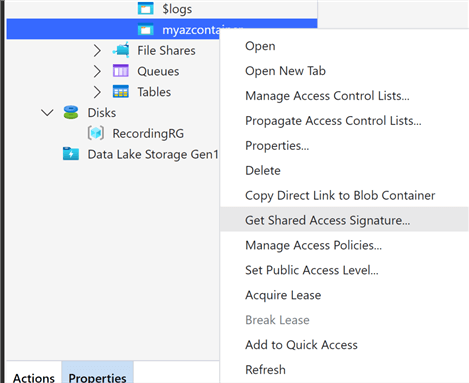
Right-click on the container and click on the option "Get Shared Access Signature".
Select both "Read" and "Write" permissions in the Shared Access Signature box and click Create.
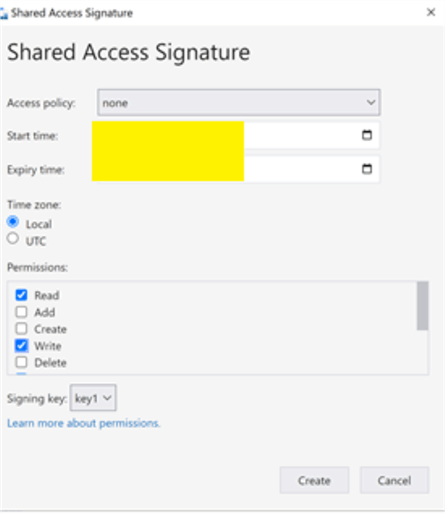
The above box helps to define the access policies, for a certain duration, and with certain permissions. For the current scenario, we have left the rest of the options unchanged and requested a read-write key. Once created, another screen will appear showing the URL and query string. Click the Copy button next to the URL box and store it temporarily for the upcoming steps.
Now we will perform two activities. First, we will copy one item at a time, and second, we will copy the entire folder.
Let’s start with one item. Go to the command line and copy the code below:
azcopy copy "fullfilepath" "SASpath"
In the command, replace "fullfilepath" with the file path including filename with an extension like "C:\myfolder\sample.txt". Please see the image below as a reference.

On successful completion, it should prompt the following message:
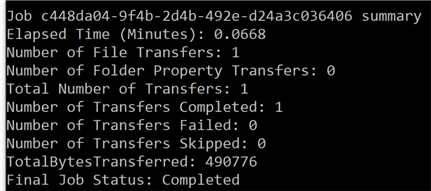
You should see the files ingested in the blob container too.
Now let’s copy the entire folder. The only change in the above code in the target path is to include an asterisk (*) at the end and not the file name. For example:
azcopy copy "C:\myazfolder\*" "SASpath"
All the remaining steps are the same. Here is the command:

On successful completion, a message like the one below will appear.
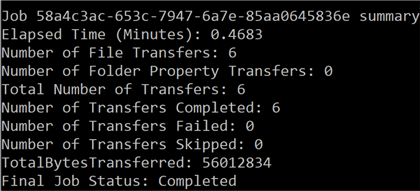
In this way, we can use the AzCopy command to ingest files into the blob container.
Next Steps
- Use different types of paths to ingest data from various on-premises resources to Azure Data Lake Storage.
- Use Azure Data Factory to copy data from on-premises, Azure Blob, and Azure SQL database.
About the author
 Rahul Mehta is a Project Architect/Lead working at Tata Consultancy Services focusing on ECM.
This author pledges the content of this article is based on professional experience and not AI generated.
View all my tips
Article Last Updated: 2022-10-04


