By: Jan Potgieter | Updated: 2022-11-10 | Comments | Related: 1 | 2 | 3 | 4 | 5 | 6 | 7 | 8 | 9 | 10 | 11 | > Security
Problem
To access SQL Server you need to create a login and to give access to a database you need to create a user. In this tutorial, we look at how to create a SQL Server login along with an associated database user using SSMS and T-SQL code.
Solution
When it comes to gaining access to SQL Server there is a need for a SQL Login which is used for authentication and a Database User which is used for authorization. Authentication checks whether you have permission to log in to a system, whereas authorization specifies what you can do once connected. In SQL Server, a login is created at the instance level, and a user is created at the database level.
Logging in to a SQL Server can be achieved by either Windows Authentication or SQL Authentication.
- Using Windows Authentication, SQL Server verifies the account name and password when a user connects using a Windows user account. This indicates that Windows has verified the user's identity. Both the identity validation and the password request are not handled by SQL Server.
- When using SQL Server Authentication, the user name and password are both generated using SQL Server and saved there. Every time they connect using SQL Server Authentication, users are required to enter their credentials (login and password).
To read up on a detailed explanation of which Authentication Mode to select, read this article: Choose an Authentication Mode.
Specific permissions are required to create logins and give access to databases. To create a login, the account creating the login must have the SQL Server server role of sysadmin or securityadmin. Sysadmin and securityadmin are fixed server-level roles that help you manage the permissions on a SQL Server. These roles are security principals that group other principals and they are server-wide in their permission scope. The discussion of server-level roles is outside of the scope of this tip but you can read more about server-level roles here.
In this tutorial, we are going to work through some simple SQL code to create a Login and User to be used to access SQL Server. This could be for an application, a website, or general ad-hoc queries.
Create Test Database
Let's set up an environment and get going.
USE master;
GO

DROP DATABASE IF EXISTS HRDatabase;
GO

CREATE DATABASE HRDatabase;
GO

USE HRDatabase;
GO
Create a Login and User with SSMS GUI
Step 1 - Create Login
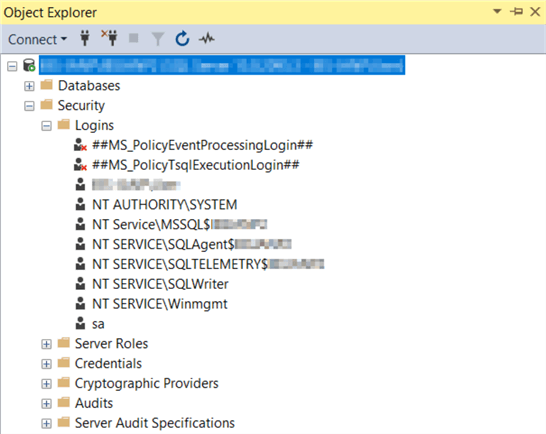
To create a Login with the SSMS GUI, in the Object Explorer expand as follows Security > Logins:
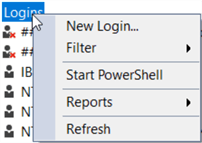
Right-click on Logins and select New Login to open up a dialogue to create a new login.
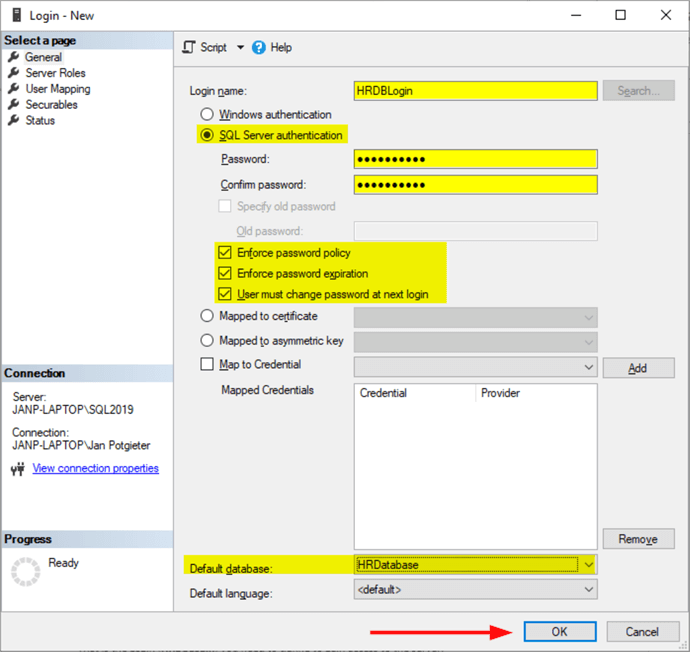
When the New Login screen opens you will see 5 different pages on the left (can be seen below):
- General - this is where you configure the primary login properties
- Server Roles - this is used to grant server-wide security privileges to a user.
- User Mapping - this is used to map a user in the database to the SQL Server login.
- Securables - view or set the permissions for securables.
- Status - set permissions to connect, enable or disable the login, and set the status of SQL Server authentication.
On the General page (see below), type the Login name (HRDBLogin), select SQL Server authentication, type a Password and confirm it, and keep the following items checked:
- Enforce password policy
- Enforce password expiration
- User must change password at next login - when you create the login and use the User must change password at next login option, the password will have to be changed with the first login.
Select the Default database which is HRDatabase and click OK to create the login.
Step 2 - Create User
After you have created the Login, you need to create a User in the database and map it to the Login created above.
Note: the user could have been created and the roles assigned in the login screen but I would like to show how it can be done on the database level.
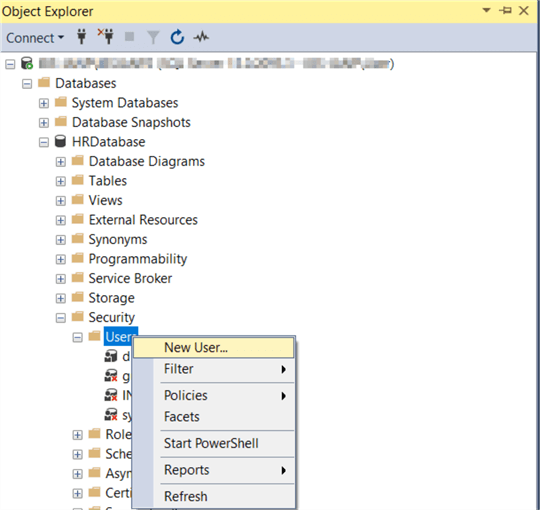
To create the user with the SSMS GUI, expand Databases > HRDatabase > Security > Users and right click and select New User.
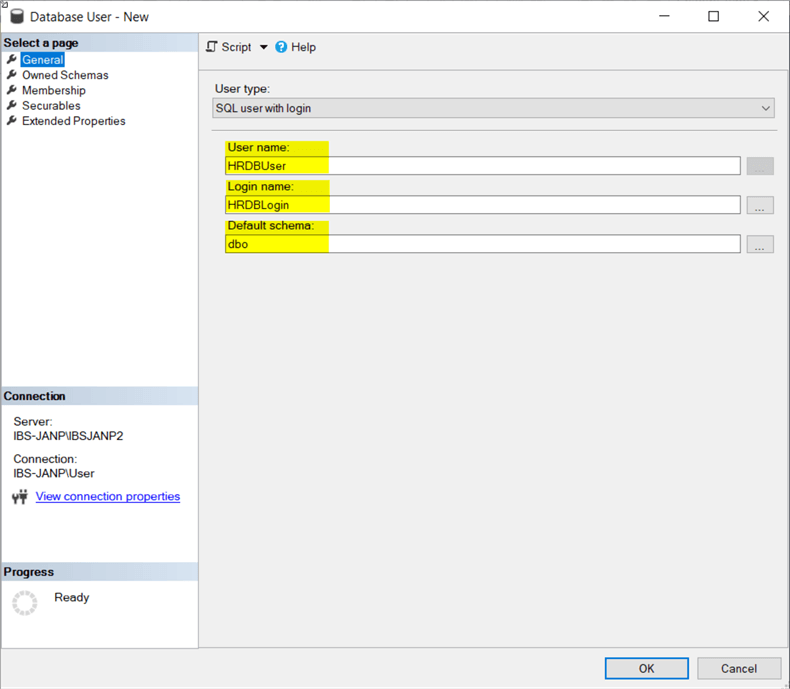
When the Database User screen opens you will see 5 options on the left:
- General - main screen to set user properties
- Owned Schemas - schemas owned by this user can be set here. This is where owner permissions can be set to administer them. Read up on it here.
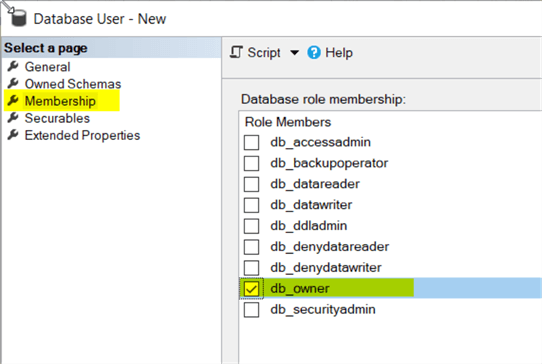
- Membership - database role membership can be set here. Managing the permissions in your database can be set here. Read up on it here.
- Securables - view or set the permissions for securables.
- Extended Properties - adding custom properties to database objects. Read more about it here.
On the General page, type in the User name (HRDBUser), select the Login name we just created and the Default schema(you can leave as dbo) and click OK to create the user.
On the Membership page, we want to make the HRDBUser a db_owner of the database, so check the box and click OK.
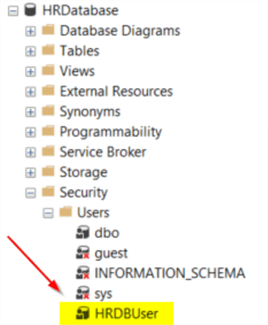
If you refresh the Users for the database (right-click on Users and select Refresh), you should now see the user has been created in the HRDatabase database.
Testing New Login
You can now test by trying to log in as the HRDBLogin and you should get a window that forces you to change the password.
When you log in to the SQL Server for the first time after the above steps to create the HRDBLogin and the HRDBUser, just click on the connect icon in the Object Explorer.
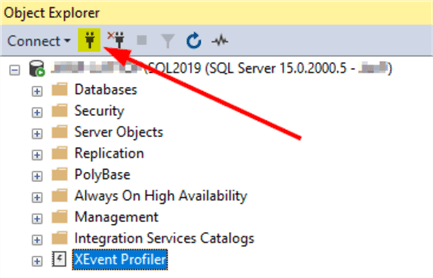
A Connect to Server window will open up where you can now type in your newly created login: HRDBLogin and the password.
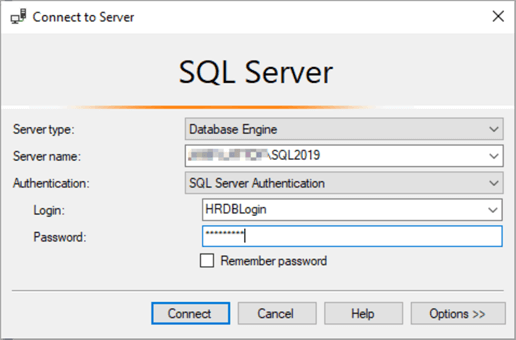
When you click the Connect button, you will be presented with a Change Password window, where SQL Server will force you to change the password for the login as you checked the option to change the password at first login, when the login was created.
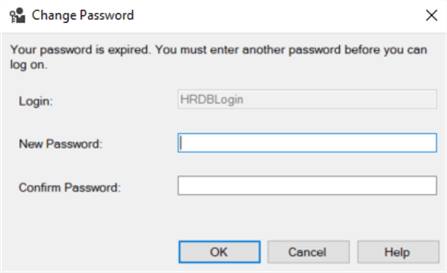
Change the password as requested, click OK and you will be logged in as the HRDBLogin login.
Create a Login and User with T-SQL
Alternatively, you can run the SQL script below to create the same Login and User as in the example above.
You need to be logged in as a sysadmin or a securityadmin to be able to run the below SQL code. As mentioned above, you can read more about server-level roles here.
USE master;
GO

-- Create the SQL Server Login
CREATE LOGIN [HRDBLogin] WITH PASSWORD = N'MyEasyPwd' MUST_CHANGE
, DEFAULT_DATABASE=[HRDatabase]
, CHECK_EXPIRATION=ON
, CHECK_POLICY=ON

/**************************************************/

USE HRDatabase
GO

-- Create the Database User
CREATE USER [HRDBUser] FOR LOGIN [HRDBLogin]
GO

-- Make the new User the Owner of the database
ALTER ROLE db_owner ADD MEMBER [HRDBUser]
GO
After you run the above SQL code, log in as the HRDBLogin in SSMS and change the password when you are asked to do so.
Test New Login and User
Open up a New Query window (as the new logged in: HRDBLogin) and execute the following SQL code:
CREATE TABLE TestTable (
 ID         INT CONSTRAINT PK_TestTable PRIMARY KEY IDENTITY,
 TestDescr  VARCHAR (80),
 CreateDate DATETIME CONSTRAINT DF_TestTable_CreateDate DEFAULT getdate()
)

-- Test inserting data into the newly created table
INSERT INTO TestTable (TestDescr) VALUES ('Testing the Table Create')

-- Check that the data was inserted into the table
SELECT * FROM TestTable

-- Drop the table when done
DROP TABLE TestTable
Removing the User and Login
If you want to clean up and remove the User and the Login (in this order), use the SQL code below.
USE HRDatabase
GO

-- Drop the Role
ALTER ROLE [db_owner] DROP MEMBER [HRDBUser]
GO

-- Drop the User
DROP USER [HRDBUser]
GO

USE master;
GO

-- Drop the Login
DROP LOGIN [HRDBLogin];
GO
If you try to drop the Login and you get an error that the HRDBLogin is still logged in. Just use the sp_who2 command to get the ID of the login session, kill it and then you can drop the login.
The kill command ends a user process that is based on the session ID as you can read more about here. The server level-roles that can end a process with the kill command are sysadmin and processadmin and you can read up about these roles in the server-level roles page mentioned above.
sp_who2

KILL 53;
Drop the Test Database
Clean up by dropping the HRDatabase database.
USE master;
GO

-- Drop Database if it exists
DROP DATABASE IF EXISTS HRDatabase;
GO
Next Steps
In the next article, we will take a look at how to create an ASP.Net Website and use the HRDatabase database and also the Login and User that we created in this tutorial.
See the following articles as well:
About the author
 Jan Potgieter has more than two decades of expertise in the database industry as a Certified Microsoft SQL Server Administrator and Database Developer.
This author pledges the content of this article is based on professional experience and not AI generated.
View all my tips
Article Last Updated: 2022-11-10


