By: John Miner | Updated: 2022-12-14 | Comments | Related: > Azure
Problem
It is not uncommon for companies to grow through mergers and acquisitions—meaning a single parent company might have several child companies with different ERP systems. To get a holistic view for reporting, the IT departments in the past used a Secure File Transfer Protocol (SFTP) server at the parent company to collect data files from the child companies. If the data for a given table type is in the same format regardless of the source system, it is very easy to ingest the data into a database table for reporting.
Nowadays, the centralized database might reside in the cloud to reduce the total cost of ownership. With that in mind, how do we support the SFTP protocol using Azure Blob Storage?
Solution
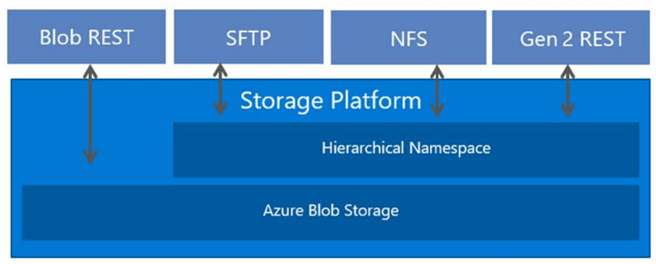
On October 22, 2022, Microsoft announced the general availability of SFTP support for Azure Blob Storage. This service supports both passwords and/or key pairs (private/public) for authentication. Once the data lands in the Azure Blob Storage Gen 2, tools like Azure Databricks can read and process the data. The image below shows how the SFTP protocol supports hierarchical namespaces.
Business Problem
There are several objectives that our manager wants us to learn today. First, how do we deploy and configure Secure File Transfer Protocol for Azure Blob Storage? Second, how can we configure password versus key pair security? Third, can we write a batch file to call our SFTP utility to automate data sending from remote servers to the cloud? Fourth, how can we manually transfer files using a graphical user interface (GUI)? This eliminates the need for the end users to learn command line syntax. Last but not least, how can we look at some sample data using Azure Databricks?
The IT team will be ready to transition the on-premises FTP workloads to in-cloud systems at the end of the proof of concept.
Create and Configure Storage
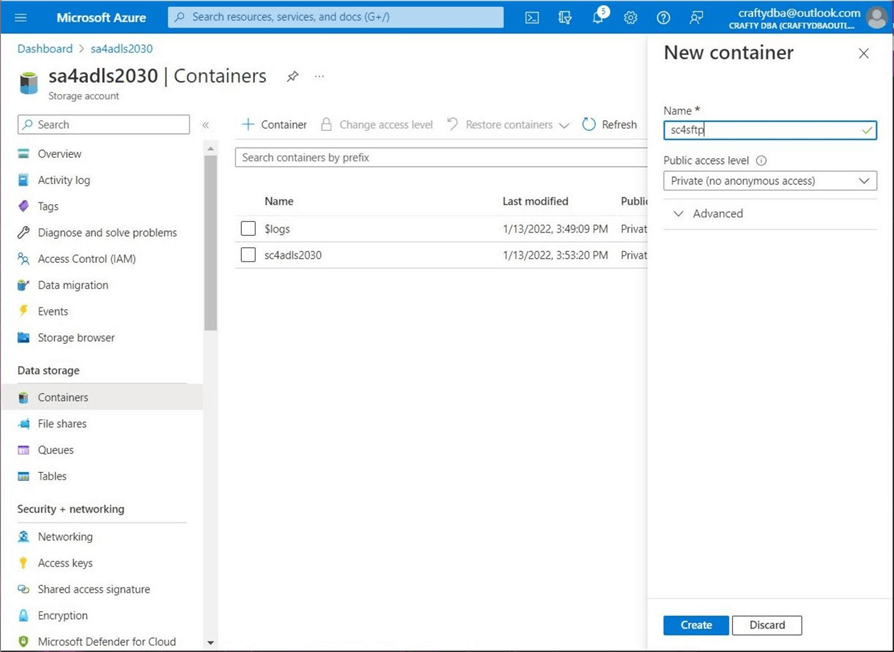
Today, we will add SFTP support to our existing data lake in the Azure cloud. We currently have a storage account named sa4adls2030 with a storage container named sc4adls2030. The image below shows the addition of a new container called sc4sftp.
There are two sample datasets for the proof of concept. We have the data files for the Adventure Works SalesLt database in parquet format. Also, we have the S&P 500 stock data for several years. In this hypothetical test, each child company owns a single dataset. We want to set up two distinct users: one using password security and the other using key-based security. The image below shows two directories: advwrks and stocks, created using the Azure portal.
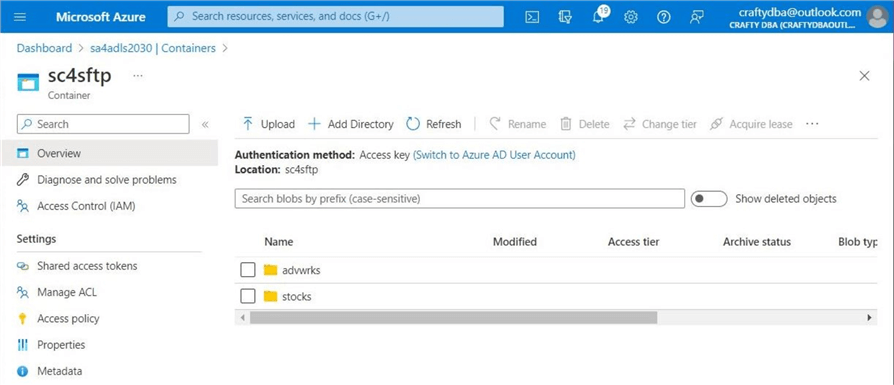
Taking one last look at the containers, we can see we are ready to enable SFTP for the storage account.

Enable SFTP Protocol
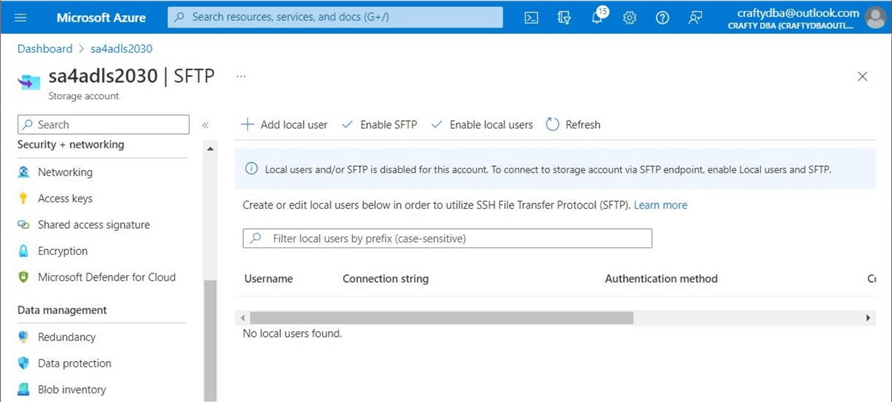
The option to enable the SFTP protocol is located under the settings section of the storage account. We can see that both enable options display checkboxes. This means the service and local users are disabled at this time. Click the hyperlink to enable the SFTP protocol at this time.
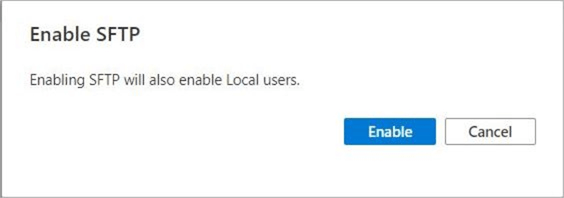
The image below is a confirmation to enable both the protocol and local users.
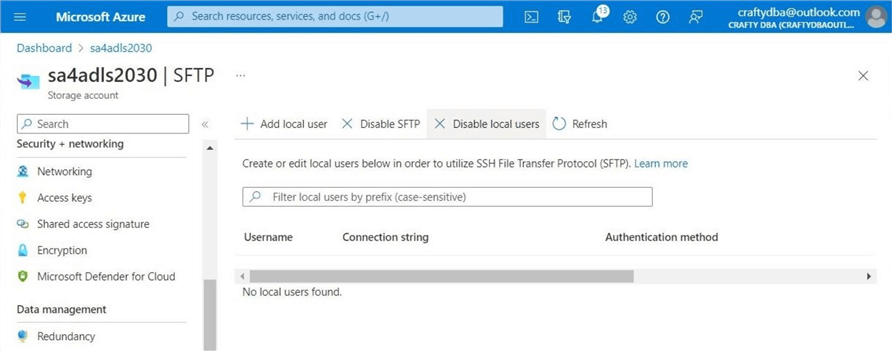
The following image shows there are no current local users. In the next section, we will create a user and enable security for each subdirectory under the container named sc4sftp.
Create Two Local Users
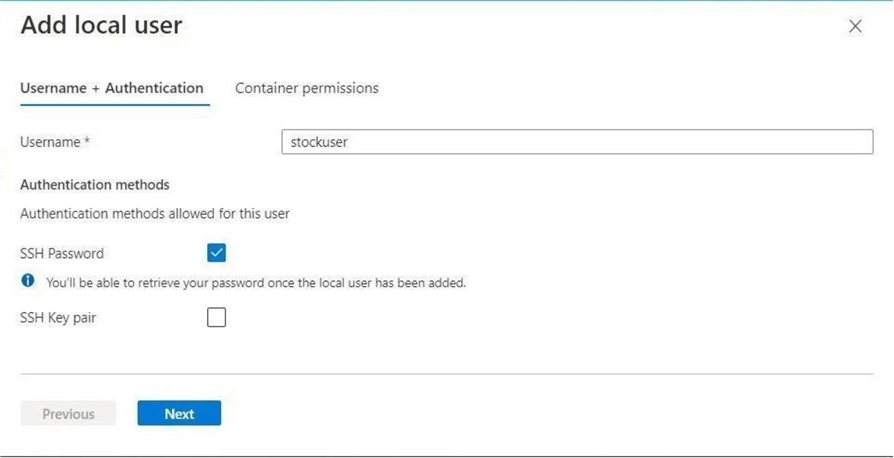
In the real world, we might have data from several child companies arriving at the SFTP site. We want to enforce isolation by creating an account for each company and allowing each account to access only one subdirectory under the container named sc4sftp. Let's now create the stockuser local account that will use an SSH password for authentication. The image below shows the selection of the local account name as well as the authentication method. Click Next to continue.
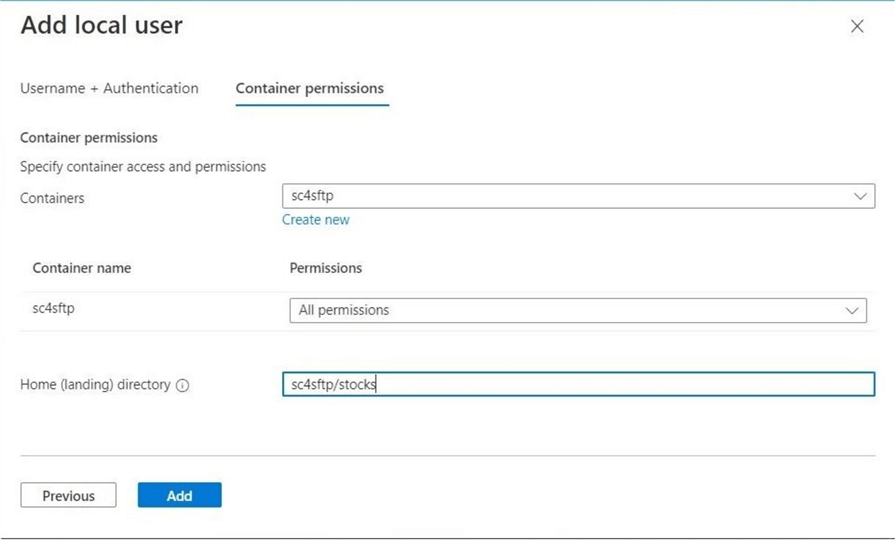
The next screen allows the administrator to select the container, landing directory, and permissions to give to the local account. The following storage permissions are available: read, write, list, delete, and create. For this demonstration, let's give the account full access. The home directory is sc4sftp/stocks. This ensures segregation of the data between the two fictitious child companies.
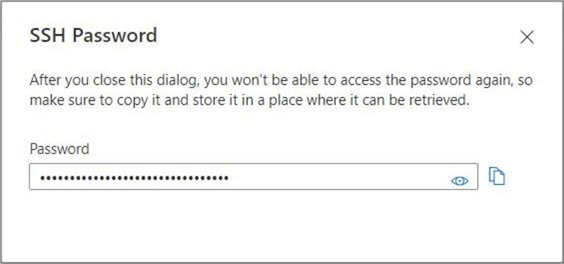
By clicking Add, the local account will be created. Make sure to copy the SSH password to a secure location. If you forget the password, you can always re-generate it without recreating the local user account.
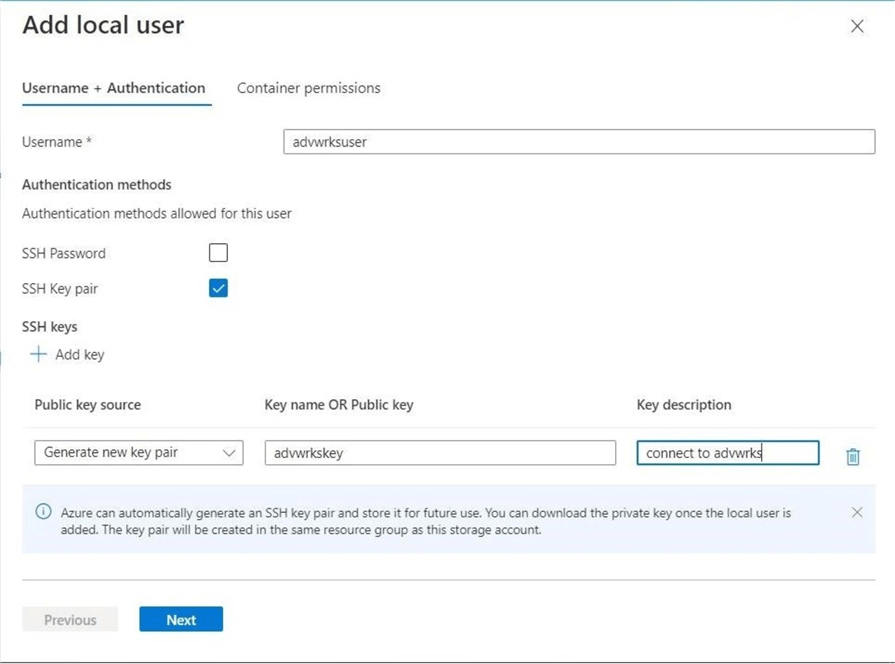
Let's now create the advwrksuser local account that will use an SSH key pair for authentication. The image below shows the selection of the local account name as well as the authentication method. We need to choose which key pair to use. See documentation for options. At this time, let's have the Azure Service generate one. We have to give the key a name and optional comment. Click Next to continue.
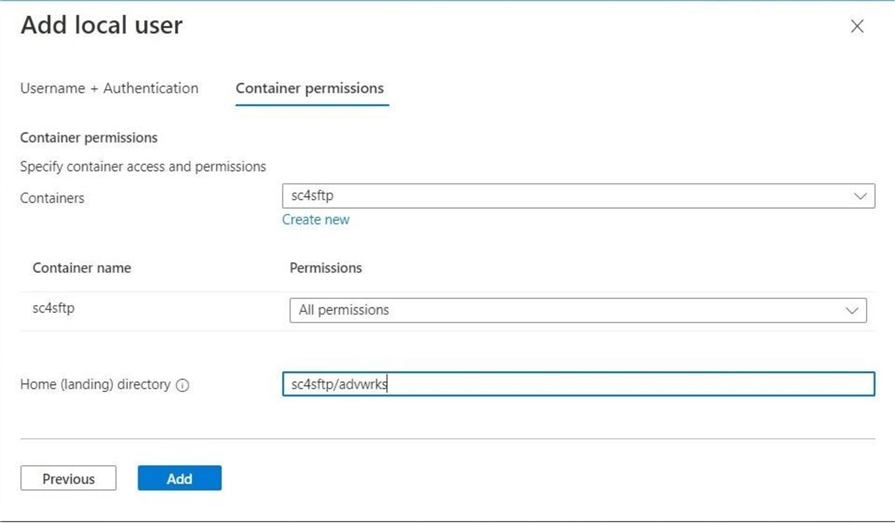
Just like before, container permissions need to be specified. The home directory will be set to sc4sftp/advwrks. This will keep the isolation between the two child companies' fictitious data.
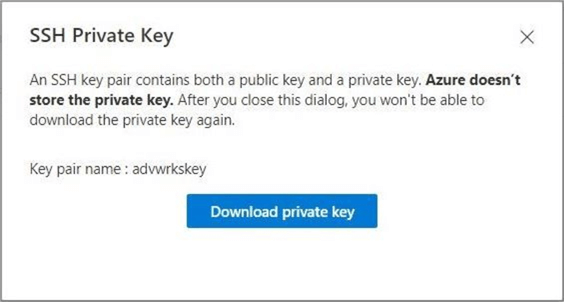
Since the SSH key is larger than a password, a prompt appears to download the file. Again, keep the file for later use.
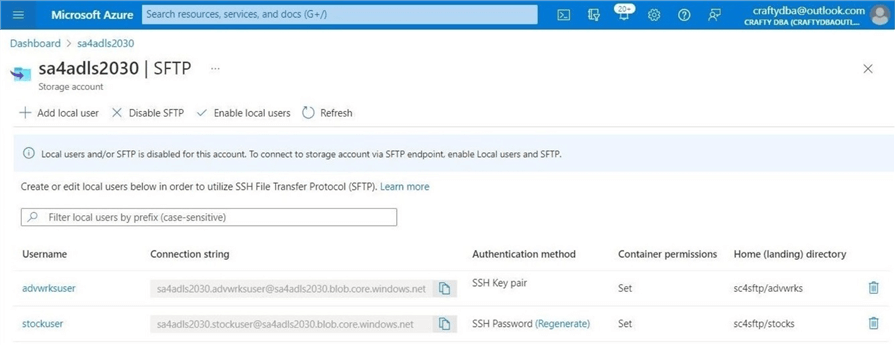
Let's review the newly created accounts. The image below shows the two local accounts. The connection string is important when creating a connection. We can see that the password can be regenerated at will. However, we must recreate the local account to get a new SSH key pair. As we saw, this is not a big deal.
Using Putty
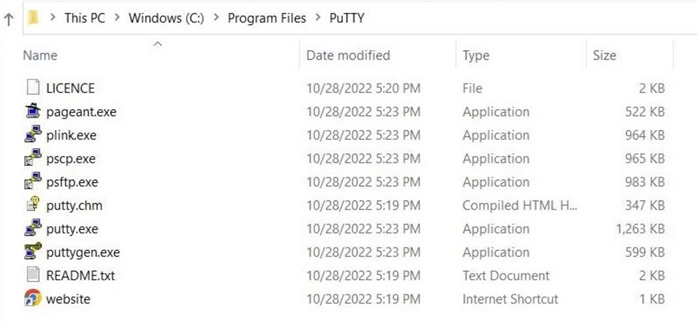
The PuTTY organization provides a set of free tools for Telnet, SCP, and SFTP. Please download and install the tools now. The Windows Explorer screenshot below shows the various executables in the Program Files directory after installation. We are interested in the sftp.exe file.
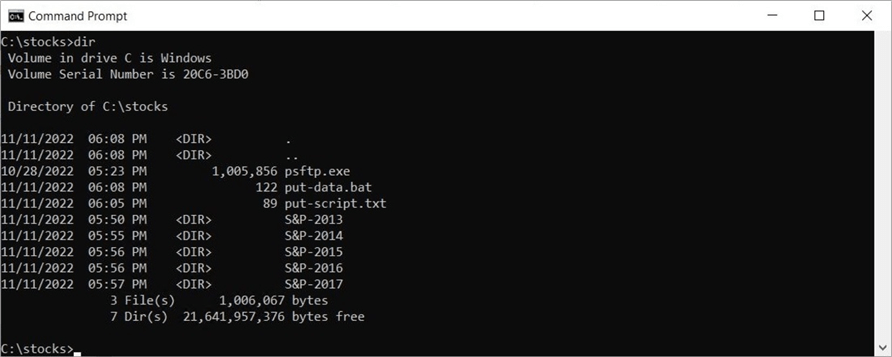
In the past, automation was achieved using a command line utility and a batch file. I have five years of S&P 500 data in the c:\stocks directory. We need to copy over the SFTP utility in the same directory. This will shorten the paths required in the batch file. We also need to create a script file to perform the necessary actions.
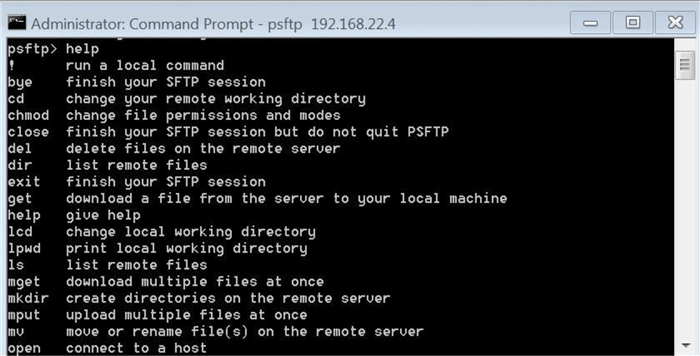
The easiest way to get a list of commands is to execute the help command. You can also look at the documentation on the Putty website.
The script file put-script.txt copies over the five directories in a recursive manner from my local computer to Azure Blob Storage. See the below commands for details.
put -r S&P-2017
put -r S&P-2016
put -r S&P-2015
put -r S&P-2014
put -r S&P-2013
exit
The batch file put-data.bat connects to the service using the connection string shown in the previous local user window. The only thing you need to do is change the SSH password for your environment. It executes to the script file until completion or an error is encountered.
psftp -b .\put-script.txt [email protected] -pw <your ssh password>
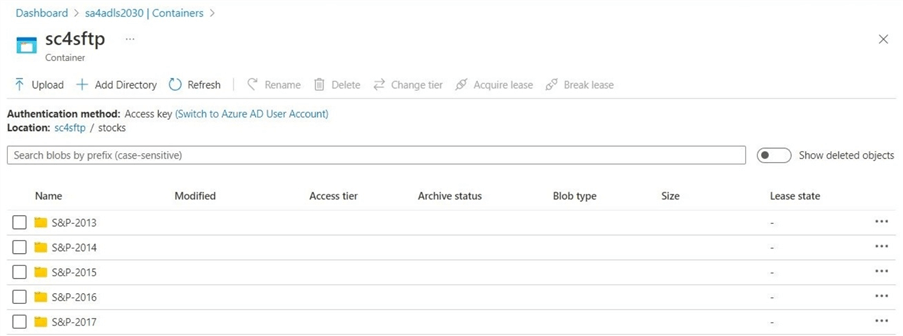
The next step is to validate that the SFTP script completed the actions correctly. The image below shows the five directories created in ADLS Gen 2.
The final step to make this script production ready is to schedule it. We can use Windows task scheduler if you do not have a third-party enterprise package.
Using WinSCP
The WinSCP application is a free, award-winning file manager. Please download and install the package now. Begin by creating a new site connection. Enter the connection string from the Azure local user window as the host name. If using an SSH password, enter it now. Since we are using key pair authentication, click Advanced…
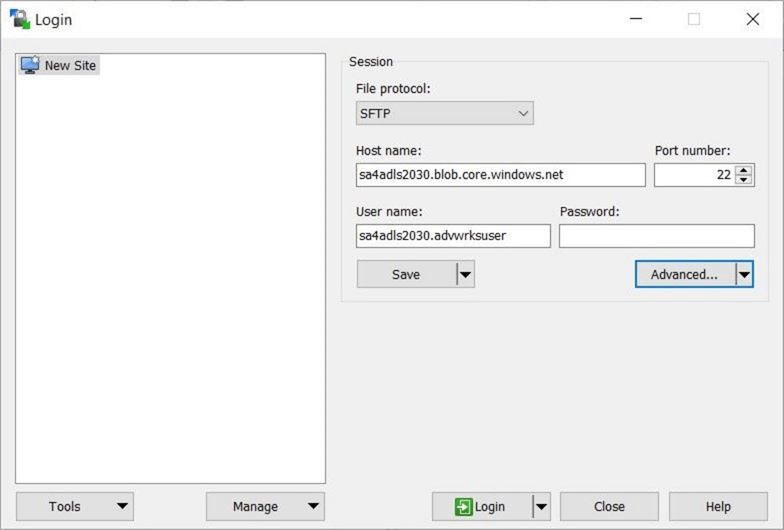
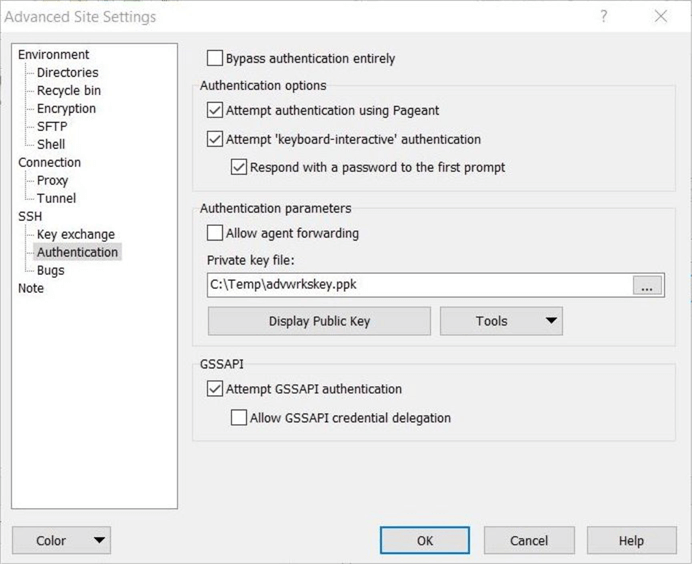
Under the advanced settings, find the private key for SSH authentication. Choose the SSH key pair file named advwrkskey.ssh, which was downloaded from the Azure Portal after creating the advwrksuser. Unfortunately, WinSCP wants the key in a different format.
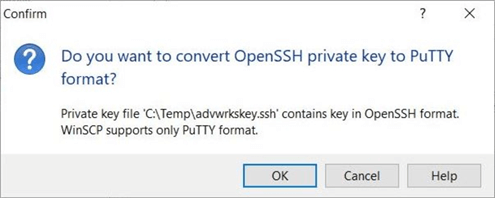
Save the key in PuTTY format in the c:\temp directory. The parquet files for the SalesLt schema already exist as a sub-directory.
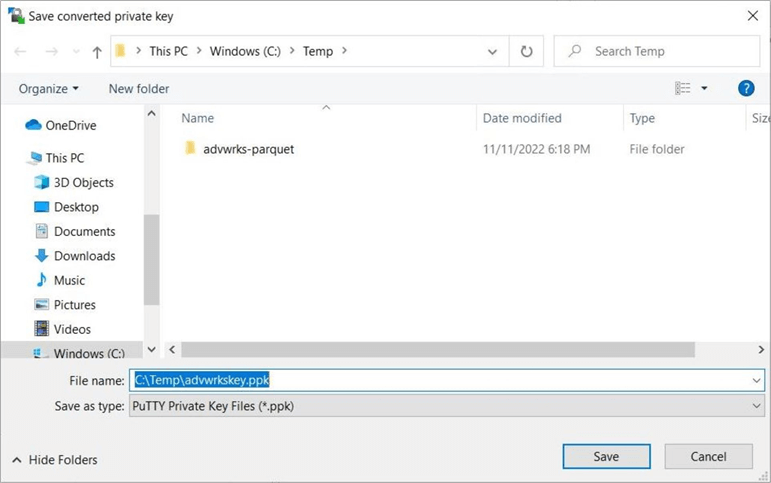
Click OK to accept the key in the new format.
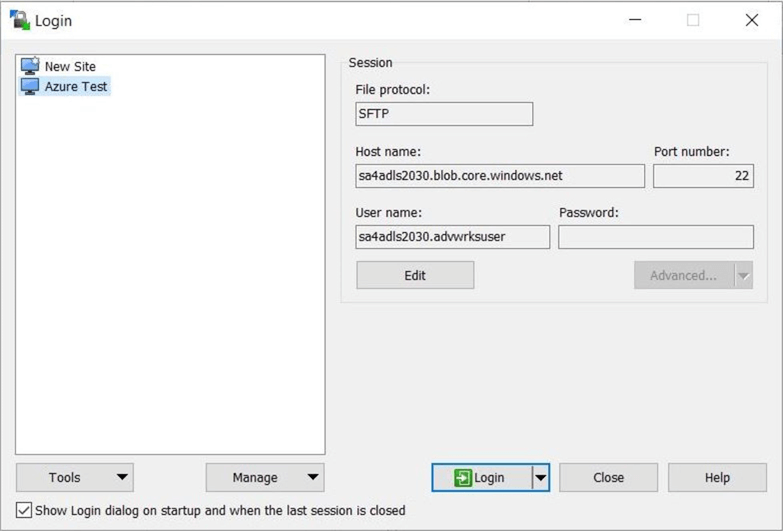
Most of the time, you will want to save the site settings. This allows you to connect without entering the connection information. The image below shows the settings saved as the site named "Azure Test".
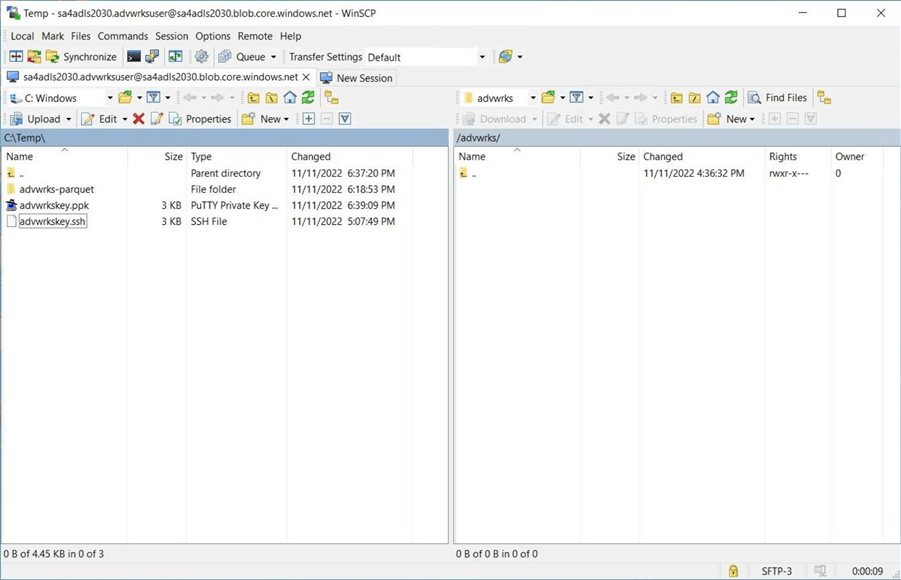
I like using a file manager since all actions are drag and drop or cut and paste. Drag the "advwrks-parquet" sub-directory to an empty destination.
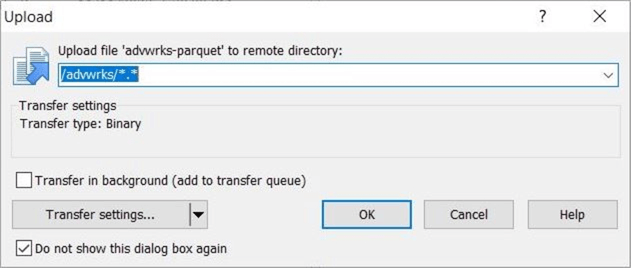
We are prompted to send the files from on-premises to the cloud using the binary method. When we used the command line utility, we did not need to choose a file format since all files were ASCII. However, since parquet is a binary format, the file manager is smart enough to change the transfer type. Click OK to proceed with the copy action.
The image below shows that the copy action has been completed. We have nine dimensional files and two logical facts. The Internet Sales data has been partitioned into four files.
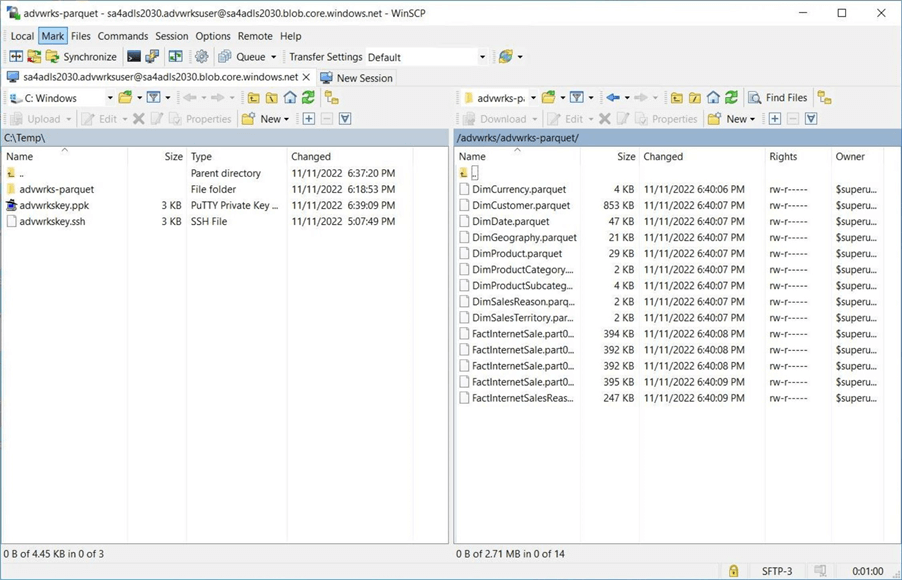
In short, if you manually upload files, use a file manager like WinSCP. If you want to automate file uploads, use a command line utility such as PuTTY.
File Processing
There are several ways to process files that are landed in data lake storage. Speaking about Apache Spark, let's discuss how to ingest and explore the data with Azure Databricks. In the past, the sc4adls2030 account was mounted to the Databricks workspace. However, the sc4sftp is a new container. We must give the service principle both RBAC (contributor and blob storage contributor) and ACL (read, write, and execute) rights to the folders and files. We will explore the stock files that were transferred using the SFTP protocol. The notebook below mounts the remote storage to the Azure Databricks file system (DBFS).
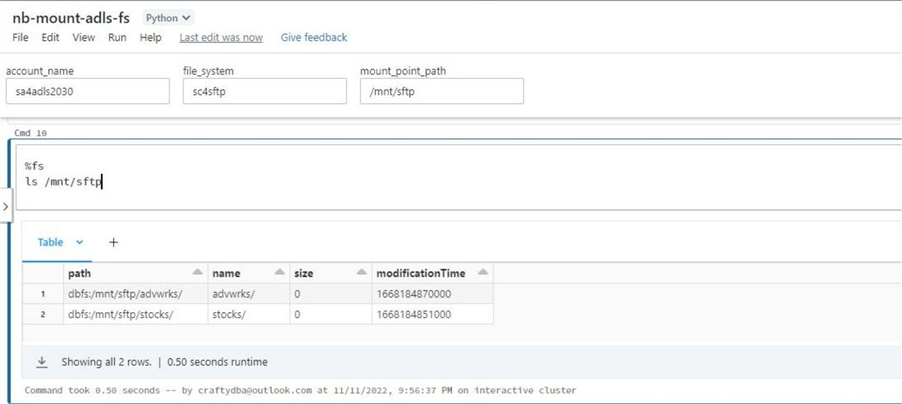
At the end of the notebook is a simple test to ensure the storage is mounted. If we list the files in the sftp directory, we can see that the two sub-directories are available to browse.
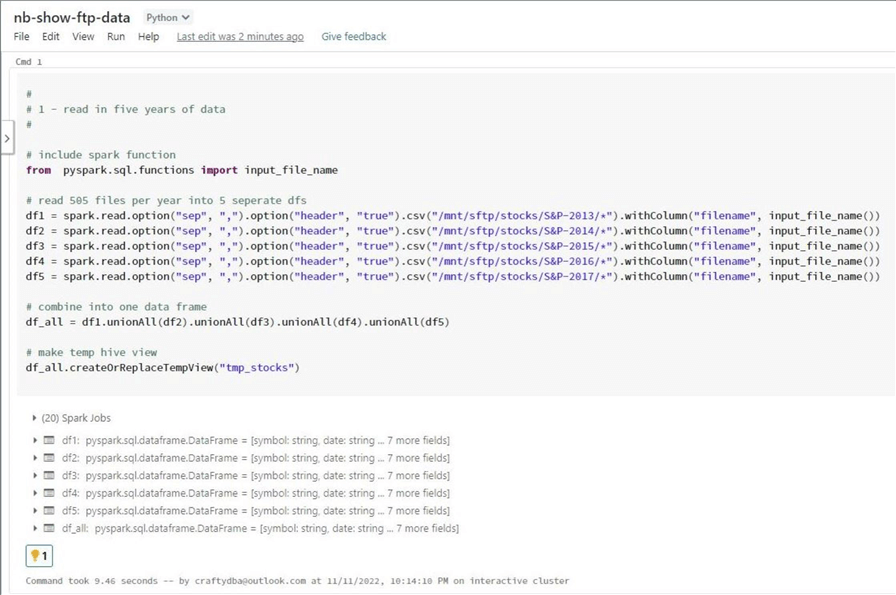
Most of the time, I write code using Spark SQL. However, there are times when it makes sense to work with the dataframe methods. We have stock data stored in five separate directories. One way to load all this data into a temporary view for querying is to read each directory into a separate dataframe. Afterward, we create a new dataframe called df_all,which combines all the previous data frames. Please look at the unionAll method for more details.
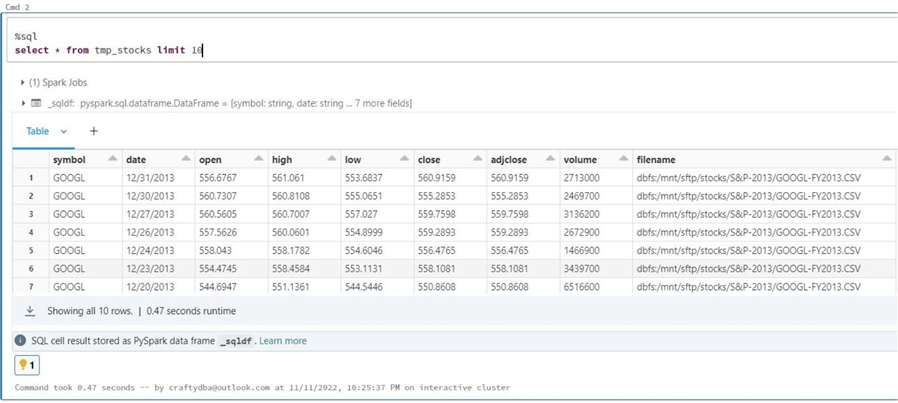
There are two more methods. The withColumn method allows the developer to define a new field within the dataset, and the input_file_name function returns the file path from which the data was read. The image below shows the top 10 records from the tmp_stocks view.
Let's count the number of files per year. The date of the stock information is stored as a string. So, we can use the substring function to get the four-digit year as a string. We will filter, group, and order by on this expression. Note: The set used by the in expression is text values. Last, we cannot use the count function on the filename. It will return all records; we only want the number of distinct files (companies) per year.
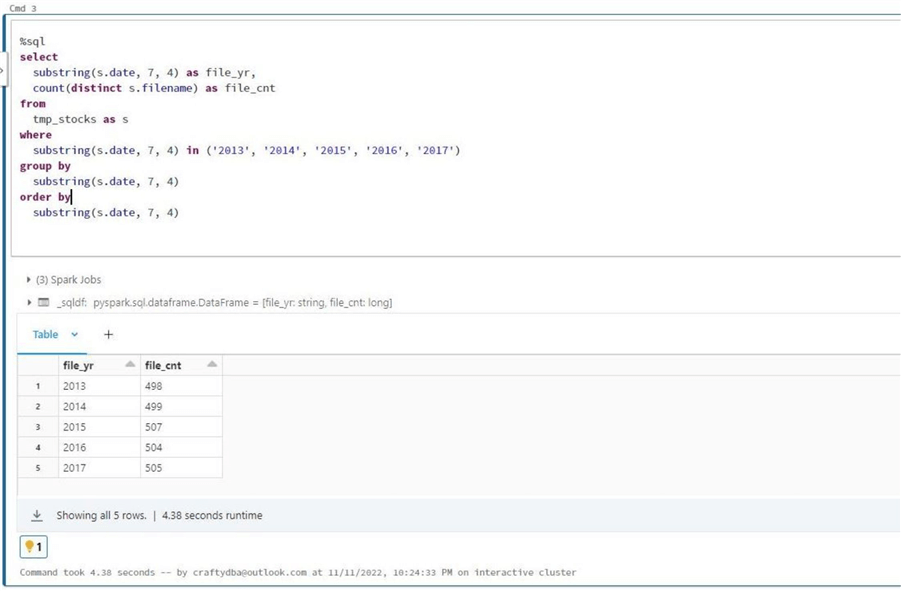
The stock data for 2013 to 2017 was obtained by calling the Yahoo service with a PowerShell program. There is always the possibility of errors when obtaining data through a web call. Since the S&P 500 should have at least 500 separate files, I would have our company analyst validate the files for 2013 and 2014. It seems like we might be a little short.
Summary
The secure file transfer protocol (SFTP) has been around for many years. In fact, I remember using it at an employer about 20 years ago. However, many of these old systems are still in existence. How can you land these files into Azure Blob Storage with little change?
Microsoft has recently announced the general availability of the SFTP protocol for Azure Blob Storage. It supports both password and key pair security. In this tip, we saw how easy it was to create accounts for both types of security. I suggest using different home directories or landing zones for each account. This will keep the data isolated between different user groups.
Both command line (CMD) and graphical user interface (GUI) applications support the SFTP protocol. The CMD application can automate the transfer of data using batch files. The GUI application is great for quick ad hoc transfer of data. This tip's focus was on utilities available in Windows. However, other operating systems like Linux support a similar set of tools.
I will continue to write about Apache Spark in the coming year since it will be a huge player in the future. In this tip, we saw that once the remote storage is mounted, our Python program can read the raw data and expose it as a temporary view. It is important to learn both the PySpark Dataframe methods and SQL coding techniques. We could have created five separate temporary views and then used a common table expression (CTE) to work with the combined data in Spark SQL. However, it was a lot easier to call a dataframe method to union all the data into one dataframe before turning it into a temporary view.
Enclosed are three zip files containing code/data for the Putty, WinSCP, and Databricks examples.
Next Steps
- Check out these other Azure articles.
About the author
 John Miner is a Data Architect at Insight Digital Innovation helping corporations solve their business needs with various data platform solutions.
This author pledges the content of this article is based on professional experience and not AI generated.
View all my tips
Article Last Updated: 2022-12-14


