By: Alejandro Cobar | Updated: 2023-03-15 | Comments (1) | Related: > PowerShell
Problem
PowerShell is a great tool for task automation whether it be with a Microsoft SQL Server database or something external to SQL Server. One key component is the ability to schedule the PowerShell scripts you create and in this article we look at how this can be done using SQL Server Agent and Windows Task Scheduler.
Solution
In this article, we will explore how to automate the execution of PowerShell scripts using Windows Task Scheduler and SQL Server Agent.
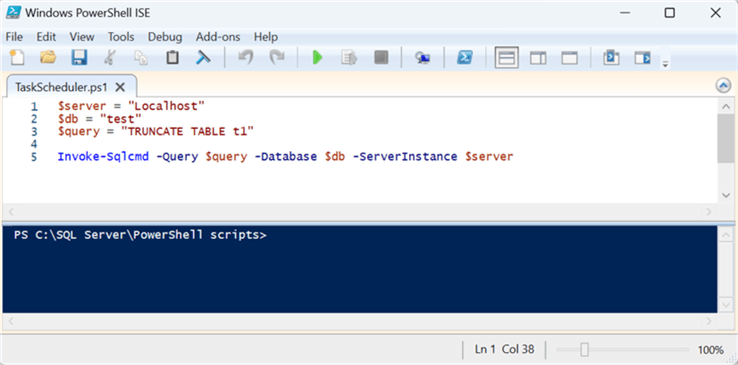
I will be using a very simple test scenario just as proof that the automated executions work. This will consist of a test database with a simple table with some records in it, then the Windows PowerShell script will connect to the instance and issue a TRUNCATE statement against the table. I will be using Windows 11 operating system and SQL Server 2022, so certain things might be a tiny bit different (hopefully not that much) depending on the version you use to replicate any of the examples within this article.
Here is a screenshot of the PowerShell script (ps1 file) I will be using.
Run PowerShell Script with Windows Task Scheduler
Step 1
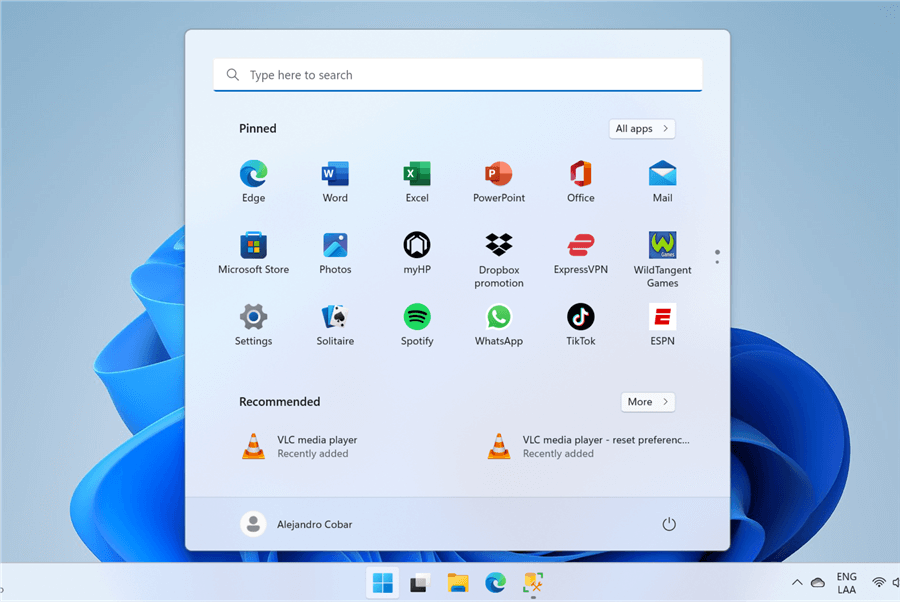
Click on the Windows Start menu on your taskbar or tap the Windows key on your keyboard.
Step 2
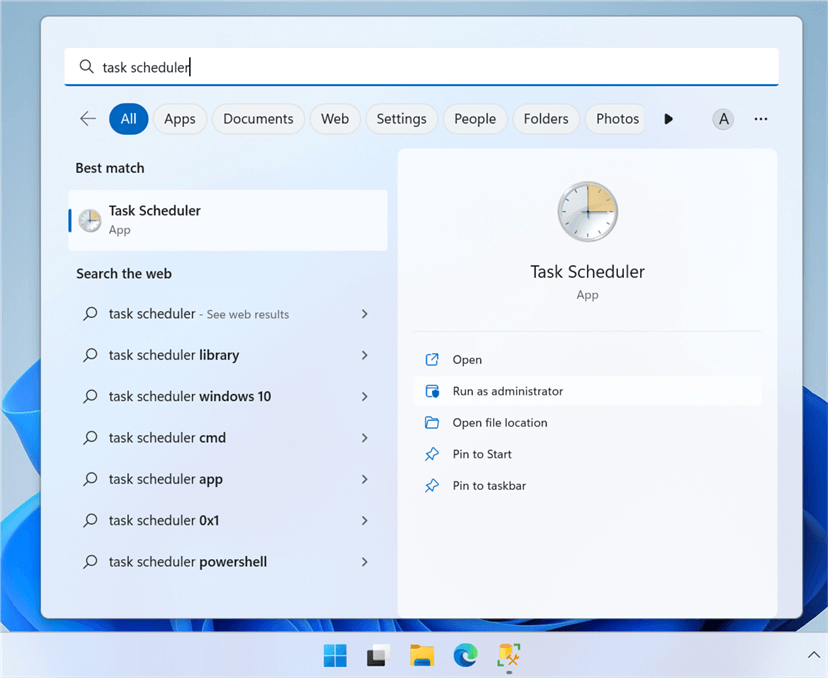
In the Search Bar type "Task Scheduler" and open the application. If you have the necessary permissions on the system you are doing this on (not production), then I would advise you to run the Task Scheduler as administrator, mainly because you might encounter issues due to the lack of permissions within the execution context. For production environments, my advice would be to use minimum privileged accounts (just enough permissions to get the job done).
Step 3
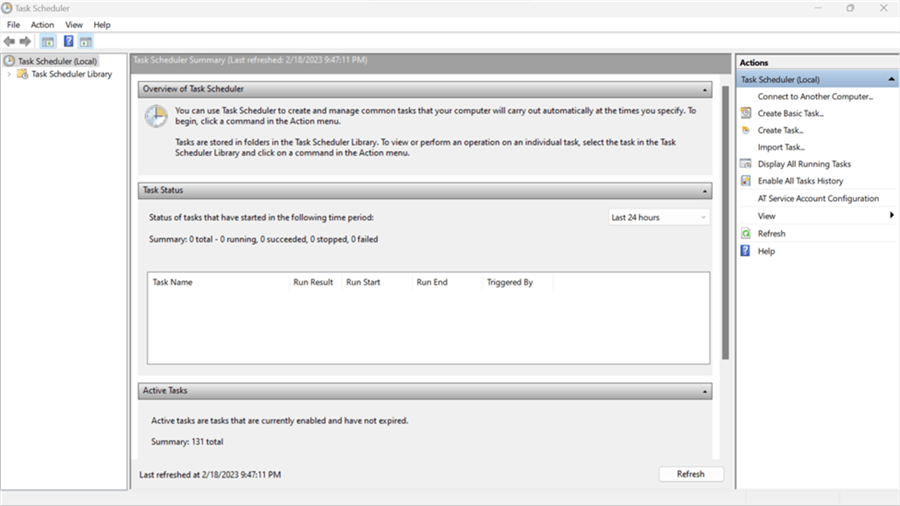
When Task Scheduler is launched, the dashboard is immediately displayed:
Step 4
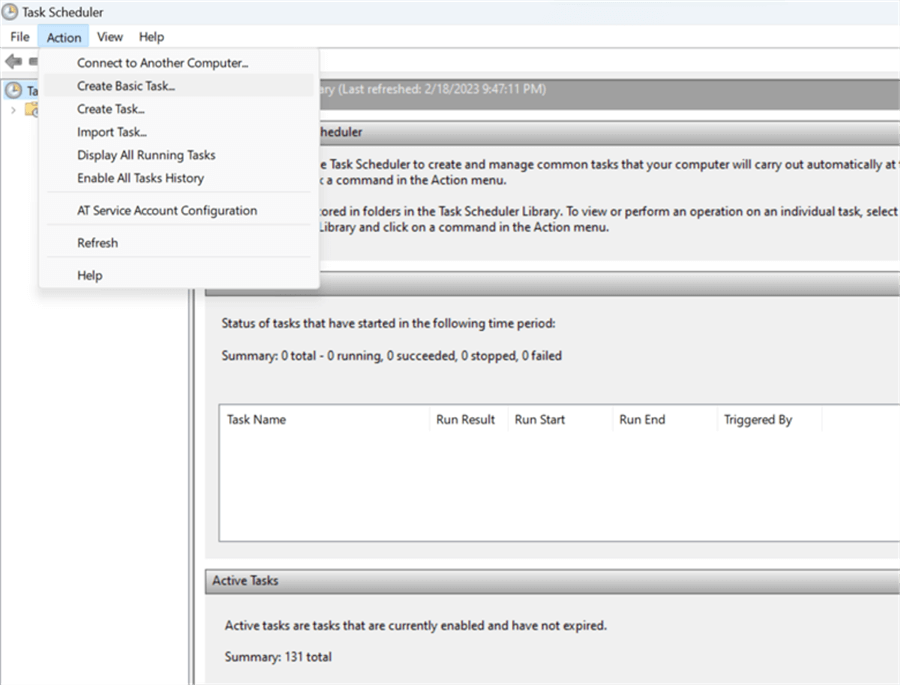
Click "Action" in the top menu bar and pick "Create Basic Task..."
Step 5
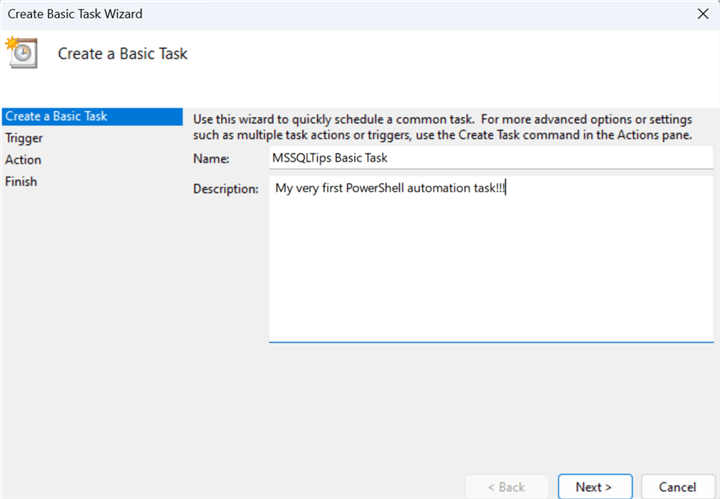
In the Create Basic Task Wizard, let's start by populating everything required to set things in motion.
Give the task a name.
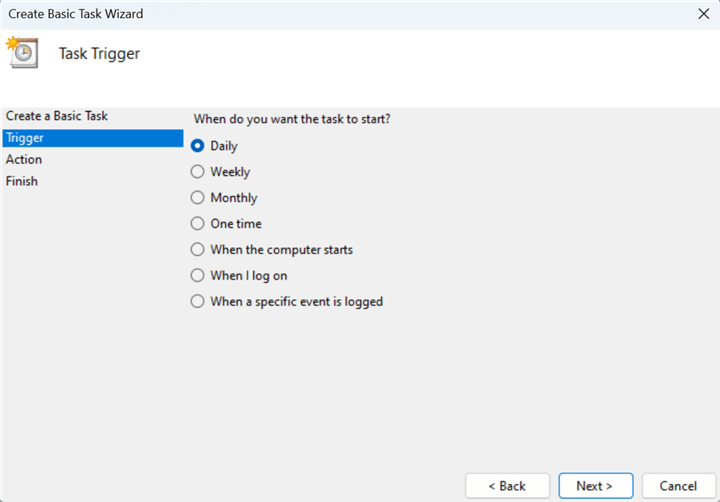
Select how often you want the task to run.
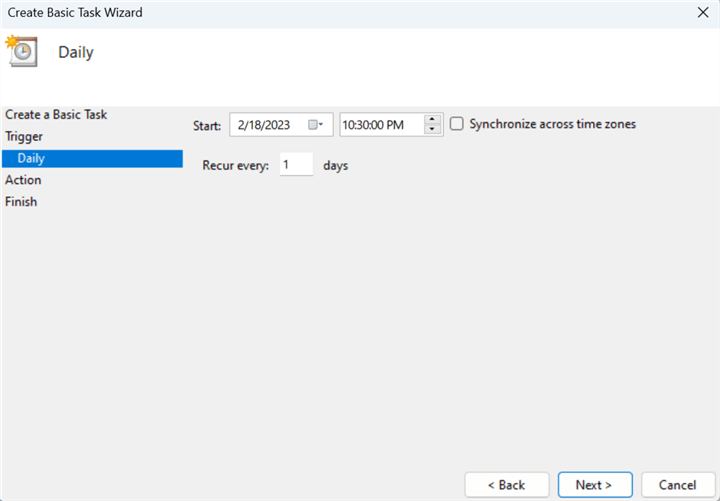
Select additional details for the run time.
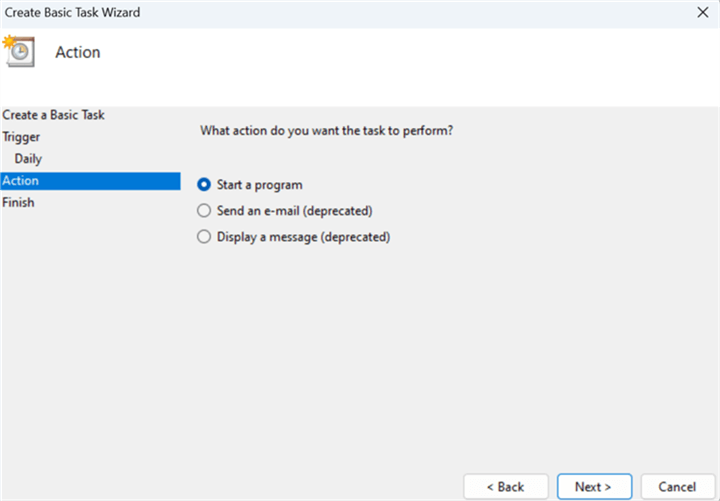
Under Action, make sure to choose "Start a program." Note: I know it's obvious that the other two options are marked as deprecated, but I think it is very important to mention it regardless.
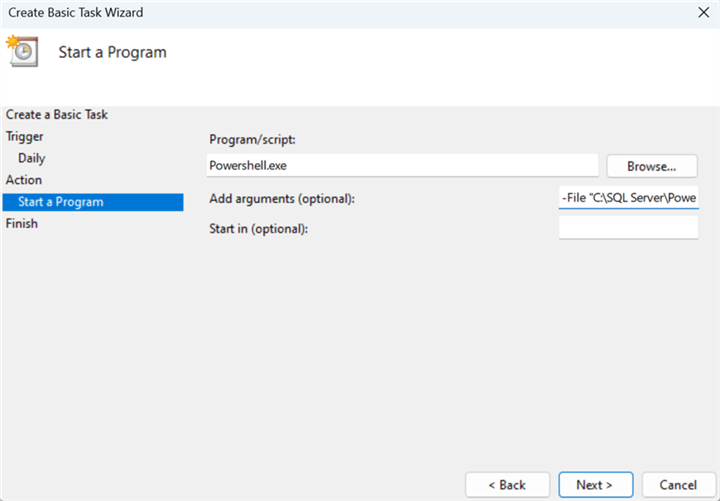
This section can be tricky, so be careful. In the "Program/Script" box, you might be tempted to click "Browse" and then look for the location of your script and move on. However, you need to do it in a very similar way I'm showing in the screenshot; I'm saying in a similar way because you might need to specify the full path/location of the Powershell.exe you want to invoke.
In the "Add arguments (optional)" section is where you specify the location of your script (so this is not optional). You use the parameter -File and between double quotes you put the path. Here is what I entered:
-File "C:\SQL Server\PowerShell scripts\TaskScheduler.ps1"
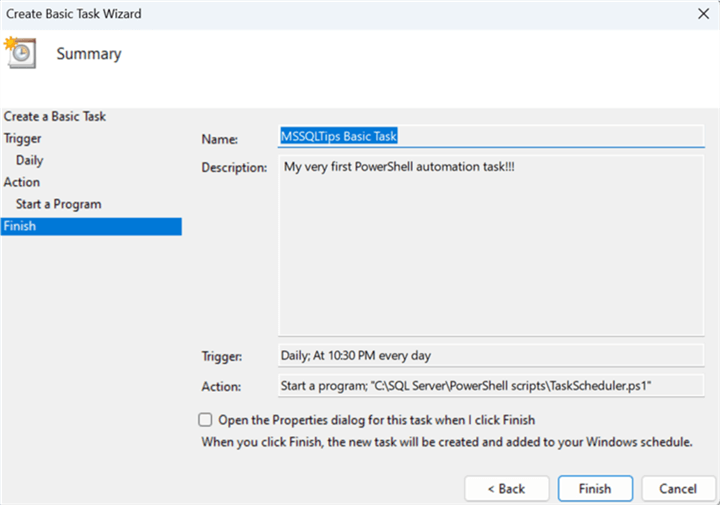
Step 6
After you hit "Finish," you will see your newly created task.
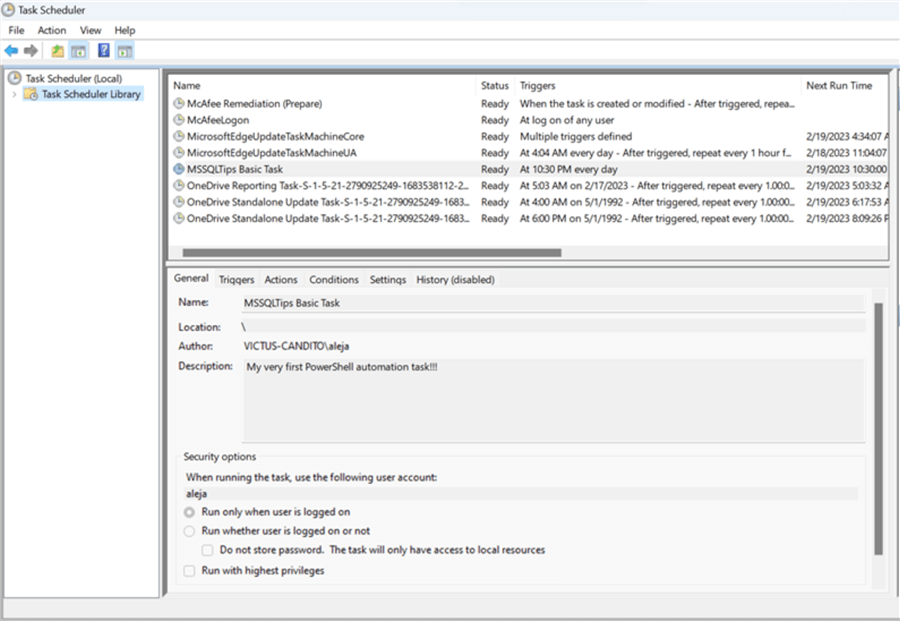
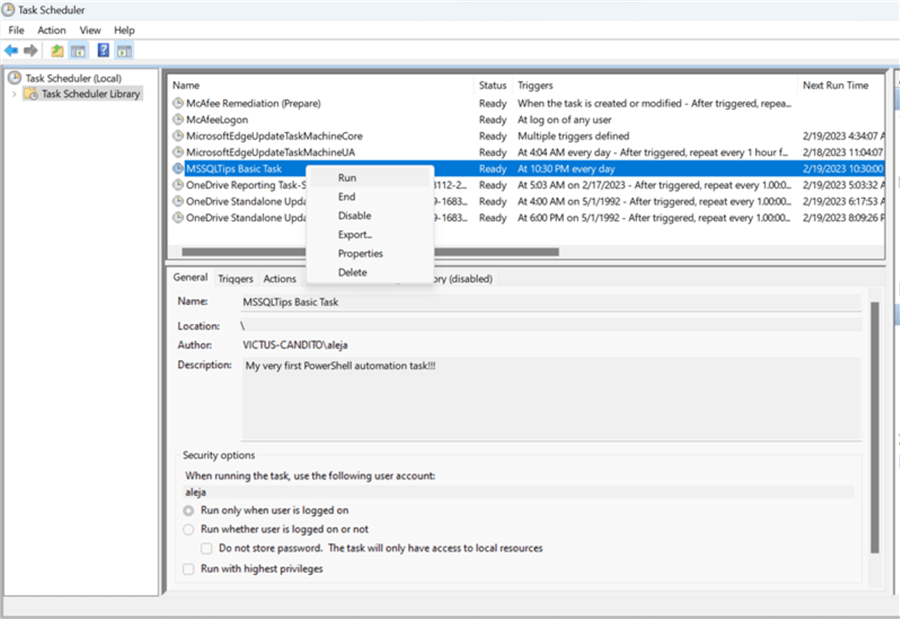
Several options are available if you want to execute the task. You can wait for the designated time you used for the schedule or you can perform a manual execution by right-clicking the task and clicking "Run."
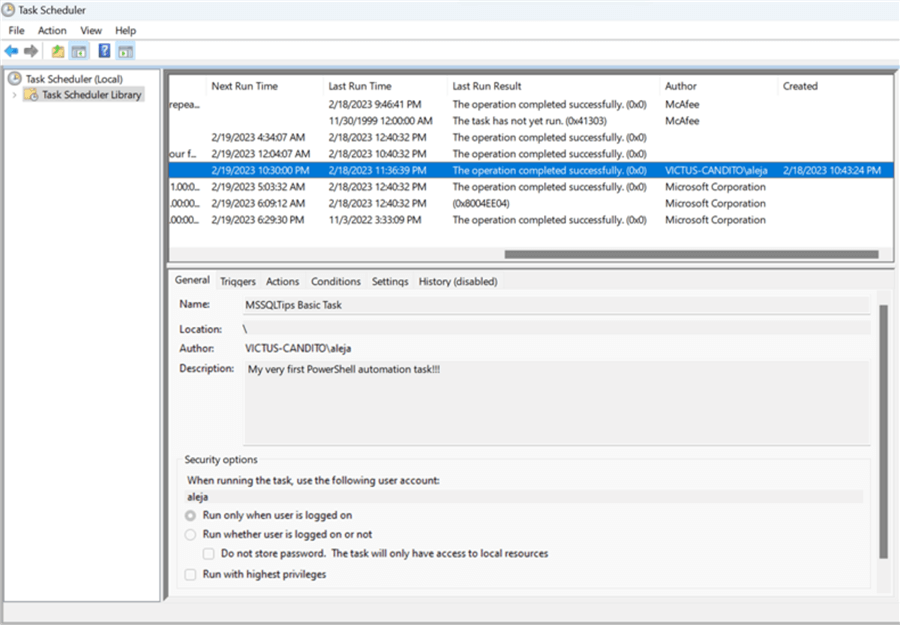
So, how do you know if the task was executed? If you scroll to the right, you will see columns "Last Run Result" and "Last Run Time" to let you know the last outcome of the task.
I used the "Basic Task" option for this example, so take some time to see what the other options offer when creating a task.
Create a Template for New Scheduled Tasks
To make creating future tasks easier, you can export the task and use it to create new tasks.
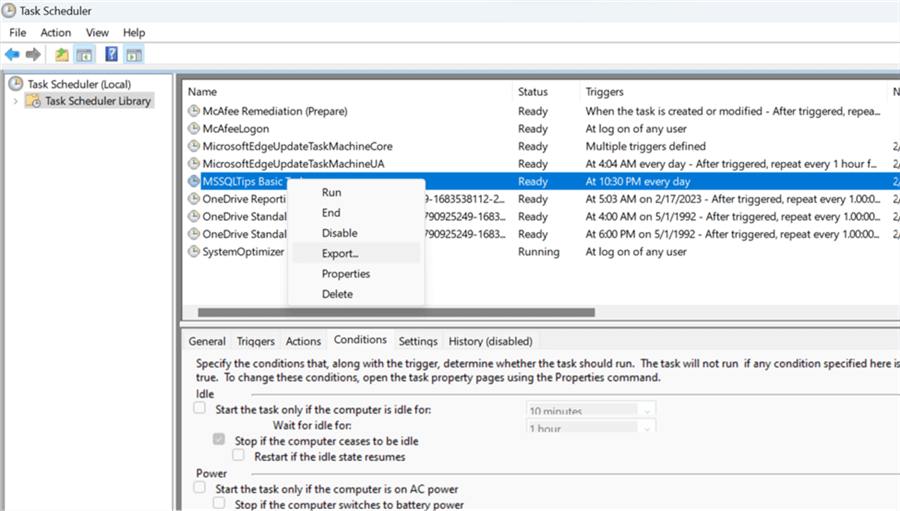
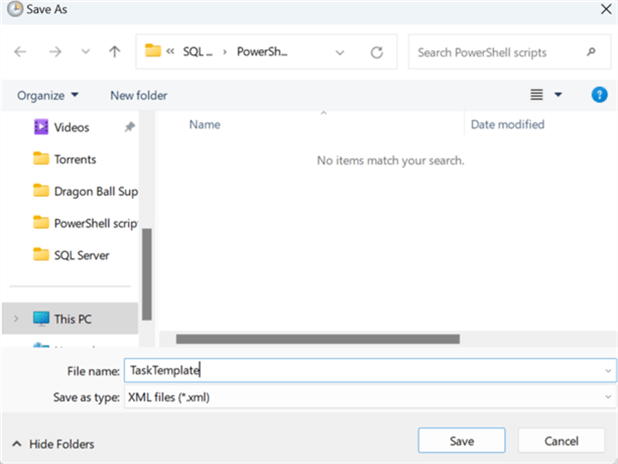
Just right click on the task and select "Export" and save the file.
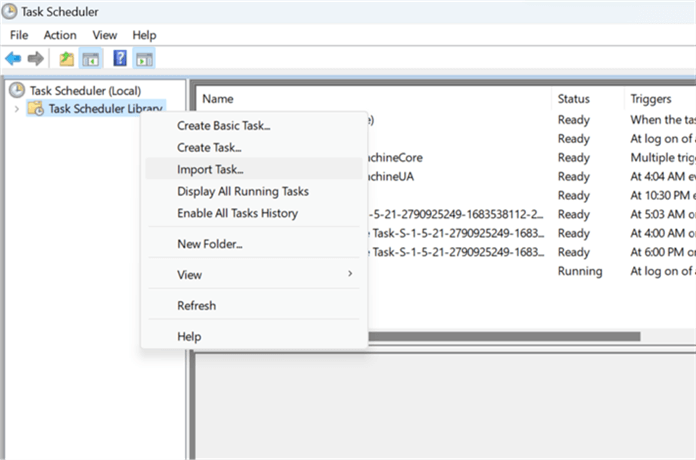
To create a new task, select "Import Task" and select the file you saved.
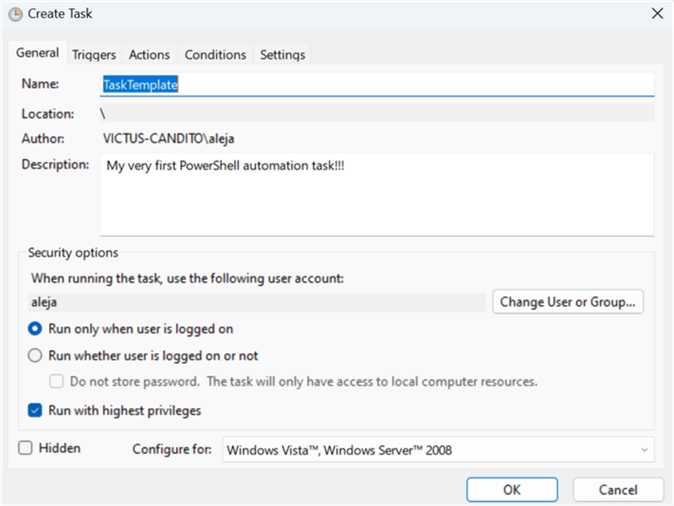
When it opens make any necessary changes and save the scheduled task.
With that, I've demonstrated the very basics to automate the execution of PowerShell scripts using Task Scheduler.
Schedule PowerShell Script with SQL Server Agent
In order to follow along in this section, you will need a version of SQL Server that supports SQL Server Agent. Keep in mind that SQL Server Express and Azure SQL DB do not include SQL Server Agent.
Step 1
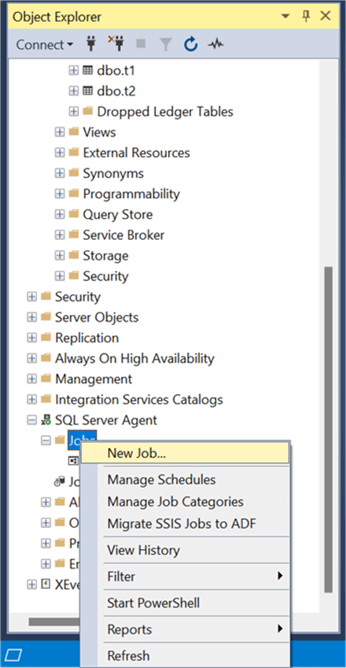
In SQL Server Management Studio (SSMS) navigate to the "Object Explorer section," go to the "SQL Server Agent" section, expand it, and click on the "New Job…" option.
Step 2
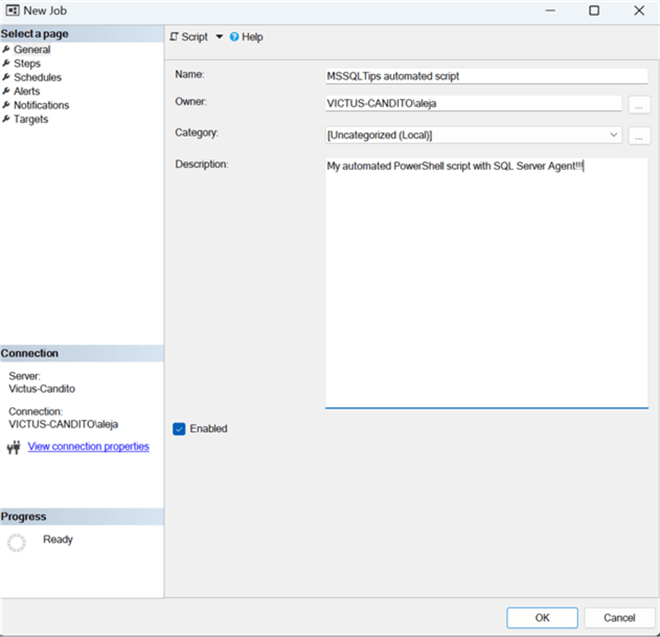
In the very first screen that pops, fill in the basic information like this:
Step 3
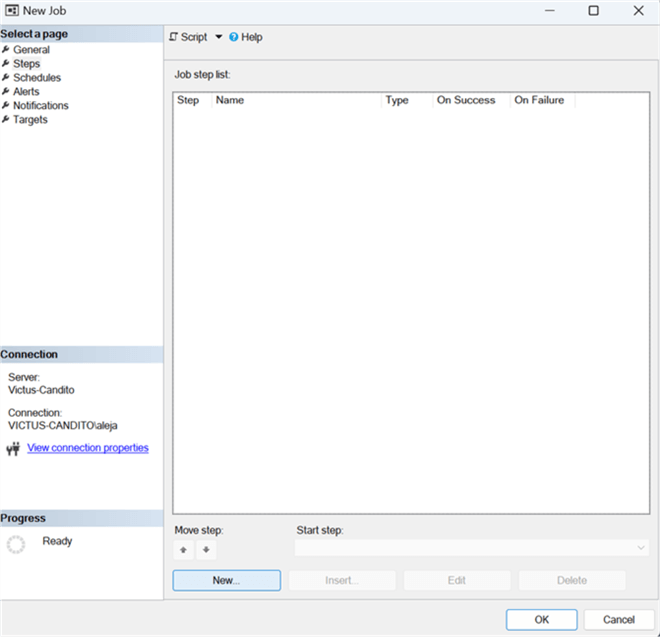
In the upper left section, where it says "Select a page," click on "Steps" and then click the "New" button.
Step 4
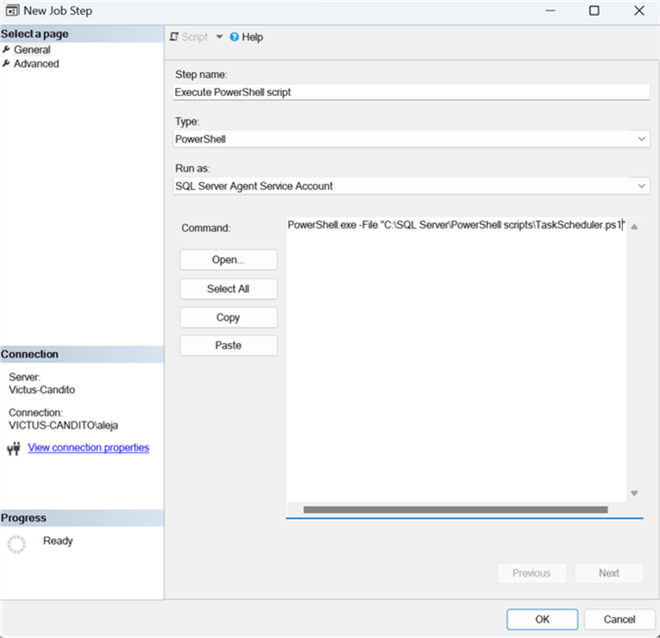
In the screen that appears, fill in the information as shown in the screenshot below and make sure Type = "PowerShell."
The PowerShell command is as follows to call the PS1 file:
PowerShell.exe -File "C:\SQL Server\PowerShell scripts\TaskScheduler.ps1"
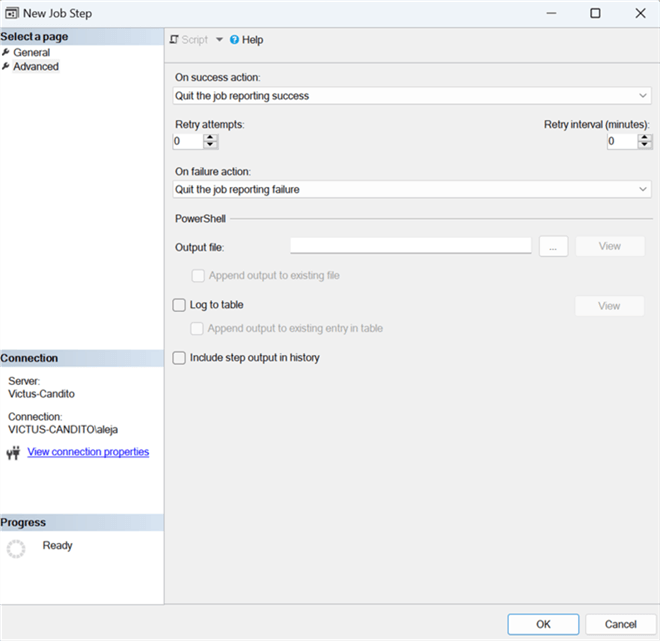
In the "Advanced" section of the same screen, make sure it looks like this.
Step 5
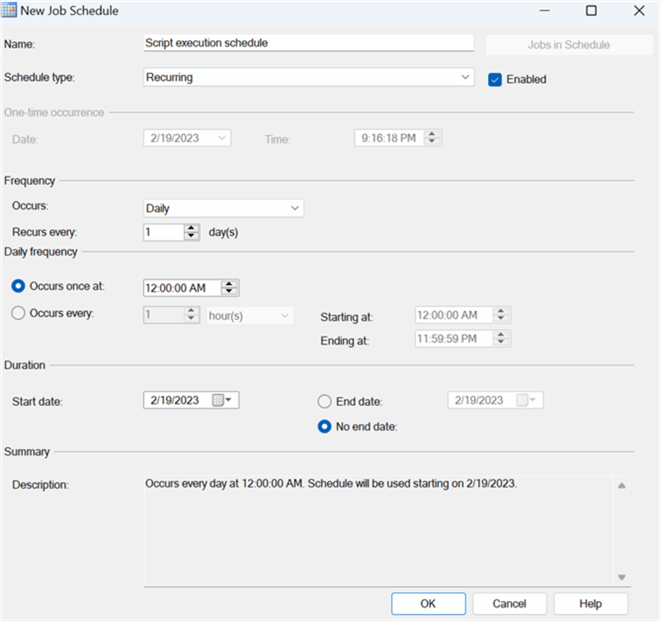
In the "Schedule" section, create the schedule you want for your script.
Step 6
For this demo, I'm not going to be covering the "Alerts," "Notifications," and "Targets."
With that said, click "OK" to create your job, and it should now appear in the SQL Server Agent Jobs section.
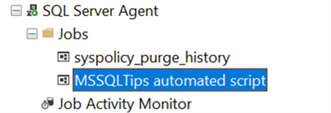
To run the job, right click on it and select "Start Job at Step" and it should begin to run or wait for the schedule time to run.
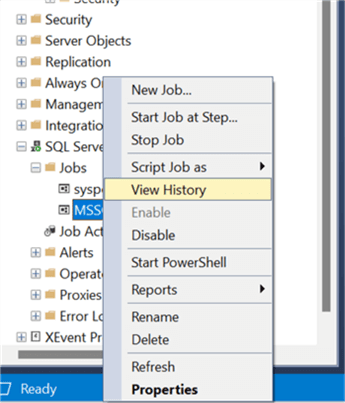
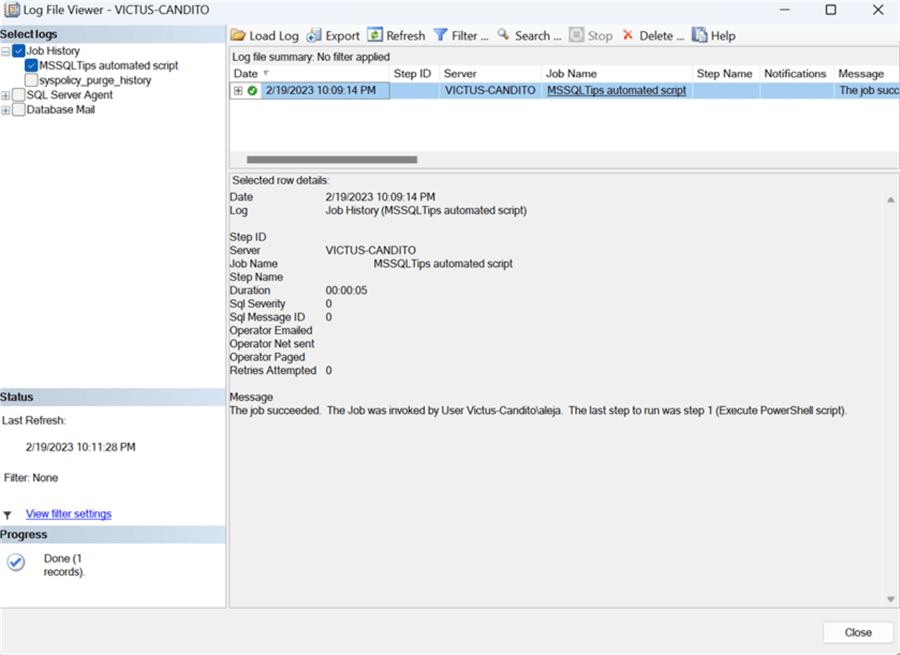
How can you confirm the status of your job and if it executed successfully? To answer this, you need to right-click on your job and select the "View History" option.
In this view, a green circle checkmark indicates that everything went well (if the Job was unsuccessful then the icon will be a red circle with a cross). This view also includes other useful information like job duration.
You can also use this query to get information about your jobs:
SELECT *
FROM msdb.dbo.sysjobs sj
INNER JOIN msdb.dbo.sysjobactivity sja ON sja.job_id = sj.job_id
INNER JOIN msdb.dbo.sysjobschedules sjs ON sjs.job_id = sja.job_id
INNER JOIN msdb.dbo.sysschedules ss ON ss.schedule_id = sjs.schedule_id
Create a Template for New SQL Server Agent Jobs
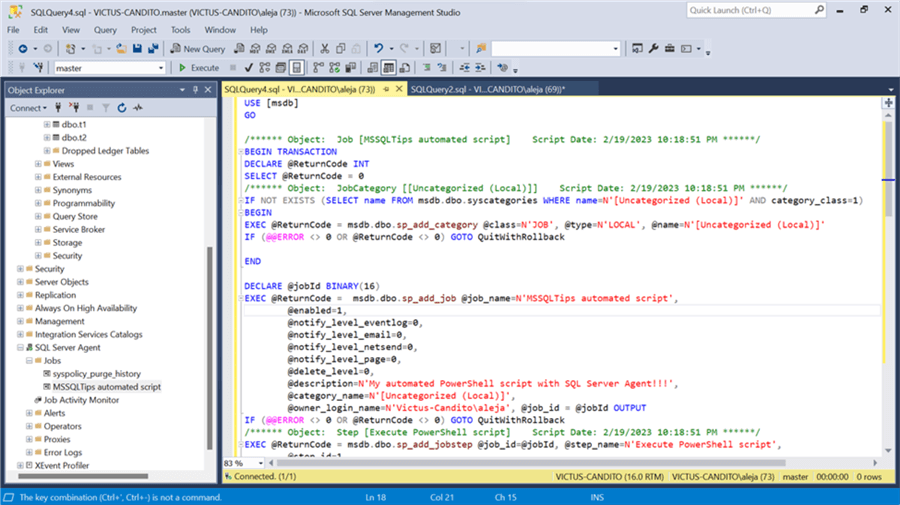
You can script a job to use as a template for new jobs as shown below.
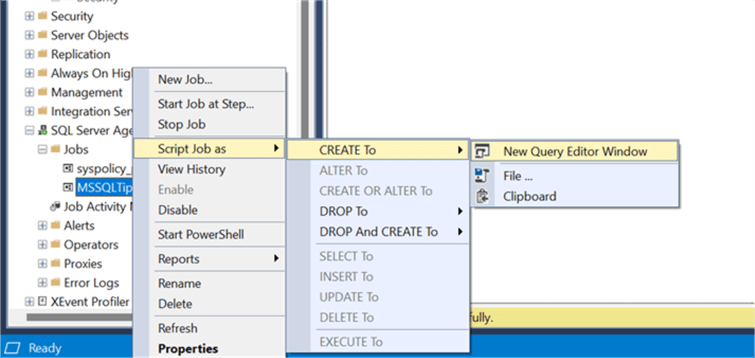
This is what the script looks like. You can make necessary changes, like the name and PowerShell script file to run and then run the script to create a new job.
Next Steps
- In this article, I focused on the two Windows "out-of-the-box" ways to automate the execution of PowerShell scripts. In the next article, I will add some DevOps to see how we can achieve the same thing, but with tools like Jenkins and even Azure Functions.
- Click on this link to learn more about PowerShell for the DBA – Getting Started.
About the author
 Alejandro Cobar is an MCP, SQL Server DBA and Developer with 10+ years of experience working in a variety of environments.
This author pledges the content of this article is based on professional experience and not AI generated.
View all my tips
Article Last Updated: 2023-03-15


