By: John Miner | Updated: 2024-02-16 | Comments | Related: > Azure
Problem
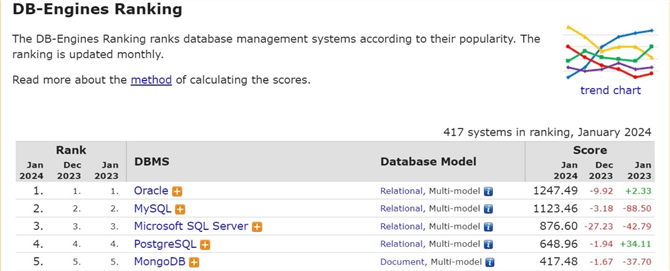
Many companies grow through mergers and acquisitions, typically referred to as M&A. If your company is not on the buying side of the deal, you might be required to change technology in the future. Currently, the top four relational database management systems (RDBMS) in use are Oracle, MySQL, Microsoft SQL Server, and PostgreSQL. As a data platform developer, you should be familiar with each one. How can we deploy and configure PostgreSQL on an Azure Virtual Machine?
Solution
There are two ways to deploy relational databases in the Microsoft Azure Cloud. First, Infrastructure as a Service (IaaS) refers to deploying a virtual machine, downloading the database software, and installing/configuring the database engine. The total ownership cost is higher for this deployment, but it provides the designer full functionality. Second, Platform as a Service (PaaS) refers to a managed ecosystem in which all the maintenance and availability are delivered at a cost. Because the ecosystem is shared by many companies, limited functionality of the database engine might be available. Today, we are going to focus on an IaaS deployment.
Business Problem
The image below was taken from the "DB-Engines Ranking" website, reinforcing that many companies use PostgreSQL.
Our manager knows that a merger is in the works for our company. The current staff is well versed in Microsoft SQL Server but will have to transition existing databases to PostgreSQL soon. Therefore, the manager has tasked us to deploy PostgreSQL using both the IaaS and PaaS methods. Additionally, he has asked us to migrate a benchmark database from SQL Server to PostgreSQL. These proof-of-concept projects will get the team up to speed for the upcoming transition.
Database Engine
The deployment of a virtual machine is straightforward and will not be covered in this article. My current virtual machine is a Standard D8s v5 with 8 virtual CPUs and 32 GB of memory. I will use the remote desktop protocol to connect to the virtual machine called vm4postgresql.
The PostgreSQL database is considered open source and has been in development for over 35 years. The install program can be downloaded from this link for a Windows operating system. I chose to use version 15.5 since it is one major release back from the latest development. Let's kick off the installation process now.
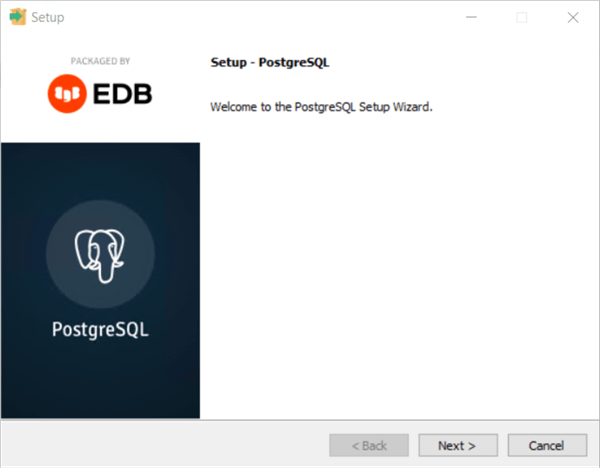
The image above is the typical welcome screen. Click Next to continue.
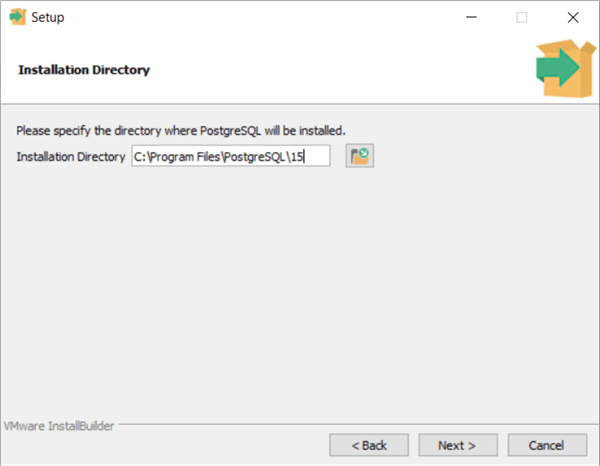
The screenshot below shows the directory in which the database engine will be installed.
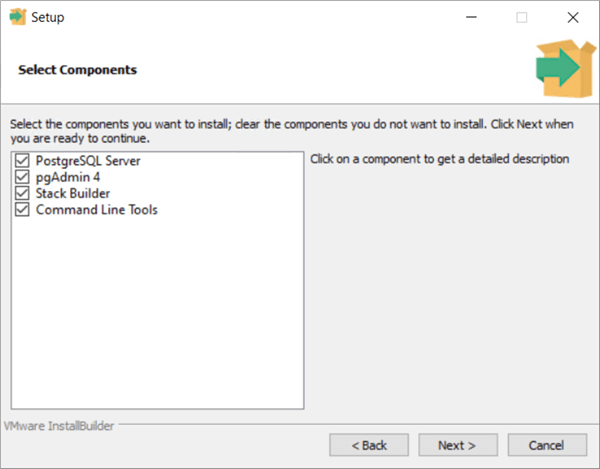
The installation has four main components: the engine, the admin tool, the extension installer, and the command line tools. The default selection of all is fine for a server install. If we were installing the software on a client computer, we might choose pgAdmin 4.0, the administration tool, instead of all four choices.
Click Next to continue.
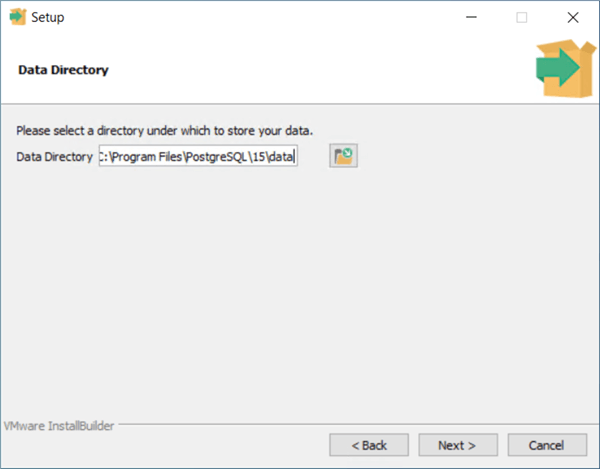
The data directory is where the default tablespace lives. We will talk about tablespaces in a future article.
Again, the Next button is the logical choice.
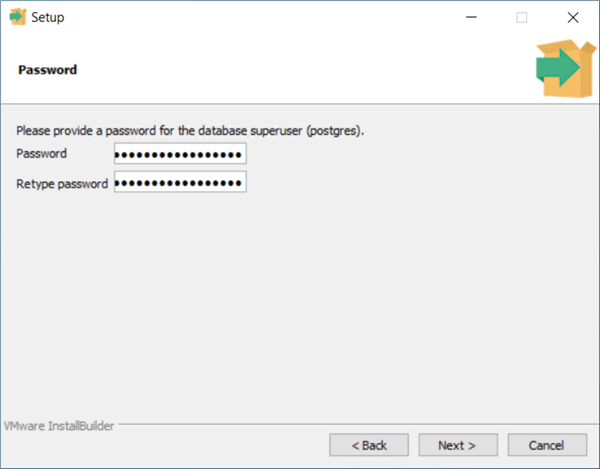
The postgres user is the default super user (administrator) account. Please choose a strong password. I typically use a website like random.org to generate my passwords and stored them in a key-vault for later retrieval.
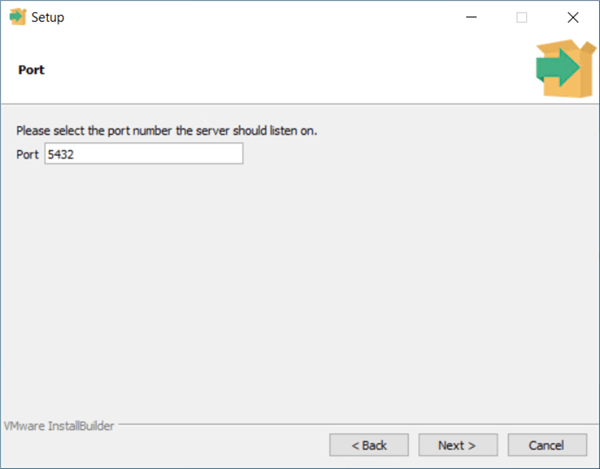
The next screen asks for the port in which the database engine can listen. We will take the default value of 5432. Note: Network address translation (NAT) can be done at the Azure Network Interface level. To keep it simple, we will use the default port.
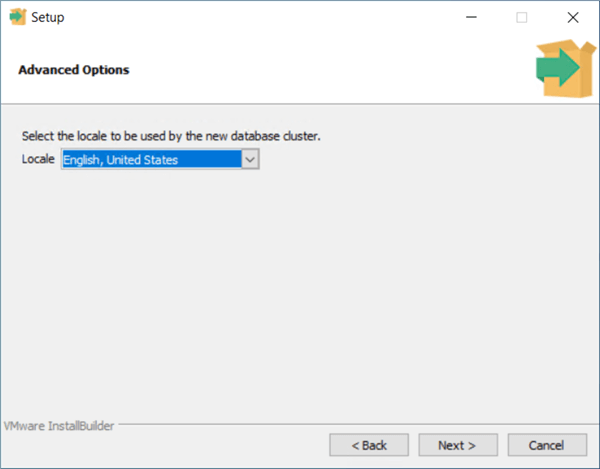
The locale of the database is important when dealing with strings. Since I live in New England, I will use the setting for English, United States.
The final click of the Next button brings us to the summary page. This is your chance to review where the software will be installed. Press the back button to change any choices you need to alter.
Click Next to confirm the installation.
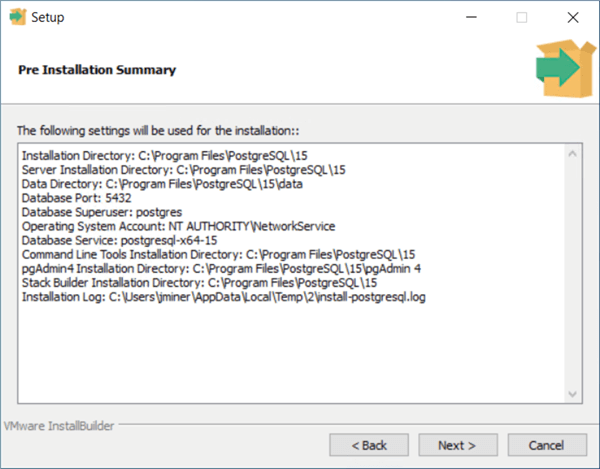
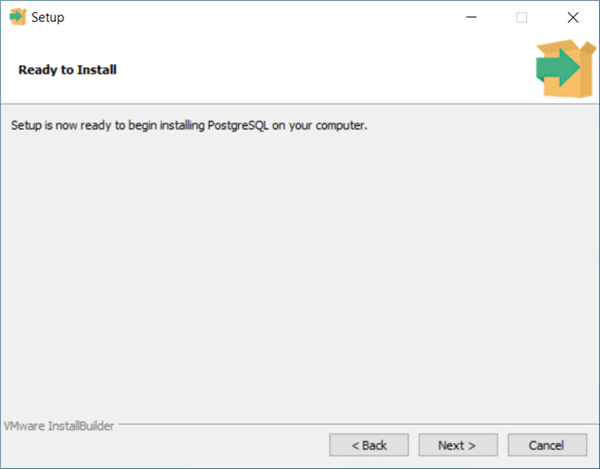
Clicking Next starts the installation. I did not time the execution, but it is a great time to grab a fresh cup of coffee.
After a couple of minutes, the success screen will appear. Stack Builder is used to install extensions such as pgAgent, used for scheduling jobs, or PostGIS, used to work with spatial data. I have utilized both in the past.
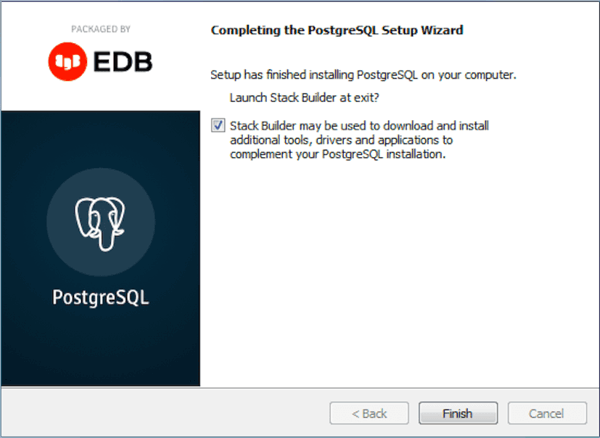
In the next section, we will install the pgAdmin. A database without maintenance jobs is a slow database indeed.
Jobs Scheduler
The Stack Builder program lets you download, configure, and install software. The first installation screen asks you to select which database engine you want to connect to.
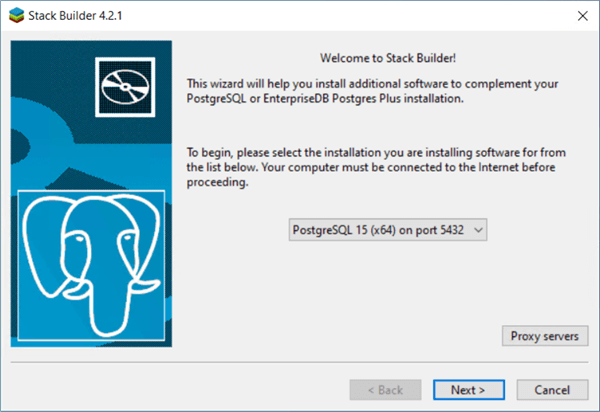
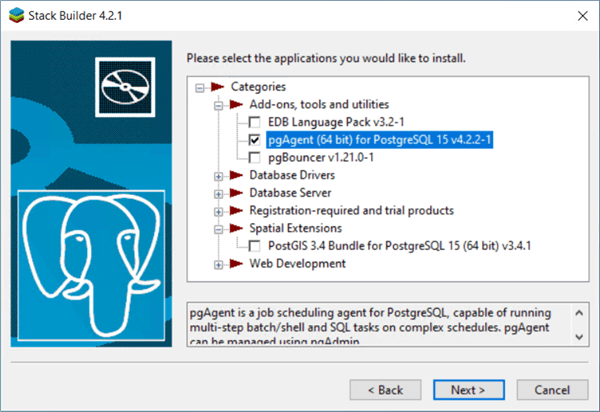
The second installation screen offers choices regarding what to install. I want to install the pgAgent extension.
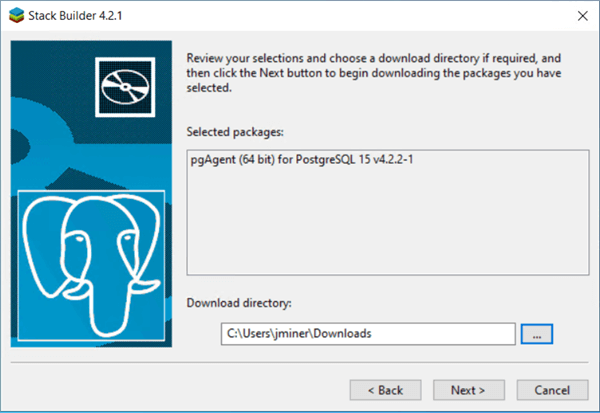
The third installation screen allows you to pick the download location.
The fourth installation screen asks you to start or skip the installation.
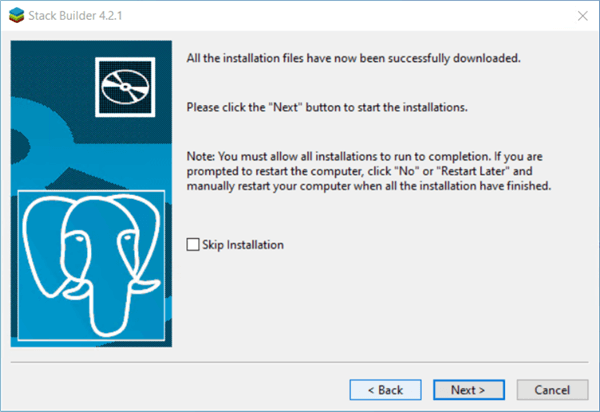
Let's kick off the installation now! Click Next.
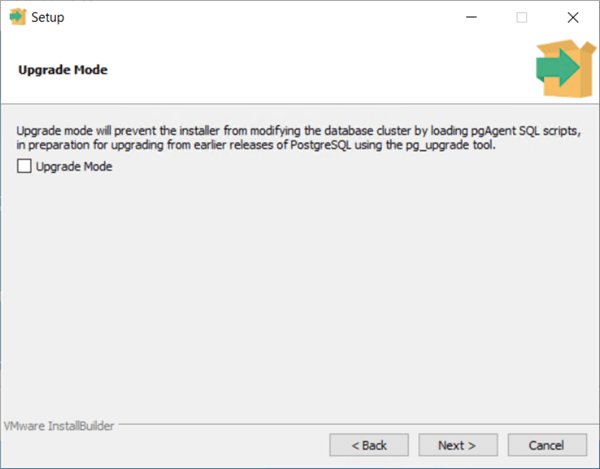
Upgrade mode is used for database migrations. Since we are doing a brand new install, skip this setting. Click Next.
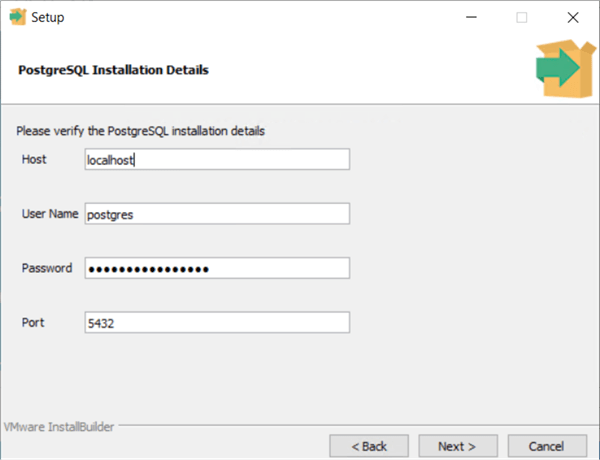
The installation program needs to connect to the database engine. I chose to supply the super user account and password. Click Next.
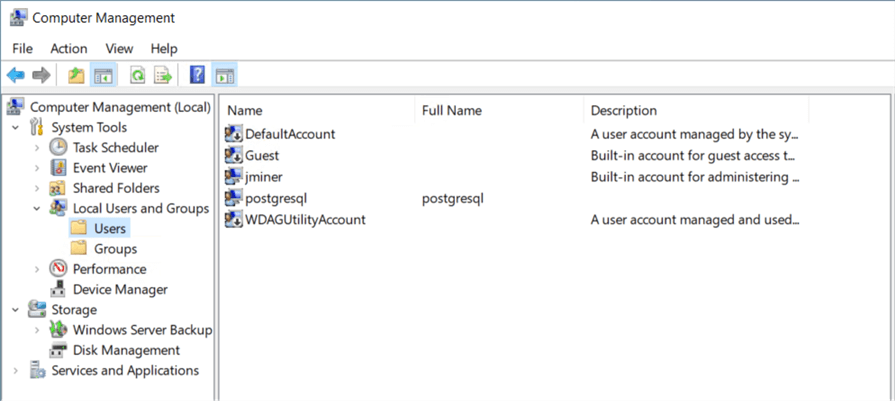
Open the Windows Computer Management snap-in to manage users and groups. We can see that the database engine already created a user named postgresql. I will create a user account named postgres that will be used by the jobs scheduler. Here is an article on how to create a local user account. If I wanted to copy my backups to a remote location, I would domain join this virtual machine and use a domain account for this service. We will have to do some minor configuration to this account in a future article. Please enable remote desktop protocol for this user. This article gives you details on how to do this task.
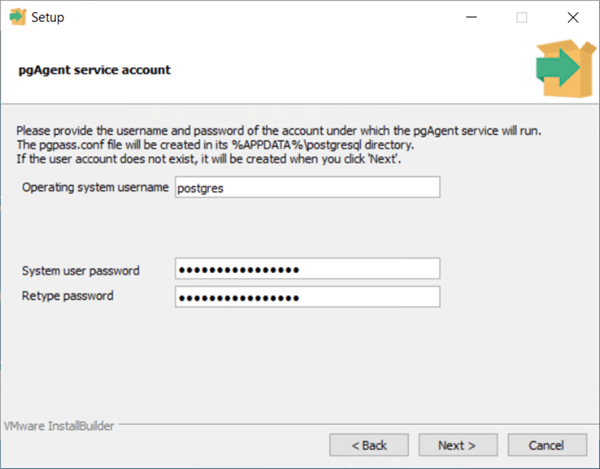
Enter the newly created service account now. Click Next.
At this time, the setup program is ready to install the pgAdmin extension. Click Next.
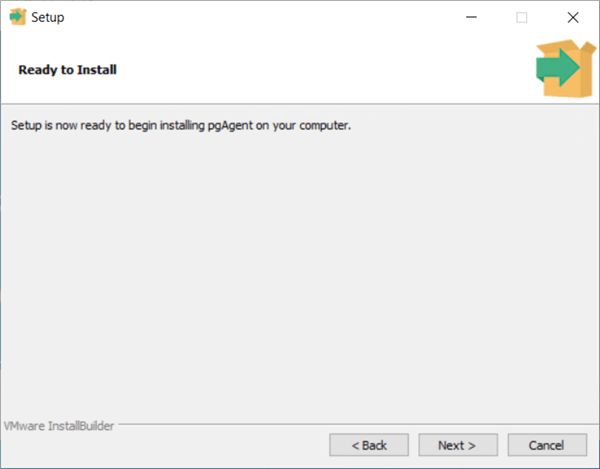
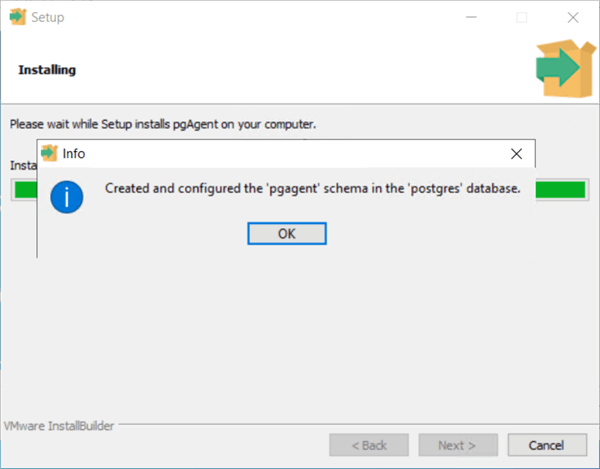
By default, the new extension will be installed in the default database called postgres and the new schema will be called pgagent.
We can configure the admin tool on the PostgreSQL database server after we have finished the installation.
Configure Admin Tool
The pgAdmin tool is where the database administrator does most of his work. Right now, we can see that the program auto detected the local installation of the database engine.

Let's look at the settings. To add more remote servers in the future, right-click the register server option. The general screen shows us that the connection was automatically detected.
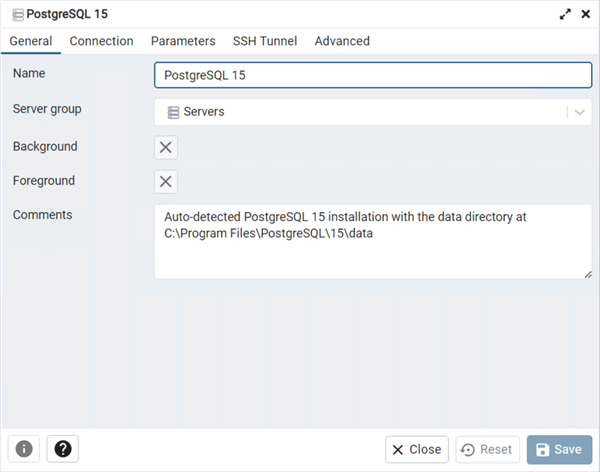
We can see that it is a local database engine. We can use the postgres login to connect to it. In the future, I will discuss entering certificates and keys as parameters. This is required for installations that are using SSL during a connection.
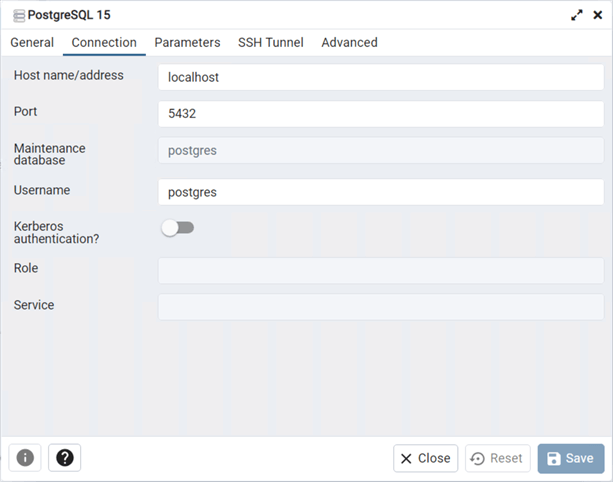
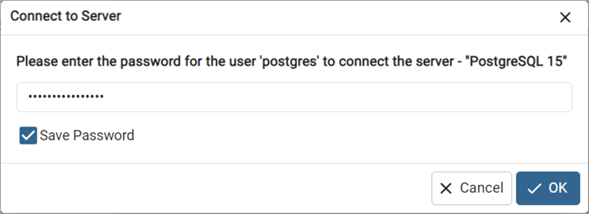
Enter the password for the postgres super user and click Save. That way, we do not have to re-enter the password whenever we connect to the server.
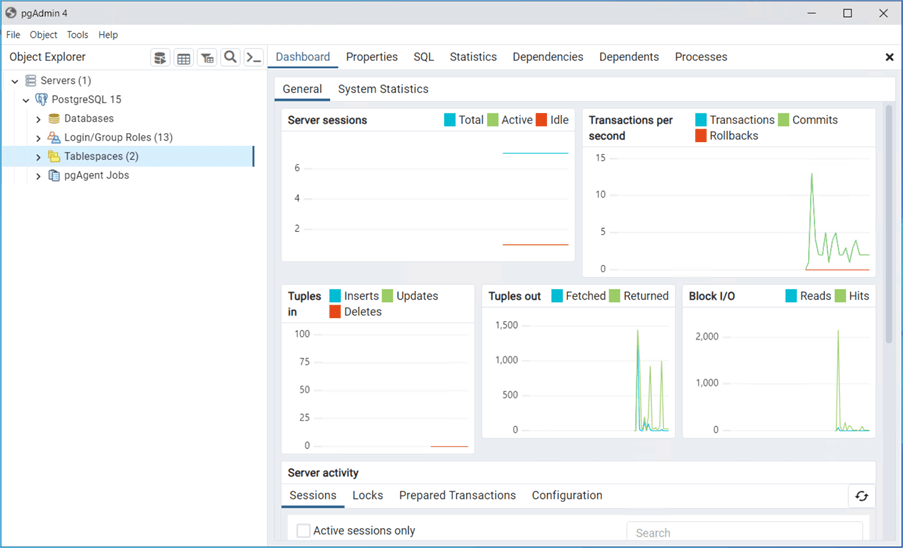
The default database is postgres. The dashboard shows the activity of the database engine. We can see that two default tablespaces are available.
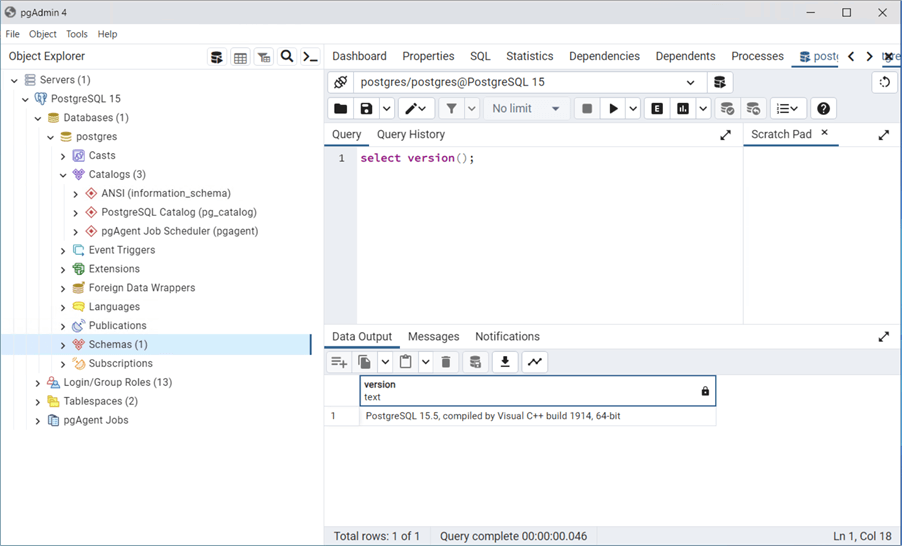
If we drill into the catalog section of the postgres database, we see three definitions. The information schema catalog is a database agnostic view of the database objects. A query executed on a PostgreSQL database should work without major changes on a SQL Server database. The pg_catalog catalog contains the default system views for PostgreSQL objects. The pg_agent catalog contains the tables used by the job scheduler.
We currently have a local installation of the PostgreSQL database, which means we can not connect to the database engine remotely. In the next section, we will discuss firewall settings and configuration files to open this database up to the internet.
Configure Remote Access
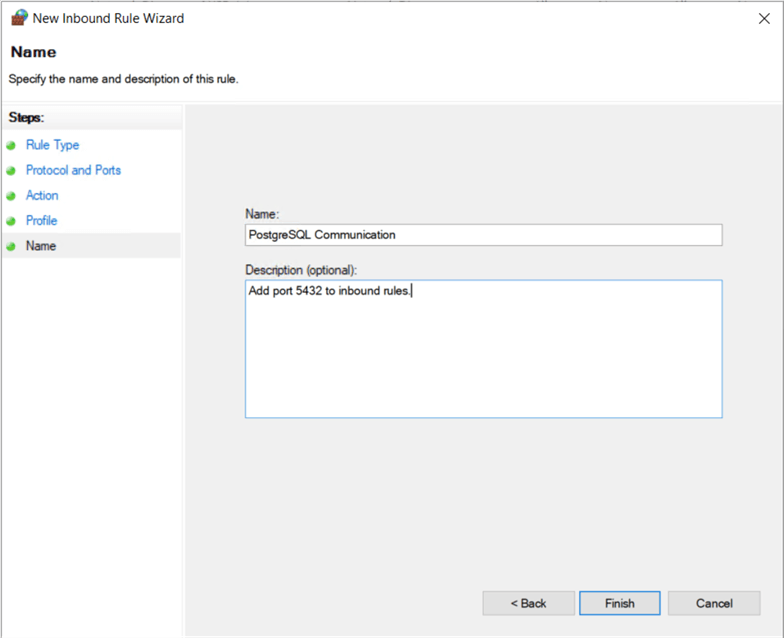
The first step to enable remote access is to create a firewall rule for Windows Defender. Right now, port 5432 is being blocked by the local firewall. See this MSDN article on how to add a firewall rule. It was written for SQL Server, but substitute port 1433 with 5432. I used the control panel to alter the configuration for the Windows Defender firewall to add my port rule under the advanced section.
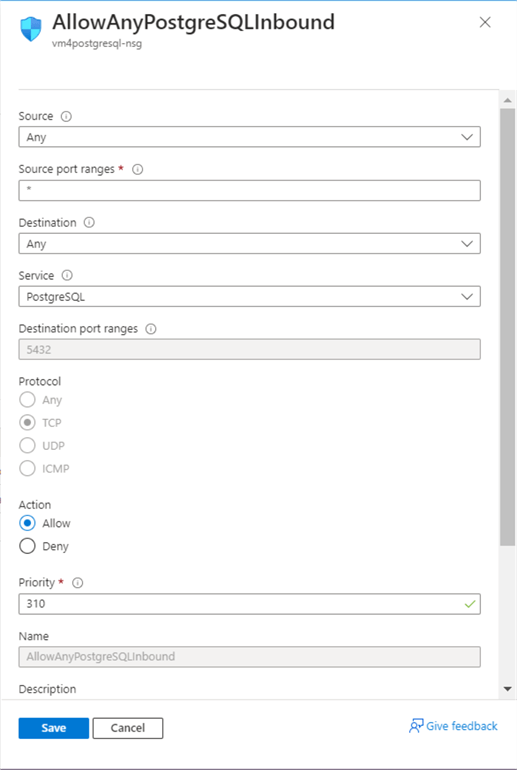
The second step is to open port 5432 by finding the networking section for the virtual machine named vm4postgresql. Make sure the information is listed as shown below. For more on network security, see this MSDN article.
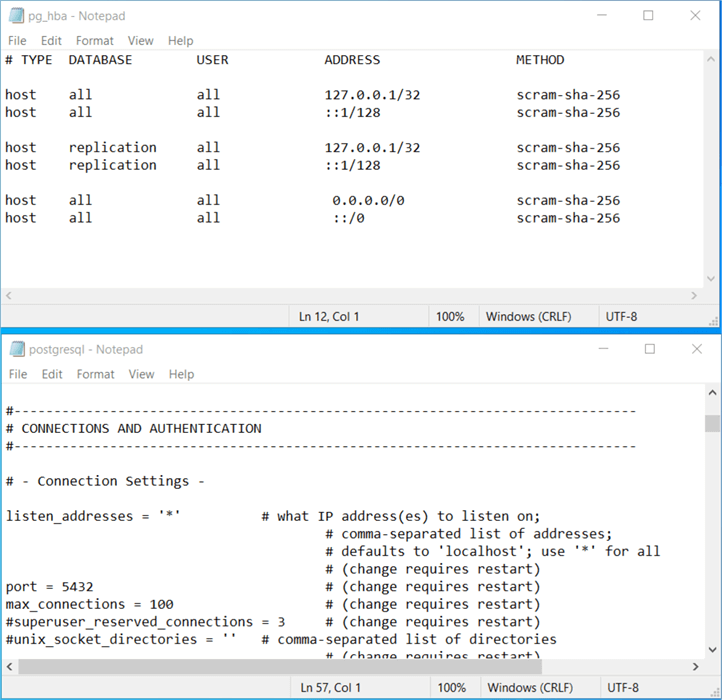
The third step modifies the two configuration files used by the PostgreSQL server engine:
- "pg_hba.config" file - Needs to be modified to contain the last two lines and
- "postgresql.config" file - Must have the addresses listened to set to "*".
Please see this article for more details. Both files are located in the default data directory.
Unfortunately, these setting changes will not take effect until you restart the PostgreSQL Windows service. A quick way around this task is to execute the following code in a pgAdmin query session:
-- Reload configuration files
SELECT pg_reload_conf();
Even with years of experience, I still make mistakes. When creating the firewall rule for the virtual network, I typed in the wrong information. How did I track this bug down? The old-school way is to install telnet and try to connect to the port. The package manager in the Windows Server can be used to install the utility:
-- Install telnet client
pkgmgr /iu:"TelnetClient"
The image below shows a failed connection between my vm4win10 remote machine and vm4postgresql local database machine. I am using the IP address in the telnet command.
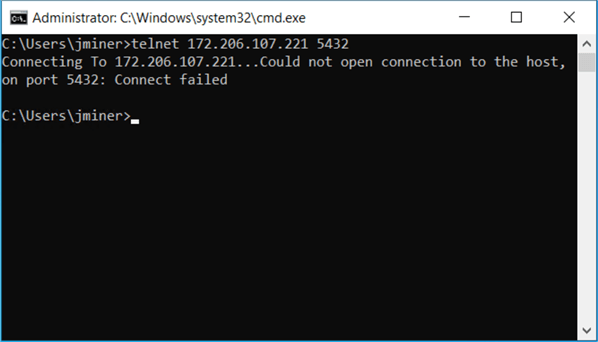
Once I deleted the bad Azure Virtual Network rule and recreated a good one, I could connect to the database using pgAdmin on the remote machine.
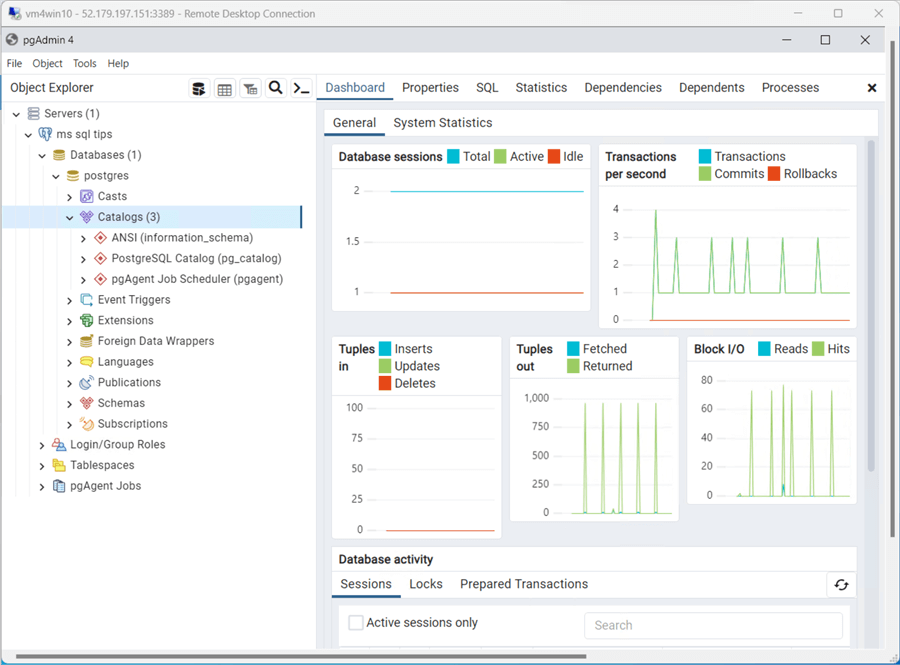
Yes, to open up the database to the internet, there is some work to be done. Since it is open to the internet, use very strong passwords and rotate them frequently. A better configuration is to use either Express Route or VPN as your connection from on-premises to in cloud. Then, pair the network of the database virtual machine to that network connection.
Benchmark Database
I have been using the math database, which calculates the prime numbers from 1 to 5 million, for some time. Enclosed is the script for your use. Note: The tablespace and database creation must be done from the postgres database. Unlike SSMS, you need to open a new connection to change databases. Run the rest of the script line by line in the math database. I will go over how to migrate the previous code from SQL Server to PostgreSQL in my next article. Also, I will finish configuring the pgAgent extension and talk about scheduling SQL and batch jobs.
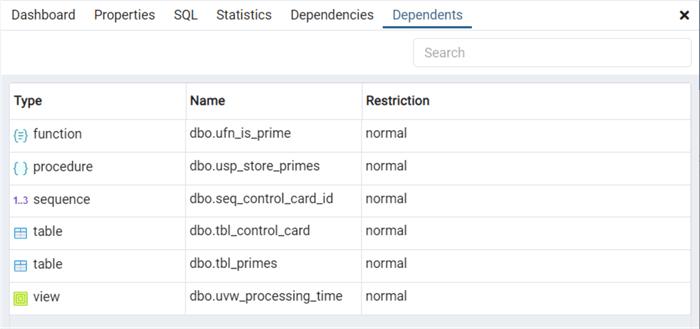
The image above shows the objects in the PostgreSQL version of the math database. The magic happens with the command line utility called psql.exe.
The (child) batch file below has four environment variables: the path to SQL program, the path to SQL utility, the password for SQL user, and the path to postgreSQL server. We are using the postgres SQL user to connect to the math database. Change the server from web address (remote) to localhost (local) depending on the server you execute from.
REM ******************************************************
REM *
REM * Name:         call-psql.cmd
REM *
REM * Design Phase:
REM *     Author:   John Miner
REM *     Date:     01-01-2024
REM *     Purpose:  Call the stored procedure to
REM *               calculate prime numbers.
REM *
REM ******************************************************/

SET PRGMPATH=C:\pgsql-testSET PGPATH=C:\"Program Files"\PostgreSQL\15\binSET PGPASSWORD=<enter your password here>
SET PGSERVER=pgsql4tips.eastus2.cloudapp.azure.com
%PGPATH%psql.exe -h %PGSERVER% -p 5432 -U postgres -d math -a -f %PRGMPATH%calculate-prime-numbers.sql
The (parent) batch file calls the child batch file 20 times. Because the increment value of the sequence is 250000, we get the first 5M numbers searched for primes.
REM ******************************************************
REM *
REM * Name:         run.cmd
REM *
REM * Design Phase:
REM *     Author:   John Miner
REM *     Date:     01-01-2024
REM *     Purpose:  Calculate prime numbers less than 5 million.
REM *     Note:     These calls are done asynchronously.
REM *
REM ******************************************************/

FOR /L %%A IN (1,1,20) DO (
  start cmd /c .\call-psql.cmd
)
Kick off the run.cmd batch file now.
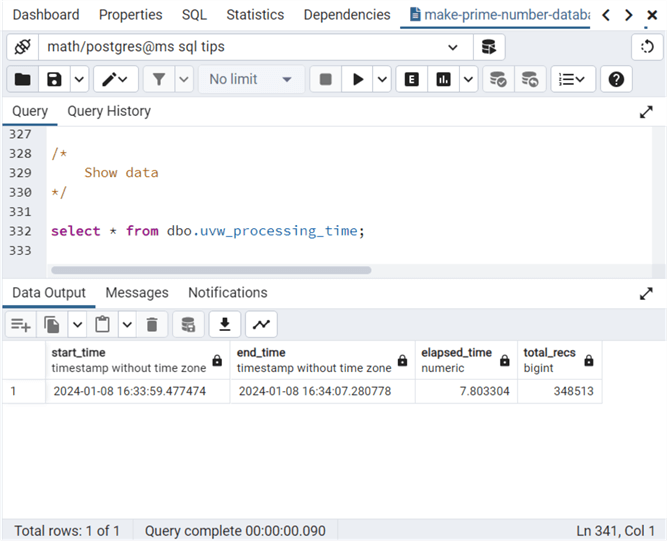
The above image shows that the stored procedure took about 8 seconds to run and produced the correct number of prime numbers. I have seen this execution time vary from 8 to 16 depending on how busy the virtual machine infrastructure is at the Azure Data Center.
Please notice we have double the number of cores compared to all other builds. Even if we double the execution time to compensate for more cores-, the postgreSQL standalone installation is still the fastest compared to all the other configurations. My educated guess for this surprising result is that PostgreSQL uses Multi-Version Concurrency Control and Write Ahead Logging to perform inserts more efficiently.
| Test No | Platform | Description | Configuration | Compute | Cores | Time |
|---|---|---|---|---|---|---|
| 1 | Cloud SQL | SQL 2019 - STD | ? | 4 | 478 | |
| 2 | Azure | Provisioned Business Critical | SQL DB | GEN5 | 4 | 462 |
| 3 | Azure | Provisioned General Purpose | SQL DB | GEN5 | 4 | 426 |
| 4 | Azure | Serverless Compute | SQL DB | GEN5 | 4 | 437 |
| 5 | Azure | Provisioned Managed Instance | SQL DB | GEN5 | 4 | 387 |
| 6 | Hardware | Local Laptop | SQL 2016 - DEV | GEN6 | 4 | 206 |
| 7 | Azure | IaaS – Virtual Machine | POSTGRES 15.5 | D8s V5 | 8 | 8 |
Summary
Today's article focused on installing and configuring the PostgreSQL database engine on an Azure Virtual Machine. While there were a lot of steps to follow, it was not too difficult to complete the tasks. Make sure you get those firewall rules correct. The telnet utility comes in handy when debugging closed port issues.
The details of the benchmark database were skipped over. Complete coverage of how to convert a SQL Server database to PostgreSQL will be explored in the next tip. Additionally, we will talk about what is not supported and what is different between the two database engines. Finally, we will demonstrate two ways to schedule jobs for calculating prime numbers.
I hope you enjoyed reading the article. Enclosed is the zip file with all the codes covered today.
Next Steps
- Convert SQL Server database to PostgreSQL.
- Deploy and configure Azure SQL Database for PostgreSQL
About the author
 John Miner is a Data Architect at Insight Digital Innovation helping corporations solve their business needs with various data platform solutions.
This author pledges the content of this article is based on professional experience and not AI generated.
View all my tips
Article Last Updated: 2024-02-16


