By: Eduardo Pivaral | Updated: 2024-04-30 | Comments | Related: > DevOps
Problem
One integral part of modern Continuous Integration and Continuous Development (CI/CD) pipelines is the ability to create the underlying infrastructure, assets, and database objects as part of the pipeline in a consistent and repeatable manner.
While Infrastructure as Code (IaC) offers the capability of creating the underlying infrastructure, database objects and scripts, there are still very challenging aspects of the pipelines since there are many constraints that we should be aware of. We can drop or damage valuable data because of a bad deployment or application of the scripts (for example, recreating a table and dropping its contents).
If we are aware of those constraints and create robust scripts, we can automate deployments once we push changes to our code repository. How can we automate database deployments from script files stored on GitHub to an Azure SQL database?
Solution
If we source our SQL scripts in a GitHub repository, we can use GitHub Actions to trigger pipelines, actions, or events after a commit to the repository. Actions allow us to deploy to different environments based on the branch we commit.
For this tip, we will execute .sql scripts to an Azure SQL database when we commit directly to Main.
Microsoft already provides an action called sql-action, so we do not have to worry about coding our custom deployment script.
This tip creates a simple workflow to deploy .sql files using this action after a commit to the Main branch.
Prerequisites
For this example, we need to set up the following:
-
Azure SQL database
- You can use a free tier.
- Be careful if you test in an environment where no tables can be dropped
- Make sure your scripts have an IF logic to determine whether the objects exist before dropping and recreating them.
- Make sure your firewall access is configured correctly so the database can be accessed via a connection string.
- Below, you can see I already have an Azure DB with a few tables:

- GitHub repository in place
- You can see that this repo already has some tables as .sql files. (Assume we create them manually, and we will automate further changes.)

Configure a GitHub Secret
We will securely store our connection string via a GitHub Secret.
If you do not want to store credentials outside of Azure, you can modify the action to use SAS tokens.
To obtain your Azure SQL database connection strings, go to the Azure Portal, then Connection Strings:
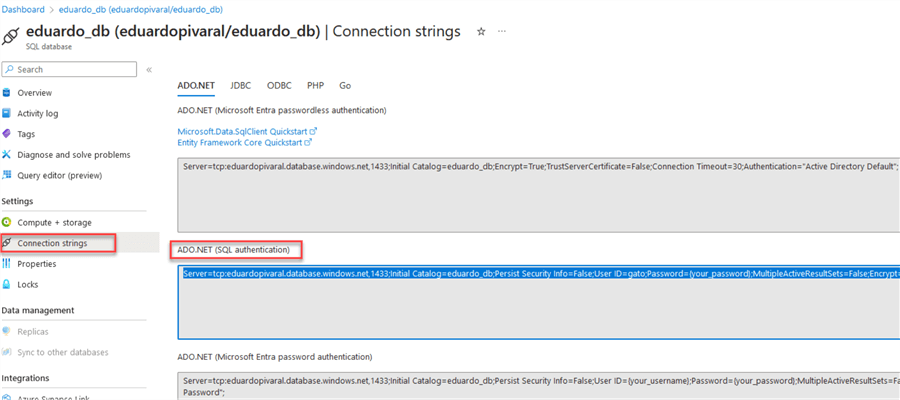
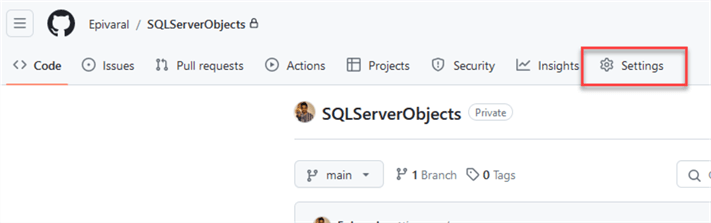
Remember to update your username and password. Then, go to your GitHub Repository and click Settings.
Next, go to Secrets and variables and click Actions.
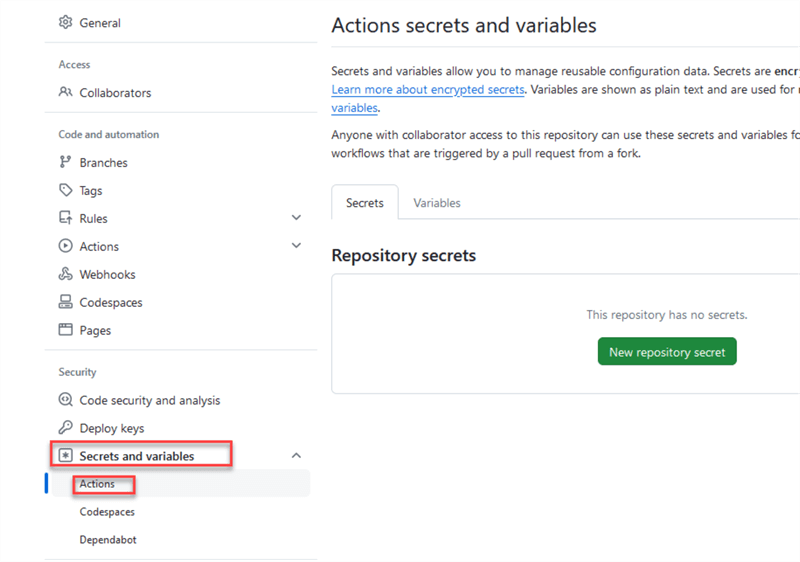
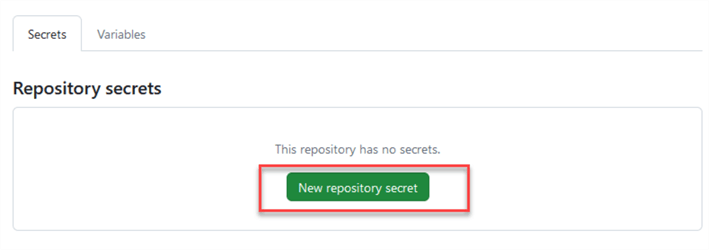
Click New repository secret:
Type the secret name and the connection string, then click Add secret:
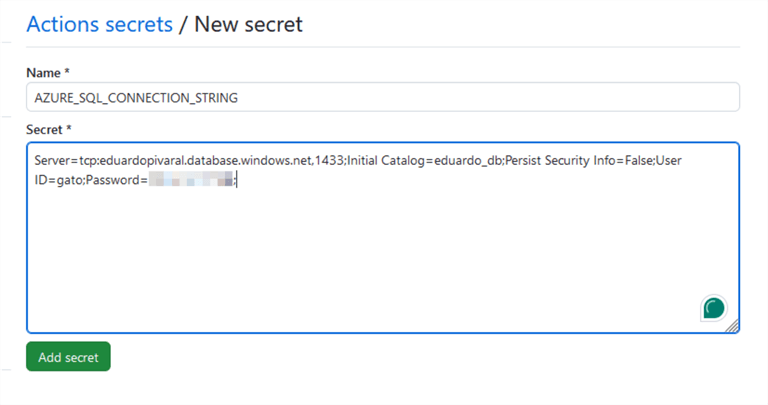
The name of the secret is what you will use in the action to connect to the Azure SQL database.
Setting Up GitHub Action
If you are new to GitHub Actions, you should know that actions are set up by adding a folder named .github/workflows/, and then the actions are declared via .yml files.
Multiple actions are available on the marketplace, or you can define your own. You can programmatically create the actions by just committing the .yml files to the .github/workflows/ folder (create it manually if it does not exist), or you can check and create actions via the GitHub web page.
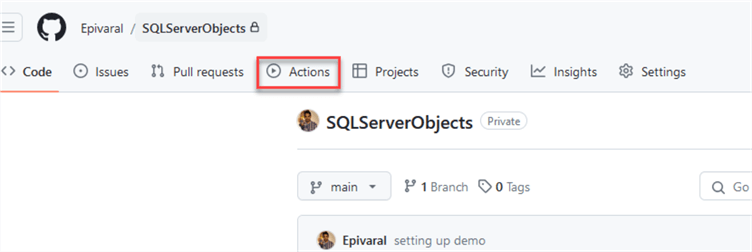
Since this is a beginner tutorial, we will use the website. In your GitHub repository, go to Actions:
You can see multiple actions already available on the marketplace. You can browse them on your own.
To use sql-action, we need to create an empty workflow. Click set up a workflow yourself.

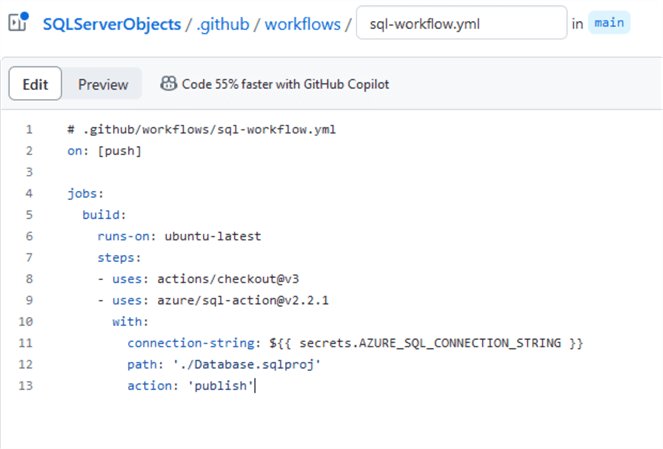
On the next page, name your file sql-workflow.yml. In the code, add the following:
# .github/workflows/sql-workflow.yml
on: [push]

jobs:
  build:
    runs-on: ubuntu-latest
    steps:
    - uses: actions/checkout@v3
    - uses: azure/[email protected]
      with:
        connection-string: ${{ secrets.AZURE_SQL_CONNECTION_STRING }}
        path: './Database.sqlproj'
        action: 'publish'
We need to add a new sqlproj file to deploy multiple scripts since a database project is needed for this, as we will see in a moment. For now, only create the action.
Also, use the secret name created in the previous step.
Your action should look like this:
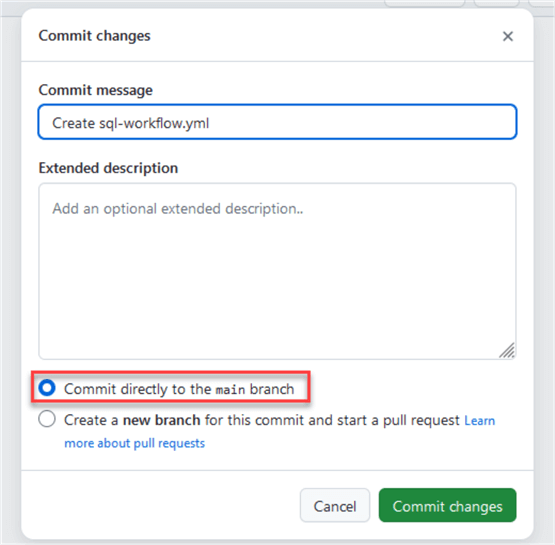
Once you have validated everything is ok, commit your changes, then commit directly to the Main branch:
The workflow will trigger automatically after we deploy the file. So, this execution will fail because the database project file does not exist:

Following the action documentation, add database project file Database.sqlproj, and commit directly to Main:
<?xml version="1.0" encoding="utf-8"?>
<Project DefaultTargets="Build">
  <Sdk Name="Microsoft.Build.Sql" Version="0.1.3-preview" />
  <PropertyGroup>
    <Name>reactions</Name>
    <DSP>Microsoft.Data.Tools.Schema.Sql.SqlAzureV12DatabaseSchemaProvider</DSP>
    <ModelCollation>1033, CI</ModelCollation>
  </PropertyGroup>
</Project>
Your file should look like this. You can commit it from your local branch or via the webpage:

After committing the file, the workflow will trigger again. If everything is set correctly, the workflow will succeed:

If you check the logs, you will see nothing was applied to the database because we have not committed any .sql file yet (new or modified).

Note: The Azure SQL timeouts are because I am using a serverless database.
At this point, everything is set up, our action is up and running, and we are ready to evaluate it.
Evaluating the Action and Validating the Script Deployment
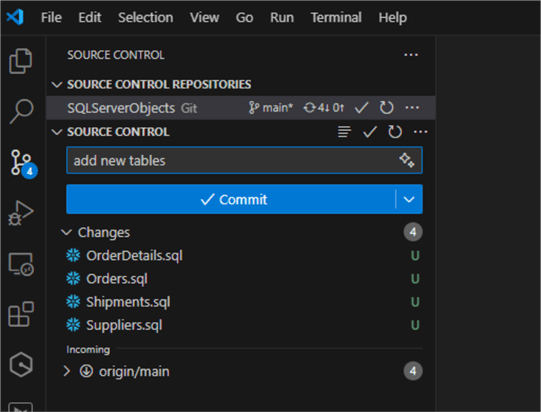
First, we will evaluate a new script. For this, you can add new tables or new files. I am adding new tables:

We need to commit them first:
And then push the changes:
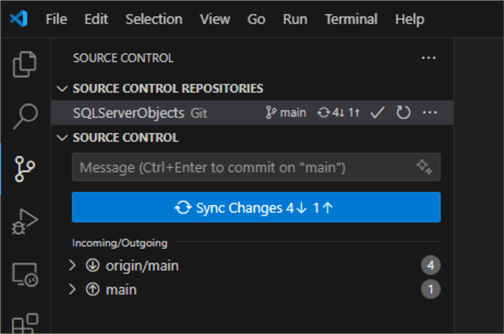
When the push is successful, we will automatically see how the workflow triggers and the objects are deployed:
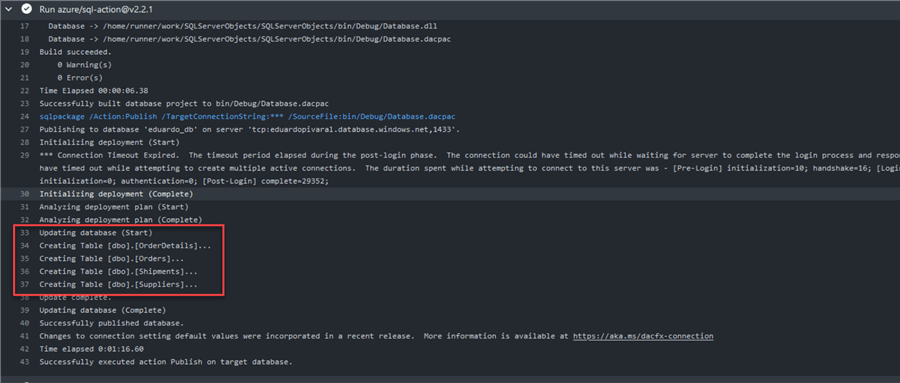
We have validated that only new objects are deployed, not the existing ones.
We can double-check browsing tables directly on the Azure SQL database:

What if we want to modify an existing file? Are the changes deployed as well?
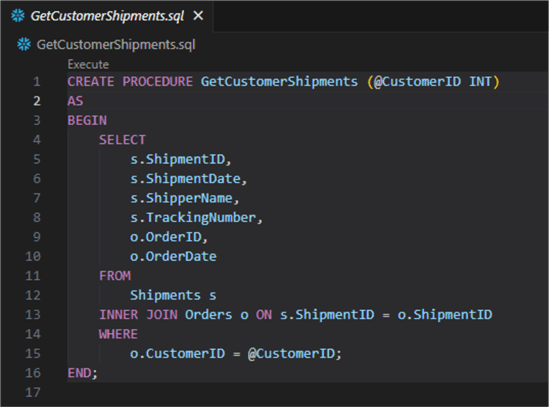
We can create a simple stored procedure (it can be anything you want) and then repeat the previous steps to commit it:
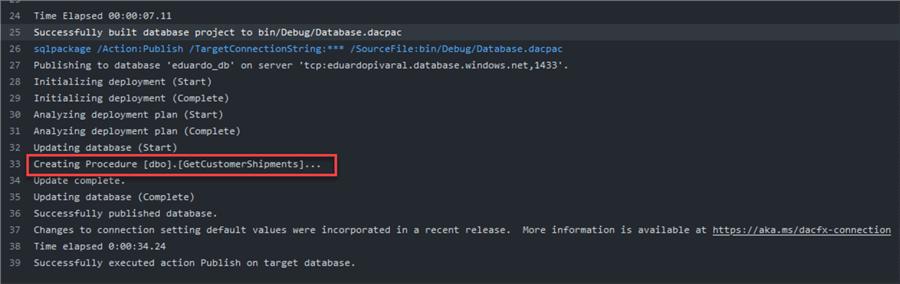
We validate the workflow automatically triggers and create it:
Now, return to the procedure and modify it. For example, you can add or remove a column in the code. Any change is valid if the procedure code changes:
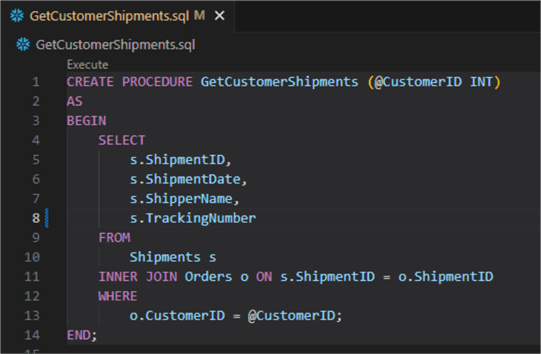
Note: You can see that the procedure code still has the CREATE PROCEDURE at the beginning. But as you will see, when we commit it, an alter is done. This is one of the cool things about this deployment:
OK, but what about tables? Will the table be dropped if we add a new column?
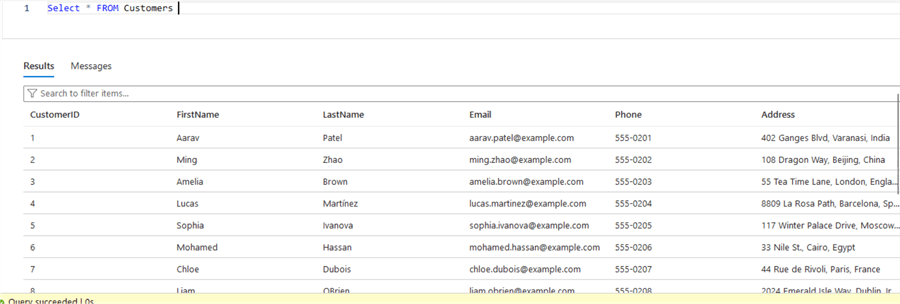
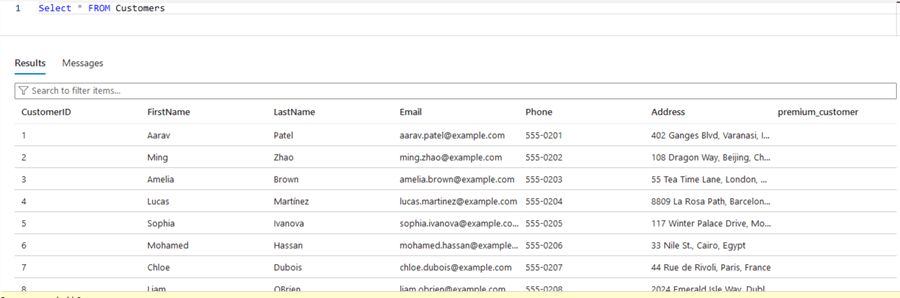
That is another cool feature. Even with the Create statement, the table is being altered, and I can prove it. Let's modify any table that already has data; the Customers table has 15 rows:
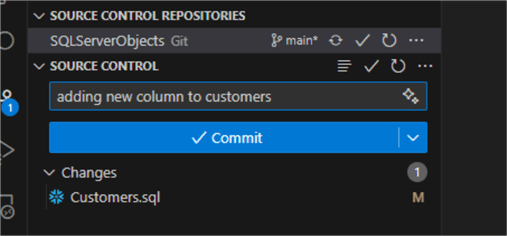
What if we add a new column to it? I have added a premium_customer column at the end:

Then, we commit the changes and push it to GitHub:
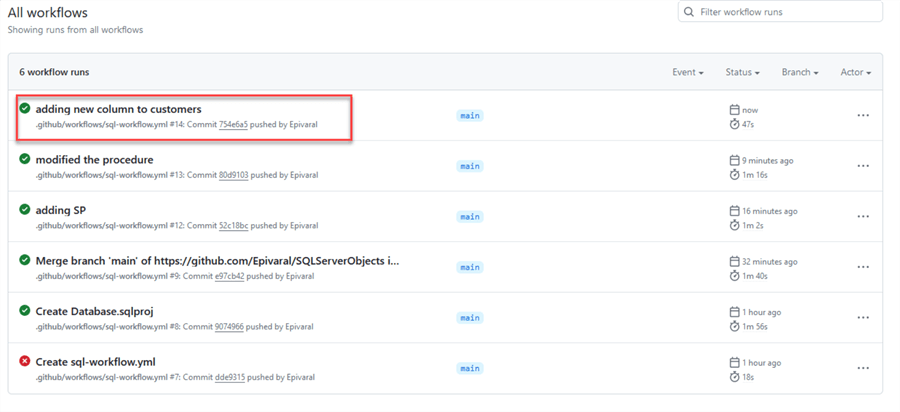
We can see that the execution succeeds even when the table exists:
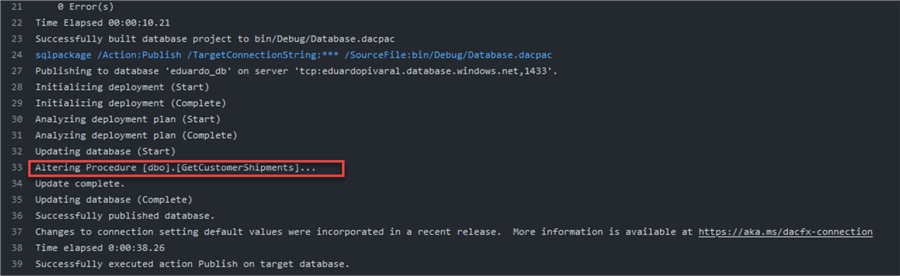
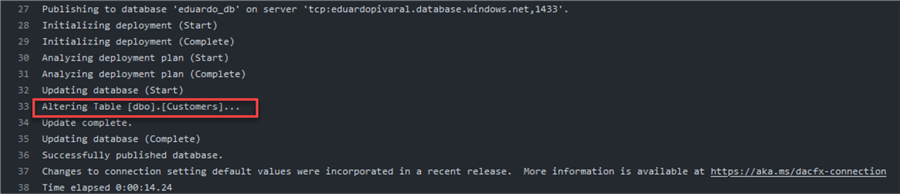
If we check the log, we can see that an ALTER was performed:
If we recheck the table, we can see that the data is still there, and the new column was added:
Next Steps
- GitHub Actions documentation.
- sql-action repo and documentation.
- Getting Started with the SQL Database Projects Extension: how it works and how to optimize scripts so valuable data isn't lost.
- This action can work with other actions configured on your repository so that you can chain multiple action files, such as validations, or IaC deployments.


About the author
 Eduardo Pivaral is an MCSA, SQL Server Database Administrator and Developer with over 15 years experience working in large environments.
 This author pledges the content of this article is based on professional experience and not AI generated.
View all my tips
Article Last Updated: 2024-04-30