By: Eduardo Pivaral | Updated: 2024-06-03 | Comments (2) | Related: > Application Development
Problem
In the modern IT world, globally available data that can be accessed in a secure, fast, and reliable way is vital for businesses to stay competitive and provide great data solutions to their customers. REST API offers a reliable, secure, and platform-agnostic method to share information via the web. Previously, we used third-party tools or coded our own solutions to create our data APIs, which could take us some time to achieve. Whether you are a developer or data engineer working with Azure databases, how can we easily create a data API for our databases without spending excessive time coding the solution or using third-party tools?
Solution
Microsoft offers a tool named Data API Builder (DAB). According to the documentation, it generates modern REST and GraphQL endpoints for your Azure databases. It can securely expose API (Application Programming Interface) endpoints so your data can be accessed using modern techniques from any platform, developer language, or device. It includes a flexible, deeply integrated policy engine, granular security controls, and integration with popular Azure databases.
DAB is open-source and can be executed for development workloads on your machines or production workloads in any cloud. It also supports multiple database engines: Azure SQL, SQL Server, Azure Database for PostgreSQL, Azure Database for MySQL, and Azure Cosmos DB for NoSQL.
This tutorial will guide you through creating your first REST API using Azure SQL database.
Prerequisites
One of the Supported Database Engines: Azure SQL, SQL Server, Azure Database for PostgreSQL, Azure Database for MySQL, and Azure Cosmos DB for NoSQL. I will use an Azure SQL database on the free tier.
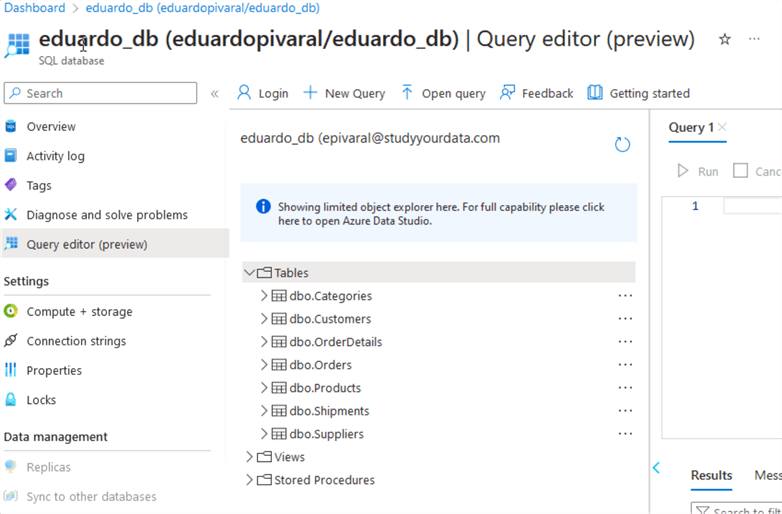
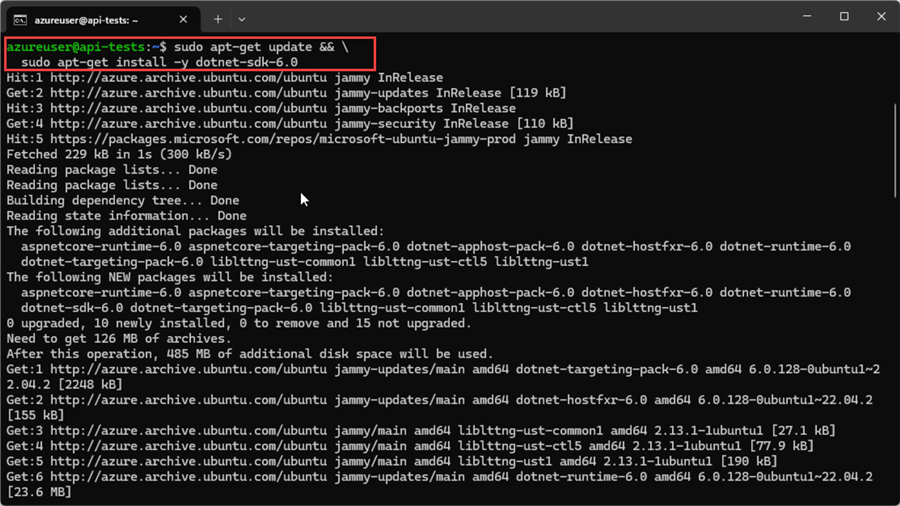
.NET 6: This is the current version at the time of writing; it should support higher versions soon. Since it is platform agnostic, you can use Windows, MacOS, or Linux. For this tip, I will use an Azure VM with Linux. Below is the command I use on my Linux VM for .NET 6:
sudo apt-get update && \
sudo apt-get install -y dotnet-sdk-6.0
Installing Data API Builder
Once you have the prerequisites in place, start using DAB by installing the CLI:
dotnet tool install --global Microsoft.DataApiBuilder

You can validate that it installed successfully by running this command:
dab --version

Note: If you get a "not found" error, try to reload your session. If the issue persists, try reinstalling the tool.
Creating the First REST API
DAB functions as a "web server" on the machine where it runs, meaning it serves REST API calls.
The usual flow for DAB is Init > add/update entities > start service.
It's as simple as that!
Once completed, you can perform API calls to the machine where it is running.
Now, let's go step by step with a simple example. I am using an Azure SQL database and a Linux VM.
We should first initialize our DAB using the init command. If you are using another engine, change it as needed.
The --config flag is used to specify multiple environments, such as dev, QA, and Prod. It must follow this convention: dab-config.<Your-Environment>.json
For this demonstration, my environment will be mssql: dab-config.mssql.json
dab init --config "dab-config.<Your-Environment>.json" --database-type "mssql" –-connection-string '<Your Connection String>'

The next step is to add entities to our REST API; a simple example is adding a table.
With the -c flag, we specify the environment we want to add the entity, in our case dab-config.mssql.json
dab add <MyObjectName> -c "dab-config.<Your-Environment>.json" --source <MyDBObject> --permissions "anonymous:*"

We can use the add or update commands as needed. You can see the full CLI reference here.
Once you are done with the configuration, you can source the dab-config.mssql.json in case you need it deployed on another server or container or to be part of your CI/CD strategy.
We can explore the .json file and make sure everything is correct. In Linux, perform a cat command:
cat dab-config.mssql.json
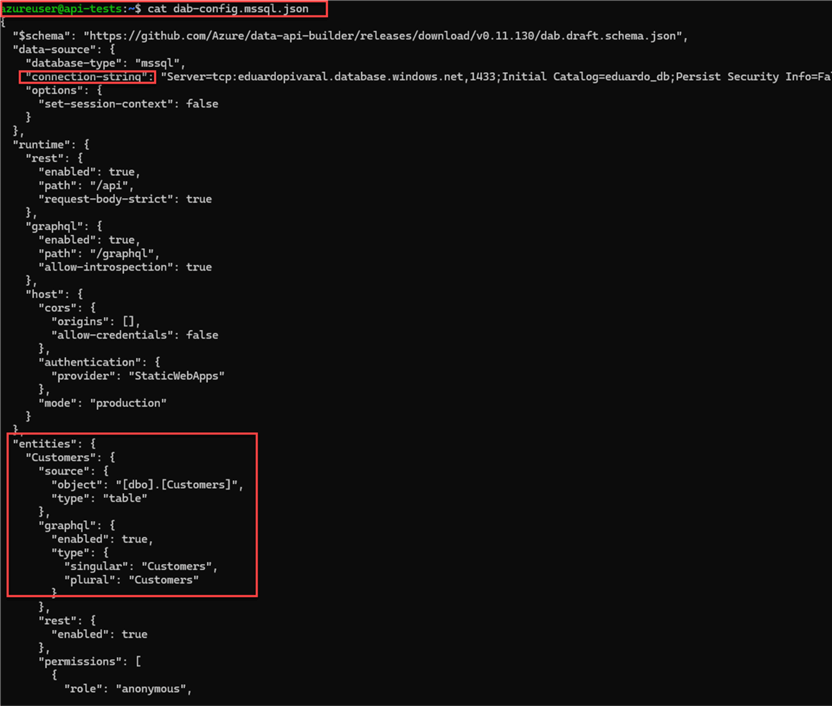
We can see the entity we added and the connection string we initialized for our configuration file are there. As stated earlier, on production environments, you need to source/copy and deploy this file; there is no need to run the init and add/update commands again.
Once the config file is ready, the last step is to run the start command so the API can be consumed:
dab start -c "dab-config.<Your-Environment>.json"

If successful, you will see the input in the image above.
To consume the API, you must use the address marked in the image https://localhost:5001 or use the server IP address so it can be accessed from another location. You must configure firewalls and access rules properly, depending on the underlying infrastructure DAB is running (VM, container, on-premises).
Testing It!
We can test it on the same machine by opening another session. If the session where the DAB Start command is stopped, you will not be able to consume the API.
One of the easiest ways to test if you can access the API is via a curl command:
curl -v https://localhost:5001
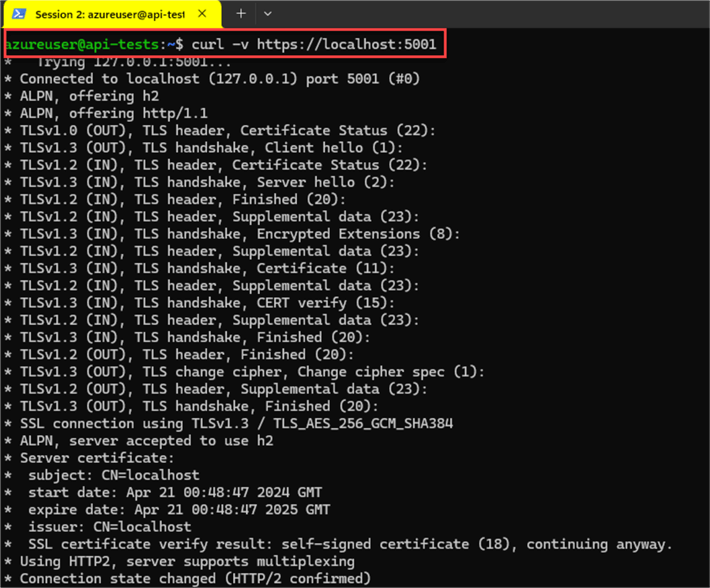
The -v flag indicates that we want verbose output.
If you want to make it simpler, remove the flag, and you should see only the Healthy text:

The last step in our testing is to consume the API.
Do you remember that we set up a Customer entity? We can try to call it by issuing a GET command with curl.
The basic structure to call an entity should be https://host:5001/api/<Entity>
curl -i -X GET https://localhost:5001/api/Customers
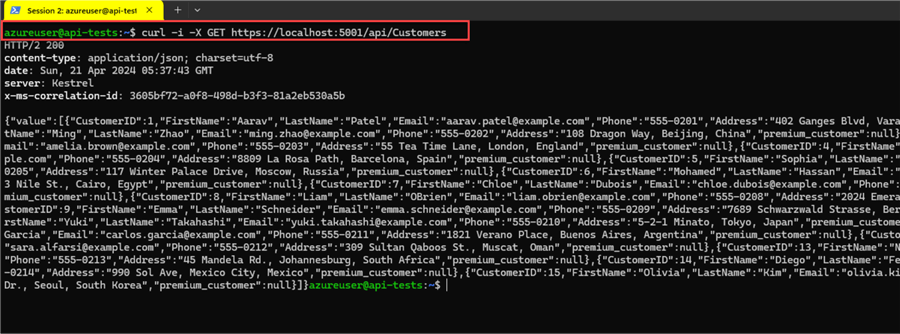
Note: If you have https issues with curl, you can use the -k flag to mark the connection as insecure.
If we check the original session, where the start command is executing, we can see the calls we made so far:
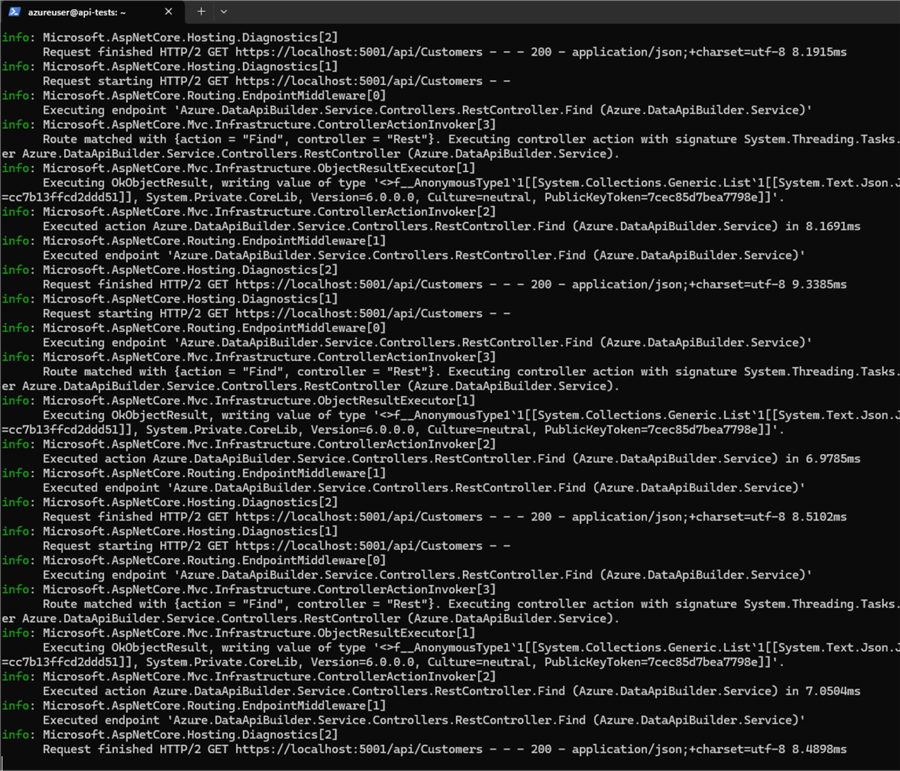
Using jq, we can customize the API calls to see only the relevant data we want.
For example:
curl -s https://localhost:5001/api/Customers | jq '.value[0] | {CustomerID, Email}'

curl -s https://localhost:5001/api/Customers | jq -c '.value[] | select( .Phone | contains("21"))'

Next Steps
- Check Data API Builder documentation.
- DAB can be deployed on VMs, Containers, and on-premises servers, so you can use the one you want, which may be different from this example.
- You can use any programming language that supports REST API calls so you can start working with your API.
- If you want to secure your connection string, you can set up environments. If you use them, remember to exclude .env files from your git repository.
- Stay tuned for more tips where we will see more examples and configurations.
About the author
 Eduardo Pivaral is an MCSA, SQL Server Database Administrator and Developer with over 15 years experience working in large environments.
 This author pledges the content of this article is based on professional experience and not AI generated.
View all my tips
Article Last Updated: 2024-06-03


