By: Rajendra Gupta | Updated: 2024-08-15 | Comments | Related: > Amazon AWS RDS
Problem
Suppose you have an AWS RDS SQL Server database and need to back up the database and copy\store the backup file locally on your on-premises server. Is it possible to backup the RDS instance and store the backup locally? Yes, let's figure it out in this tip.
Solution
Amazon RDS database supports native backups and restore capabilities. It uses the native backup format files (*.bak) and stores them in Amazon S3 storage. You can take manual native backup and download the backup file from the S3 bucket to use it wherever you need.

The following components are involved in this process:
- AWS RDS for SQL Server Database with option group SQLSERVER_BACKUP_RESTORE
- AWS Simple Storage Service(S3)
- IAM policy to access the S3 bucket
These are the steps:
- Create database on AWS RDS for SQL Server (not needed if you already have in place)
- Create a Simple Storage Service (S3) Bucket (not needed if you already have in place)
- Create an Option Group for SQLSERVER_BACKUP_RESTORE
- Modify the DB Instance to use Option Group for SQLSERVER_BACKUP_RESTORE
- Create Backup of RDS Database and Download
1 - Create database on AWS RDS for SQL Server
You can use the steps outlined below to deploy an RDS instance if you don't already have one setup.
Login to the AWS portal and follow these steps.
Step 1
In the AWS portal, go to services and select RDS and then click Create database.

Step 2
Choose the database creation method - Standard create.

Step 3
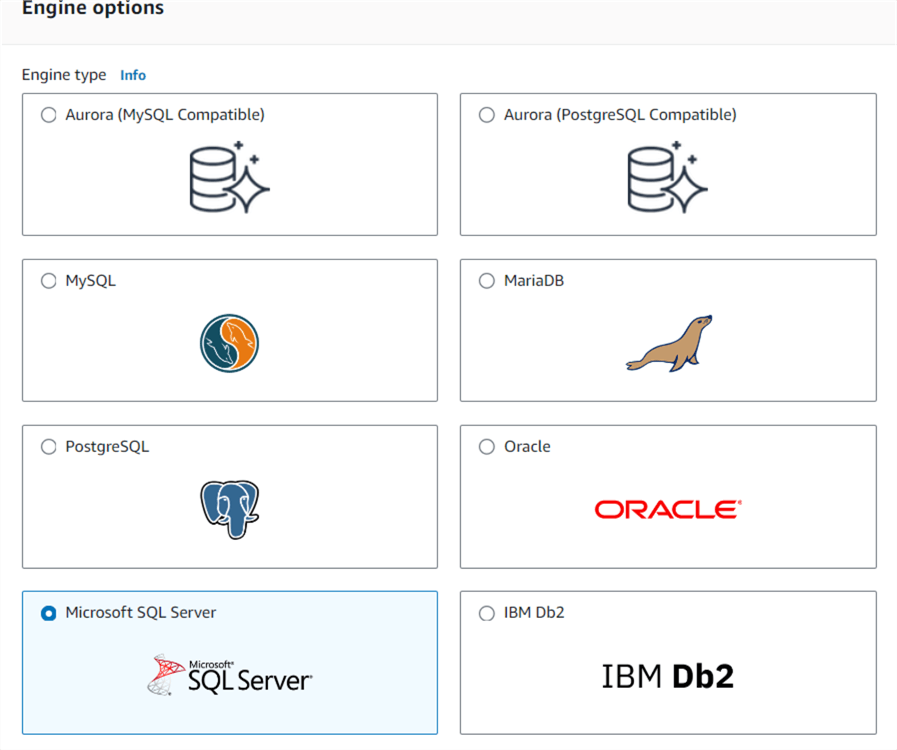
Choose Microsoft SQL Server from the list of engine options.
Step 4
Choose the database management type as Amazon RDS.

Step 5
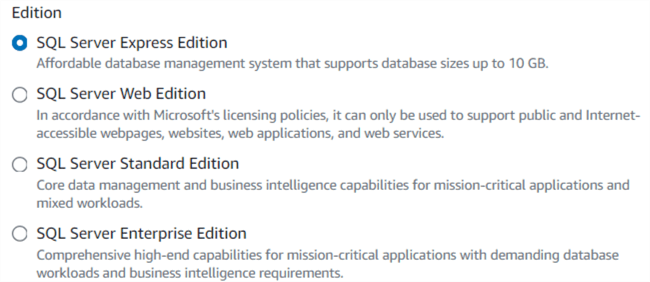
Select the requirement SQL Server edition. For this demonstration, we can use the Express Edition.
Step 6
Select the SQL Server version from the list of SQL Server 2016 to 2022 versions listed. Let's choose SQL Server 2022 16.00.4120.1v1

Step 7
Choose the template from Production or Dev\Test. Production supports high availability and consistent performance. Let's use Dev/Test for the demonstration, which suits the development environment.

Step 8
Enter a DB instance identifier. This identifier (name) should be unique across your AWS account and region.

Step 9
Enter the master user name for the RDS instance. Here, we specify sqladmin.
You can manage the sqladmin credential using AWS secret manager or self-managed. In self-managed mode, you can use an auto-generated password or specify your password. Let's use the self-managed with auto-generated password in this tip.
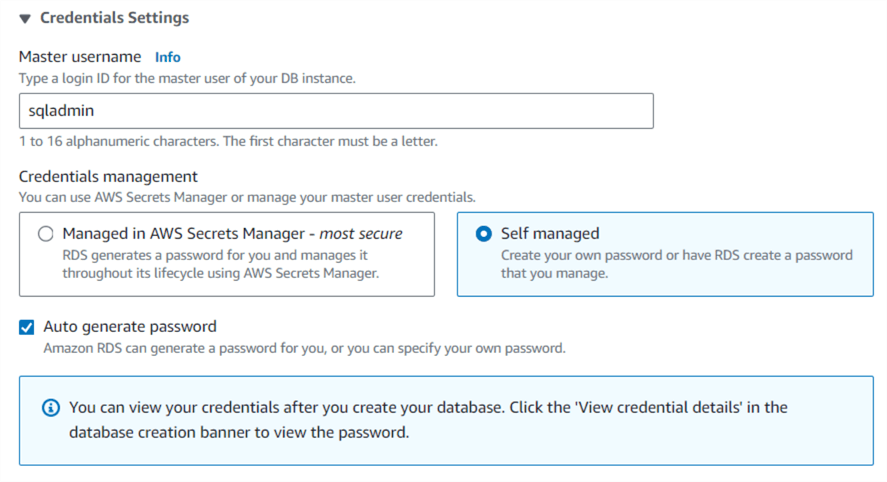
Note: If you use AWS Secret Manager, you must pay additional charges.

Step 10
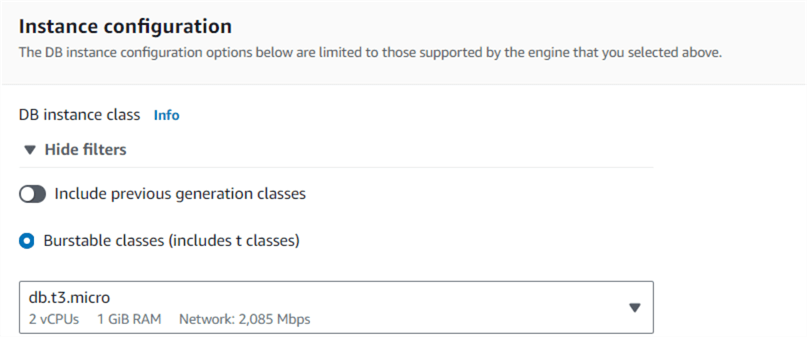
Choose the instance configuration based on the vCPU, GiB RAM, and network Mbps. The available instance class depends on the Standard\Enterprise\Express SQL Server edition. You should choose the instance class carefully to avoid high costs.
Step 11
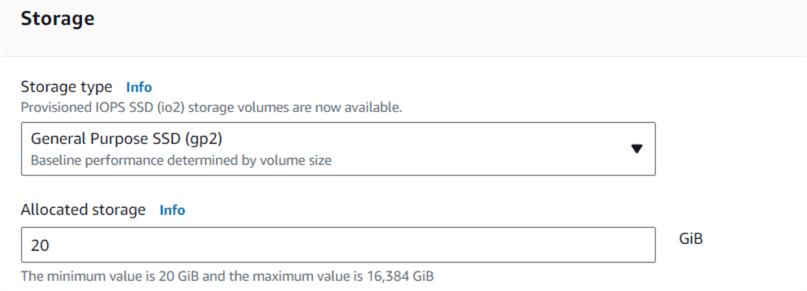
Choose the storage type and allocate storage in the specified range.
Step 12
Enable Public access to assign a public IP address to the RDS instance.

Step 13
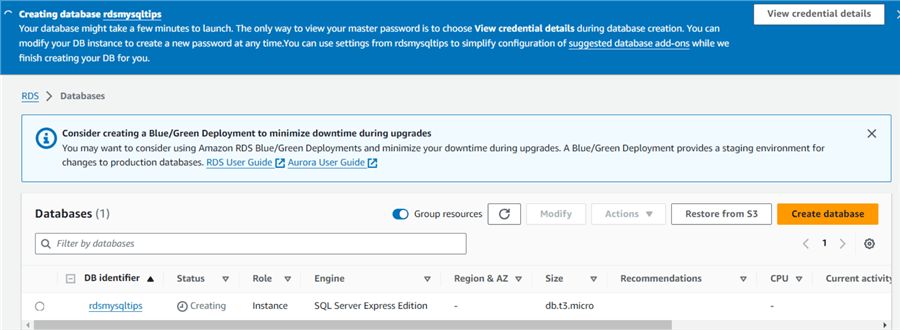
Click Create database to start the RDS deployment.

2 - Create a Simple Storage Service (S3) Bucket
Step 1
Navigate to the S3 service in the AWS web portal and click Create bucket.

Step 2
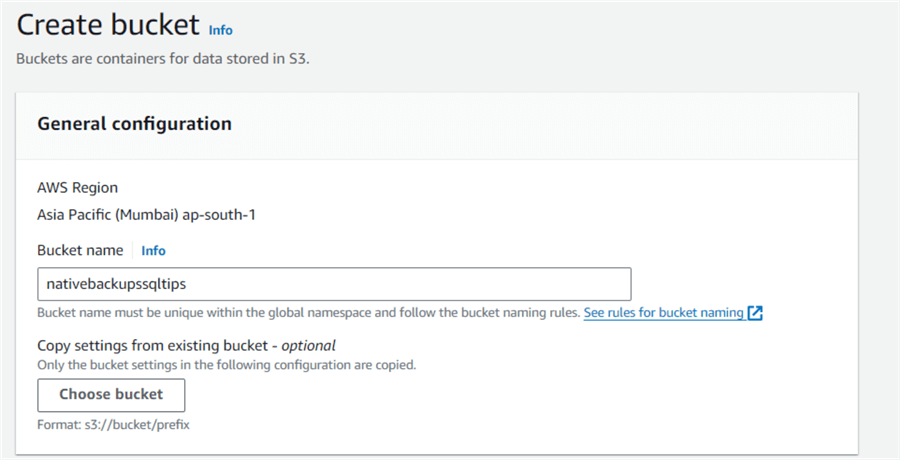
Enter a unique bucket name.
Step 3
Click Create bucket at the end of the page, and the bucket will be created quickly.

Step 4
Select the S3 bucket, click Copy ARN, and save it in Notepad. We will use this ARN to backup the database. In our example the ARN is arn:aws:s3:::nativebackupssqltips

3 - Create an Option Group for SQLSERVER_BACKUP_RESTORE
Step 1
Click on Option Groups in the RDS section of the AWS portal and this will list all available options groups for the RDS instance.

Step 2
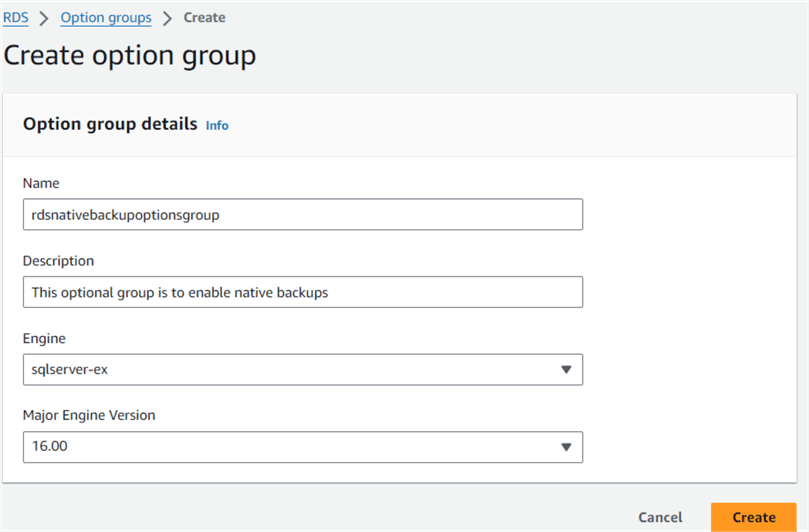
Click on Create Group and enter the following information:
- Name: name for the new group
- Description: enter into to help you identify the purpose
- Engine: choose the RDS engine. For example, my RDS instance is on Express edition; therefore, choose sqlserver-ex.
- Major Engine Version: choose the major version for RDS. I deployed SQL 2022 RDS; therefore, I chose the major version as 16.00
Step 3
Click Create. It creates an option group with default properties.

Step 4
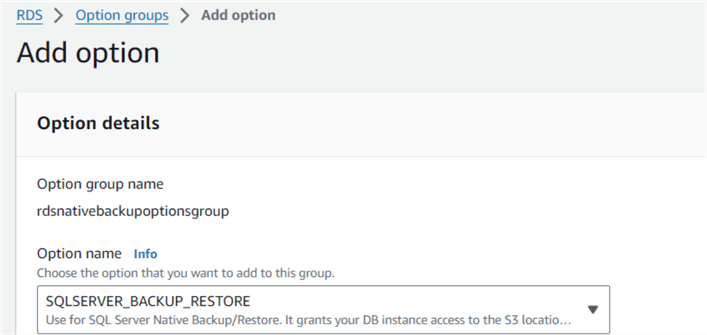
Select this new option group and click Add option.

Step 5
Select the option SQLSERVER_BACKUP_RESTORE, as shown below.
Step 6
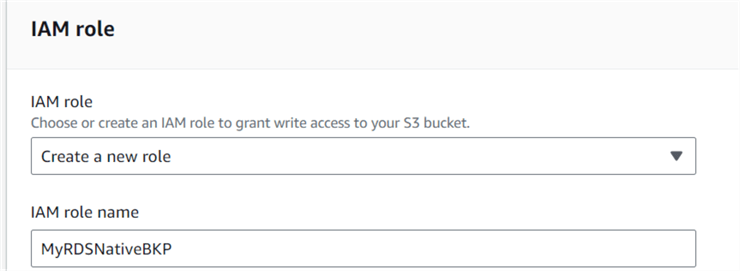
If you have an existing IAM role to access the S3 bucket, select it from the drop-down. Otherwise, create a new role and provide an appropriate IAM role name.
Step 7
You can apply the changes immediately or during the next maintenance window, as displayed on the page.

Let's choose immediately and click on Add Option. You get a notification as shown below.
Step 8
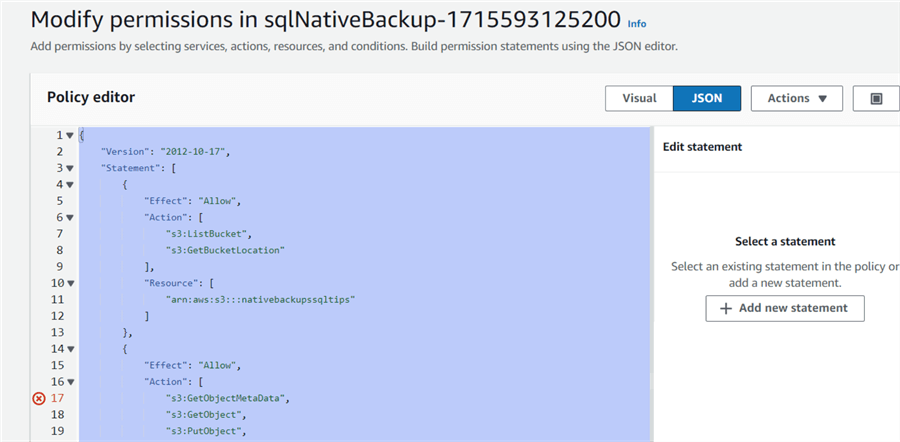
You can go to IAM and check the role policy created by the AWS option group.

Click on the role to check the IAM policy and its assigned permissions.

Click on the policy name to get the permissions in JSON format.
4 - Modify DB Instance to Use Option Group for SQLSERVER_BACKUP_RESTORE
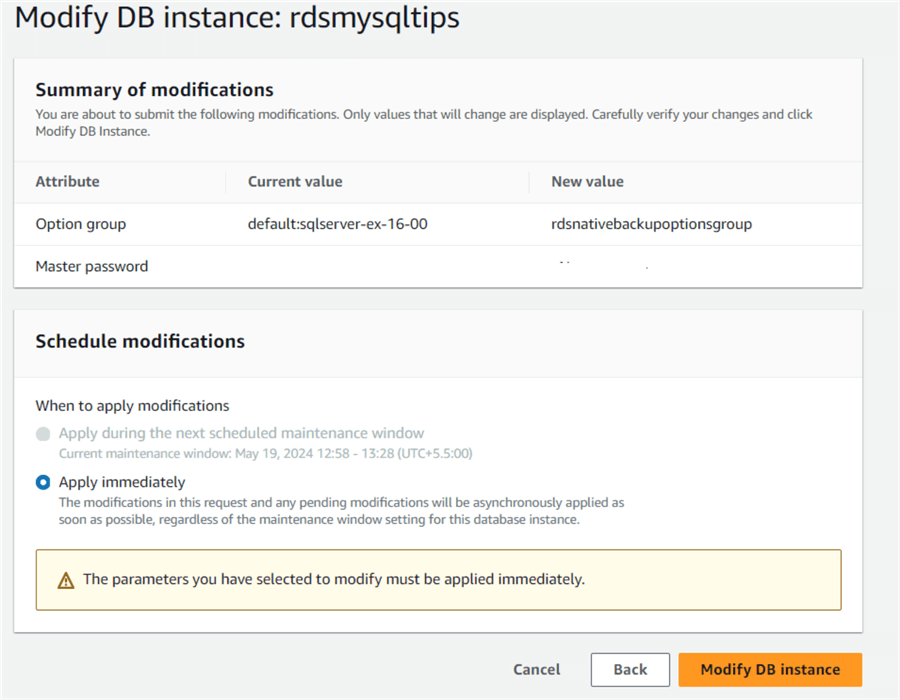
We need to associate the option group SQLSERVER_BACKUP_RESTORE with the RDS instance for native backups and restores.
In the RDS portal, select the instance and click Modify.
Note: If your RDS instance is temporarily stopped, you need to start it first to modify the instance.

It opens a page to modify the DB instance properties. Review the modifications and apply the changes. As shown below, the parameters selected require immediate modification.
Click Modify DB instance and wait for the instance to be available.

5 - Create Backup of RDS Database and Download
Step 1
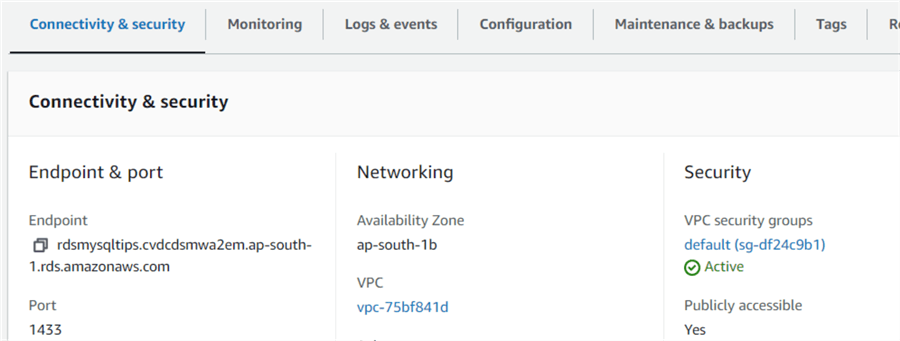
Connect to the RDS database using SQL Server Management Studio (SSMS) using the endpoint and credentials. You can copy the endpoint from the Connectivity & security page of RDS, which is shown below.
Step 2
To take a native RDS database backup, we need to use the msdb.dbo.rds_backup_database stored procedure. Let's use it to take a backup of the mssqltips database.
In this script, change the following parameters:
- source_db_name - enter database you want to backup
- s3_arn_to_backup_to - use the ARN value that you got from above and add file name (i.e. mssqltips.bak)
exec msdb.dbo.rds_backup_database
   @source_db_name='mssqltips',
   @s3_arn_to_backup_to='arn:aws:s3:::nativebackupssqltips/mssqltips.bak',
   @overwrite_S3_backup_file=1;
After this is run, it returns a task ID for the RDS backup, as shown below.

Step 3
You can use the stored procedure below to check the status. As shown below, native backup is IN_PROGRESS.
exec msdb.dbo.rds_task_status @db_name='mssqltips';

Once the task status changes to SUCCESS you can download the backup.

Step 4
Go to the S3 bucket you used for the backup file, select this file, and click Download.

Choose a destination folder and it will download the native backup that can now be used to restore on a different SQL Server instance. Keep in mind you will need to use the same version of SQL Server or later for the restore, you can not restore a SQL Server backup to a prior version of SQL Server.

Important Points
- You cannot take a native backup during maintenance windows or while automated backups run.
- Users cannot take native log backups for RDS databases.
- If the backup size exceeds 5 TB, you need to split the backup into multiple files.
Next Steps
About the author
 Rajendra Gupta is a Consultant DBA with 14+ years of extensive experience in database administration including large critical OLAP, OLTP, Reporting and SharePoint databases.
This author pledges the content of this article is based on professional experience and not AI generated.
View all my tips
Article Last Updated: 2024-08-15


