By: Hristo Hristov | Updated: 2024-08-27 | Comments | Related: > Application Development
Problem
Companies that build data products powered with data from production databases require a scalable and reliable method of exposing that data to their data products. The problem is that constantly querying production databases can have performance impacts on the database and its applications. For example, let us say your company is an online ticket marketplace. When sellers log in, they are shown a dashboard with their sales and stock availability insights. Sellers expect and need this data to be up-to-date and in real-time. To achieve this and avoid any impact on the production database, the company must replicate the sales and stock availability data from its production database to a data warehouse. Then, they must connect the data warehouse to its client-facing dashboard or application. Using log-based CDC database replication avoids any performance impact on the production database. This all needs to happen in real-time to ensure the dashboards are current. So, how can this data integration use case be accomplished?
Solution
Integrate.io is the platform and go-to choice for high-velocity data replication with CDC (change data capture) and Extract, Transform, Load (ETL) support. The platform is a low-code data pipeline and transformations suite with support for intuitive drag-and-drop data pipeline authoring, 220+ data transformations, and 20+ source and destination data connectors covering the major on-premises and cloud-based database providers. Integrate.io resolves numerous business intelligence and technical data management challenges:
- Data Latency – As low as 1 minute latency between line of business systems and analytical systems.
- Scalability – Ability to seamlessly scale with high volumes of enterprise data without impacting line of business systems.
- Simplicity – Intuitive wizard to set up data pipelines and a management interface.
- Automation – Full pipeline automation with monitoring of the business processes.
- Performance– High-performance CDC and replication without impacting line of business systems.
- Security – Secure transport data among systems with confidence.
- Support – Proactive support to help with the initial setup and changes as your business evolves.
To display the capabilities of the data integration solution, we will focus on the CDC functionality. With this functionality, we can develop a fast, secure, and reliable pipeline for data replication from a transactional database to a cloud data warehouse based on the following steps:
- Source system simulation
- Source setup on Integrate.io
- Destination setup on Integrate.io
- Power BI reporting
While the focus is on the final data product that Integrate.io creates, I have chosen Power BI to visualize the effect of the data arriving in real-time in a user-friendly way.
Scenario
To simulate a real-time transactional system, I imported the Wide World Importers database from Microsoft. Then, I defined this simple query, which produces a consolidated result of orders and order lines:
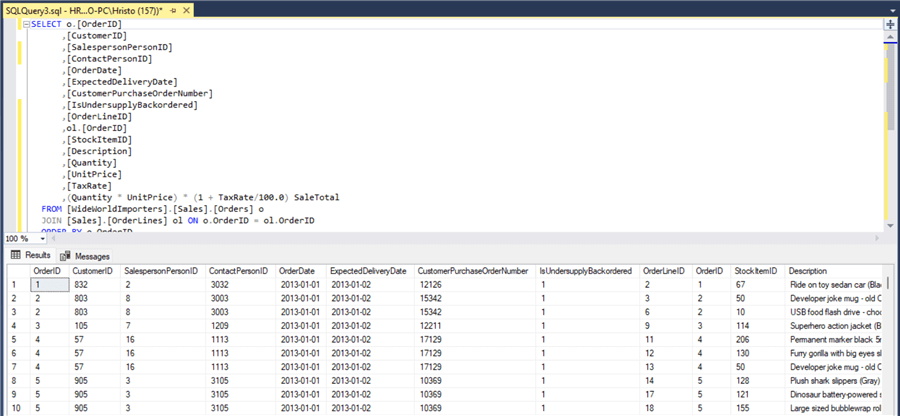
Next, I wrote a Python script that runs this query every 5 seconds and inserts every next row into a "staging" table, LiveOrdersData, on an Azure SQL Server relational database. This process simulates the arrival of the latest sales data in an OLTP system at regular 5-second intervals and will serve as the source data to be plugged into Integrate.io for CDC and replication. With this scenario in mind, let us see how to leverage the platform's capabilities to make it happen.
Set Up the Source
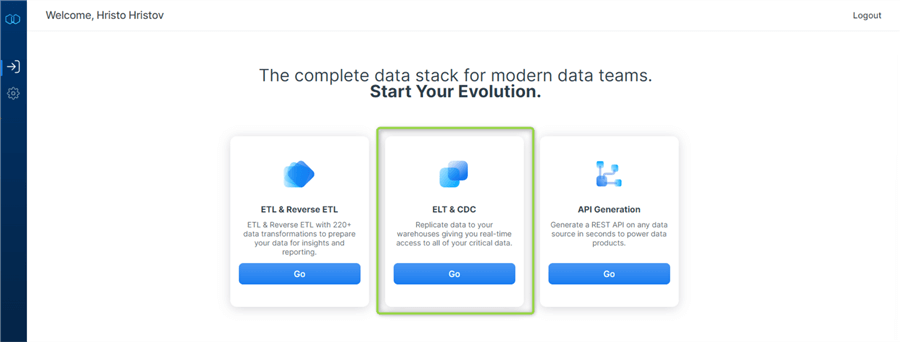
Once you have signed up for Integrate.io, go ahead and sign in. You will be welcomed by the following screen. Click Go on the ELT & CDC card, which will take you to your list of pipelines.
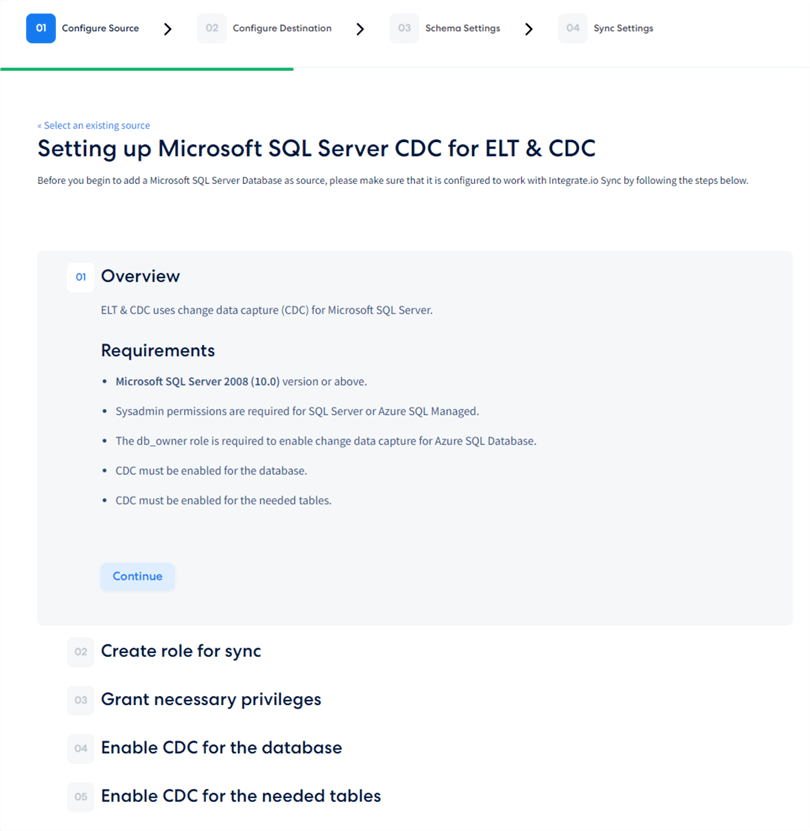
At this point, the main configuration menu will unfold before you. Here, we see a well-organized list of steps to set up the data source correctly. The first tab gives us an overview of the requirements. Most importantly, CDC must be enabled on the databases and the table:
Configure the Source
Source Details
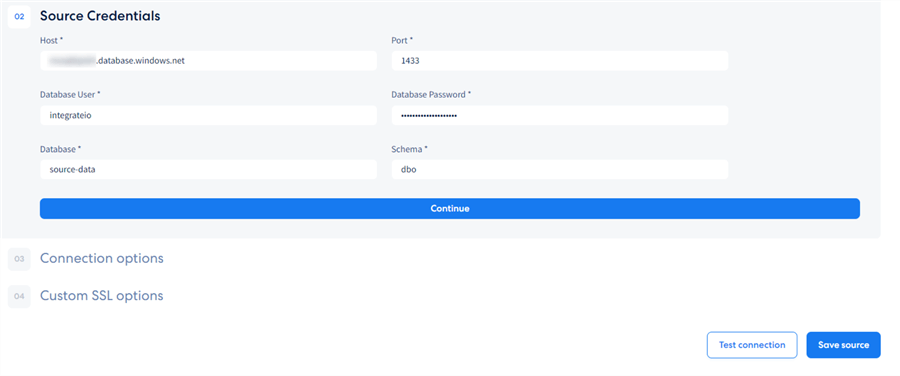
After following the detailed source configuration instructions, we need to ensure the connection works. The process starts with giving the source a name and then filling in the connection credentials that Integrate.io generated for us previously (or using ones you prefer):
At this point, our source configuration is ready! Integrate.io has guided us in a well-structured and thoroughly documented process to configure our CDC-enabled Azure SQL data source. In case new tables appear, they will also be automatically detected and synchronized.
Set Up the Destination
For this scenario, I will use a Snowflake data warehouse destination. Snowflake is a powerful data-as-a-service (DaaS) platform that can efficiently store vast amounts of data. Using Integrate.io to create your data pipeline makes tapping into data stores quick and easy, even for non-technical users. If you have previously signed up for Snowflake, you can proceed with setting up the connection from Integrate.io.
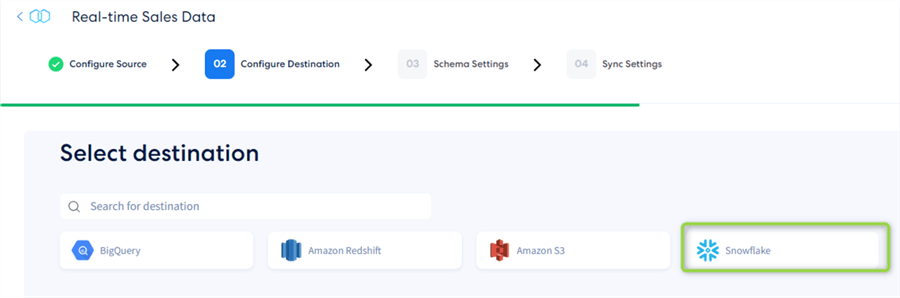
Select Destination
First, select the destination type:
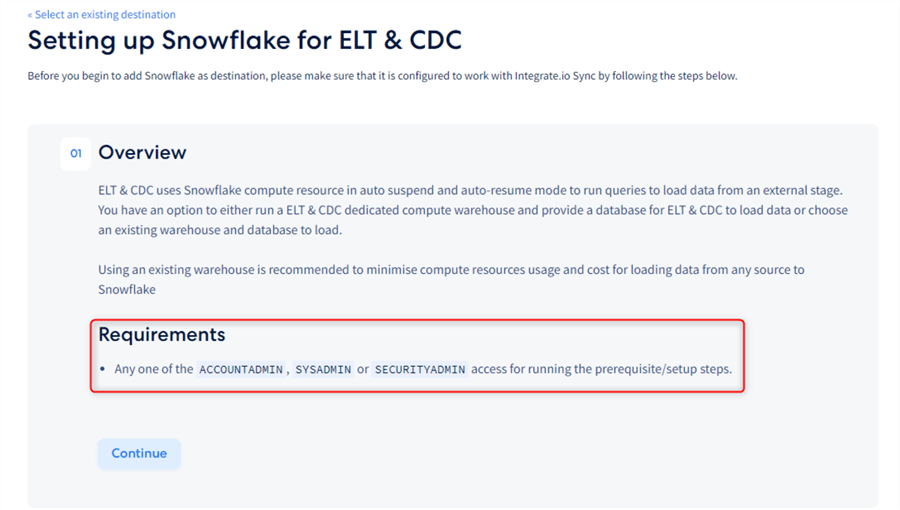
Overview
Note: The requirements state that you need to be an admin to execute the setup steps, as seen in the image below.
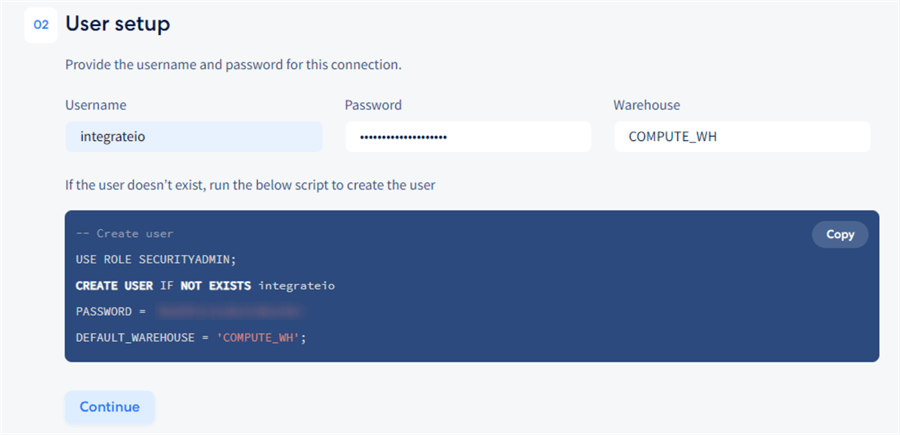
User Setup
Next, we must create an integration-level user that Integrate.io will use to write to the data warehouse:
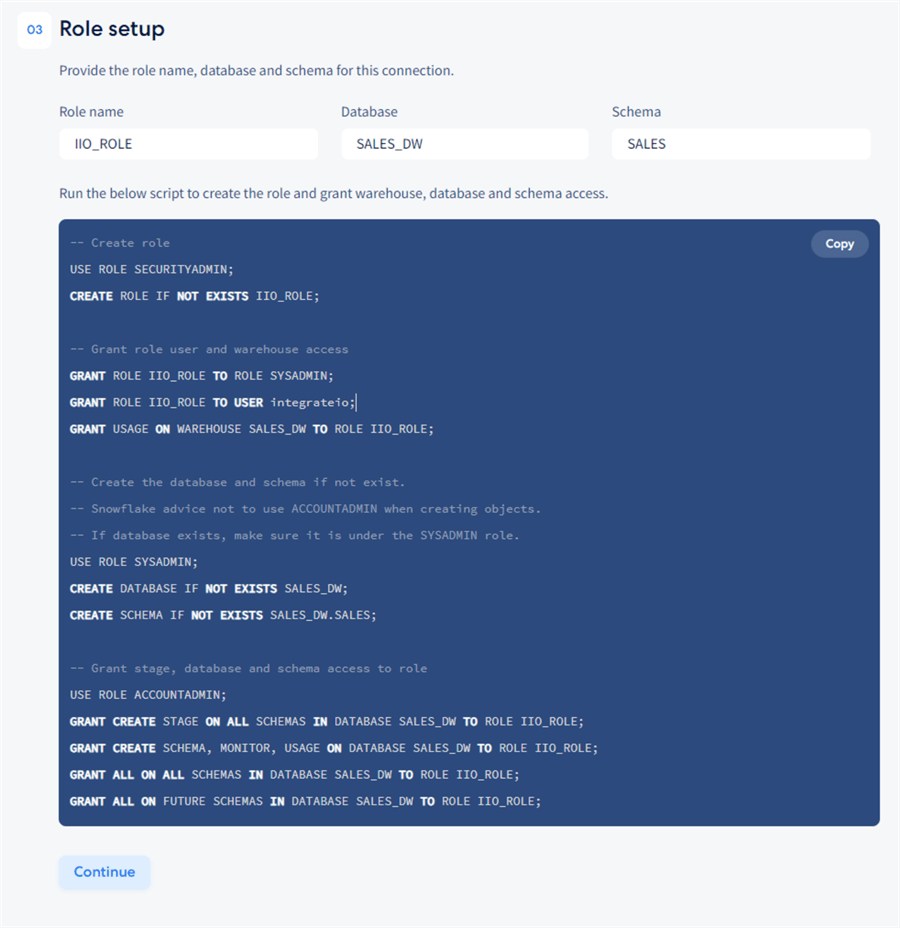
Role Setup
Next, we must set up the role. Specify the name of the role, database, and schema:
Storage Integration Setup
The fourth and final step is the data storage integration setup:
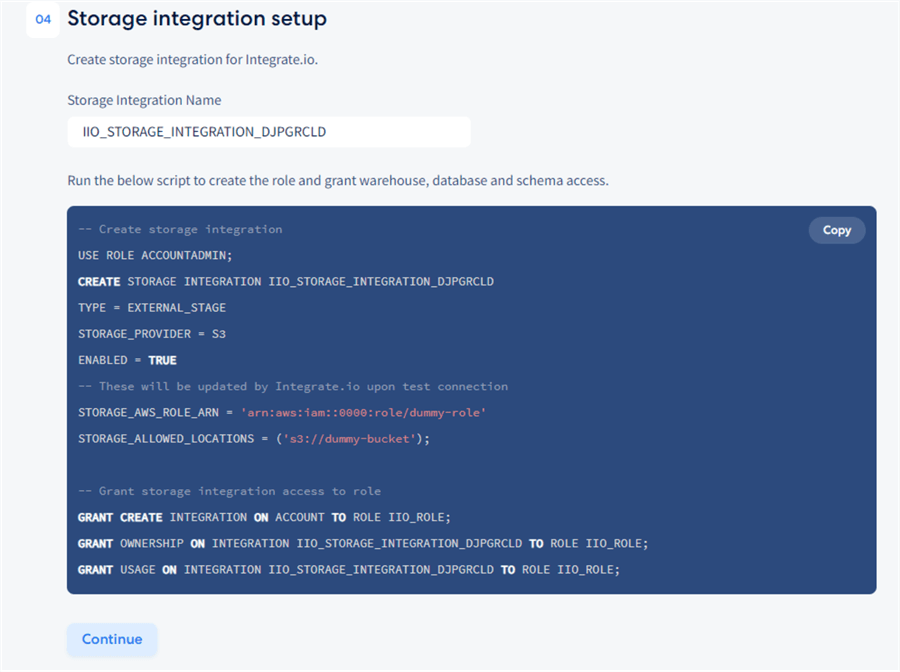
This crucial step is required because, under the covers, Integrate.io uses Amazon
S3 storage as a buffer between the source and the target system. From Azure SQL, Integrate.io
will serialize the data to an avro format and store it in S3, a setup particularly
suitable for streaming analytics, data replication, and big data processing scenarios
like this. Integrate.io will assign the value for STORAGE_AWS_ROLE_ARN and
STORAGE_ALLOWED_LOCATIONS
at run-time, so there is nothing extra the user must do to make the pipeline work.
Applying Transformations
There is also an option to apply certain transformations on the source data before it reaches the destination. Specifically, Integrate.io supports the replacement of values in a column. To apply this rule, you must contact the support team and provide a Regex pattern for the string to find and a replacement string. Other transformations are not supported due to following the best practices of the typical architecture of data replication to a data warehouse. In such an architecture, more extensive transformations are implemented in the destination only after the data arrives with ETL Tools, e.g., when creating a curated dataset out of a staged dataset.
Configure the Destination
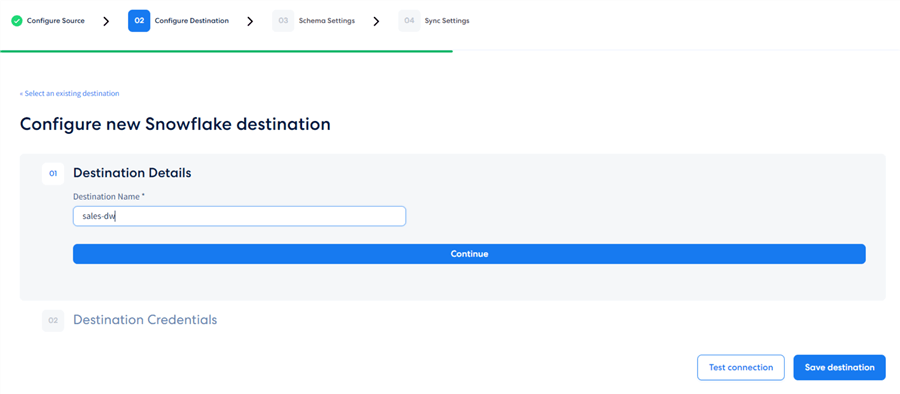
Destination Details
Integrate.io is now guiding us through the final configuration steps for the destination. We must provide a name for the destination:
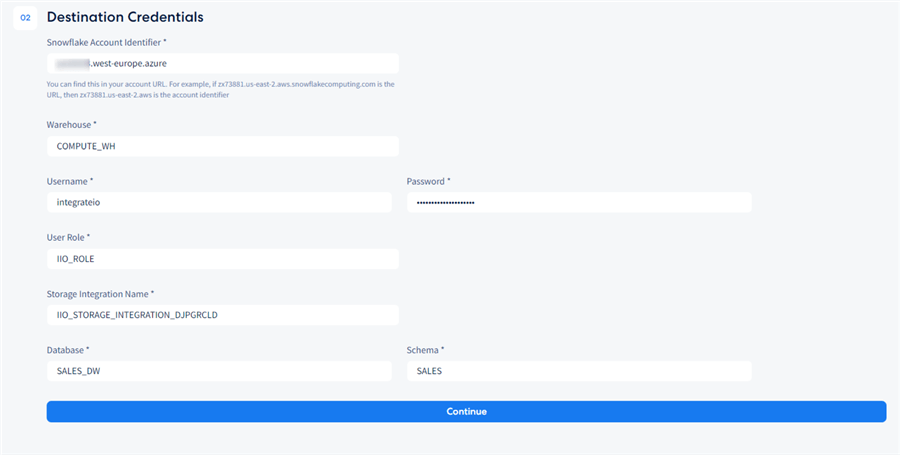
Destination Credentials
Fill in the fields with the connection attributes that we now have, such as username, password, role name, storage integration name, database, and schema:
Configure the Pipeline
At this point, we have successfully configured the source and destinations and tested the connectivity. We are now at the schema settings stage. Integrate.io gives us a list of the available tables for syncing:
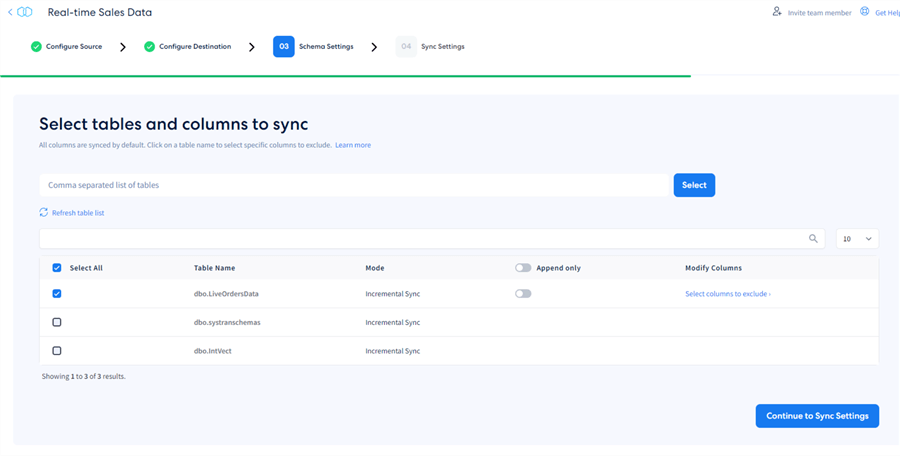
Here, I will select the table needed without applying any additional settings. It is that easy to get started with real-time CDC! We have the option to "append only" to avoid having deletes replicate, which is irrelevant in this scenario. From this interface, we can modify the columns we want to exclude from syncing. Here, I will exclude the ContactPersonID:
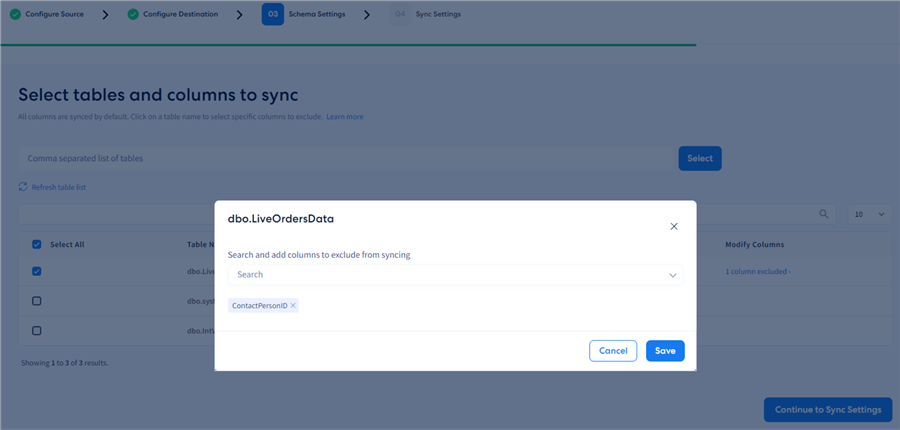
You will notice the column selection dropdown menu will not contain the primary key column. Therefore, tables without a primary key will not be available for selection for CDC replication in the table list. Tables that do have a unique index but no primary key will be blanked out as well, although CDC may be enabled for them:

Sync Settings
The final stage of the pipeline setup is the sync frequency setting. To demonstrate the platform's capabilities, we will use the highest frequency - 1 minute. This setting will make the pipeline run and check for changes every minute.
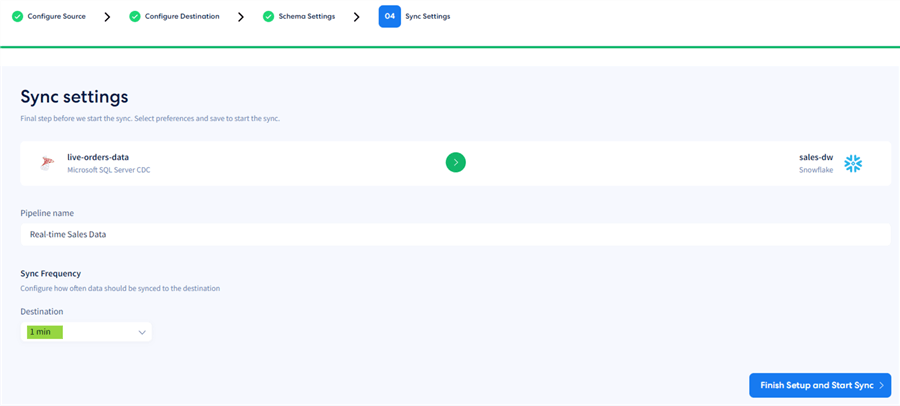
Click Finish Setup and Start Sync. The initial sync will commence:

After the initial sync completes, the pipeline will execute every minute to sync only the new rows. Once the pipeline is running, we get access to a handy overview. Here, we see the main pipeline metrics, such as last sync and number of rows that were synced:
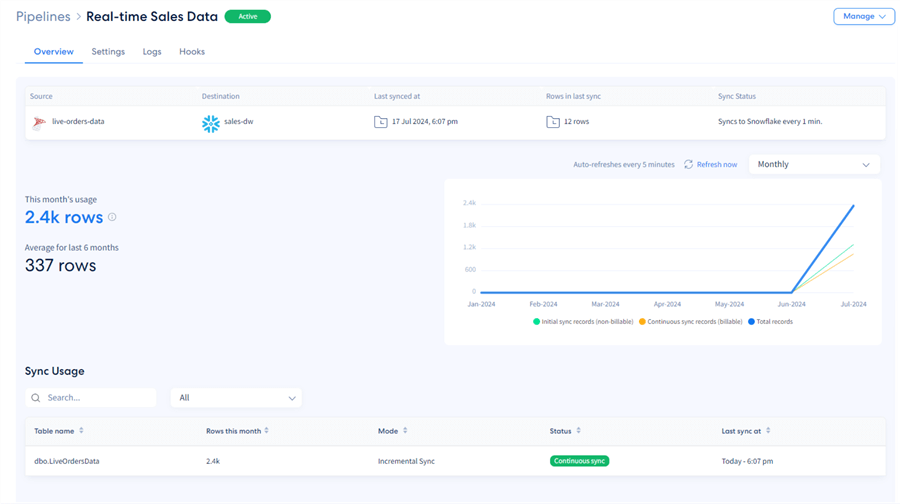
Since we generate new data every 5 seconds, we should get about 12 new rows every minute (60 / 5 = 12):

Leverage the Data
Having the 1-minute pipeline set and running, Integrate.io will now have the data available in Snowflake for analytics or other scenarios, such as application integration, fueling other line of business apps with real-time data, or building curated data products. For this demo, let us examine the data by building a Power BI report.
Power BI Data Source
To start, configure the Snowflake data source in Power BI and log in with the previously configured user as suggested by Integrate.io. Next, from the familiar Power BI data navigator, pick the table needed:
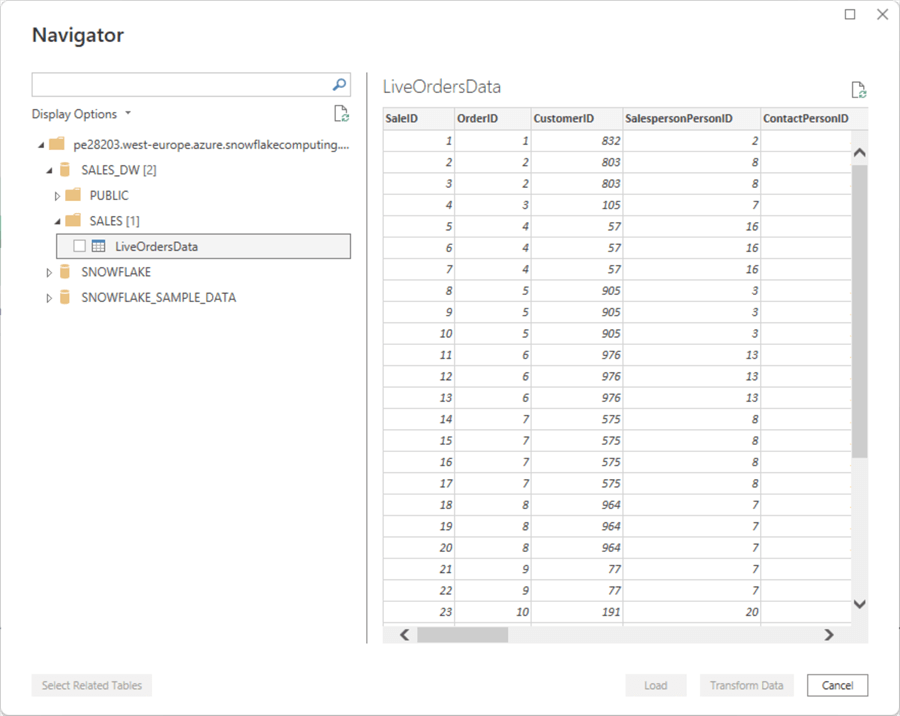
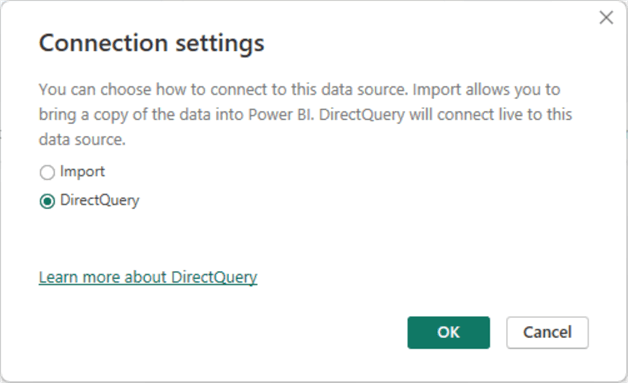
Importantly, we will utilize the DirectQuery connection mode to showcase the data arriving every minute:
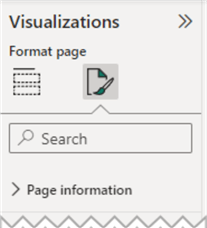
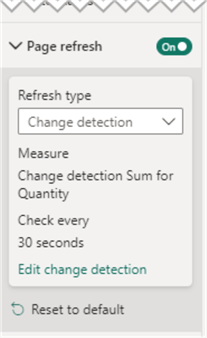
Next, click on the blank report canvas, open the Visualizations pane, and expand the Page refresh tab. Set it to On and configure it like this:
- Change detection of the total Sum for Quantity (i.e., overall number of products sold).
- Check every 30 seconds.
This configuration instructs Power BI to refresh the page every 30 seconds so new data is immediately reflected on the report visuals as Integrate.io continuously syncs to Snowflake:
We can observe the result of the pipeline run in the following animated screenshot. Notice how the total sales quantities and sum of total sales in USD evolve as the new data comes in (speed has been increased 3x):
What are Customers Saying?
Since Integrate.io started offering its CDC and real-time data replication, customers have loved the time savings the platform enables for decision-making. Geoff Harcourt, CEO at CommonLit, an EdTech organization and Integrate.io customer, stated: "Our engineers are able to work on the projects and obligations they're assigned to, knowing they won't have to be dragged off to firefight an ETL pipeline breakdown." On average, Geoff's team has calculated that Integrate.io saves up to 22 man-days of engineering per year, enabling the organization to concentrate its resources in other areas. At the same time, CDC and data replication are secured by the robust capabilities of the Integrate.io platform. Geoff also highly praises the platform's documentation, saying it has "provided clearly laid out the steps to follow, plus we received some code to run, which got our permissions properly set up, so we could get things moving." Finally, the CommonLit team also felt safe in the hands of the Integrate.io "super responsive" support team.
Conclusion – Getting Started with Integrate.io
With Integrate.io, we created a real-time data replication and CDC pipeline in a straightforward and reliable way. We were able to quickly expose transactional data from various data sources to a cloud data warehouse so our business users could observe the sales evolution in real-time. Using the clear, step-by-step instructions from the ELT and CDC wizard, we can develop a scalable and secure data replication pipeline facilitating immediate data insights with little effort. This is how you can bring visible business value to your organization.
Interested in finding out more? Head over to Integrate.io's trial page to sign up now.
Next Steps
- Check out the step by step instructions to setup and configure Integrate.IO
- Integrate.io ELT and CDC knowledge base
- Transforms – replacement rules
- Azure SQL CDC
- Automatic page refresh in Power BI
About the author
 Hristo Hristov is a Data Scientist and Power Platform engineer with more than 12 years of experience. Between 2009 and 2016 he was a web engineering consultant working on projects for local and international clients. Since 2017, he has been working for Atlas Copco Airpower in Flanders, Belgium where he has tackled successfully multiple end-to-end digital transformation challenges. His focus is delivering advanced solutions in the analytics domain with predominantly Azure cloud technologies and Python. Hristo's real passion is predictive analytics and statistical analysis. He holds a masters degree in Data Science and multiple Microsoft certifications covering SQL Server, Power BI, Azure Data Factory and related technologies.
This author pledges the content of this article is based on professional experience and not AI generated.
View all my tips
Article Last Updated: 2024-08-27